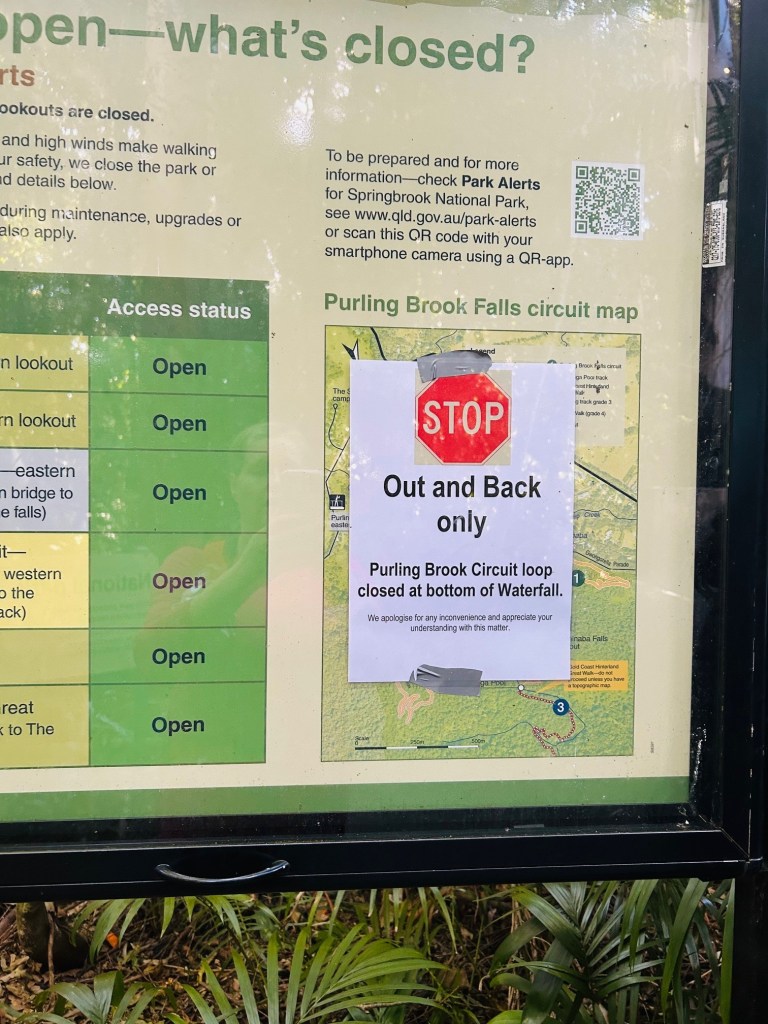
If you’re looking for a hike that really makes you feel your legs (and your lungs), then the Warringa Pools walk, part of the Purling Brook Falls Circuit in Springbrook National Park, is one to add to your list. I hit the trail early, hoping to do the full loop, but as it turns out, the circuit was closed at the mid-point. So instead of a loop, I ended up doing a “down and back”… and wow, what a down and back it was.
The Trail
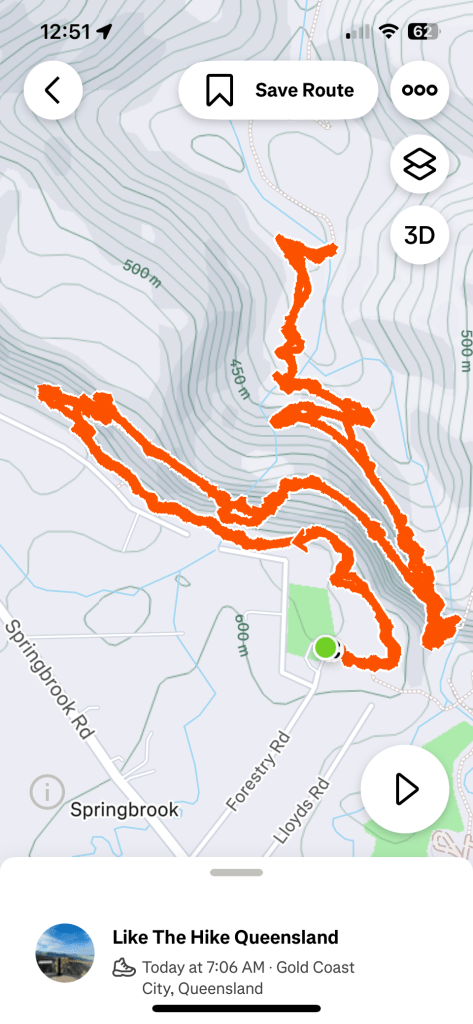
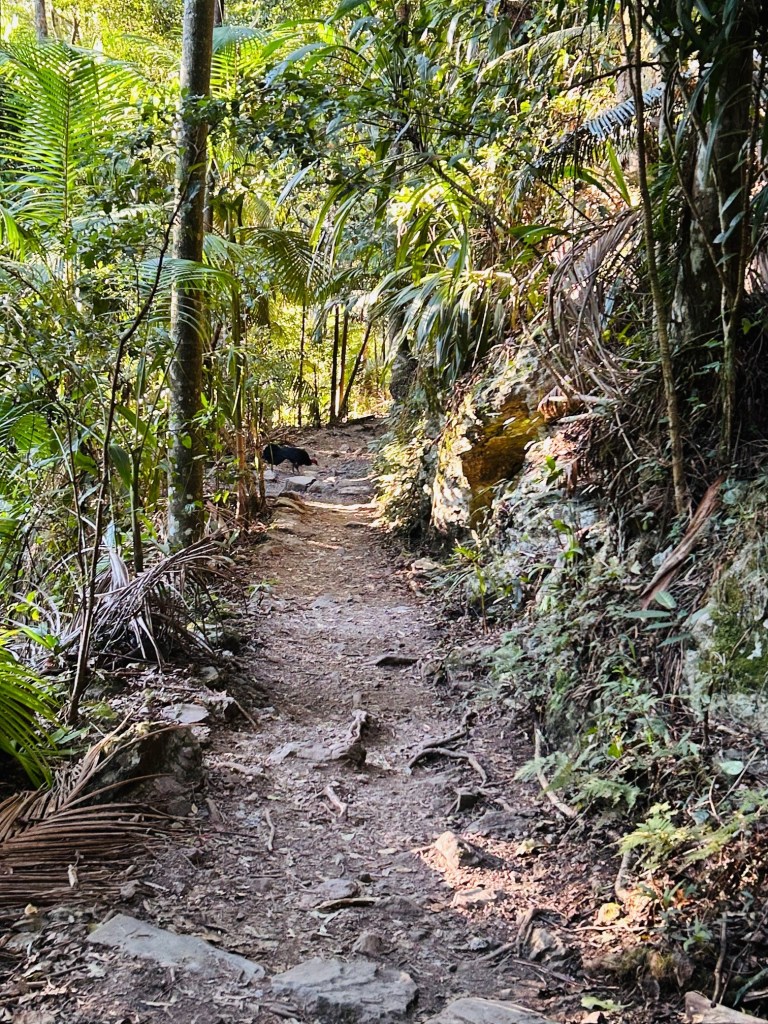
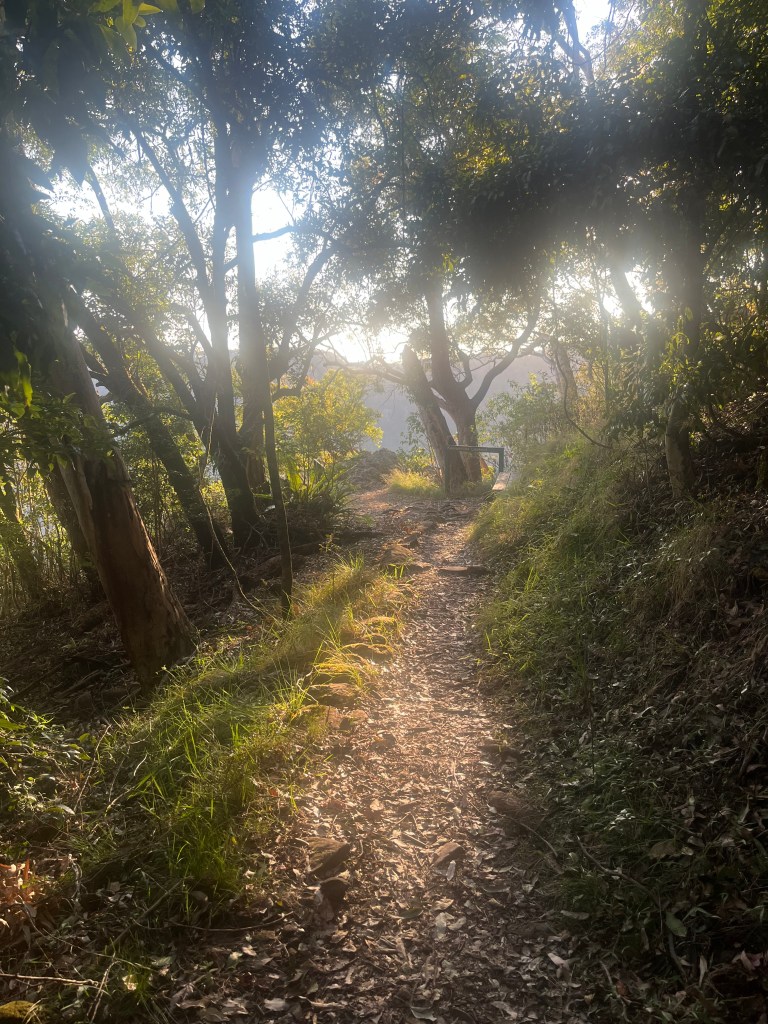
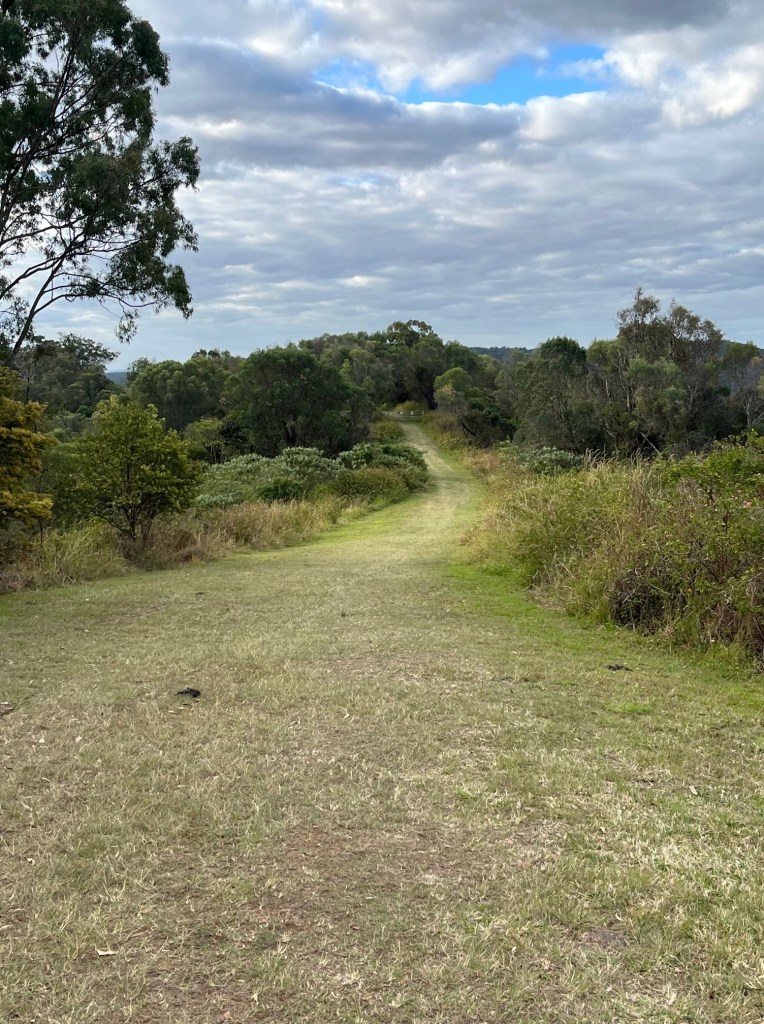
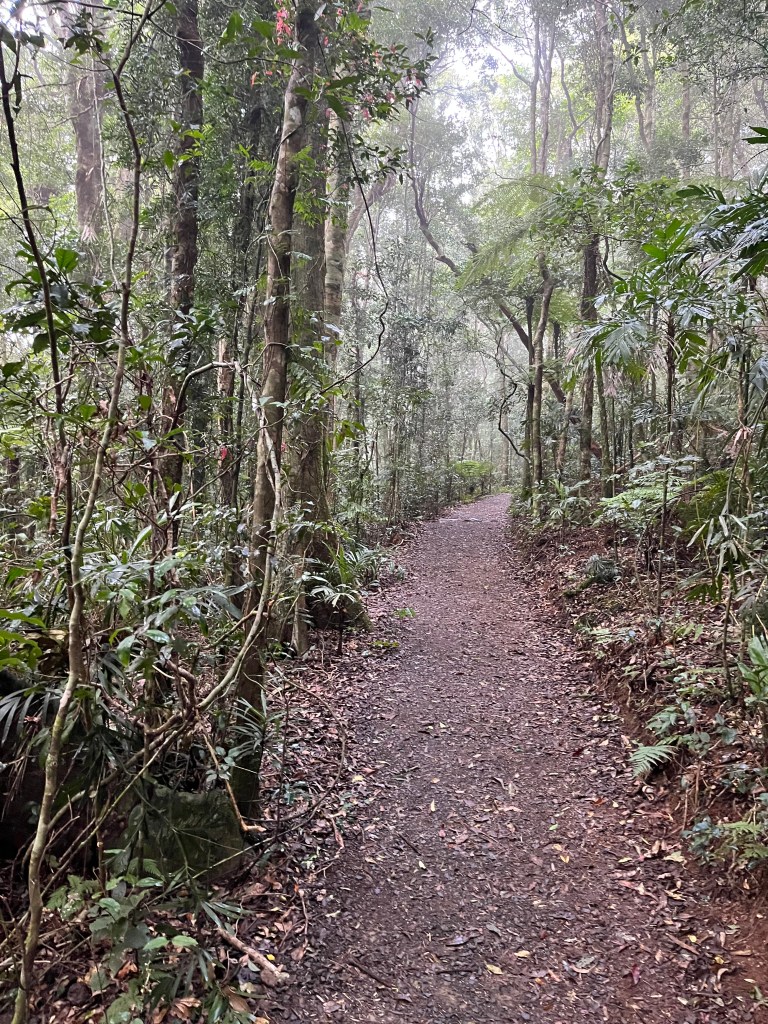
I started out on the Purling Brook Falls circuit, walking clockwise. Just after the 1 km mark, the descent really begins, winding down into the rainforest. Around 1.7 km I passed a very confident bush turkey, as they tend to be, strutting across the trail like it owned the place.
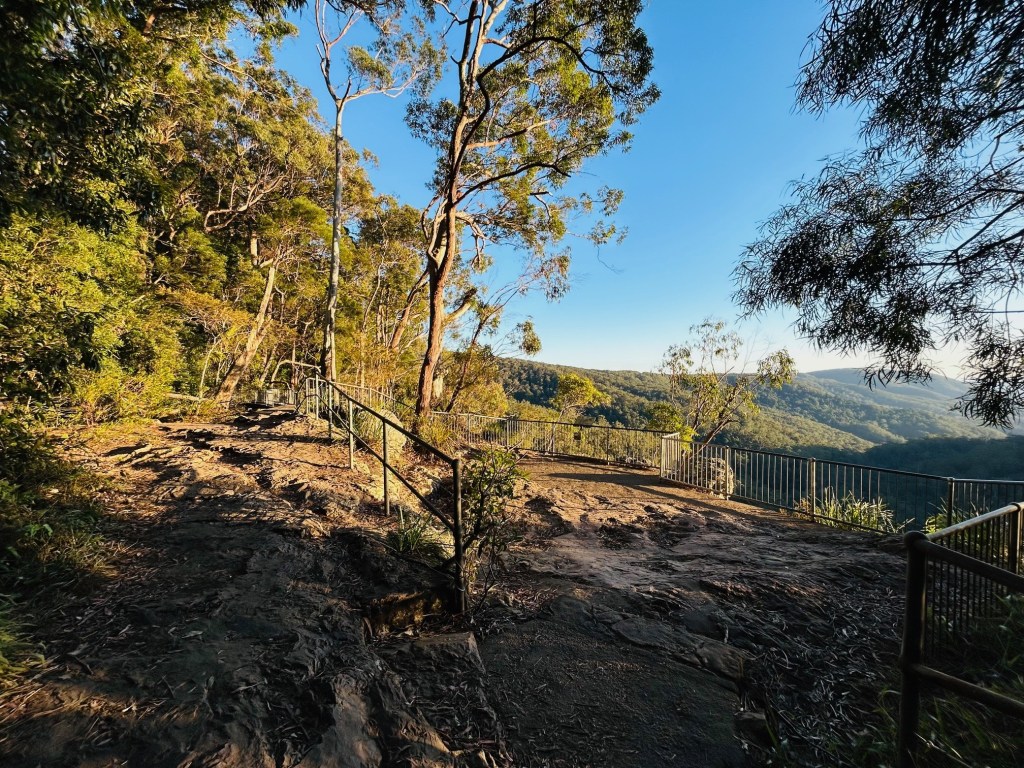
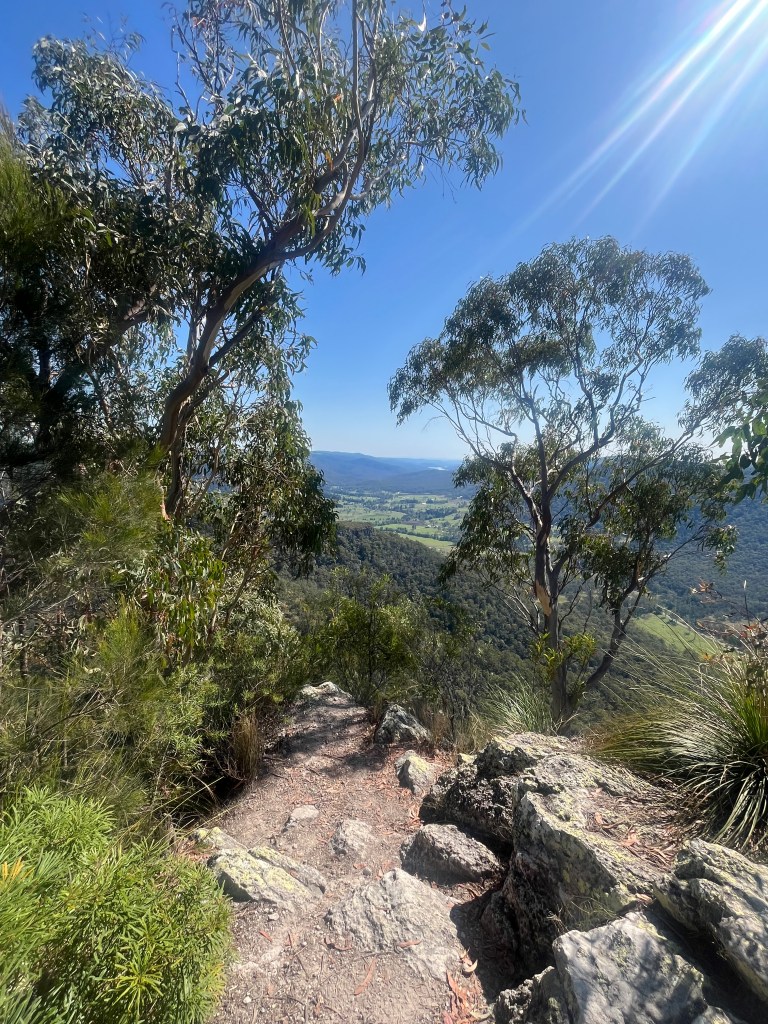
Owning the trailVery comfy around hikersThe viewing platform at the top of the escarpment
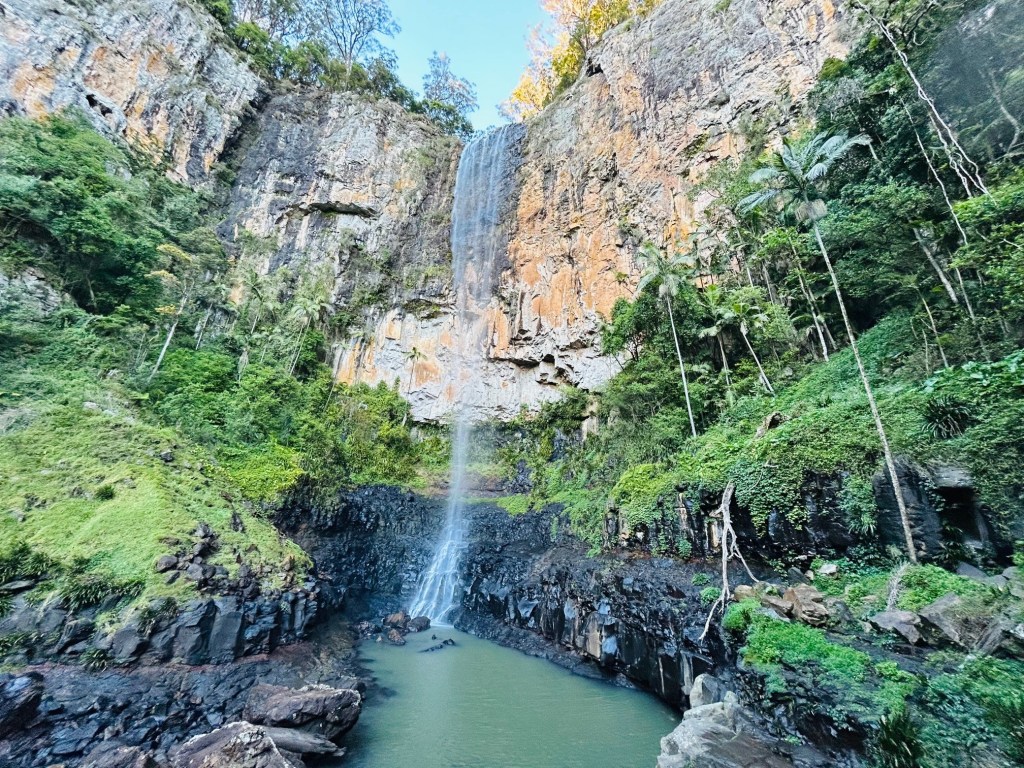
By the time I hit the 2.5 km mark, I’d reached Purling Brook Falls, also the turn-off for Warringa Pools. The falls were beautiful, even if a little underwhelming given all the rain we’ve had lately. Still flowing, but not the dramatic cascade I expected.
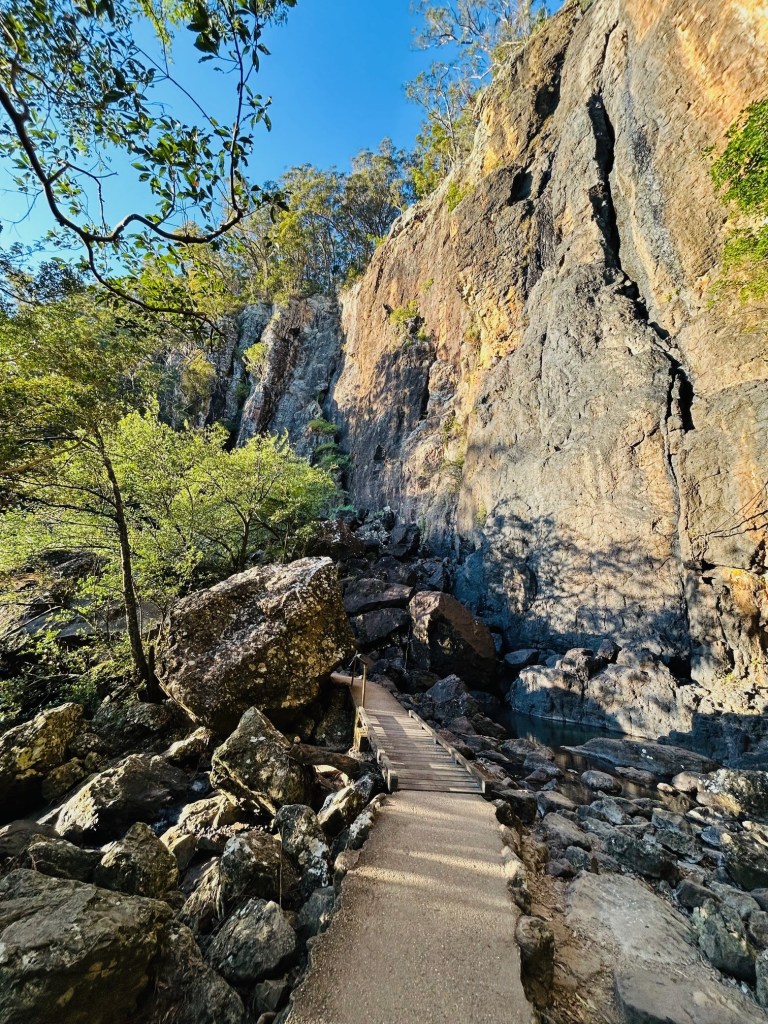
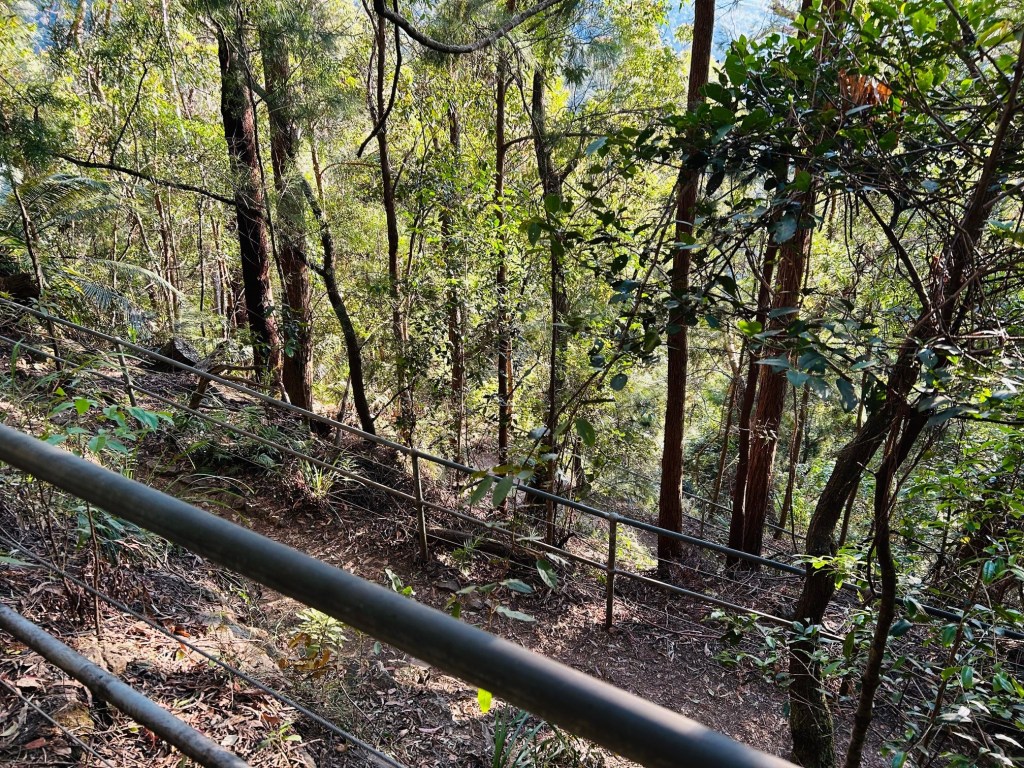
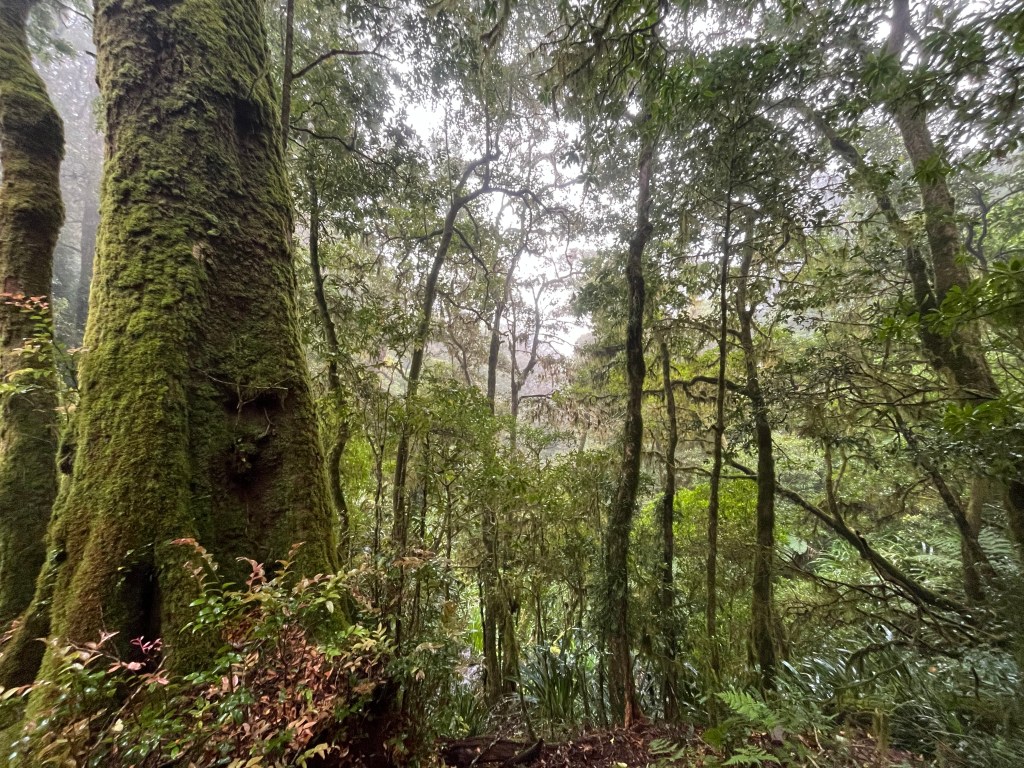
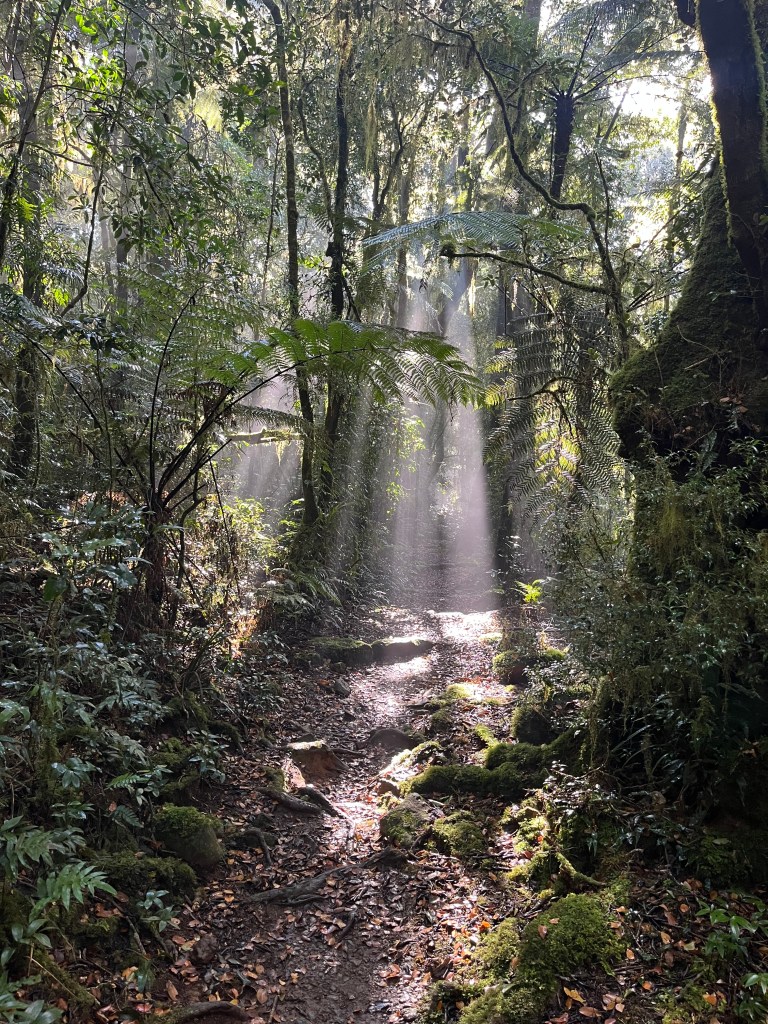
Once you’re in the gully, the air shifts. It’s damp, cool and a bit wild. The wind was whipping around where the water hits the rocks, adding to the atmosphere. The rainforest down there is proper Jurassic Park stuff.
Walking through the cliffsPays to be early, had the falls to myself!Lush and green, but a little less flow than I expected
To The Pools
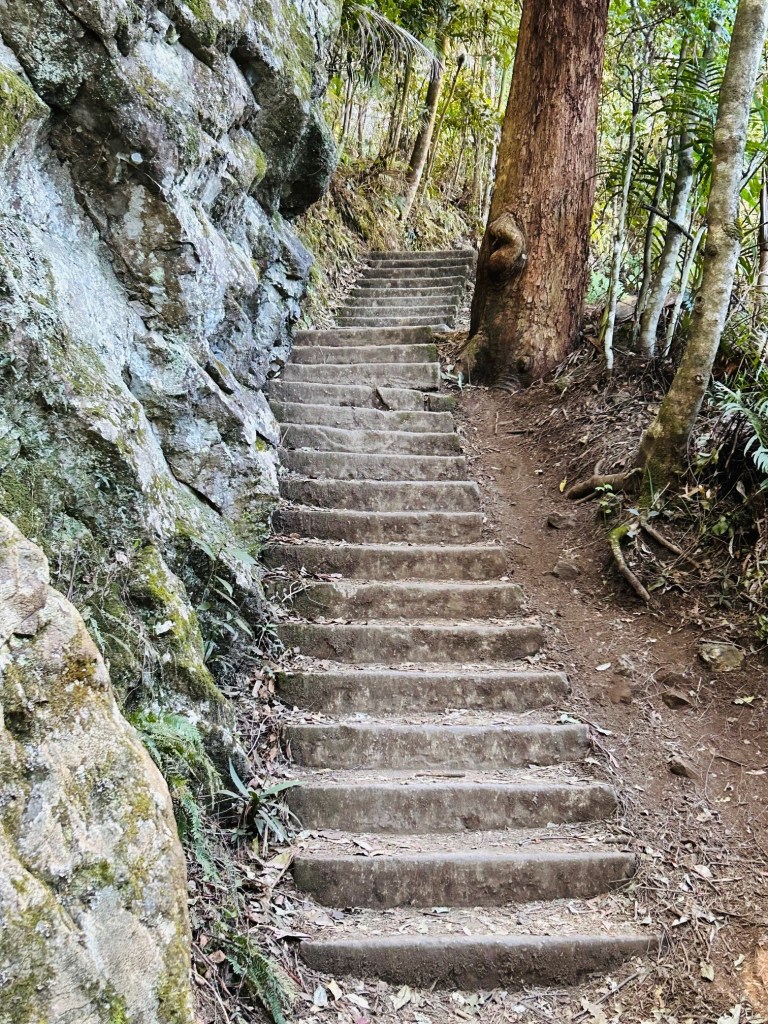
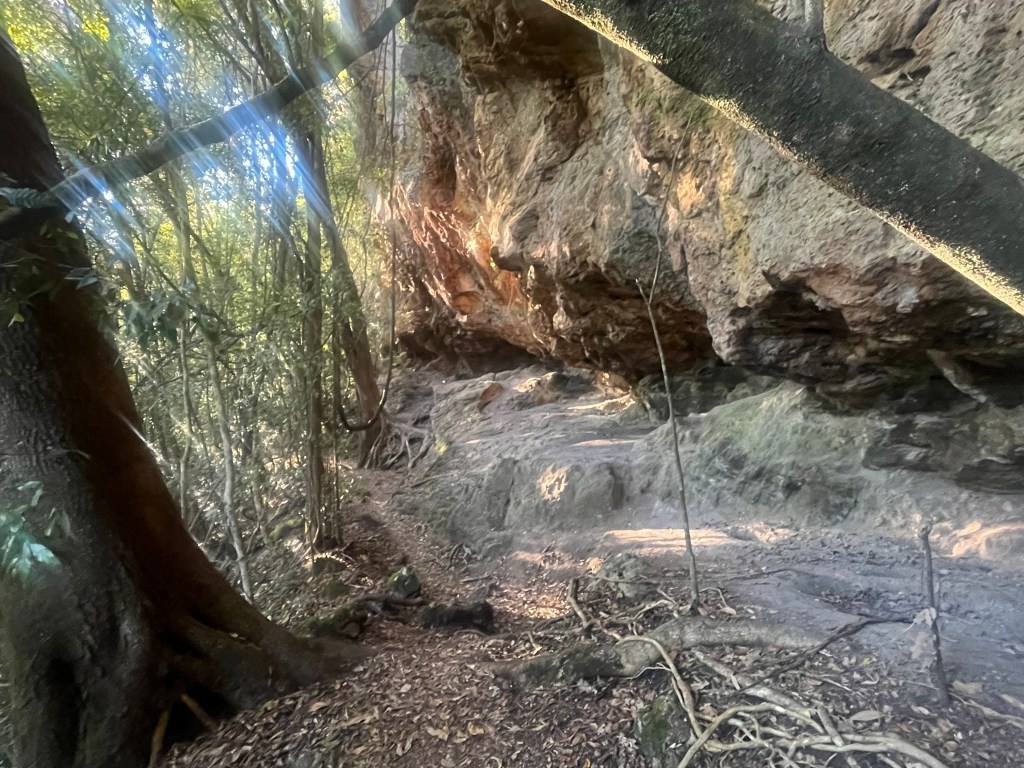
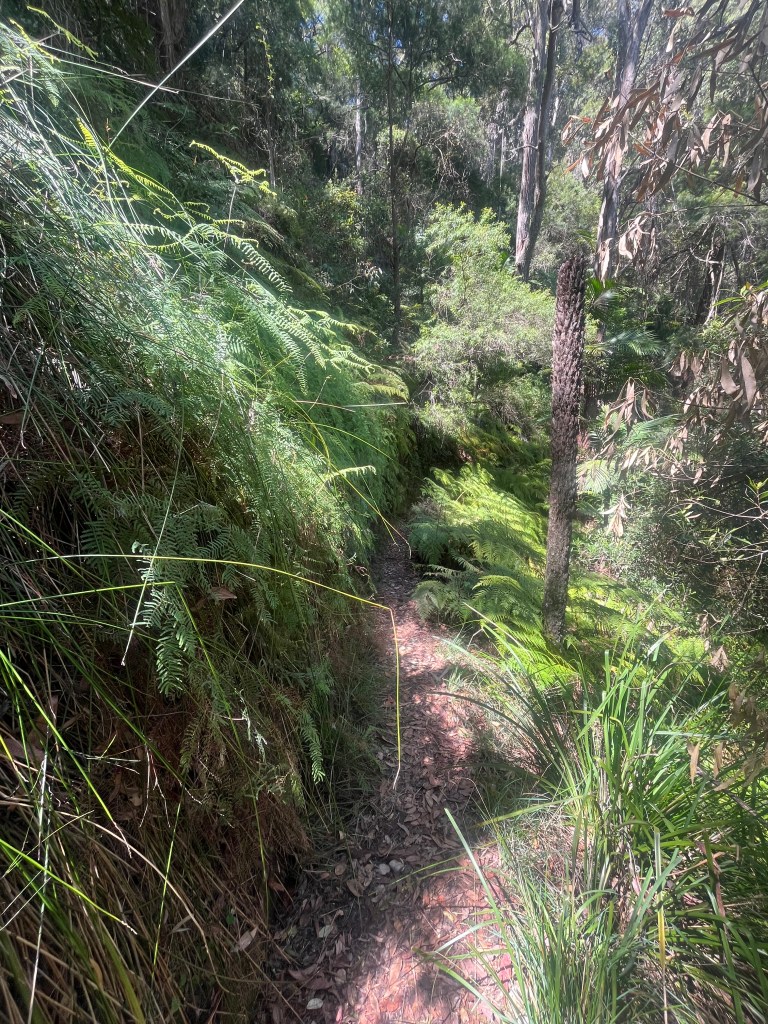
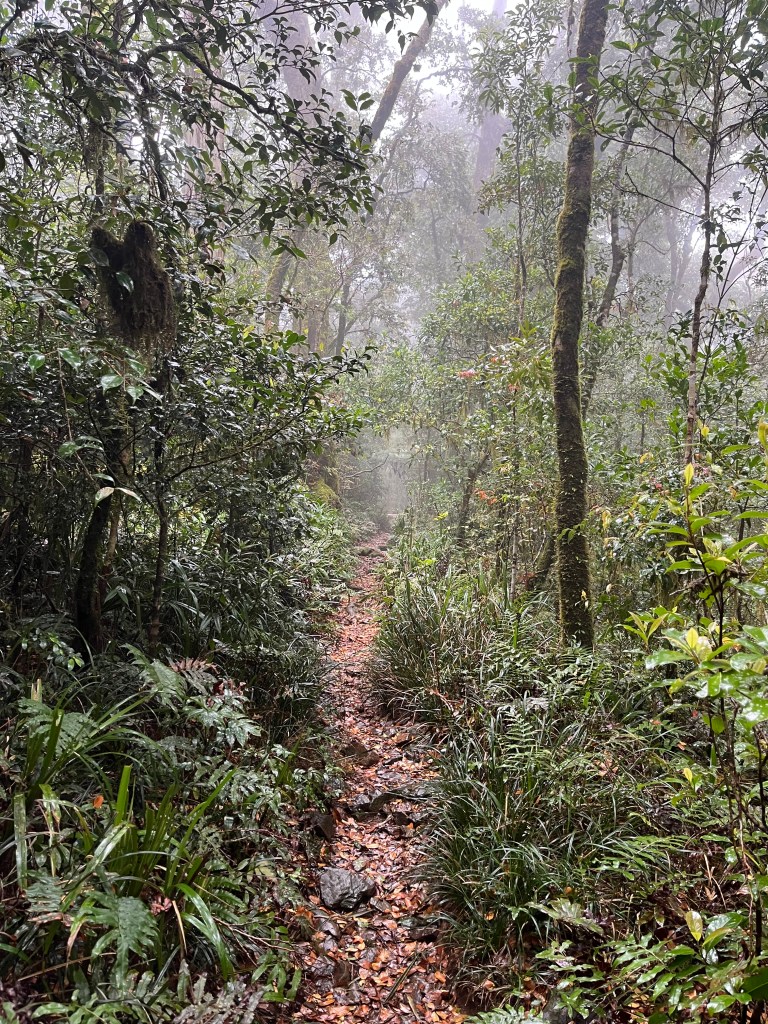
At 3.6 km you cross what I’m calling the Billy Goats Gruff Bridge, a sturdy little crossing that’s clearly built with care, like the rest of the trail. The path has been cleverly designed with mini steps and water runoff grooves to protect against erosion, especially with the recent rains.
Cute!An example of the 300+ steps you’ll traverseClever
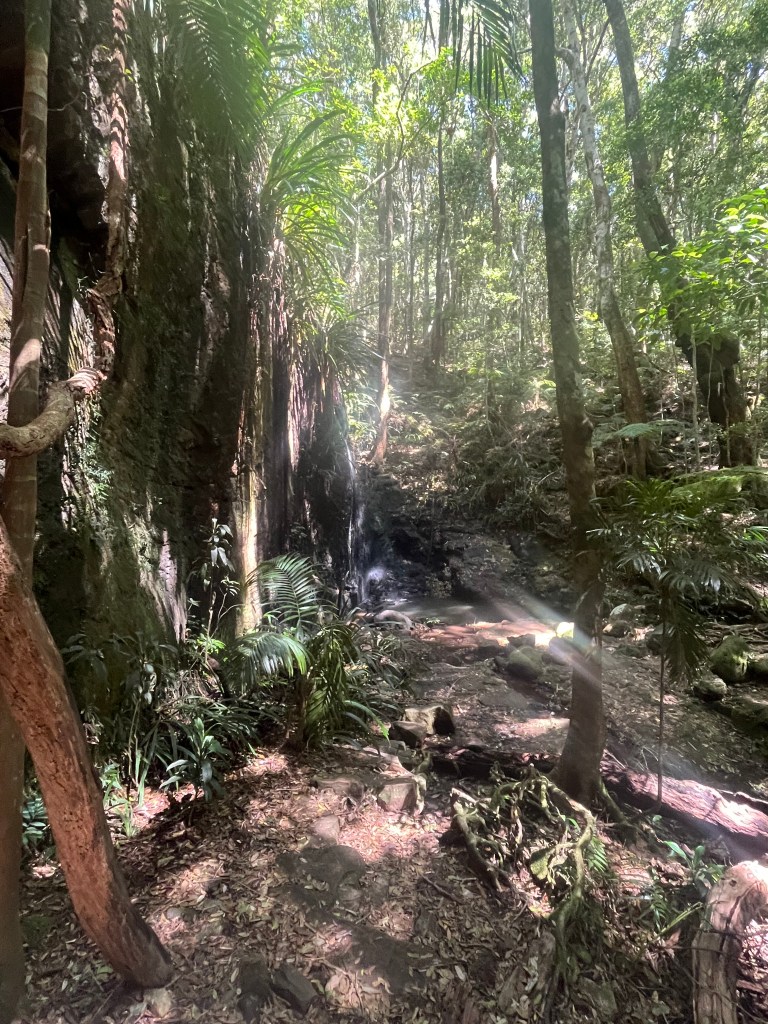
By 4 km I reached Warringa Pool, a perfect little oasis to stop, take a breather, sip some coffee, and enjoy the sounds of the rainforest. It’s a great reward for the effort of getting down there… because the real work is still to come.
My trusty coffee thermosLooking upstreamThe beautiful Warringa pool
And Back Up Again
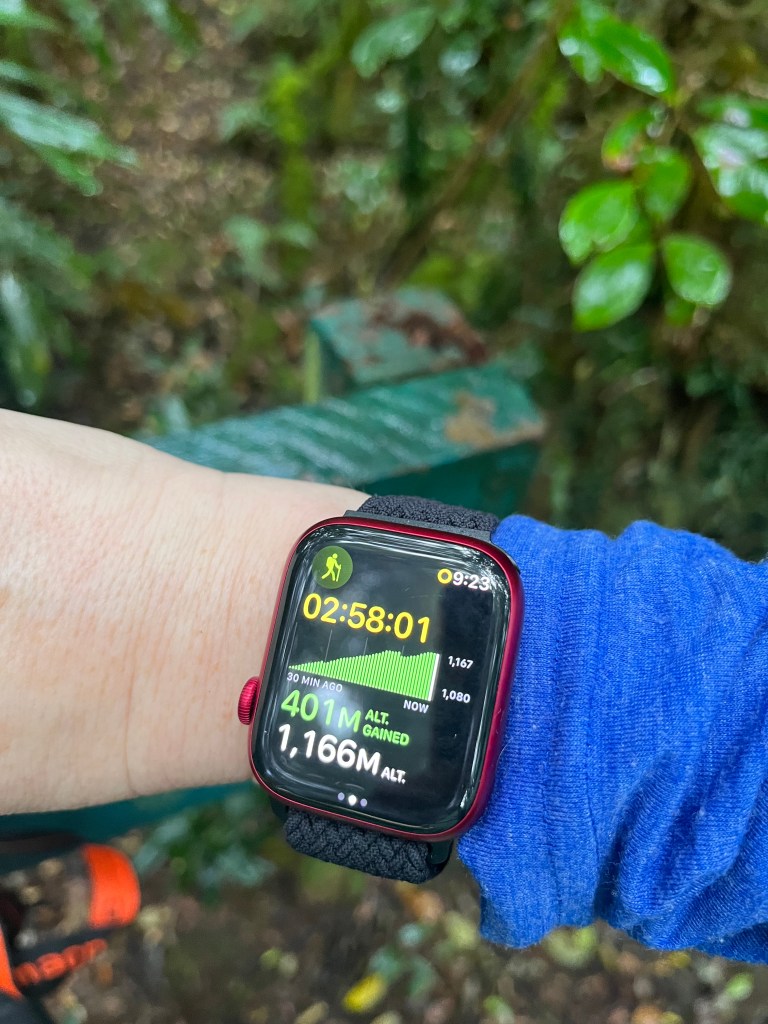
The climb out is, quite honestly, a slog. About 4 km of constant uphill, gaining over 300 metres in elevation. That’s higher than the Eiffel Tower. I’m not saying I was climbing the Eiffel Tower in hiking boots, but it definitely felt like it. My heart rate was hovering around 150 bpm just to keep moving.
I was distracted (thankfully) by a chorus of birdlife, kookaburras laughing from the treetops, and what I think was a whipbird duet: the female answering with two sharp whips after the male’s call. Hearing her reply was a bit of a thrill as it’s rare to catch both ends of the conversation.
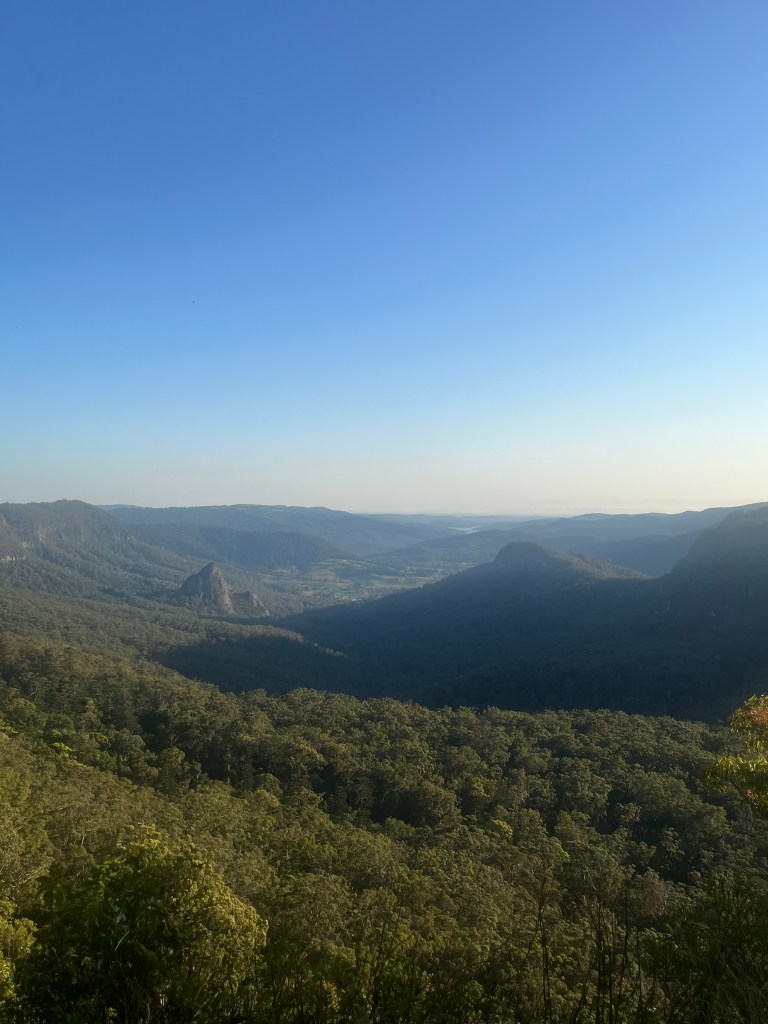
At the top, no need for jumpers or hats!Top of the fallsAnd a glorious mountain view
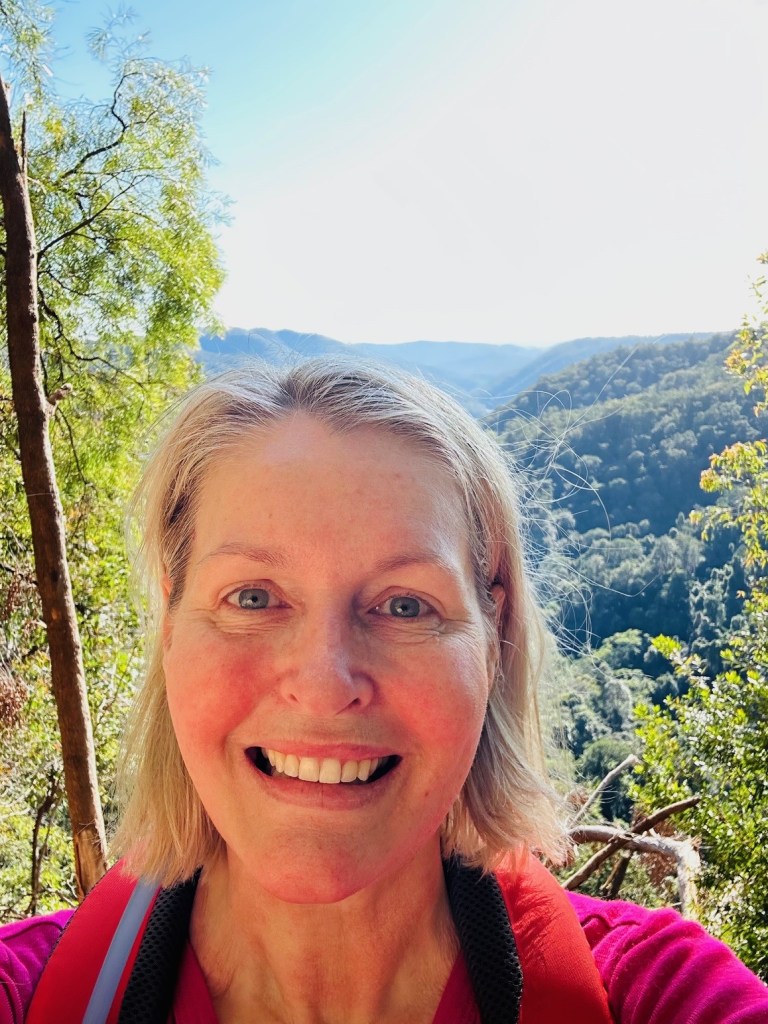
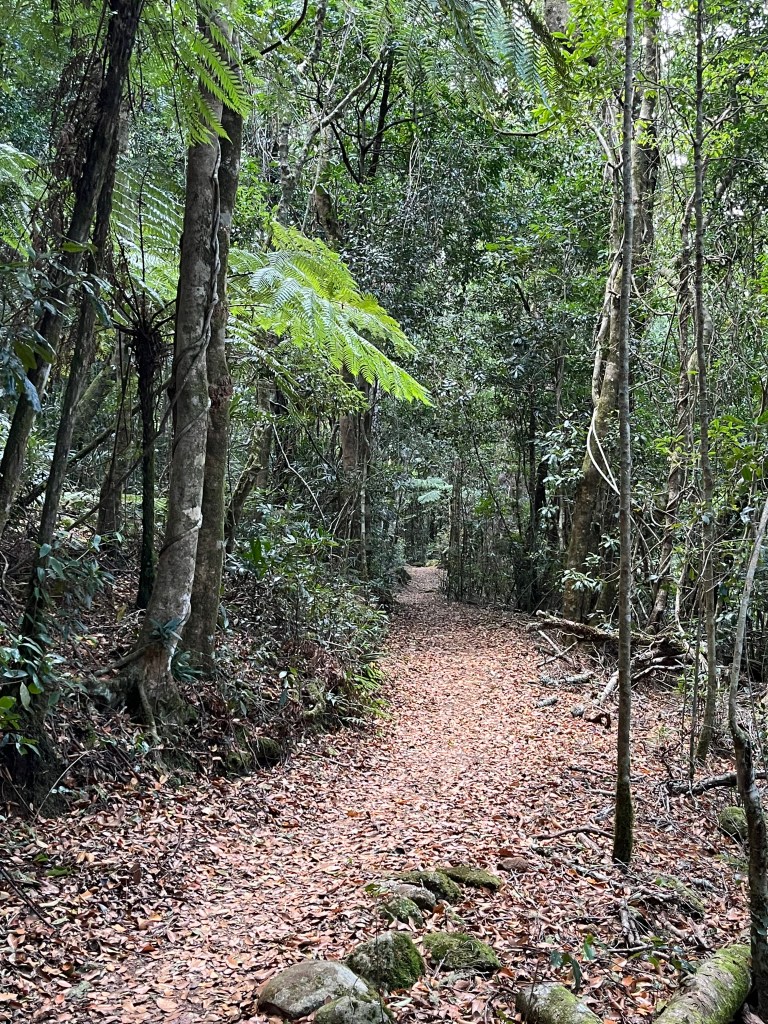
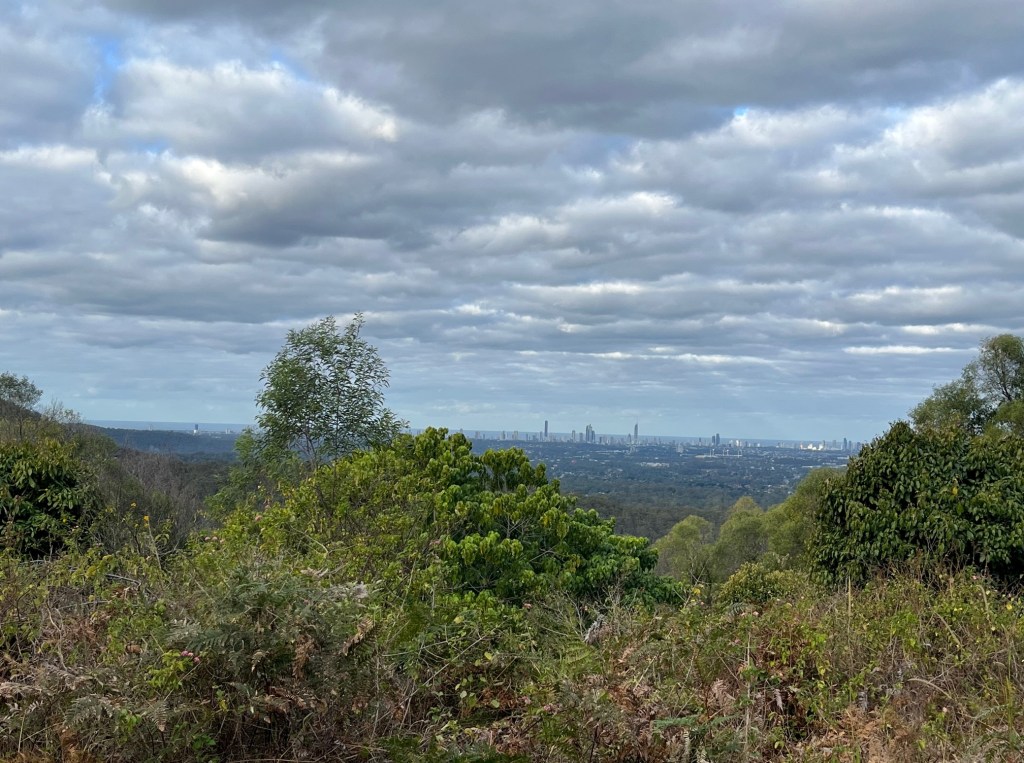
I made it back to the top at the 7 km mark, sweaty, satisfied, and very aware of my quads. The last stretch along the top was noticeably busier, with plenty of hikers starting their days. A reminder that the full circuit isn’t open right now, so if you’re planning the walk, check in advance or be prepared to double back like I did.
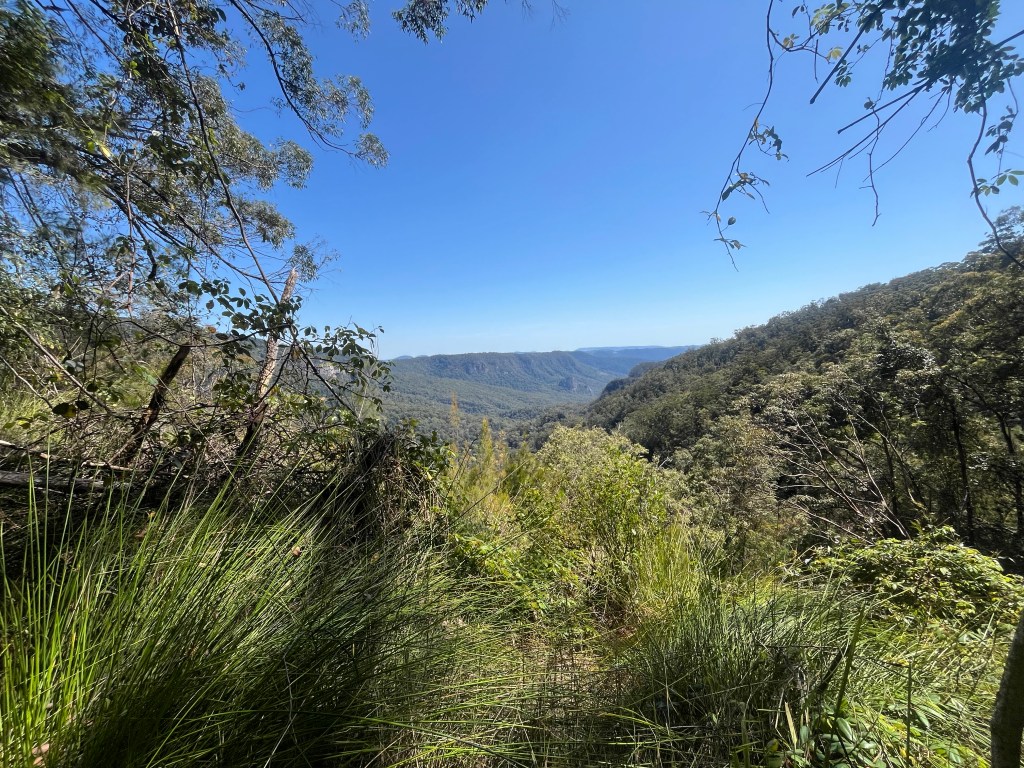
Looking back down from whence I came…Down the valley to the coast
Final Thoughts
Despite not being able to do the full loop, this was a challenging and rewarding hike through one of the most beautiful parts of the Gold Coast Hinterland. The rainforest is lush, the views are stunning, and there’s something deeply satisfying about making it all the way down to a waterfall pool and then conquering the climb back out.
So if you’re up for a bit of a workout with some serious nature vibes, give this one a go. Just bring water, a snack, and maybe a second pair of legs for the walk back up 😉
Hello fellow hikers/foodies! As Queensland is fully into summer (even though we are officially still in spring), my hiking plans are in hiatus for a couple of months due to my aversion to ticks, leeches and hiking in 32 degree heat. Never fear, we have lots to talk about, including the fuel that will get you from start to finish feeling great!
When you hike, what you take in your backpack is just as important as the trail itself. Every item serves a purpose, from water to a whistle, but few are as crucial as your food choices. The right snacks will fuel your body, keep you energised, and ensure you enjoy the adventure to its fullest. Whether you’re tackling a short day hike or a multi-day trek, here are my top six food items that I take along and why they are my ‘ride or die’ choices.
1. Nuts and Seeds: The Ultimate Energy Booster
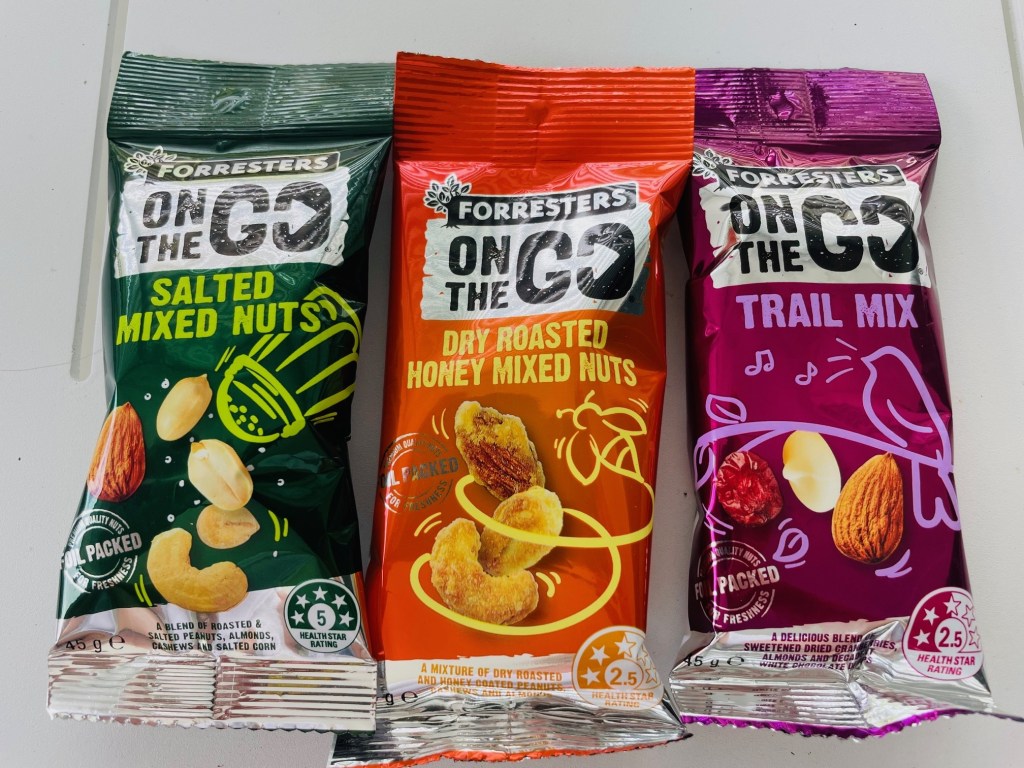
Nuts and seeds are powerhouses of nutrition, offering a perfect balance of healthy fats, protein, and carbohydrates. They’re lightweight, easy to pack, and don’t require refrigeration, making them an ideal hiking snack. A handful of almonds, walnuts, cashews, or mixed seeds can deliver a concentrated source of energy, which is essential for hikes when you need sustained fuel.
Options that I buy from Aldi, good sizes and scrumptious!
Why it’s essential:
Energy Dense – high in calories, perfect for refuelling on the go
Healthy Fats – keep you feeling full and satisfied
Protein Packed – supports muscle repair and recovery, especially during strenuous hikes
You can create your own trail mix (or scroggin, as Aussies and Kiwis call it) by combining nuts with dried fruits and chocolate for an extra energy kick. Opt for unsalted nuts to avoid excessive thirst, and try different combinations like pumpkin and sunflower seeds to keep things interesting.
2. Dried Fruits: Natural Sweetness for a Pick-me-Up
Dried fruits are nature’s lollies, providing a quick burst of sugar easily digested and converted into energy. They’re rich in vitamins, fibre, and natural sugar, making them a perfect companion to more protein-heavy snacks like nuts.
Some of the best dried fruits for hiking include raisins (small but packed with energy), apricots (high in potassium, important for electrolyte balance), dates (excellent for slow-burning energy and fibre) and banana chips (crunchy and sweet!).
Why it’s essential:
Fast Energy – replenishes sugar levels when energy dips
Lightweight – easy to pack and carry
Nutrient Dense– rich in vitamins and minerals
3. Jerky: Protein for Muscle Repair
Whether meat or plant-based, jerky is a high-protein snack perfect for the trail. Protein helps maintain muscle strength and aids in recovery, especially during longer or more challenging hikes.
A biltong style product available locally and delicious!
Since it’s dehydrated, jerky is lightweight and non-perishable, making it easy to carry for extended periods.
Why it’s essential:
Protein Rich – helps prevent muscle breakdown
Long Shelf Life – doesn’t require refrigeration and can last for weeks
Salty Goodness– contains sodium, replacing electrolytes lost through sweat
Choose a low-sodium jerky if you’re hiking in conditions where dehydration is a concern. Vegan and plant-based jerky options made from soy or vegetables are also available if you prefer a meat-free option.
4. Energy Bars: Compact and Convenient Fuel
Energy bars are designed specifically for active people, making them an ideal hiking food. They’re packed with essential nutrients like carbohydrates, fats and proteins in a small, easy-to-carry form.
Bars sitting in my pantry that come hiking with me (ignore expiry date on paleo bar!)
Whether you prefer muesli bars, protein bars, or whole food bars, these snacks are perfect for refuelling quickly and efficiently on the trail.
Why it’s essential:
Convenient – easy on the go, no preparation required
Nutrient Packed– offers a balance of carbs, protein and fats
Portion Controlled– helps manage your energy intake without over eating
Look for bars that are free from artificial additives and high in natural ingredients like oats, nuts and seeds. Avoid bars with too much sugar, as they can cause an energy crash later on.
5. Nut Butters: A Versatile Source of Energy
Nut butters are not only delicious but offer a great source of protein, fats, and carbs. When paired with celery or apples, they provide sustained energy, which is important for longer hikes.
Nut butters also come in single-serving packs, making them easy to carry and consume.
Why it’s essential:
Sustained Energy – combines fats and protein for long-lasting fuel
Versatile– eat it on fruit, veggies, bread or solo
Portable– single-serve packets are lightweight and easy to carry.
Prepare nut butter and apple/celery “sandwiches” ahead of time and pop them in a container for easy transportation and access.
6. Tuna Pots: High Protein with a Teeny Tiny Spoon!
Tuna pots or other pre-cooked options provide hikers a high-protein, filling option. They are convenient, lightweight and packed with omega-3 fatty acids, which help reduce inflammation and support heart health – essential for maintaining stamina during prolonged physical activity.
Yummy and fillingA non-tuna option
Why it’s essential:
Protein Rich – helps with muscle repair and keeps you feeling fuller longer
Omega-3s-supports overall health, especially heart health
Convenient– ready to eat and easy to pack, often available in flavours
Keep an eye out for packets that come with a spoon or easy-open designs for ultimate convenience, or you can make your own tuna, chicken or salami snacks to munch on.
Bonus Tips for Packing Hiking Snacks
When packing for a hike, it’s not just about the food you choose but also how you carry and consume it. Here are a few tips to help you make the most of your hiking snacks:
1. Portion Control
Pack enough to keep you energised, but avoid overpacking as extra weight can be a pain. Pre-portion snacks into small baggies or containers so you know how much you’re consuming.
2. Stay Hydrated
While food is essential, don’t forget about hydration. Many of the snacks I’ve mentioned are salty or dense, so fluid is key to staying in top form.
3. Mix and Match
Keep your taste buds tingling by catering to both sweet and savoury. Pair jerky with dried fruits or nut butter with celery. I sometimes take sushi or a salad wrap out on day hikes to keep snacks varied and something to look forward to at break time.
4. Leave Nothing but Footprints
Always make sure your wrappers and rubbish come back out with you. Our national forests are entrusted to us as hiking custodians – make sure you honour that trust.
5. Test New Snacks!
I can’t emphasise the importance of this tip. If you want to take a new snack, try it out ahead of time. This will avoid any nasty digestive surprises caused by food that might not suit you. Trust me; toilets out on the trails are few and far between…. 😮
So, whether you’re a seasoned hiker or just starting out, the right food can make all the difference in your hiking experience. From energy-boosting nuts to protein-packed tuna, these top six hiking snacks will keep you fuelled, energised and ready to tackle whatever trail you choose. So, next time you pack for an adventure, be sure to include these essential foods and enjoy your hike to the fullest!
See you out on the trails
PJ
PS – these suggestions are my opinion only. I am not a nutritionist and wouldn’t presume to give you dietary advice. Please speak to your doctor if you have specific dietary needs or health concerns.
Tackling the Ships Stern Circuit in Lamington National Park
Ahoy fellow hikers! Welcome back to another grand adventure, this time exploring one of Queensland’s treasures – the 20km Ships Stern Circuit in Lamington National park. A mere 70 minute hop from the Gold Coast, this park is part of the majestic Gondwana Rainforest, covering over 366,500 hectares of pure hiking heaven.
I’ve dallied with parts of Ships Stern before but never braved the full 20km loop. Well, today was the day! What could possibly go wrong, right? Spoiler alert: I didn’t anticipate the unseasonable heat, or the final unwelcome hitchhiker.
First Stage: Downward Delight (And Spiderweb Swords)
Being the clever clogs that I am, I arrived before 5.30am and parked at the top of the park near the Binna Burra Cafe, giving me an easy downhill finish to the hike. Plus, with a forecast of over 33 degrees Celsius, I wanted to beat the midday heat.
Pretty sunrise through the forestAlmost empty carpark
The first part of the trail was a lovely, gentle descent, perfect for soaking up the early morning rays….and as it turns out, spiderwebs. Oh, the webs! I became an impromptu samurai, waving a stick to fend off what felt like an entire arachnid population weaving across the trail! Note to self -arriving early means you get the fresh webs, lucky me.
start of the trail, make sure to clean your boots!Samurai sword in actionThe great work the parks staff do so we can enjoy the trails
At about 1.5km in I hit my first dry creek crossing and took in the beautiful views from Koolanbilba Lookout. The trail became steeper as I continued, but I couldn’t help pausing at a natural cave around the 2.6km mark. Who else had sheltered her over the centuries? I felt like an explorer uncovering new lands and treasures – until I remembered I was actually just sweaty and armed with a samurai spider-stick.
Second Stage: Snakes, Sticks and Stunning Views
By the time I hit the 6.5km mark, I started the uphill slog. Let’s be real, I was a little nervous that the rest of the hike might be all uphill from here – but hey, what’s life without a a challenge?
Bit of a clamber overRocking the hat…!Closed trails due to storm damageVery other worldly forest!
As I trudged upward, the trail opened up to spectacular valley views with grassy vistas, and I swapped my cobweb stick for a snake stick. in Queensland’s spring heat, snakes are out and about looking for love. Fortunately I only encountered one tine brown snake and it slithered away quicker than I could say, “NOPE!”
At 8.5km, I arrived at Charraboomba Rock, a stunning rocky outcrop with heart-stopping stairs that cling to the edge of the cliff. Heights aren’t my thing so I skipped this side adventure. Brave souls, you’re on your own for that one! I still had amazing views, so all was well.
Third Stage: Cliff Views and Cliffhangers
At 10km I found a perfect log for my snack break. Just me, my salad wrap, chocolate bar, and the valley stretching out below. I took the opportunity to spray myself liberally with insect repellent, than goodness for that decision as the next part of this tale will reveal!
Feeling refreshed, I set off again, only to find the second stunning lookout just 500m later. Could’ve had my breakfast with an even better view, but oh well! I had a sit and a look, and then continued along the trail, enjoying the breath-taking scenery and the stillness of the morning completely to myself. So far, I had not seen another soul on the trail – a very special experience.
By now I was halfway through the circuit and starting the long trek back. Around the 13km mark, I began the final ascent. I knew that the last 2km would be downhill, but getting there was a sweaty grind – happily the views made it worthwhile.
At 15km I took a breather at Nagarigoon Falls – the only ‘falling’ waterfall I found. Not a huge amount of water, but hey, it was still peaceful and pretty.
Fourth Stage: The Downhill Stretch (And… The Incident)
Finally, I reached the marker for the Border Track and the start of the downhill section, just 2.3km to my car, and more importantly, a flat white at the Binna Burra Café. With gravity on my side, I happily trotted along, oblivious to the horror that awaited me.
the lovely entry gates to the park
With around 1km to go, my backpack strap started to feel…odd. The right hand side was digging in, and no amount of adjusting seemed to help. But I pressed on, keen to finish. It wasn’t until I got back to the car that I discovered the truth.
Fifth Stage: THE TICK (Cue Dramatic Music)
Back at the car, sipping my well earned coffee, the discomfort in the front of my right shoulder was getting worse. What was going on? I checked the area, and there it was. A massive black tick, wriggling happily away like it was at a buffet.
My photographic skills right handed without glasses!
I’ll spare you the gruesome details (yeah nah), but let’s just say that tick had dug in DEEP. With a 70 minute drive home, I had to resist the urge to yank it out, knowing full well you can’t just pull a tick out without risking leaving its head – and its toxins – behind. I emptied a half a can of insect spray on the little bugger and called my sister (a.k.a. tick removal expert). After a tense tweezer-tugging session at her place, the tick was out, intact, and my armpit was back to normal the next day. Crisis averted!
Final Thoughts
Tick drama aside, Ships Stern Circuit was another incredible experience. Stunning views, varied terrain and a good mix of challenge and fun.
Just remember – pack extra insect repellent, watch out for snakes and always, always check for ticks!!
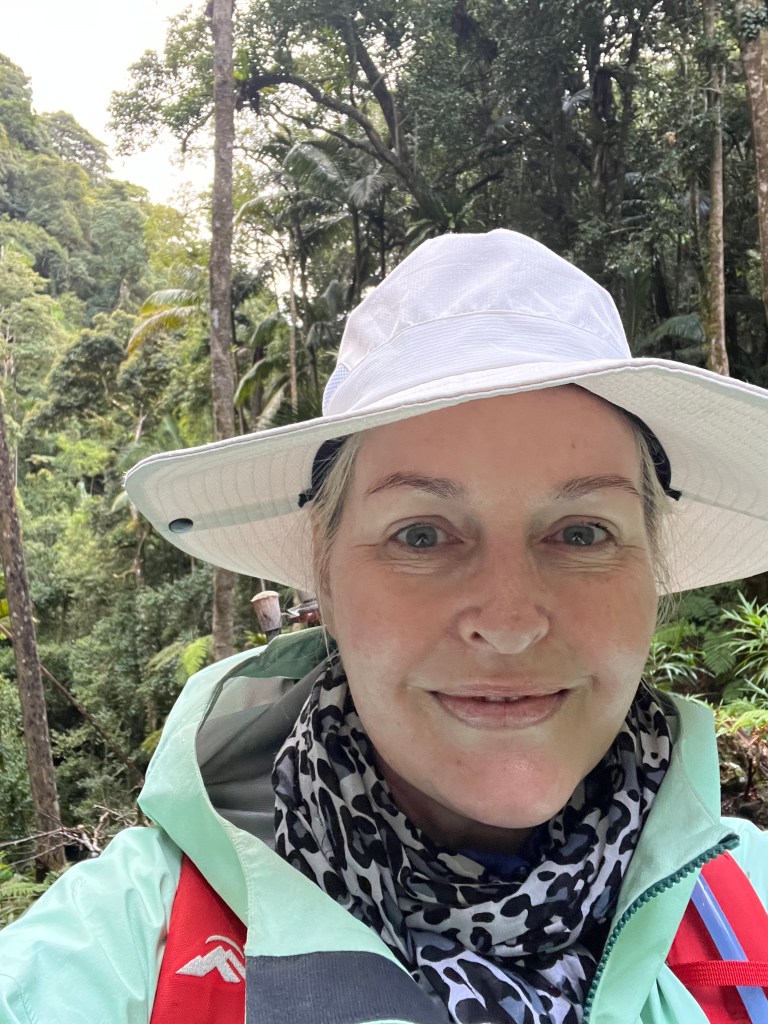
Hello and welcome to my LIKETHEHIKE blog. I’m PJ and I write about the hikes I take, giving you insights, photos, commentary, tips and tools so you can enjoy hiking and embrace the experience.
It’s Been A While…
Looking at my blog, it’s been a while since I’ve shared. That’s not to say I haven’t been hiking, but I’ve also been working and travelling, which unfortunately has cut into my blogging time.
However – I’m back and ready to share some of the great hikes I’ve done in the last couple of months.
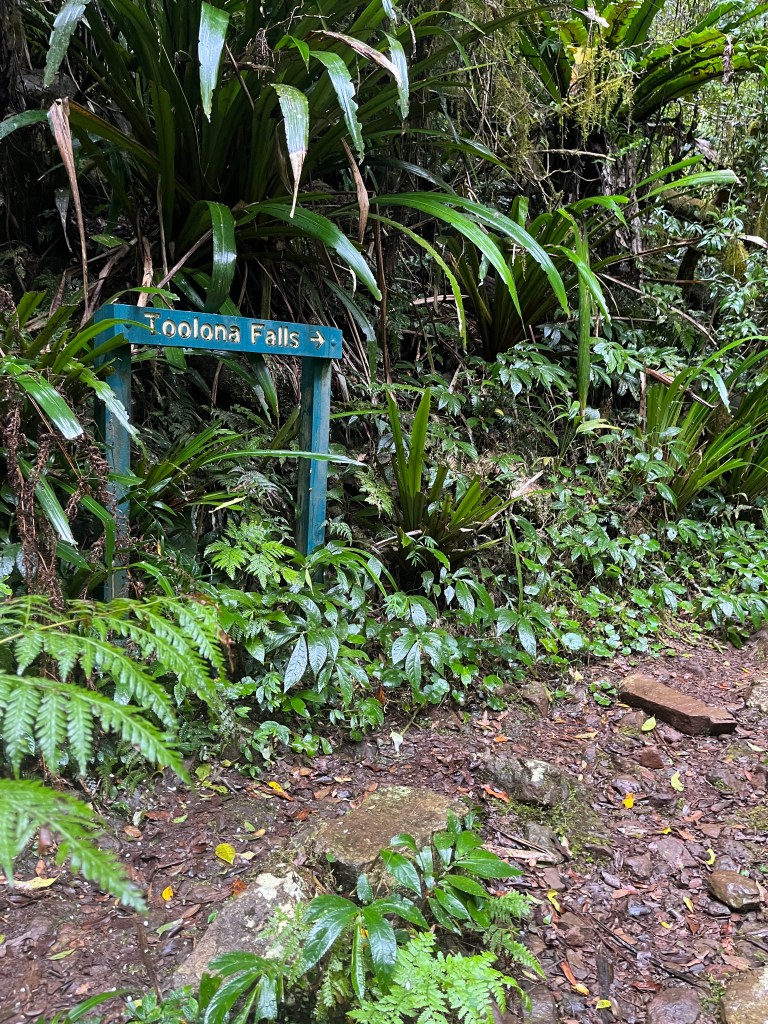
Toolona Creek Circuit
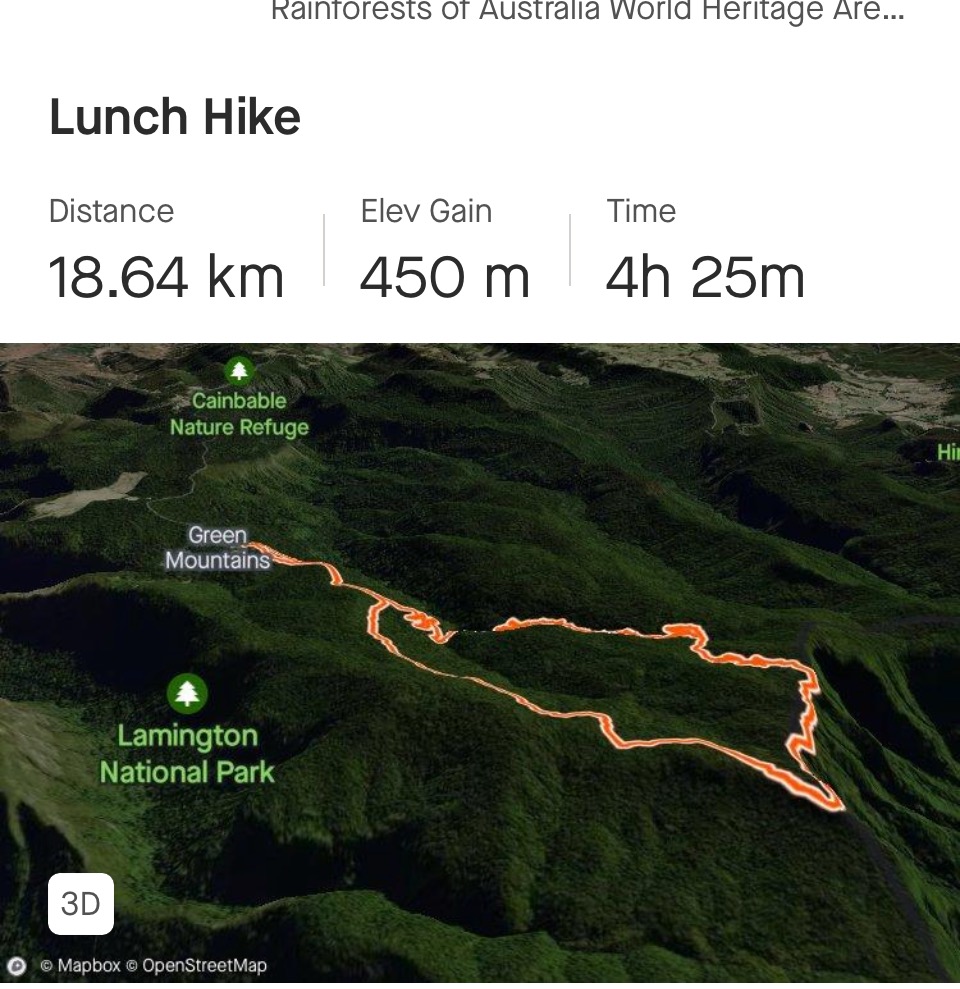
What a stunning hike – and it’s all yours to explore. Hidden away in the Green Mountains section of Lamington National Park, Toolona is a half day circuit, starting and finishing at O’Reillys Rainforest Retreat. Strava advises that I hiked 18.6km that day and Fitness says 18.3km so safe to say, 18.5km is the distance.
Maps make life easy
The Toolona Circuit provides a shady and protected experience for hikers and is a true rainforest paradise sitting around 1,000m above sea level, complete with a plethora of waterfalls and creek crossings to keep you entertained. Along with the rainforest encounter comes the risk of creepy crawlies, but more on that later…
I departed obscenely early to get up to O’Reillys by 6 a.m. I realised that I was hiking on a weekend during the school holidays , so if I wanted a quiet experience on the trail, an early start was essential. It was a lot cooler up in the Green Mountains, I had packed my raincoat and a lightweight merino jumper, but left my gloves and headwrap at home – rookie mistake!
Chillier than I thought!Lush, green, beautiful
The track early in the morning was made cooler with a light drizzle. Happily, the mist dampened down the dusty track, and as I ploughed through cobwebs, I realised I was the first hiker on the track 🙂
The Department of Environment recommends Toolona to be walked clockwise, although now that I’ve hiked it, it can be walked either way. As with any circuit involving creeks and waterfalls, you will have a hike down, and then the corresponding hike back up. I started off on the Main Border Track and at 1.7km, took the signposted left hand turn to start Toolona proper. Once on the trail, it starts gently descending down through the forest.
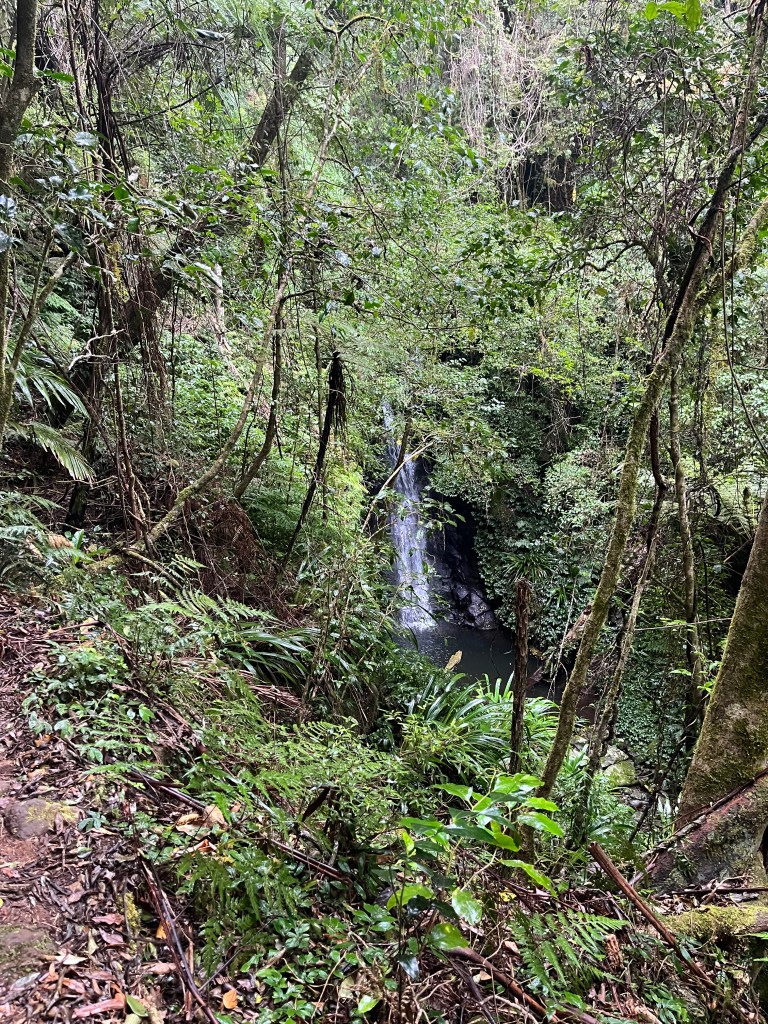
Switchbacks start around 2.4km and the gradient got steeper. At 3km another junction appeared, and I had the choice of going to Box Forest Circuit or Toolona, so just follow the directions which are very clear and well posted. I started to encounter creek crossings and little secret waterfalls…it was just lovely. It was very obvious that the whole area is quite low on rainfall so far this season. Some crossings were completely dry and I didn’t get wet feet at all during the day.
Picnic Rock – and the Creepy Crawlies!
About 3.5km down the circuit I arrived at Picnic Rock. As the name suggests, this is one of the lower points of the hike and is a small enclave nestled against the hillside, with a picturesque waterfall and smooth rocks to perch on while you have morning tea and admire the surroundings.
I stopped here for coffee and a snack, and about 23 seconds after I finished this wee video, I found a leech who was attached to my sleeve and determined to find some skins to make his snack!!!!
CAUTION – Creepy Crawlies
Leeches, ticks and other fauna are a fact of life when hiking. The time of year does make a difference in Australia – ticks seem to come out during spring and summer, and leeches just love the wet, however both can be present any time of the year. Right now, both are present in South East Queensland. It’s important to be aware of the risks they pose – and prepare accordingly.
So there I was, flailing around Picnic Rock trying to dislodge the leech. First he suckered from my arm to my finger, and then as I flicked him, he suckered onto my other hand. It was all a bit frantic! I found my bug repellent and emptied most of the can onto my hand, and then sprayed a fog over every body surface. Backpack was hurriedly packed up and I made haste up the hill away from the leech infested Picnic Rock….
I really did think they were chasing me up the hill….I did the first 2km up in record time…..I really don’t like leeches :O
TIP – FIRST AID FOR CREEPY CRAWLIES
There are two main perpetrators when hiking in Queensland (apart from snakes and just steer clear of those). Leeches are the lesser ones and can be dislodged with either bug repellent or salt. They inject an anticoagulant and an anaesthetic so you won’t feel them but after a while you can certainly see them 🙂 Ticks are more treacherous and left in situ can cause problems. I haven’t been ‘ticked’ but people say it’s like a small bee sting. You will know when you have one. There are products which direct a jet of liquid nitrogen at them, they freeze and you wait for them to fall out, OR you can remove them, keeping the body and head intact. I’m told that you twist them out counter clockwise as they burrow in clockwise. If you can’t remove the whole tick, it’s off to the doctor to have it extracted. Preventative wise, I’ve found that a very thorough bug repellent spray before and after getting dressed works….
Moving Onward and Upward
After my leech encounter, I passed a lovely swimming hole which I imagine is very popular in summer. The track was becoming narrower and rougher as I wound my way up the other side of the gorge. As I crisscrossed the creek, the waterfalls, although gentle, were quite beautiful. For those of you who enjoy forest bathing, it was an absolute delight.
Me red faced after running up the hill away from the wild rampant leech
The misty rain had certainly come down the side of the mountain, and at the 10km mark I re-joined the Main Border Track. Up on the ridge it was windy and raining, my coat was on and I was moving to stay warm! There was time for a couple of lookouts, but I was keen to clear the ridge and the wind.
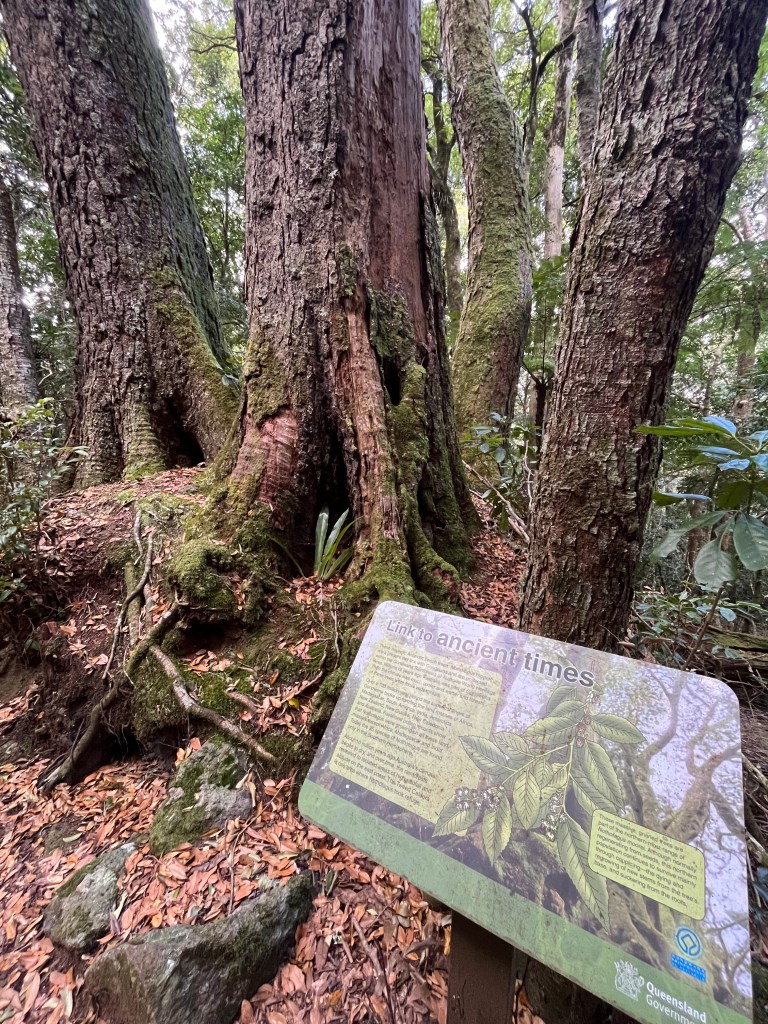
I made it off the eastern ridge after the turnoff to Bithongabel Lookout and once I headed west at 12km, the wind and rain stopped, and I was back in the calm forest oasis that is the beauty of the Gondwana Rainforest. Estimated to be over 100 million years in the making, this area of Queensland is a superb example of the forest mosaic that makes Gondwana a world heritage listed site.
?
No more wind, no more rain, just me and a glorious forest. Walking through the dappled sunlight with the delicious earthy loamy smell of the leaves underfoot is such a happy thing to experience.
Before I knew it, the O’Reillys paved path was in front of me, which means the end of my hike was near.
I completed Toolona in just under five hours. I hiked around 18.5km, climbed around 470m and my average heart rate was 137 (we aren’t counting the spike when I ran away from the marauding leech).
Slippers, hot chips and wine…Note the eastern ridge on the far right – wind and rain galore!
The fun bit about finishing at O’Reillys is they have a great café where I got hot chips for my drive home. I may have also picked up some O’Reillys wine, which is *chefs kiss*.
In Summary
Toolona is a half day trail, family friendly and a good beginner hike that can easily be achieved by all levels of fitness. I absolutely recommend this as a way to immerse yourself in a stunningly beautiful part of Queensland and hey – who doesn’t like hot chips as a reward for escaping the marauding leeches??!
I’m PJ and I write about the hikes I take, giving you insights, photos, commentary, tips and tools so you can enjoy hiking and embrace the experience.
Ahhh – Kokoda Gold Coast 2023. My friend Fran and I decided that we would register for the new 30km Kokoda Challenge.
And then it went wrong! OUCH 😮
The Kokoda Challenge
The Kokoda Challenge is Australia’s toughest team endurance event that raises funds for programs run by the Kokoda Youth Foundation. Events are held mainly in Queensland (Brisbane, Sunshine Coast and Gold Coast) and in New South Wales (Lake Macquarie).
For those of you not from the Antipodes, Kokoda is referring to the 1942 Kokoda Campaign in Papua New Guinea, where Australian troops and local infantry battled the advancing Japanese army to protect access to the local airfield. The challenge distances ( 96km and under ) represent the real Kokoda Track distance of 96km and the history of Kokoda is recognised and honoured by many Australians, with many families having generational ties to the campaign.
Kokoda on the Gold Coast
I’ve hiked Kokoda 48km twice before. The first time was in 2016 as part of a work team and then again in 2021 with my sister TB and her two daughters. Our team was aptly named “SistasnBlistas” 🙂
I’ve not tried the 96km, not sure if I have the intestinal fortitude to tackle it but… never say never.
The 30km was a new addition to Kokoda Gold Coast in 2023 and meant that we could sign up with a short training lead time. I regularly hike 20+ so 30km was very achievable.
Hikers – Start Your Engines!
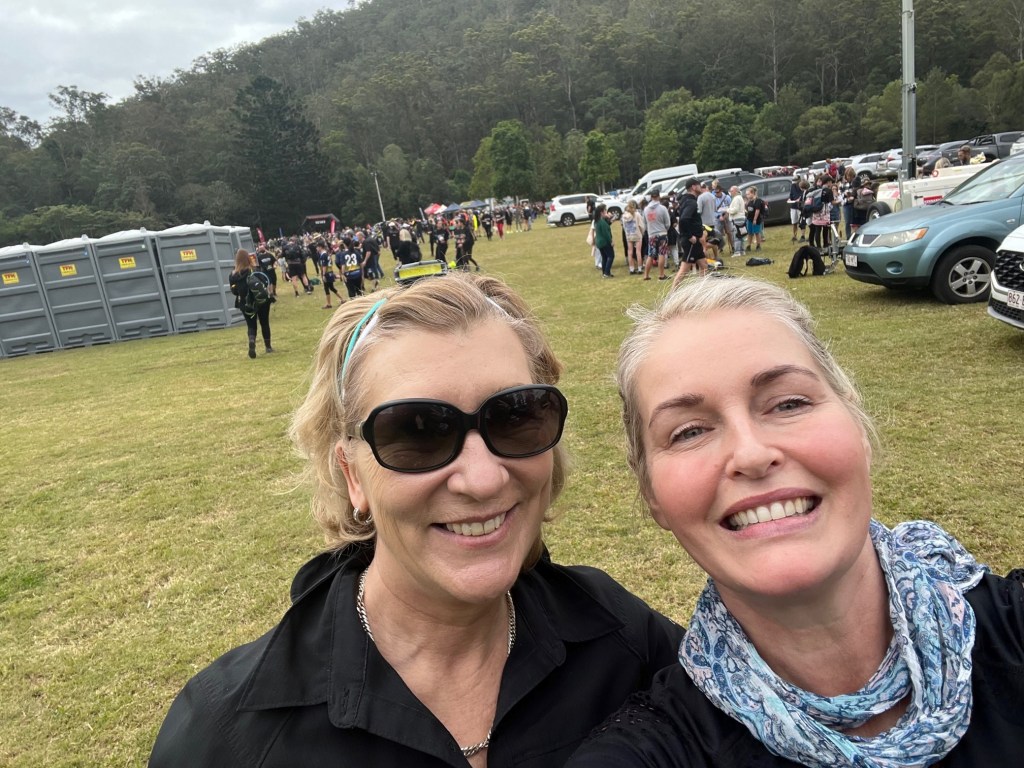
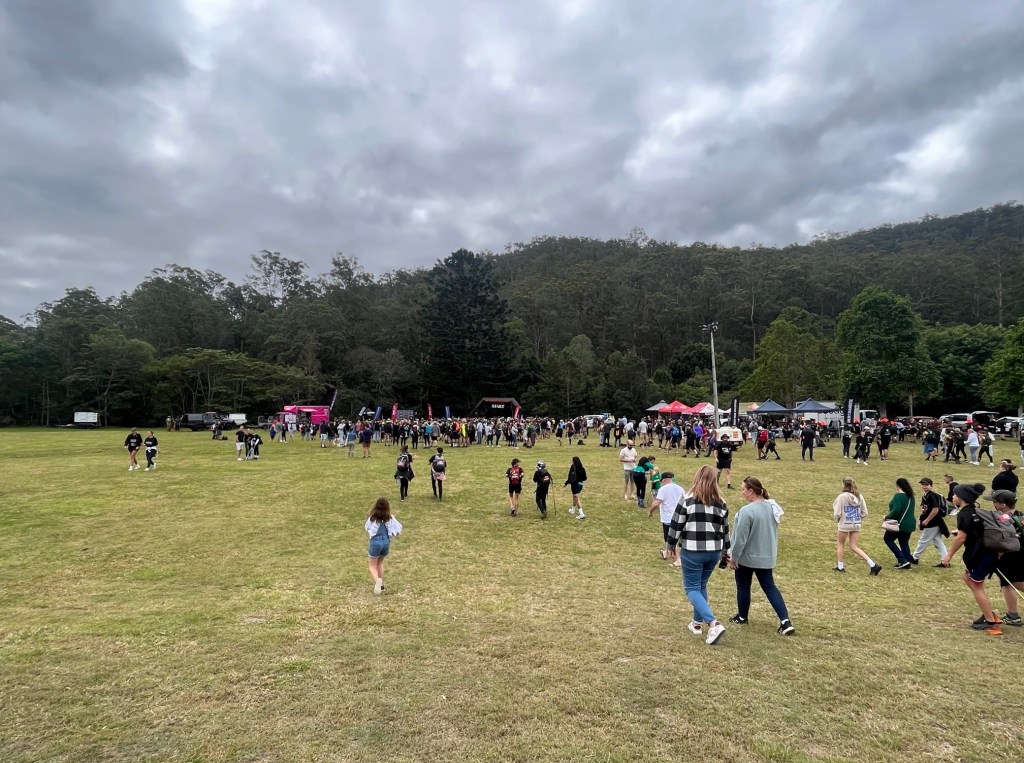
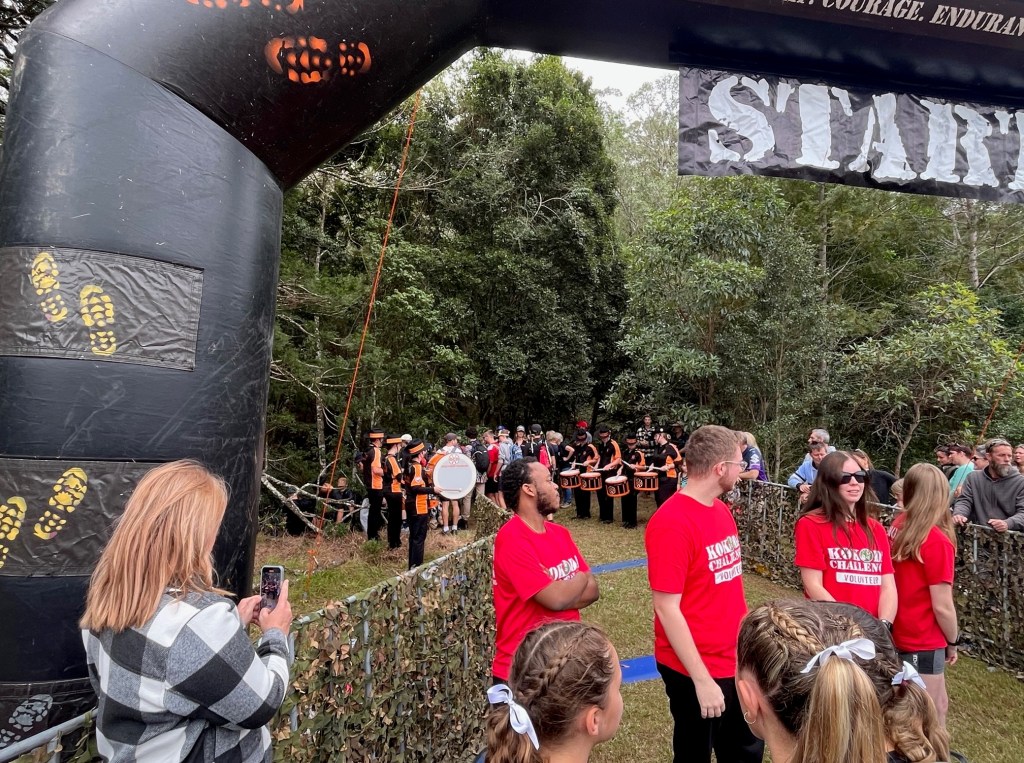
My Kokoda buddy Fran is a hiker from way back. She used to volunteer with NSW Rural Fire Service and spent many days hiking in the Blue Mountains so she was keen to flex a bit of hiking muscle for Kokoda. Our hike started at 2pm at Little Clagiraba Reserve. We kicked off along with what felt like 3,000 school teams – but was probably only about 300 kids. There was a little bit of a kerfuffle delay with the start shute as it led straight into a narrow creek crossing and a single file track, but once we hit the start line we were off! Thankfully it was a mild, cloudy Queensland winter day so perfect conditions for hiking.
The official openingFancy dunnies!The swathe of participants A fantastic drum team send-off
Section 1 – Up a Hill and Down Again
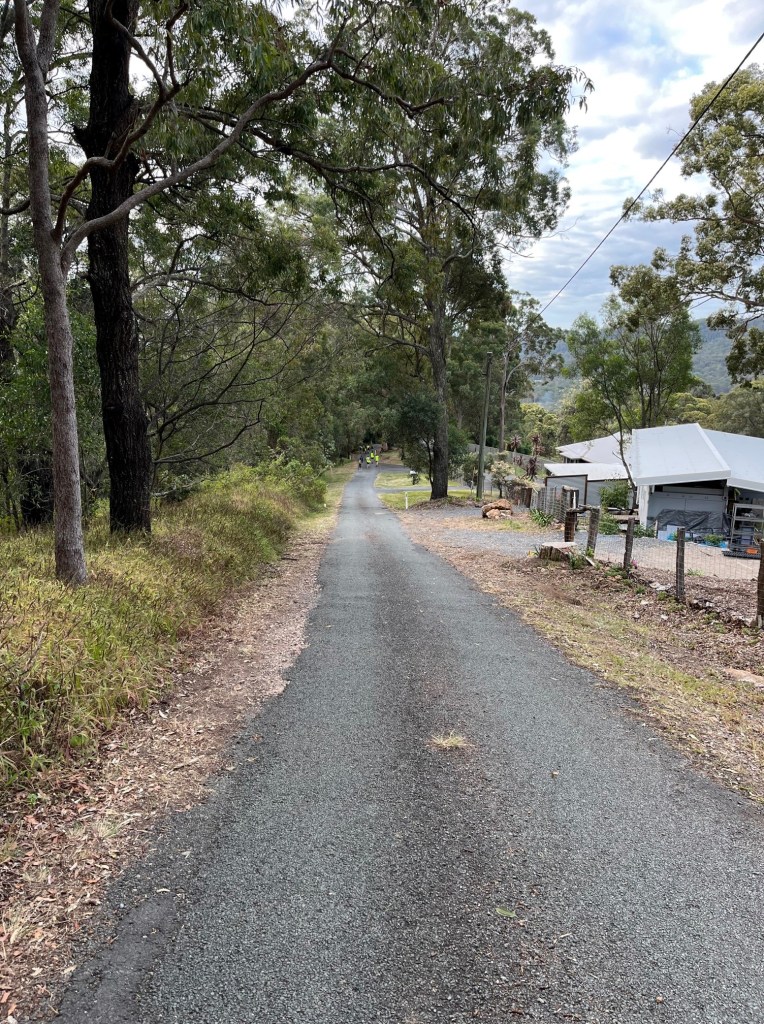
So the start of the 30km is actually the support crew location for the 48 and 96km. Once you go through the start shute, its 2.6km straight up.
In 2016 and 2021, you could sit at your support crew camp, have a bit to eat and a rest while you watch the headlamps twinkle as teams wound their way up the side of the mountain. A bit different for the 30km as it’s the first thing you do – slog up a huge hill!
We climbed 250m as we hiked 2.6km pretty much straight upward. Underfoot was shale and rock, and boy was it dusty. Lots of feet kicking up dust as everyone climbed. It was slow, and still quite warm. Took about an hour to make it up to the top with little stops to catch our breath.
Steep and dustyThe ribbons on the right denote the correct track direction
We crested the top of the hill and came into a lovely grassy meadow, the perfect place to stop and take a short break. It also allowed some of the larger school teams to move off and we could then hike with a little more peace and quiet 😉
10 minute RnRCoffee time!
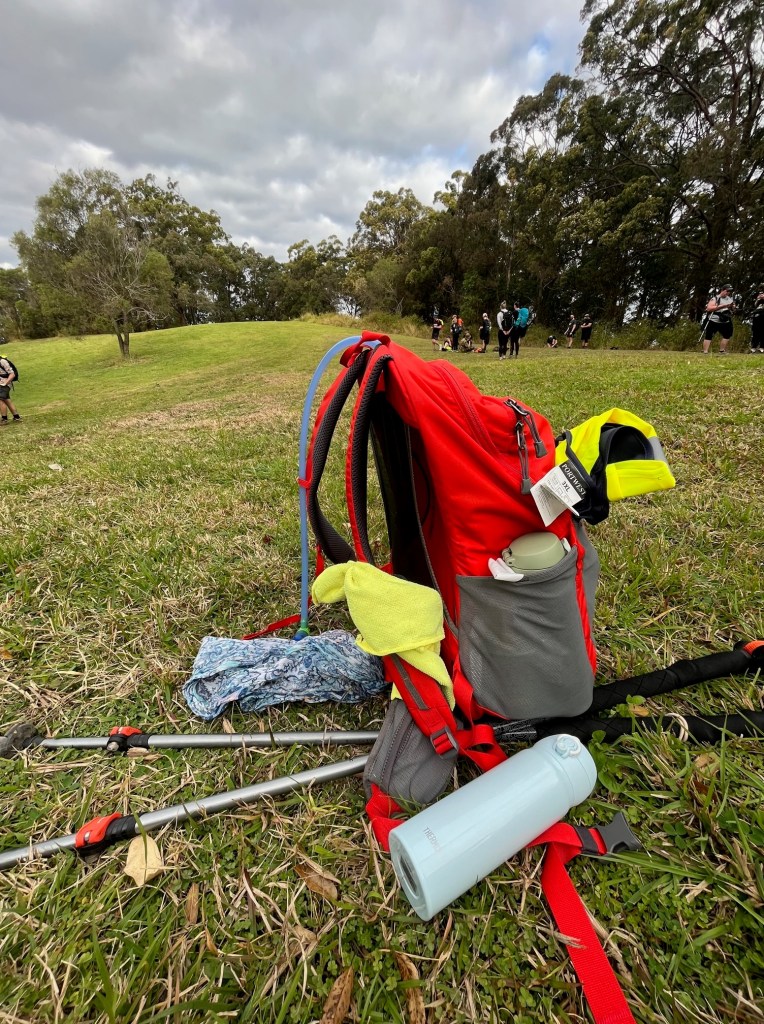
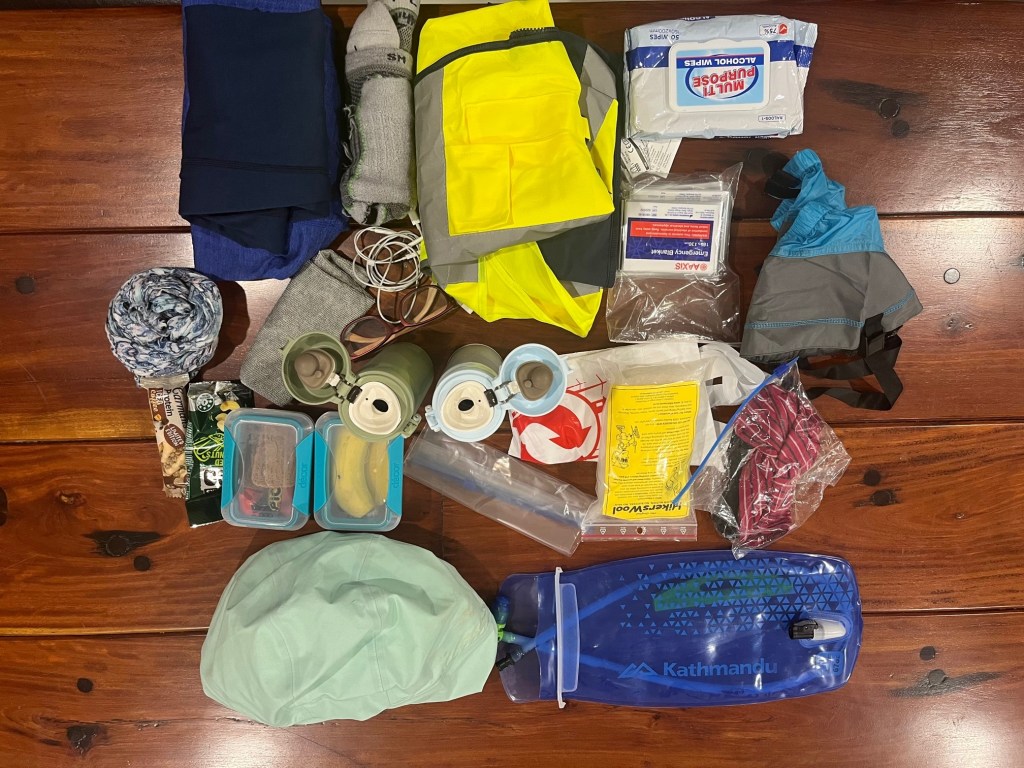
What’s in the Backpack?
Pleased you asked.
Packing for a 30km hike is a bit of a hybrid. It’s 10 hours and crosses from day into night. We had planned to complete the 30km before midnight, so averaging 3km an hour. Food and water was a must. The Kokoda organisers also require to you have a high vis vest as we cross a couple of large roads, a whistle, a first aid kit and we needed to download an emergency finder app. I included a couple of layers – merino wool, as well as a beanie, gloves and my trusty raincoat. Then I had assorted items – headphones, headlamp and batteries, two mobiles, drugs, antiseptic wipes, hikers wool and…here is what I packed…
Clockwise from 6pm we have raincoat, food, coffee, scarf, tops, extra socks, glasses, earbuds, high vis vest, space blankets, wipes, gloves and hat, gaiters, bags, hikers will and water bladder. Fran carried the first aid kit and whistle 🙂
After our little rest at the top of the hill we then walked along the ridge, with stunning views down to the Gold Coast glitter strip. The weather turned on some lovely mild temperatures and the cloud cover was just perfect. After walking for 3km on shale and rocks, the grassy paths were very welcome. It was then time to start walking downhill to Nathan Valley where the first checkpoint was located – which transitioned us onto a local road.
Of course hikers know what goes down, must go up…..!
Lovely softness underfoot
Gold Coast skyline
Nathan Valley Rd
Section 2 – Into the Forest and Disaster!
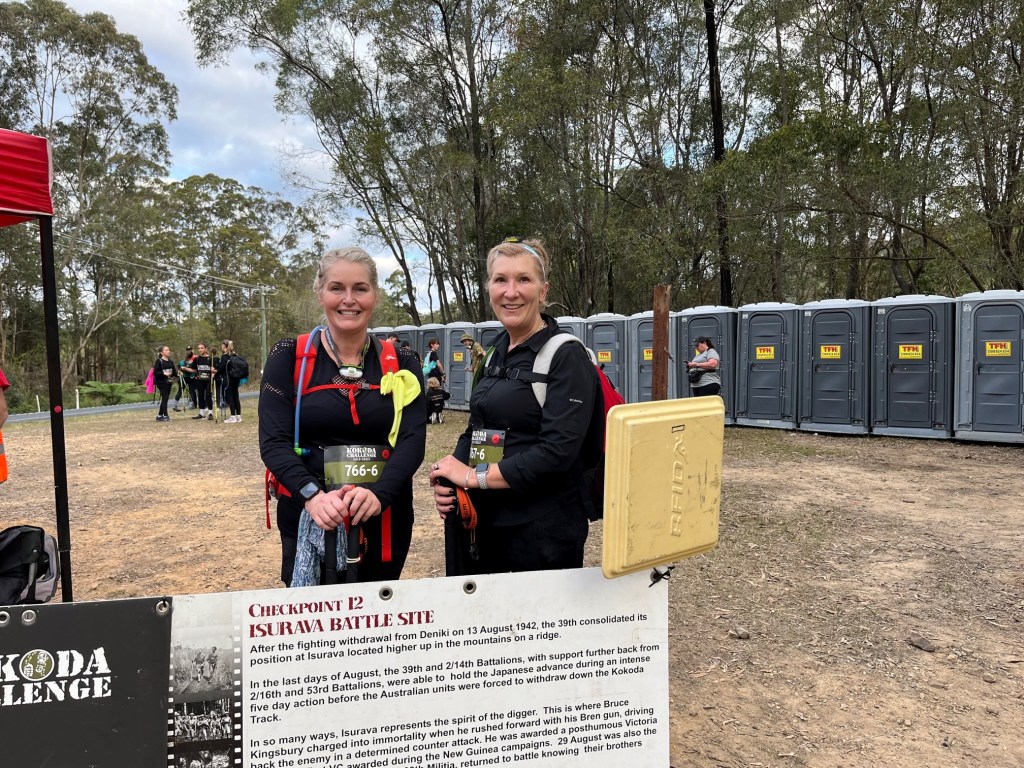
Committing to the Kokoda Challenge means you need to travel through the requisite checkpoints and pass over the electronic pads to record your progress. Importantly, teams need to pass through the checkpoints together – for safety as well as reflecting Kokoda mateship. Nobody gets left behind.
Fran and I arrived at the first checkpoint in good shape and really enjoying the hike so far. We had come about 6km, and it was late afternoon. Time for another photo, and toilet break and steeling ourselves for the next big mountain climb.
Checkpoint 1 for 30km hikers
We crossed over Maudsland Rd, tracked alongside it for a bit and entered into Nerang National Park proper. We had another big hill to hike up, around 200m and 2km. Again, we were back on the shale and rock hiking underfoot, which can be quite punishing on the soles of your feet.
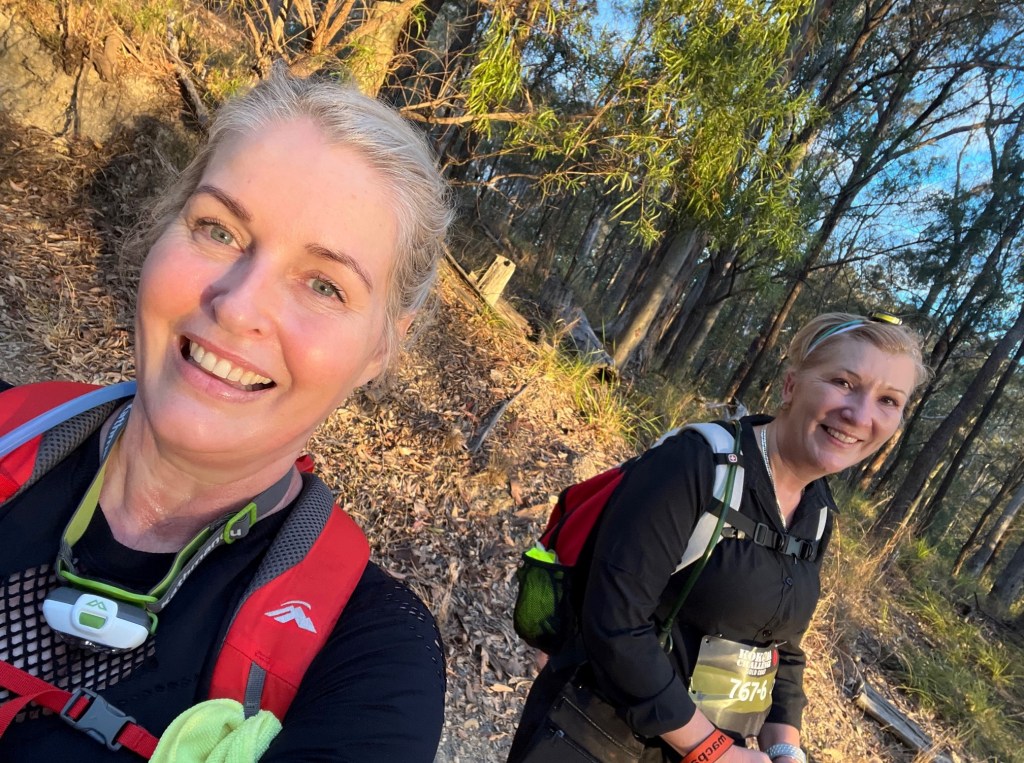
Again with the Sweaty Betty’s!
Glorious Track Sunset
Around 5pm we were almost at the top – and disaster struck!
Fran injured herself…!
Not badly, but enough for us to stop and have a bit of a think about what the rest of the hike was going to look like. She was already hiking with a knee brace so this wasn’t a good thing.
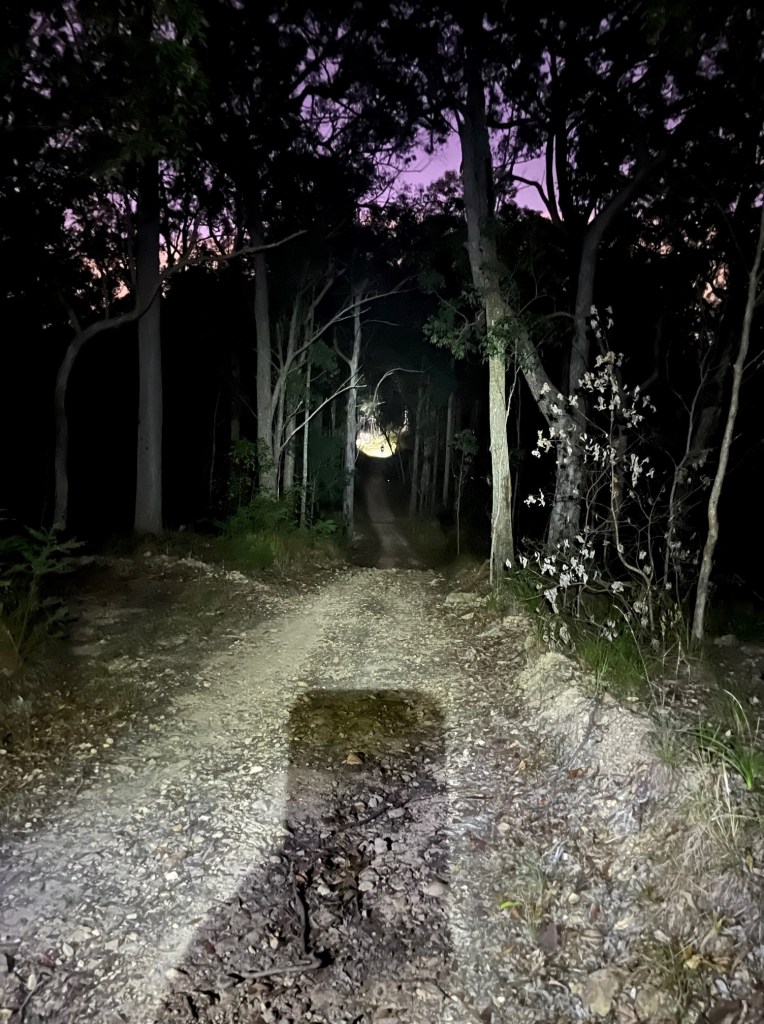
It was heading into dusk – so it was headlamps on and darkness was upon us.
You can see a team ahead of us on the track 🙂
A decision needed to be made. Could Fran keep going and finish the 30km or did we need to cut our hike short and live to fight another day?
I’m very pragmatic about my hiking, and given that I’m over the half century mark, keeping my body intact is important. A quinquagenarian doesn’t bounce back injury wise as quickly as a quadranscentennial – sad but true.
Decisions decisions…
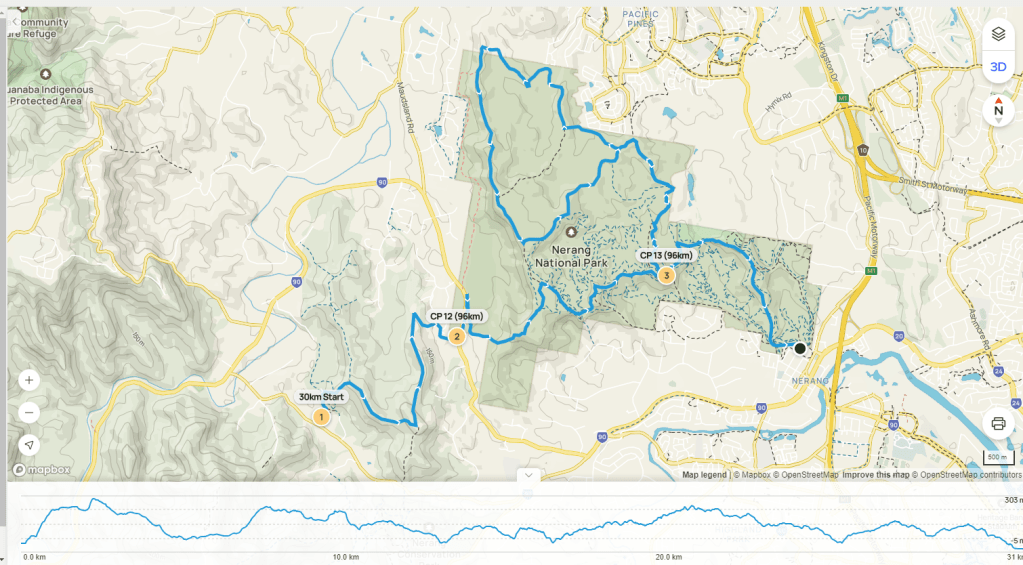
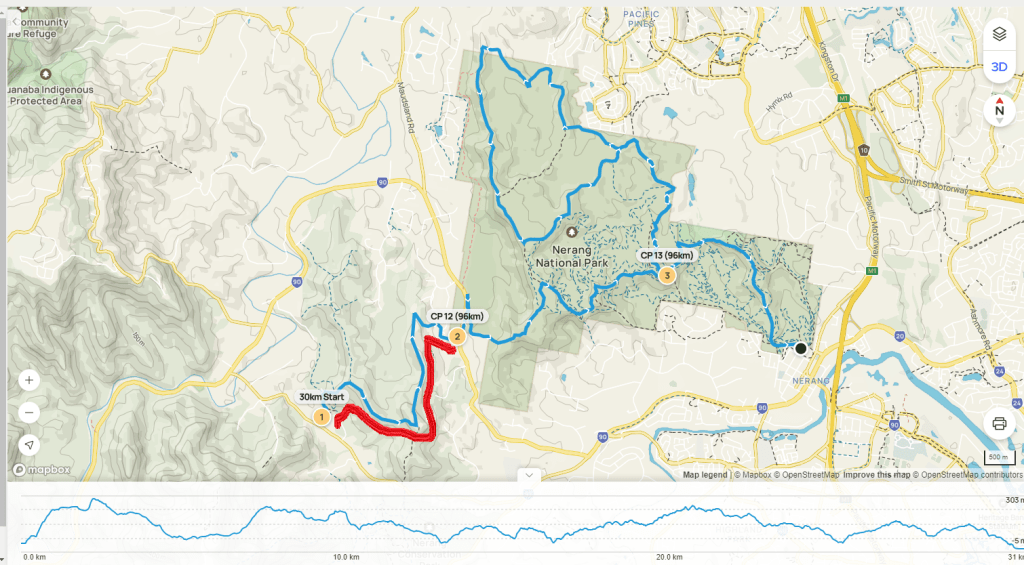
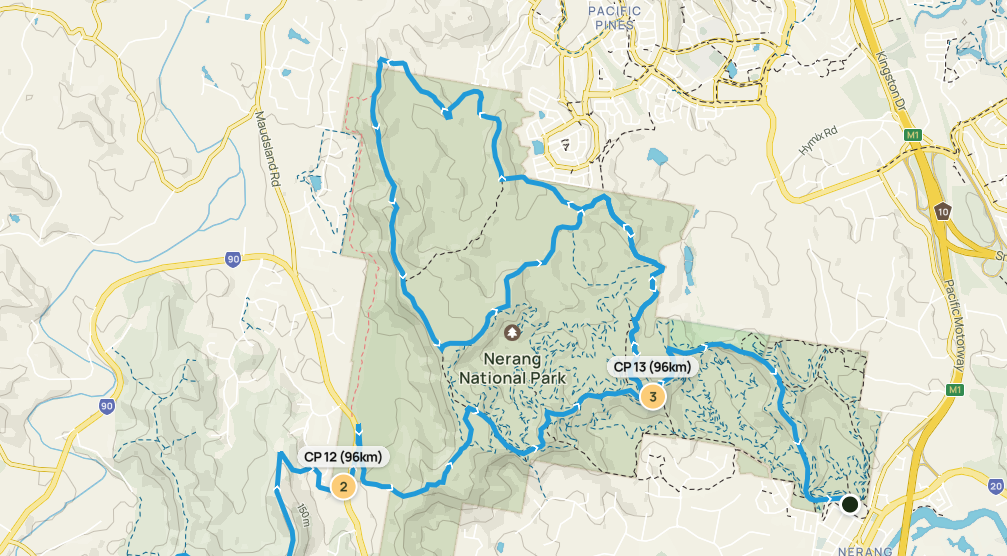
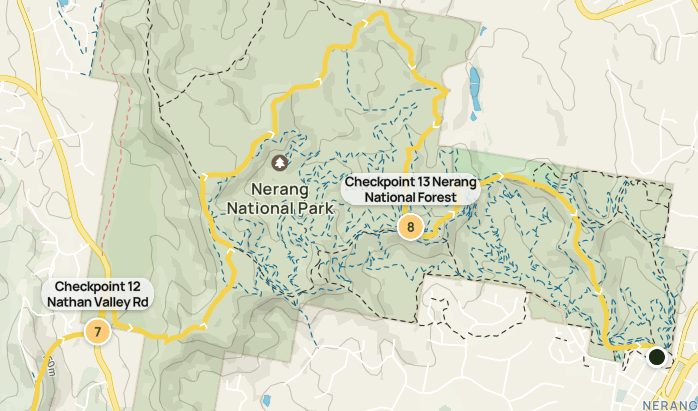
As you can see below, the 30km map involved a loop in the forest, and the 48km map was a shorter distance back to the finish. Unfortunately I didn’t have the two maps to look at when we were deciding what to do, but instead referenced the challenge signage on the track, so we made the call to hike the remainder of the 48km challenge route, estimating it would take us to the finish in 10km, rather than 20km…
What I should have done is taken the short route to Checkpoint 13 and then dropped down to the finish. Lesson learned.
Our pace slowed a bit, which was OK as we knew we only had about 10km to cover. We still had some hills and valleys, but they were a lot smaller. I reckon there were about 500 hikers looping around following the blue route, and the fast 48km hikers were also coming through, so it was a busy couple of hours. Lots of dust being kicked up…!
Checkpoint 13 is about 4km from the finish. We stopped there for a break so Fran could rest up and make sure she could walk out. There were a few younger hikers parked up there waiting for first aid and 4×4 pickups, but Fran was emphatic she wanted to walk to the end and finish – even if it was a shorter distance.
So, the earbuds went in and the podcasts went on – and we walked.
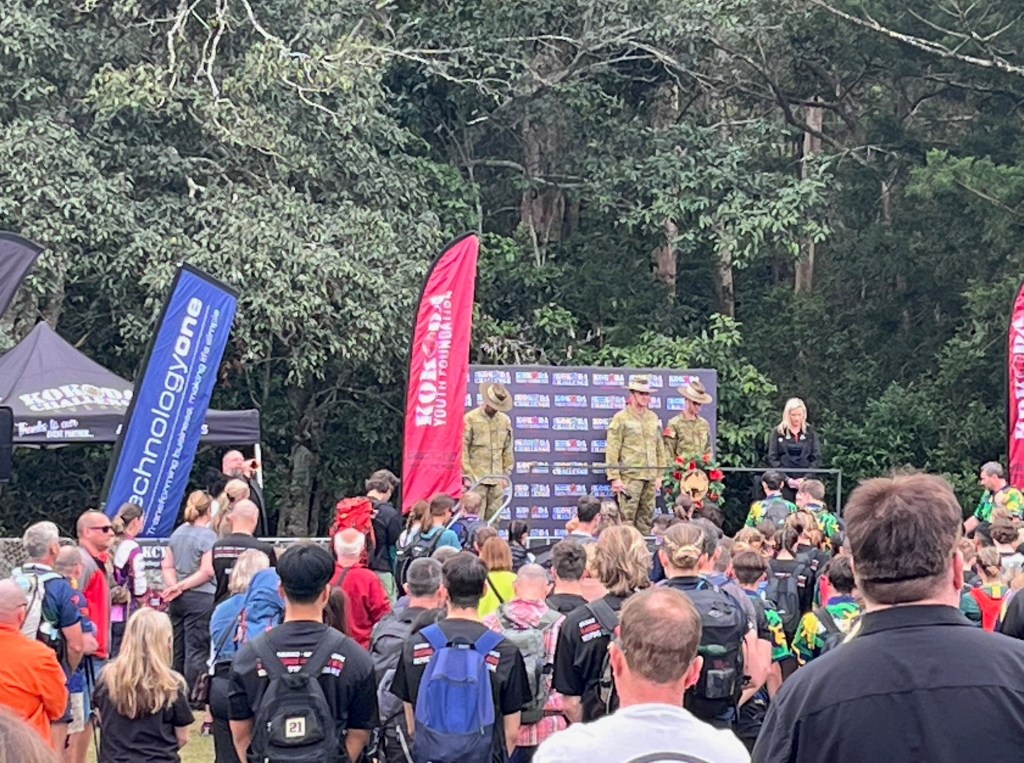
The finish line is down the bottom of a gentle hill, and you can see the lights and hear the loudspeakers so it’s a fantastic atmosphere. Fran was in a fair bit of pain by now so it was a very welcome sight.
We crossed around 9pm, having just clocked over 20km. Unfortunately you can only walk through the fancy finish line and they read your names out AND your time AND there are a million enthusiastic supporters clapping etc…. 😮 . It was lovely but we hadn’t done 30km and Fran just really wanted to get off her feet.
DONE.DOT.COM
I emailed the organisers the next day, explained the situation and asked them to take us off the finish board, and put us on the ‘incomplete’…..we didn’t want credit for something we didn’t actually do.
In Summary…
The Kokoda Challenge is a terrific event and one really worth doing.
30km vs 48km – lots to say 🙂
It was the first time the 30km distance was offered and it was chaotic at the start. It was full of school teams, including primary schools kids so if you are a regular hiker, I’d avoid the 30km. I found it too visually and audibly frantic. The route quickly became littered with the emotional wailings of young people realising that a challenge is exactly that….We passed one young person halfway up a hill who was refusing to take another step and was throwing the hugest hissy fit. I felt very sorry for the exasperated, yet very patient teacher.
The other thing about the 30km is most of it is walking around the Nerang National Forest. You loop back and forth for 20km on a kind of circuit. Kokoda training hikes are often done in Nerang due to the fact that you finish there, so for me it was hours hiking on ground that I’ve already spent quite a bit of time on….meh.
Consider training for and entering the 48km. I’ve done it twice and it’s such a great event, you get to walk on private land, army land – places that you would not be able to access. And importantly, it’s a track that goes in one direction, from start to finish, and because of the distance, teams are more prepared and committed.
It’s important to remember- any hike is a great experience. You will be out in nature, having a wonderful time and along with any challenge comes the huge sense of achievement when you finish. Injured or not!
I’m PJ and I write about the hikes I take, giving you insights, photos, commentary, tips and tools so you can enjoy hiking and embrace the experience.
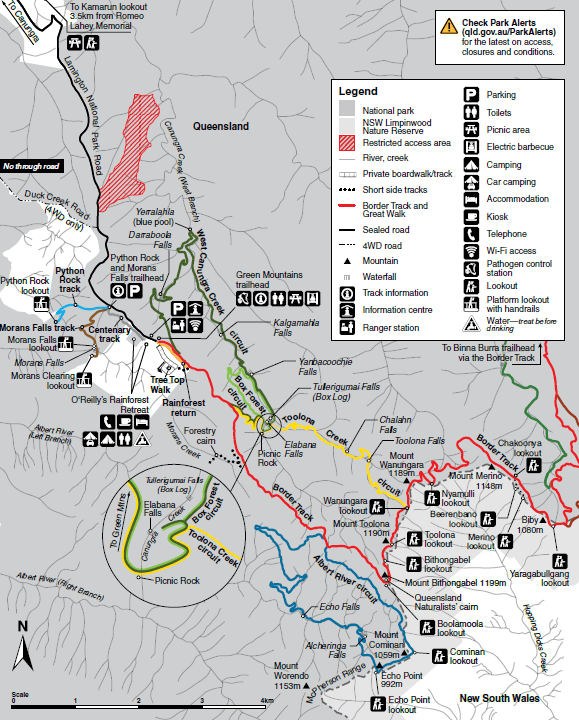
Today we are exploring the Main Border Track in Lamington National Park, in the Gold Coast hinterland. A track that’s been making hikers happy for almost 100 years.
A Weekend Escape!
It was time for me to return to my hiking roots, and what better way than a hike in the South East Queensland corner. Other Half (OH) and I had a birthday weekend planned at O’Reilly’s Retreat, a delightful tourist destination high in the McPherson Ranges, a two hour drive from the coast. Another reason to go to O’Reilly’s was to finally hike the Main Border Track!
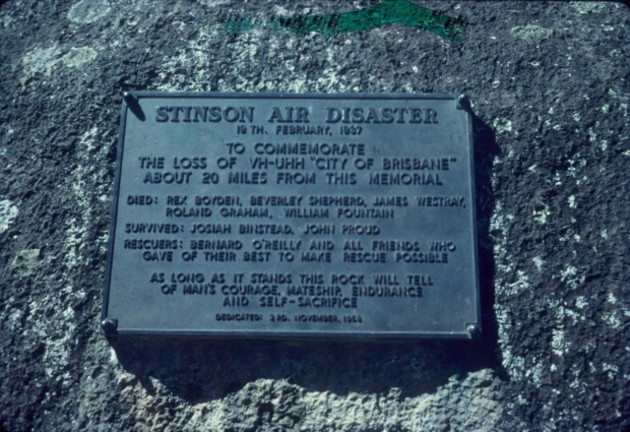
O’Reilly’s Retreat is embedded in Queensland history. It was founded in 1926 by the O’Reilly family when an attempt at dairy farming in the ranges failed. To be fair, they bought the land sight unseen, and there was NO WAY dairy farming was going to be possible in the mountainous and uncleared forest. So, rather than selling milk and cheese, they started selling eco-tourism. O’Reilly’s gained global fame in 1937 when Bernard O’Reilly tramped for three days through impenetrable forest to locate a downed Australian National Airways flight missing enroute from Brisbane to Sydney with seven people on board. A nationwide search for over a week failed to find any sign of the plane, but Bernard had a good idea where it may have come down, based on his knowledge of the area, the storm patterns and down drafts. Because of Bernard, the two survivors were rescued 10 days after the crash and reunited with loved ones.
The Main Border Track
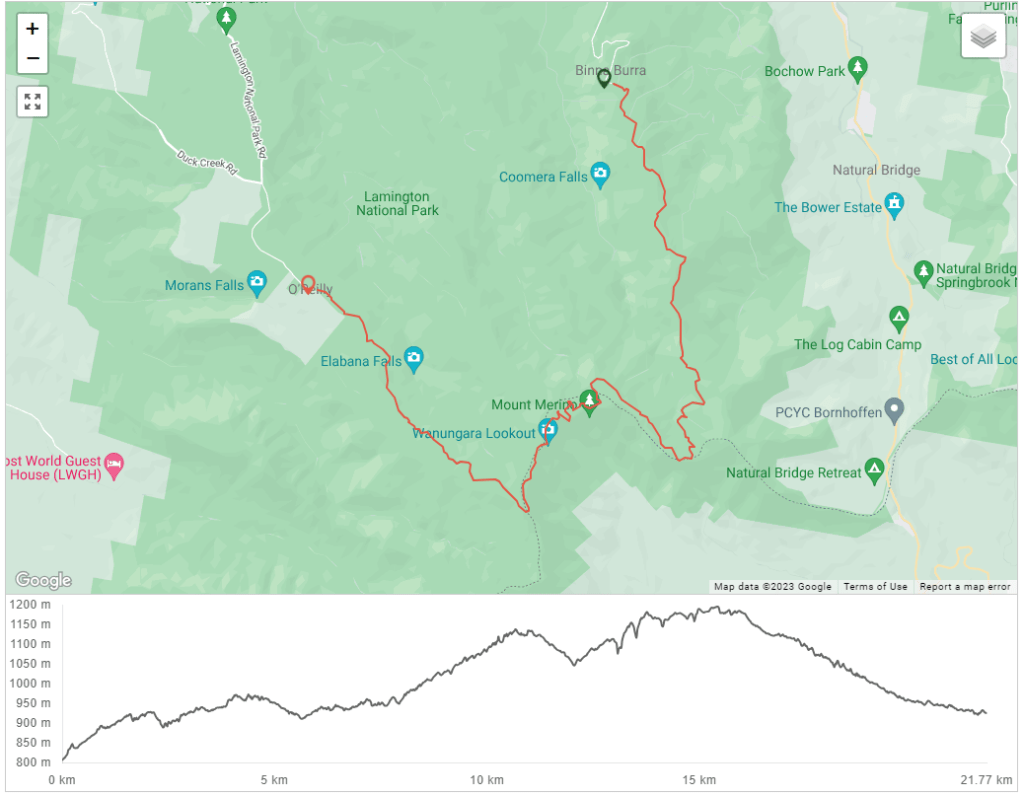
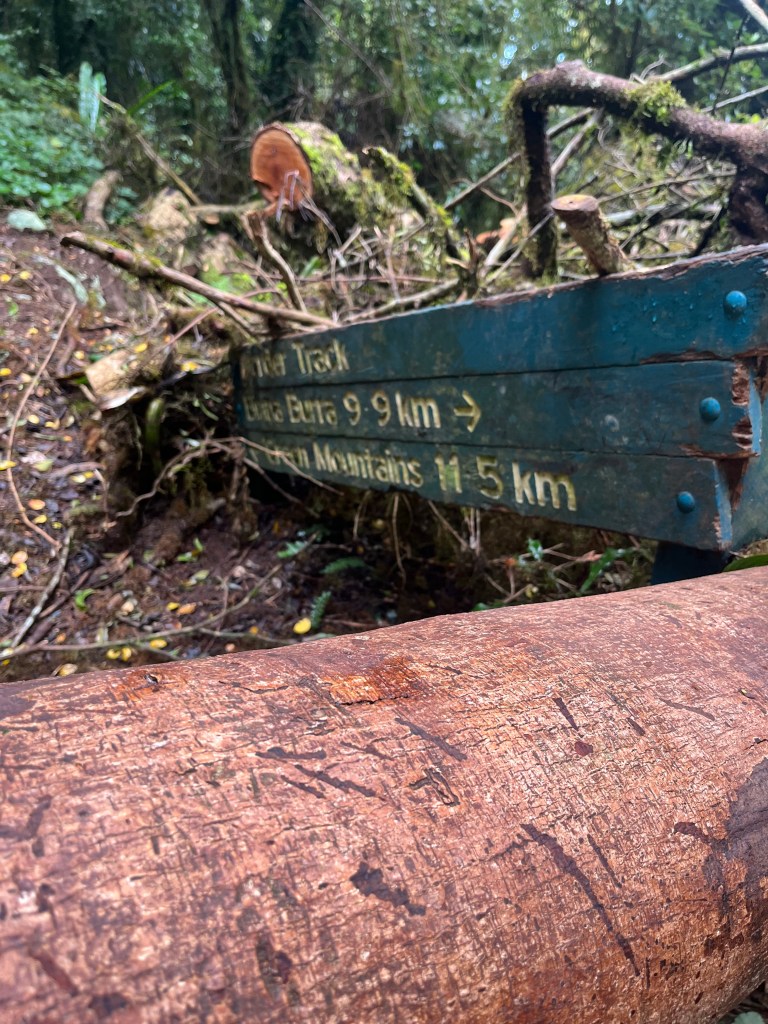
The Main Border Track runs between O’Reilly’s Resort and Binna Burra. It was built in July 1937 in two sections, with one crew cutting in from O’Reilly’s toward the second track crew working in from Binna Burra. It took 50 men 18 months to join the 22km track.
FUN FACT
As the crow flies, O’Reilly’s and Binna Burra are only 6km apart. However, the track is 22km as it winds its way around escarpments and ranges, and the drive from one to the other is over 70km!
The track can be walked in either direction. I caught a shuttle from O’Reilly’s to Binna Burra and walked back. Mary, our driver, is a long term employee at O’Reilly’s and had lots of tips and fascinating information about the area, the Track and whether leeches are around in winter. They are but only come out when it rains…
We departed around 7.45am, which put me at Binna Burra around 9.15am and I was off! Mary advised that most hikers tend to pop out the other end somewhere around 4pm, so a hike time was anticipated of around 6 hours. That was my goal, and it also meant I would be off the track before forest dusk.
Starting the Track…0-5km
It was a bit chilly…lovely Icelandic head wrapFollow the signs
The commencement of the Border Track is pretty simple. You walk under the arch – and you have started! Lamington National Park is very good with signage, and the Track is very well signposted from start to finish.
Don’t be freaked out when the first sign you see has “Green Mountains” as the destination, not O’Reilly’s. Green Mountains is a section of Lamington National Park and the day use area is adjacent to O’Reilly’s so they are one in the same. Your end goal is Green Mountains 🙂
Green Mountains here I comeMisty and lovely
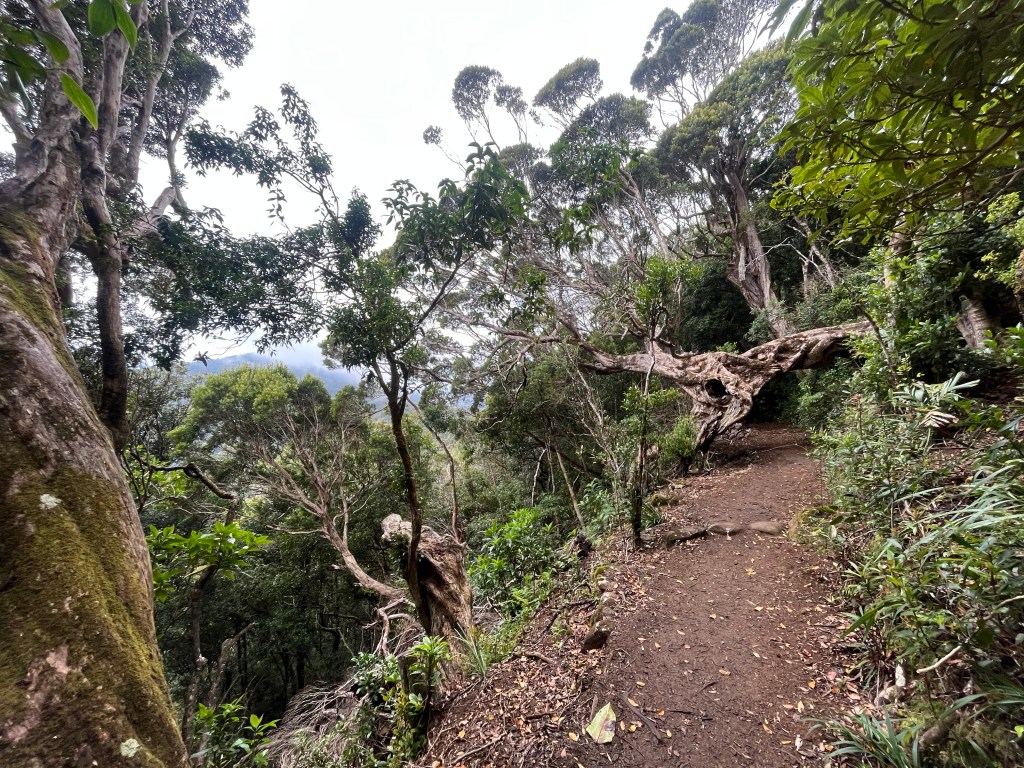
The first few kilometres are a gentle incline away from Binna Burra. You will be climbing several hundred metres upward over the first half of the track, but it’s gentle. This part of the track is taking you up the side of the Beechmont Range, with Coomera Gorge to your right. There are several circuit walks and tracks intersecting with the Border Track, just keep an eye on the signage.
About 3.7km in, I arrived at the first lookout, Joalah, and my first glimpse of a view. The vegetation has been growing vigorously since the last fires came through, so I wasn’t holding out much hope for clear lookouts. I stopped for a photo and a coffee. Those of you familiar with my Kumano Kodo blogs will remember the trusty Thermos – it was ready to go in my backpack!
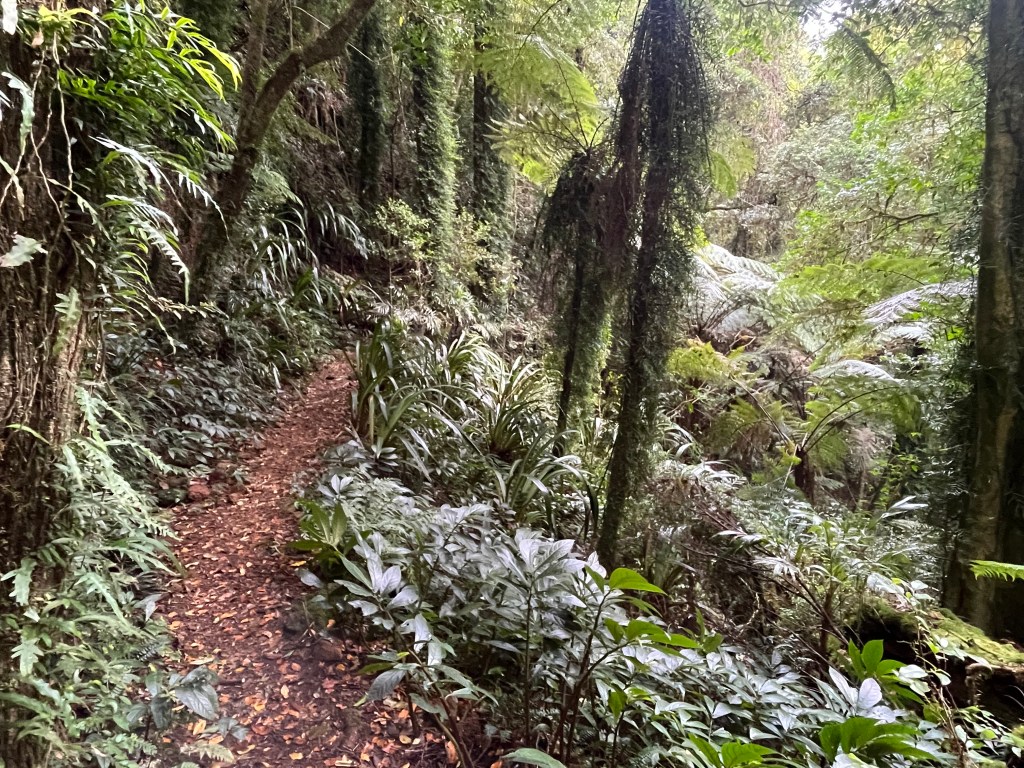
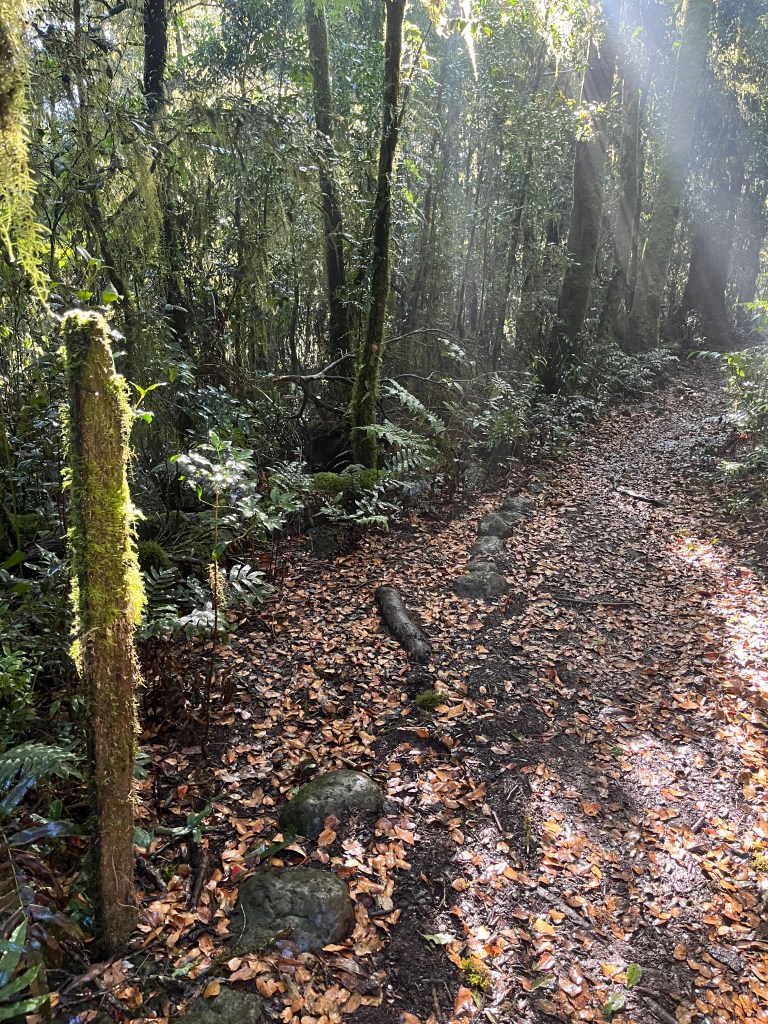
The track has a primordial forest feel. It was an overcast winters day with lots of low cloud and mist blowing up from the south. I had the place to myself and there was an abundance of trees and flora to look at as I walked. Until you get on the Border Track proper (no criss cross trails) the path is wide and flat. Once you move beyond other trails, the track narrows considerably, and is strewn with rocks and root systems.
Regular obstacles…But lots of ‘middle earth’ landscapes to make it worthwhile…
CAUTION – EYES ON THE PRIZE
Foot placement and managing the terrain are two really important aspects of hiking. It’s unusual to be on a hike where you don’t ever have to look down to navigate the terrain. Sometimes it feels that you can’t lift your head as you are forever looking down to plan your next safe step. Beware the temptation to look at a map or your phone while mobile, chances are you’ll stack. That’s the fun of hiking, keeping your eyes on the prize and staying upright…
Getting into a Rhythm…5-10km
I must admit, rocks and root systems aren’t my favourite terrain, but you play the cards you’re dealt. As I moved through the 5km mark I was feeling great. The track narrowed again and became a little rougher. There were a few creek crossings, and whilst not in full flow, they weren’t dry either so it was a careful transit across Hobwee Creek at 5.7km, Bower Bird Creek at 6.3km and Dragoon Bird Creek at 7km.
Dragoon crossing was a slippery sucker! I can only imagine what it would be like at the height of summer with the creeks roaring with water… you’d need a snorkel and flippers to make it across.
What a great name!
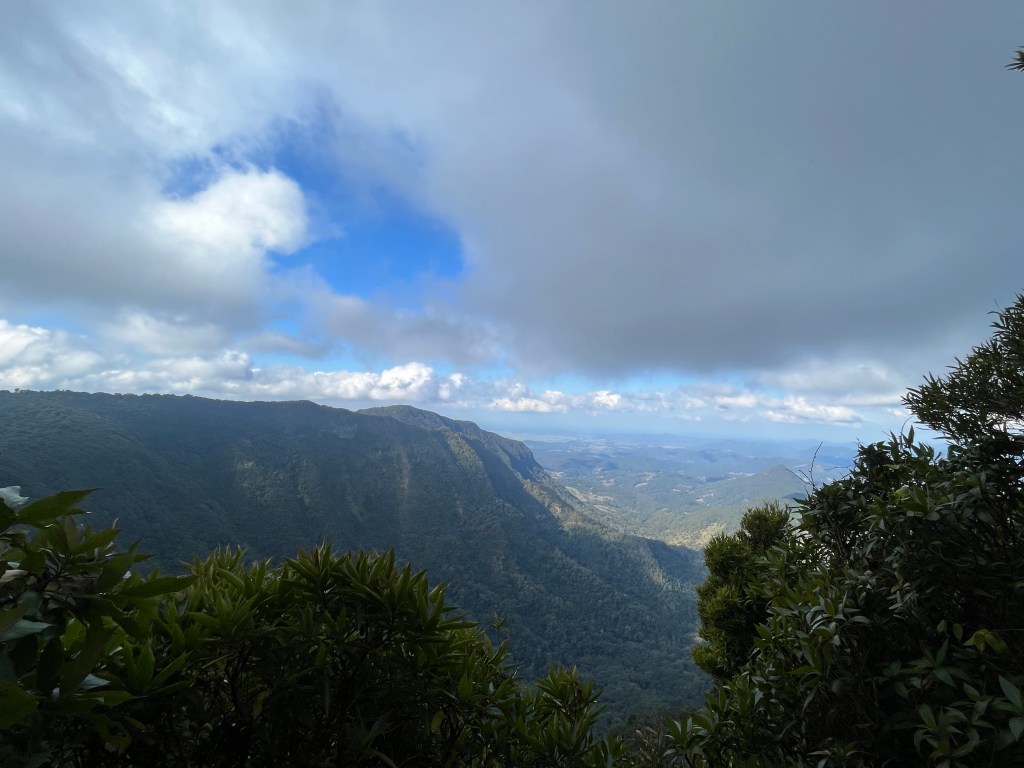
At the 8km mark there was the option to detour to the Dacelo Lookout. So far the southerly had been delivering misty squalls so I decided not to add 2km to my hike to see it. However, at around 8.5km I did sneak off the track (safely and without risk) to take a fabulous photo of the view down into the Woggunba Valley – and lo – the clouds stayed on the western side. Take a look…
How about that for a view???!!!
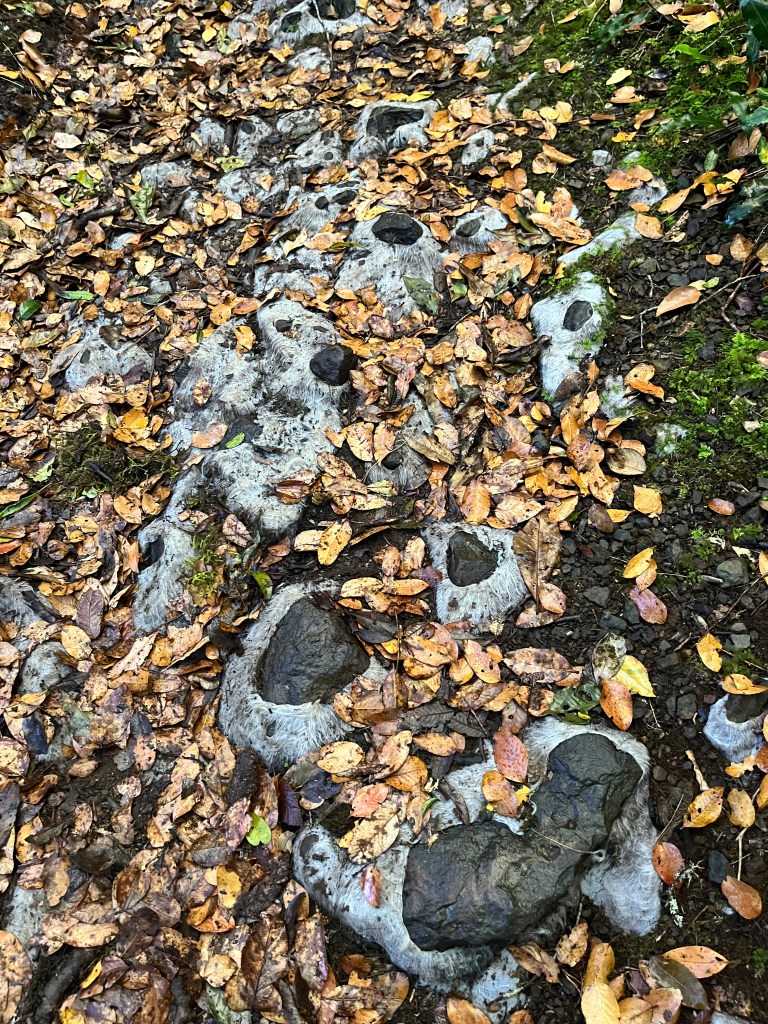
The attraction of a new trail is discovering new things, sometimes odd things. Along the track I saw stones which appeared to be covered in a light green calcification, not the whole stone but just part of it. No idea what it is, so dear readers, fill me in if you know.
Oh, and then I saw the white stuff which I thought was a type of moss or fungus… ? Got all excited – then I realised what it was…..doh. It’s the underlay put down before gravel.
Photo doesn’t do it justice…..it’s quite stunningWorked out what it is yet??!!!
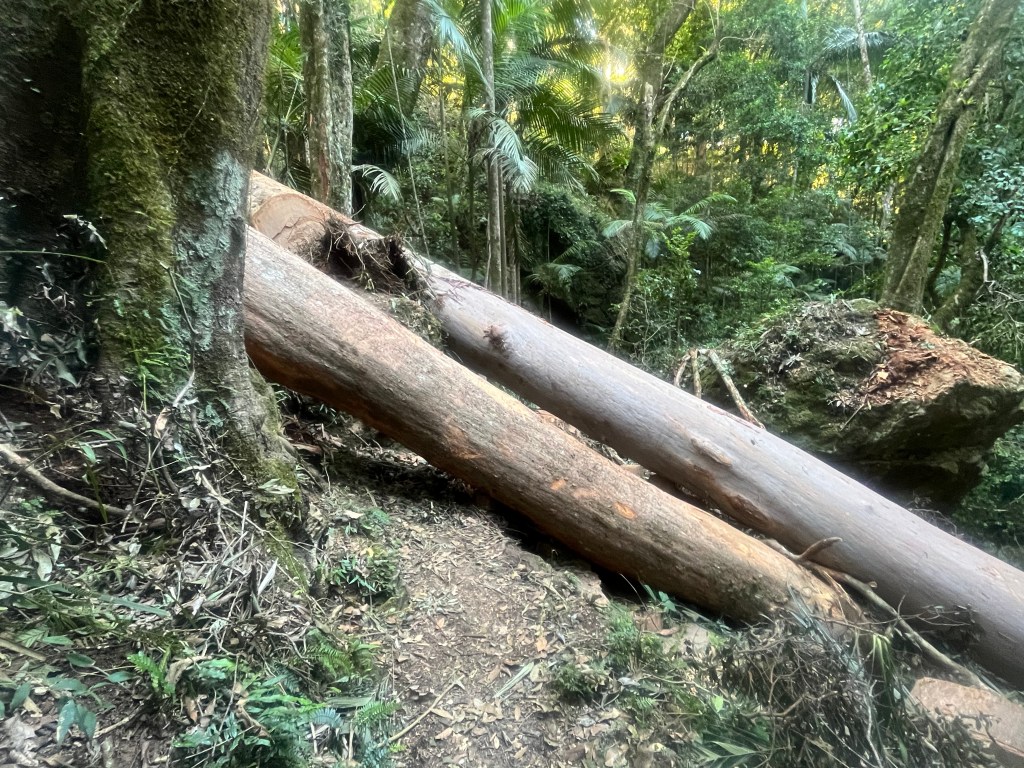
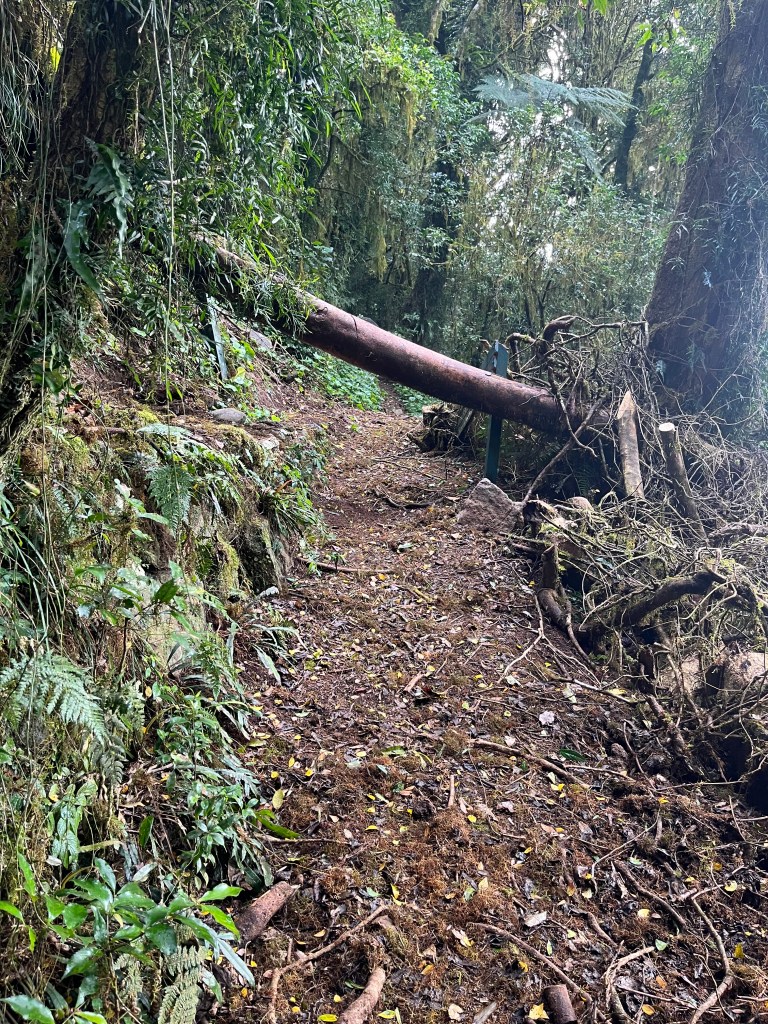
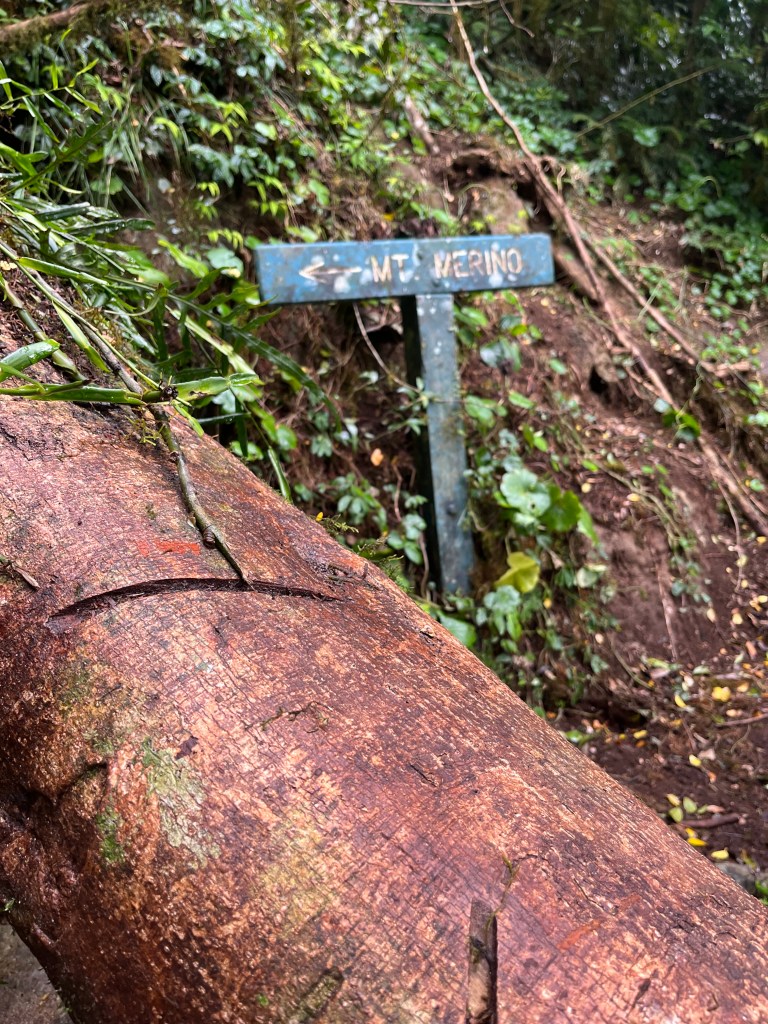
Around 9.5km I came across the sign and trail for Mt Marino. A large tree had taken exception to the sign and completely destroyed it. This quickly became the theme for the hike. There were a number of downed trees and vine entanglements to navigate over, under or around. It did provide for some interesting moments as I am not the most flexible of humans and clambering through downed foliage was a bit of a challenge.
Over Halfway…10-15km
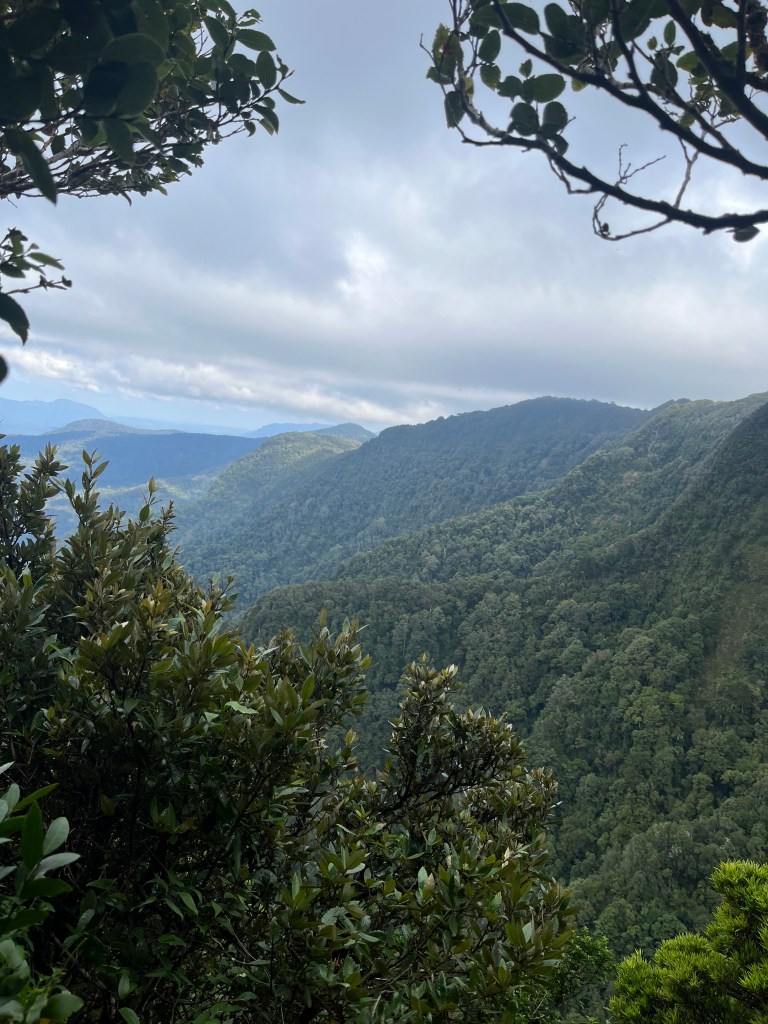
It was time for morning tea and a break. The first half of the hike had been a gradual climb upward, with an altitude gain of around 600m. The lookout and rest opportunities had been few and far between so when I came to Chakoonya Lookout which had a view AND a place to sit, I sat.
If you squint a certain way you can see the Gold Coast skyline
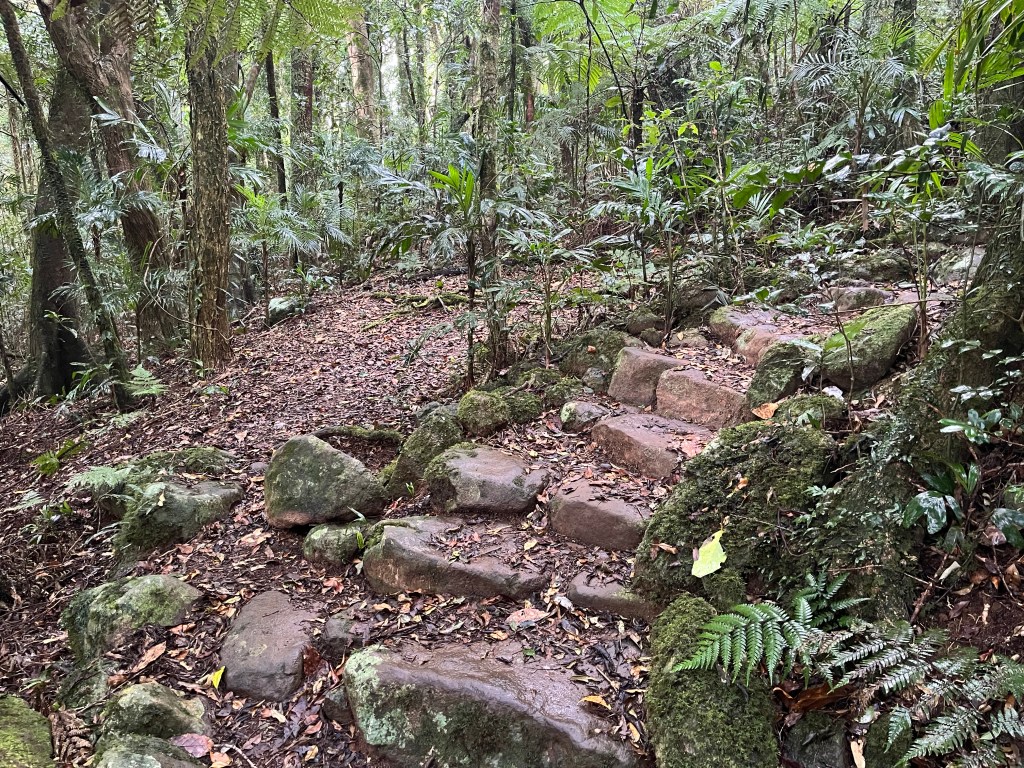
The views, when you come across them, are simply spectacular. When you can’t see the distance, you are enveloped in the green hug of the forest. You can see how narrow the track becomes and the vines were that close you are pushing your way through. However, you never feel lost thanks to the stone markers on the track floor, most of which are close to 100 years old.
Single file onlyQuite the explorer
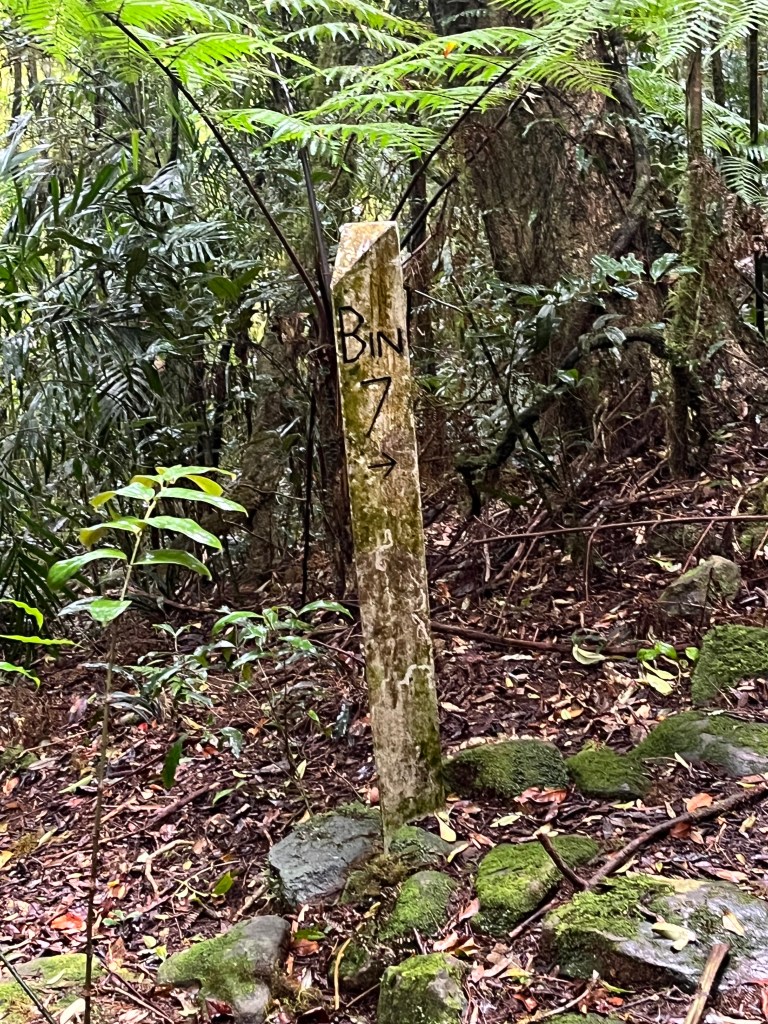
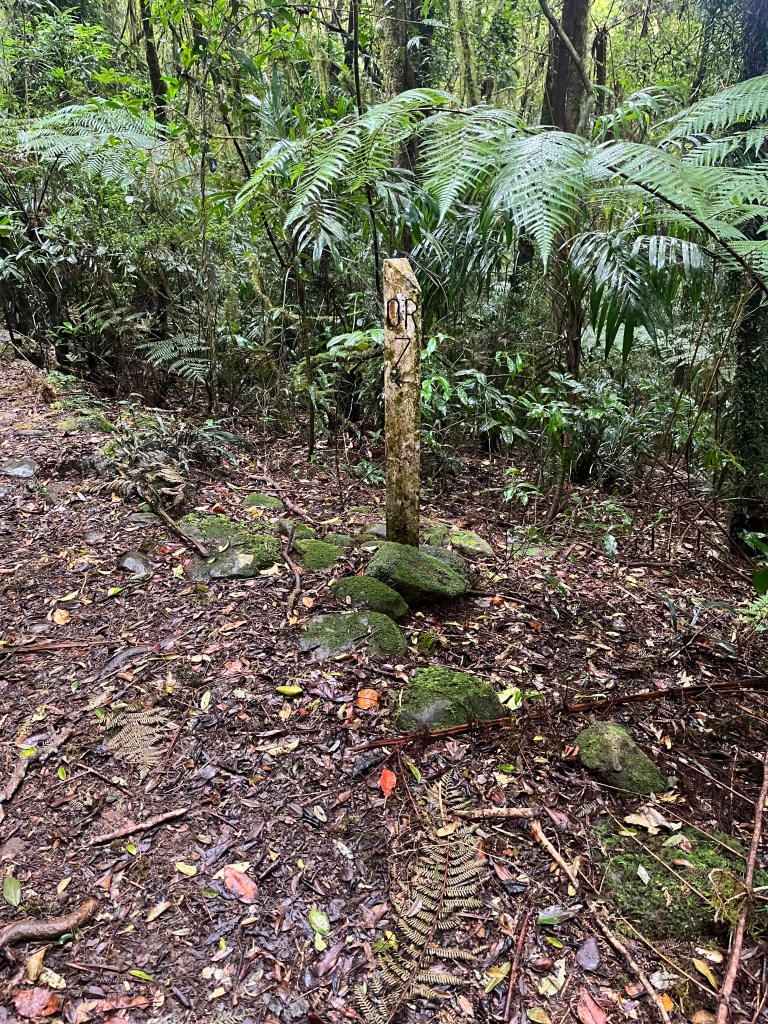
By now I was passing hikers coming from the O’Reilly’s side. For about 45 minutes, it was rush hour as we all crossed over. I also passed the original halfway marker, at around 10.5km. Luckily for the American followers, the marker shows our old imperial measurements. The Main Border Track is exactly 14 miles long and thoughtfully it shows the direction and distance for each destination.
Heading back to Binna BurraMore vines!And my destination…
A few more lookouts, Nyamulli, Wanugara and Tooloona, so more impressive escarpment vantage points. There was a distinct lack of places to sit, which may be a small failing of the track because unless you sit on the ground for a rest, there really is nowhere else to park up. Perhaps I have been spoiled on other hikes where carefully placed rocks and logs provide welcome perching places.
I was starting to count down the kilometres now, and each sign showed that I was getting closer to my destination. I did pass another triangular marker sign, but couldn’t work out the etchings….a mystery for another time 🙂
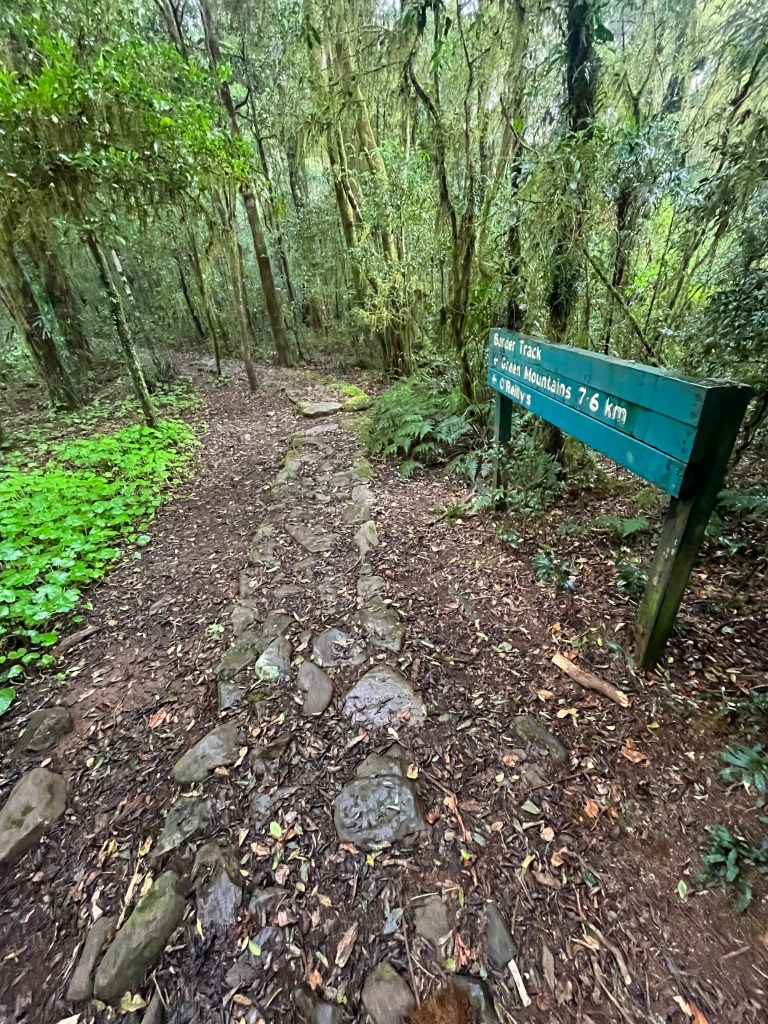
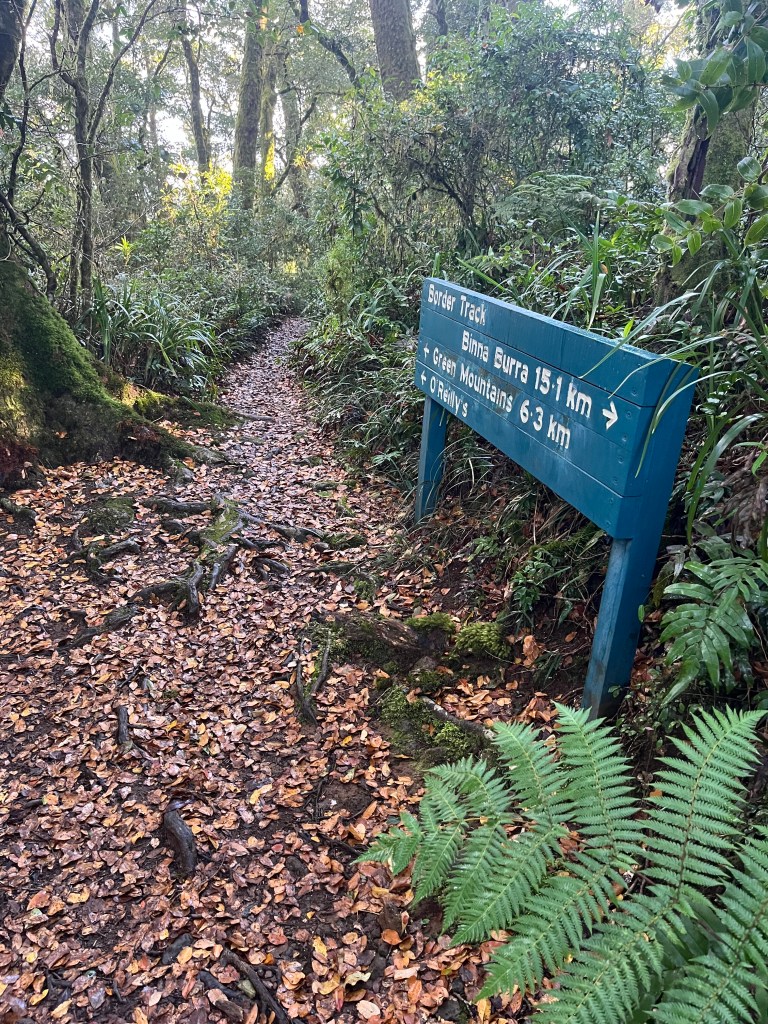
7.6km to destinationThe sun finally breaking through6.3km to destination
Almost There…15-22km
The Border Track is advertised as a 20km hike. It is, in fact, close to 22km. If you are dead set on accuracy, the last couple of km might be soul destroying so factor this in.
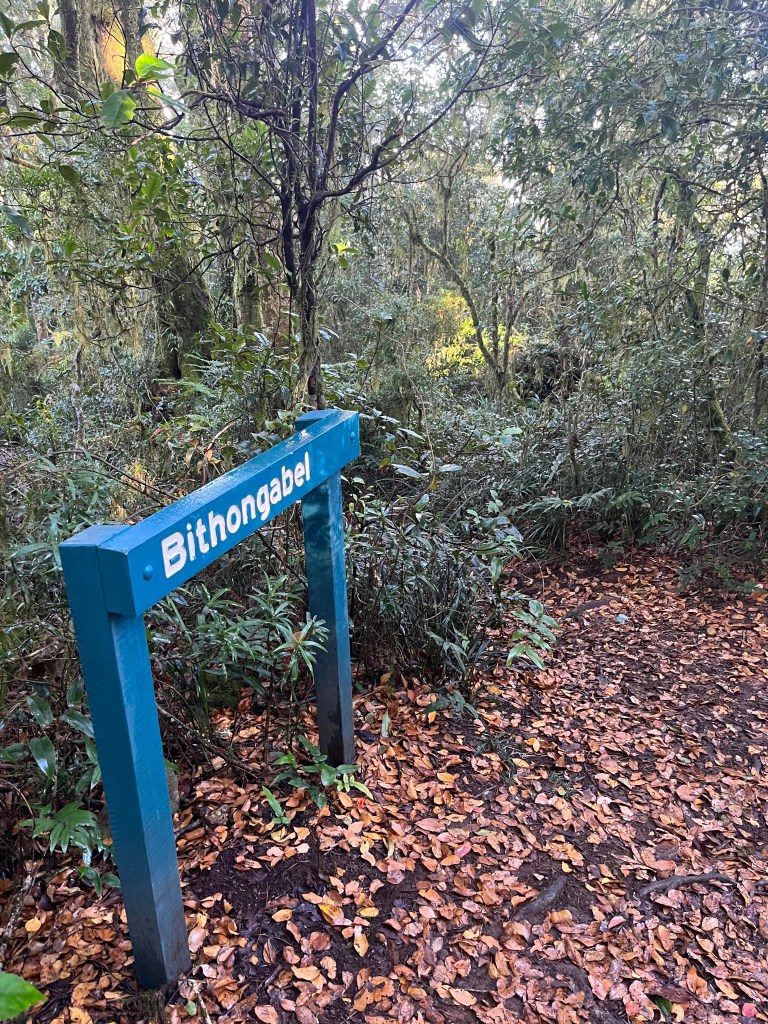
The marker for the last 6km downwards to O’Reilly’s is the Bithongabel Bush Camp sign, which is cryptically signposted as “Bithongabel”.
6km to go!So pretty
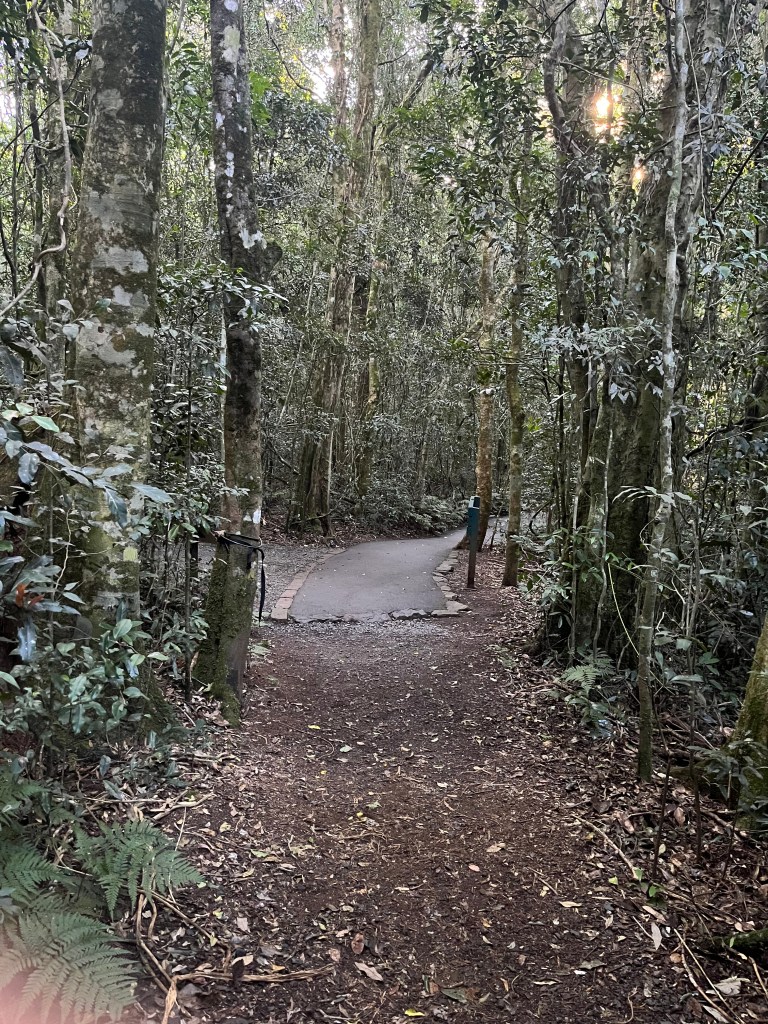
I did a bit of research, and Bithongabel is where keen hikers doing the full immersive experience of the Gold Coast Great Walk can camp overnight. So, once you arrive at this sign you’re almost done, and O’Reilly’s is not far away. The sun was out so the last couple of hours were in dappled sun and on a wider, more forgiving track. It was transitioning from 100% rocks and roots to a springy leaf litter surface. I was definitely in the Antarctic Beech Forest section now.
You’re almost finished when you reach the paved trail, which is about 800m from the end. It was such a lovely sight, as dusk was falling in the forest and the light starting to dim.
I knew that a warm shower and a lovely glass of O’Reilly’s Sparkling Chambourcin was awaiting me, as well as a sumptuous dinner next to a roaring fire. Funny how that put a spark in my step 🙂
Only a few steps leftBorder Track FINISHED!A welcome sight
In Summary…
I’m really pleased that I hiked this track solo. It was great to boost my confidence as a ‘hiker’ and tick off an achievement that was mine alone.
I was prepared. I had food, water, a headlamp, a space blanket and additional clothing in case I was delayed on the track. I sent my Strava beacon to OH, who tracked my progress and came down to meet me at the finish.
The Border Track is challenging, but not insurmountable. It’s beautiful, wild and ancient, and perfect for a solo hike.
Go on, discover what might be in your back yard and as always, embrace the experience.