THE MAIN BORDER TRACK – EXPLORING LAMINGTON NATIONAL PARK

Hello and welcome to my LIKETHEHIKE blog.

I’m PJ and I write about the hikes I take, giving you insights, photos, commentary, tips and tools so you can enjoy hiking and embrace the experience.

Today we are exploring the Main Border Track in Lamington National Park, in the Gold Coast hinterland. A track that’s been making hikers happy for almost 100 years.

A Weekend Escape!

It was time for me to return to my hiking roots, and what better way than a hike in the South East Queensland corner. Other Half (OH) and I had a birthday weekend planned at O’Reilly’s Retreat, a delightful tourist destination high in the McPherson Ranges, a two hour drive from the coast. Another reason to go to O’Reilly’s was to finally hike the Main Border Track!

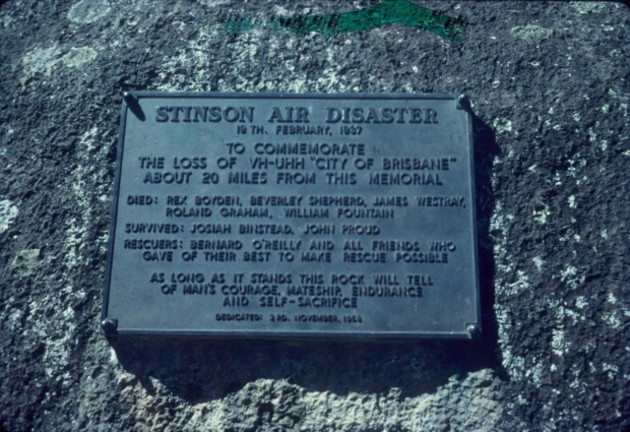
O’Reilly’s Retreat is embedded in Queensland history. It was founded in 1926 by the O’Reilly family when an attempt at dairy farming in the ranges failed. To be fair, they bought the land sight unseen, and there was NO WAY dairy farming was going to be possible in the mountainous and uncleared forest. So, rather than selling milk and cheese, they started selling eco-tourism. O’Reilly’s gained global fame in 1937 when Bernard O’Reilly tramped for three days through impenetrable forest to locate a downed Australian National Airways flight missing enroute from Brisbane to Sydney with seven people on board. A nationwide search for over a week failed to find any sign of the plane, but Bernard had a good idea where it may have come down, based on his knowledge of the area, the storm patterns and down drafts. Because of Bernard, the two survivors were rescued 10 days after the crash and reunited with loved ones.
The Main Border Track

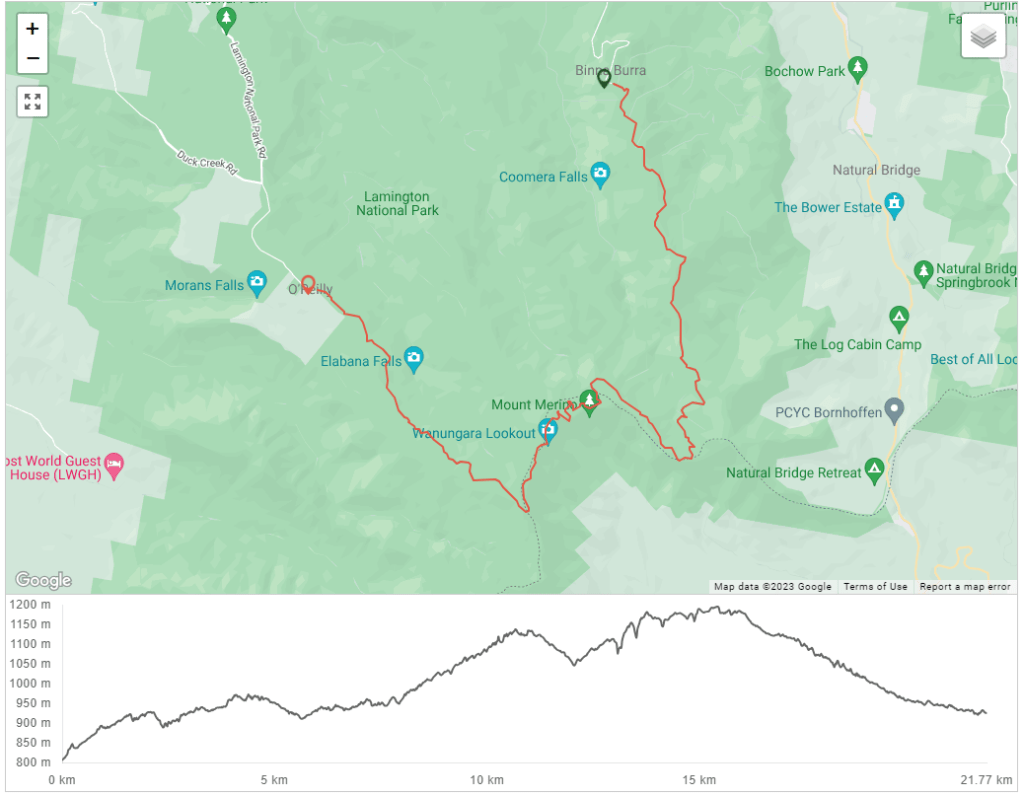
The Main Border Track runs between O’Reilly’s Resort and Binna Burra. It was built in July 1937 in two sections, with one crew cutting in from O’Reilly’s toward the second track crew working in from Binna Burra. It took 50 men 18 months to join the 22km track.
FUN FACT

As the crow flies, O’Reilly’s and Binna Burra are only 6km apart. However, the track is 22km as it winds its way around escarpments and ranges, and the drive from one to the other is over 70km!

The track can be walked in either direction. I caught a shuttle from O’Reilly’s to Binna Burra and walked back. Mary, our driver, is a long term employee at O’Reilly’s and had lots of tips and fascinating information about the area, the Track and whether leeches are around in winter. They are but only come out when it rains…

We departed around 7.45am, which put me at Binna Burra around 9.15am and I was off! Mary advised that most hikers tend to pop out the other end somewhere around 4pm, so a hike time was anticipated of around 6 hours. That was my goal, and it also meant I would be off the track before forest dusk.

Starting the Track…0-5km

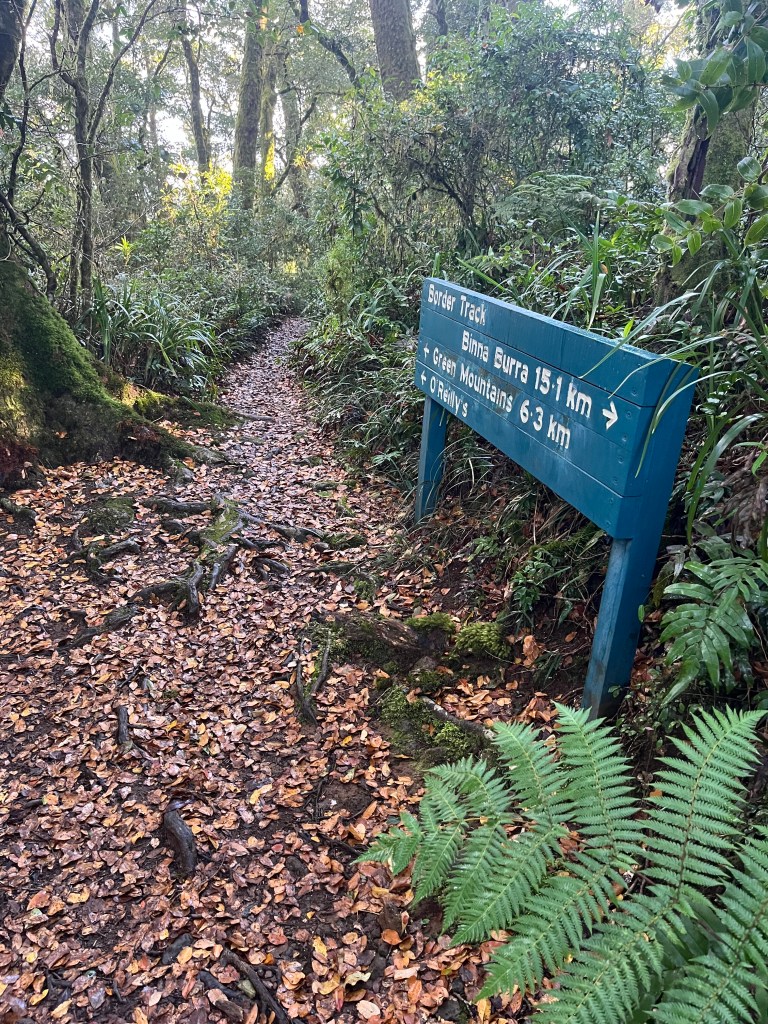
The commencement of the Border Track is pretty simple. You walk under the arch – and you have started! Lamington National Park is very good with signage, and the Track is very well signposted from start to finish.

Don’t be freaked out when the first sign you see has “Green Mountains” as the destination, not O’Reilly’s. Green Mountains is a section of Lamington National Park and the day use area is adjacent to O’Reilly’s so they are one in the same. Your end goal is Green Mountains 🙂

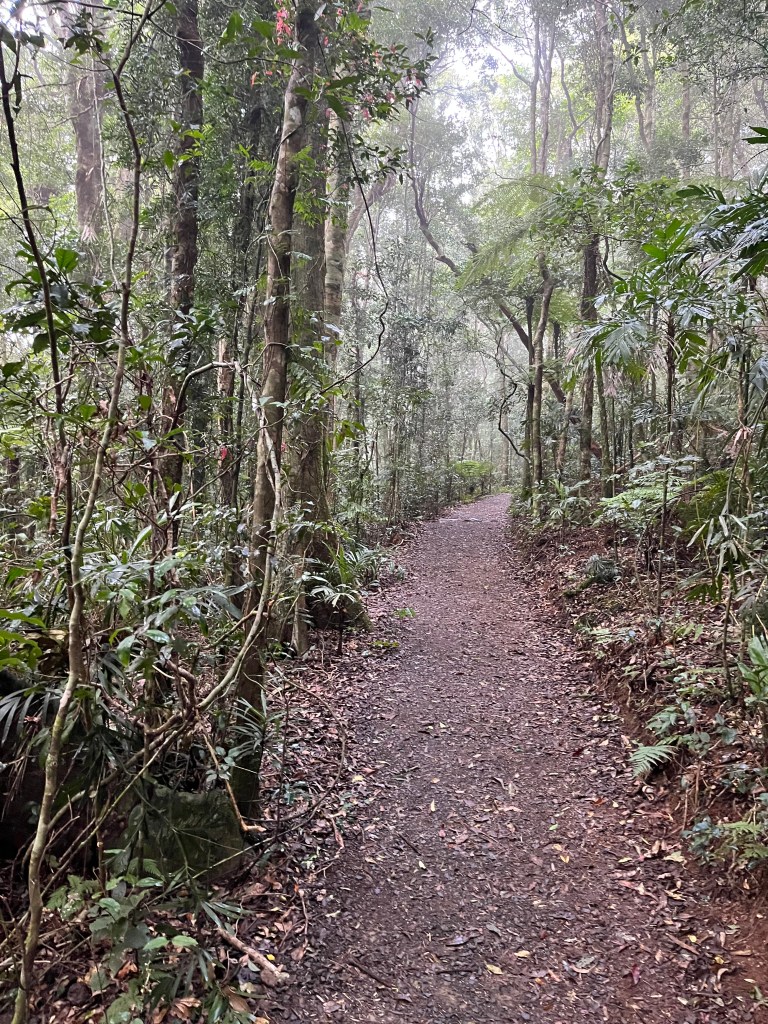
The first few kilometres are a gentle incline away from Binna Burra. You will be climbing several hundred metres upward over the first half of the track, but it’s gentle. This part of the track is taking you up the side of the Beechmont Range, with Coomera Gorge to your right. There are several circuit walks and tracks intersecting with the Border Track, just keep an eye on the signage.

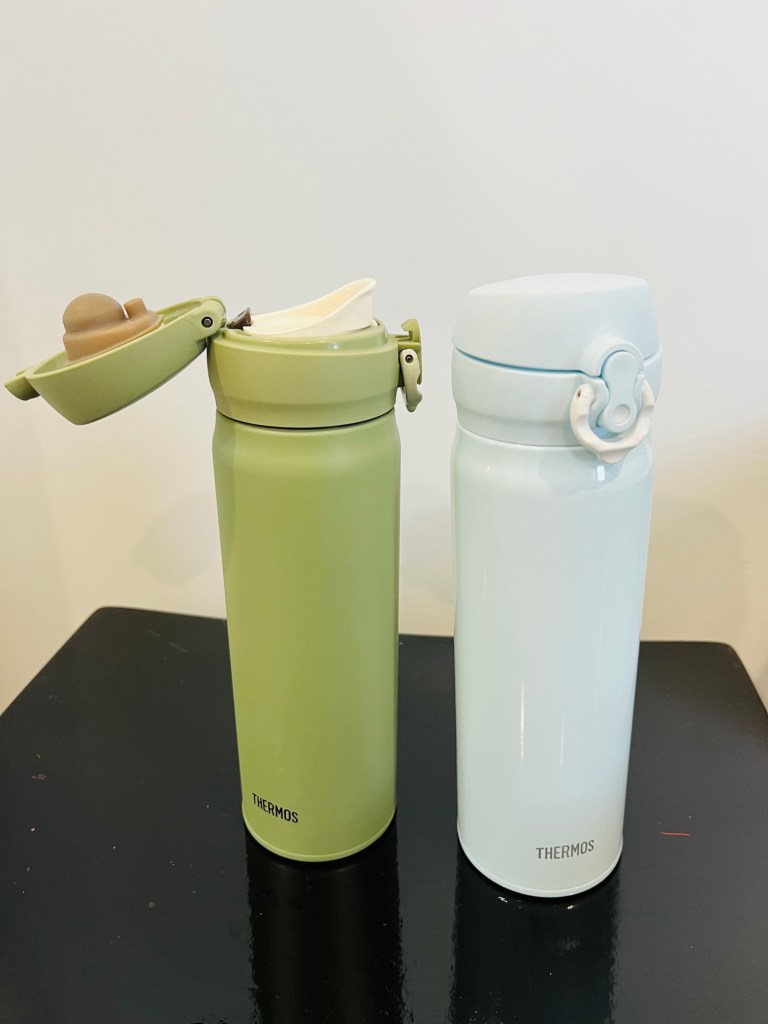
About 3.7km in, I arrived at the first lookout, Joalah, and my first glimpse of a view. The vegetation has been growing vigorously since the last fires came through, so I wasn’t holding out much hope for clear lookouts. I stopped for a photo and a coffee. Those of you familiar with my Kumano Kodo blogs will remember the trusty Thermos – it was ready to go in my backpack!

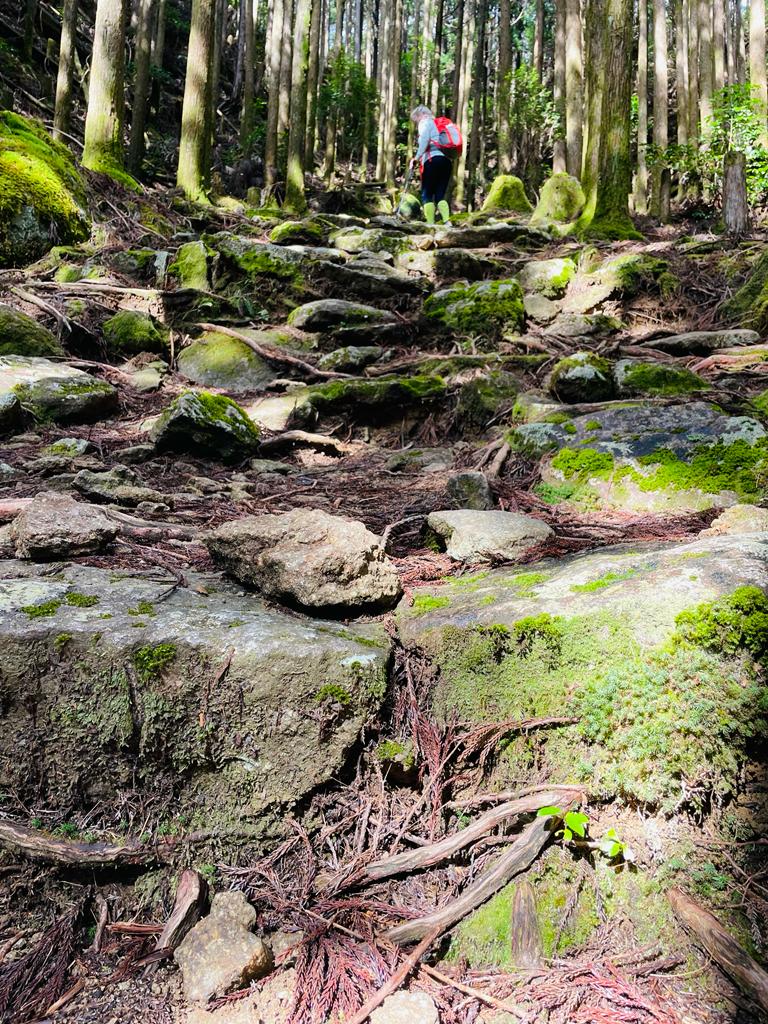
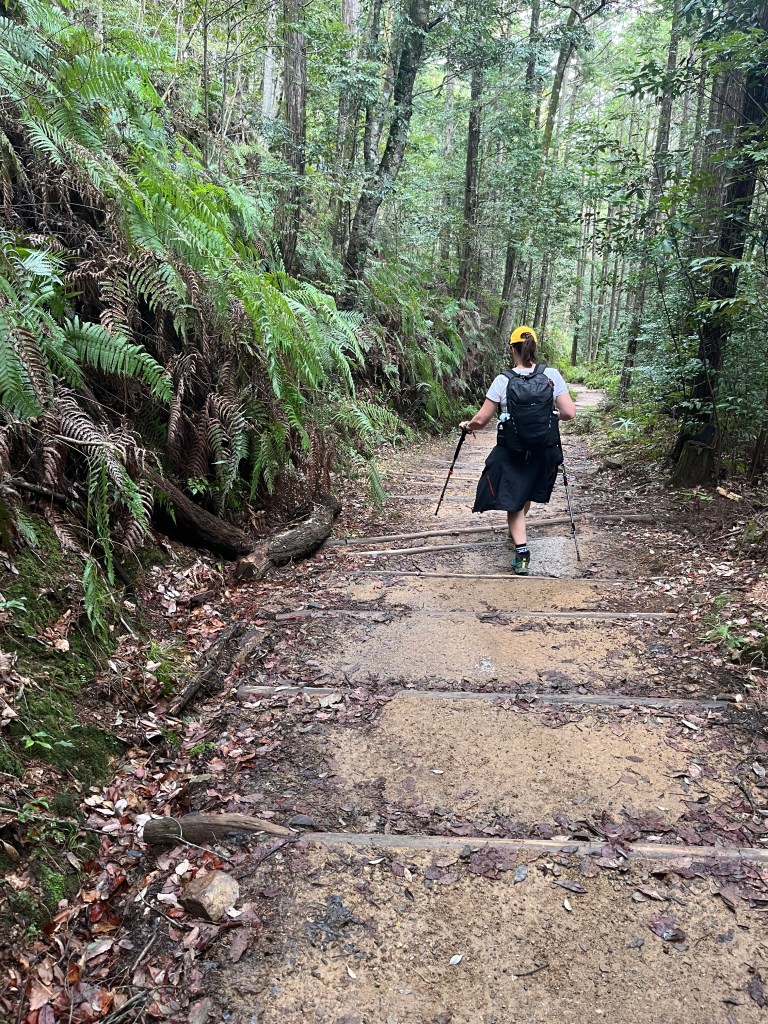
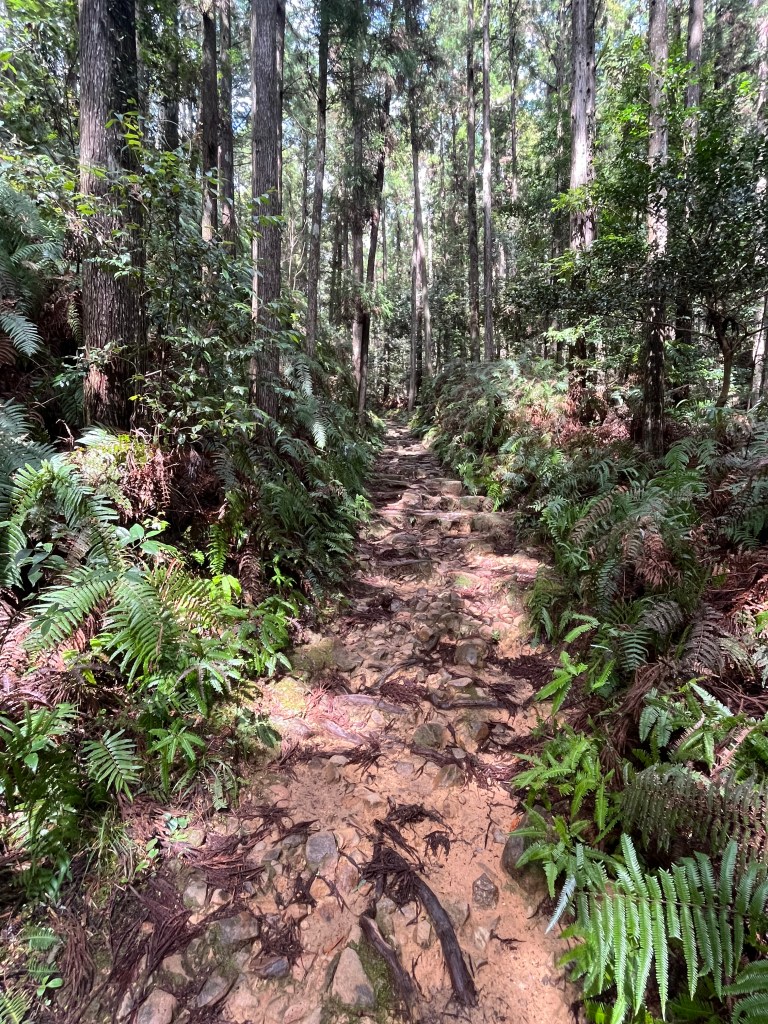
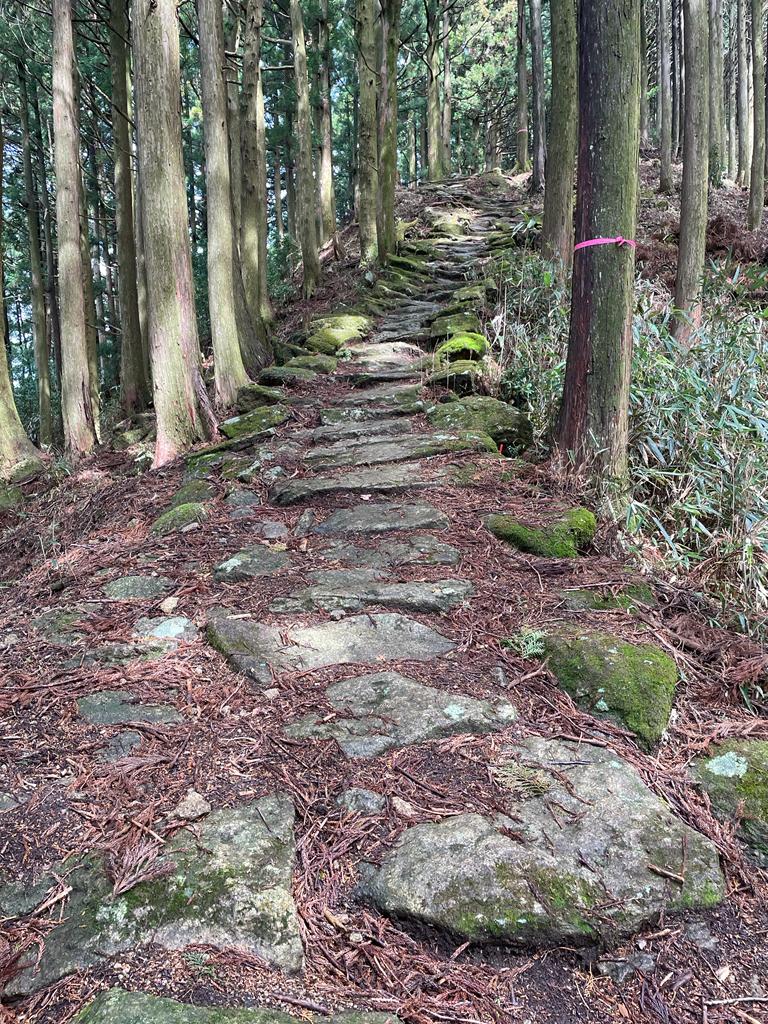
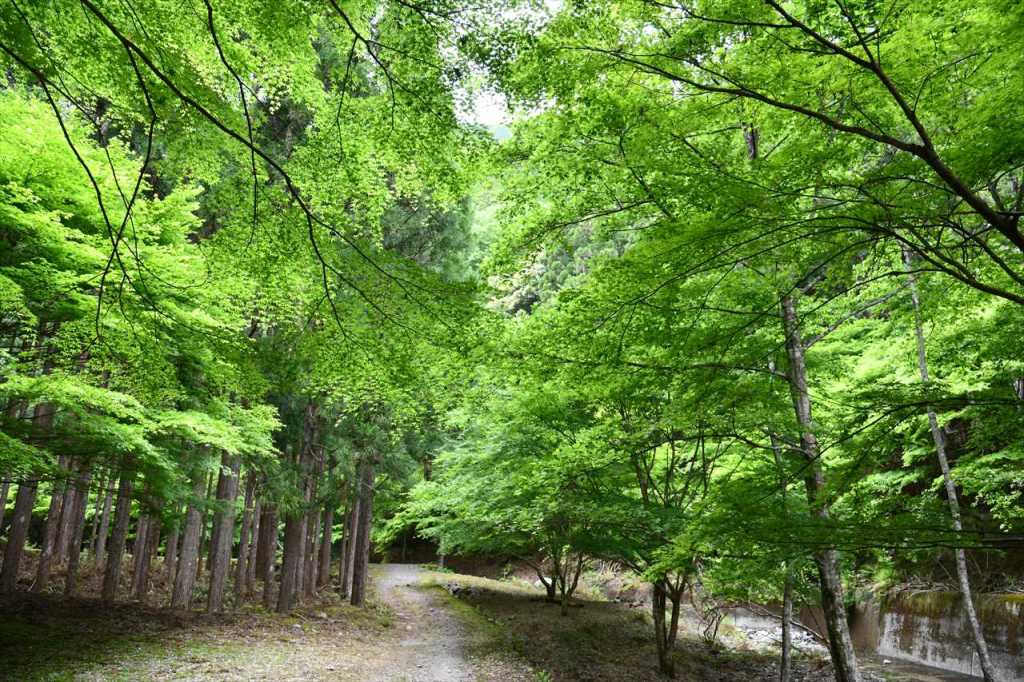
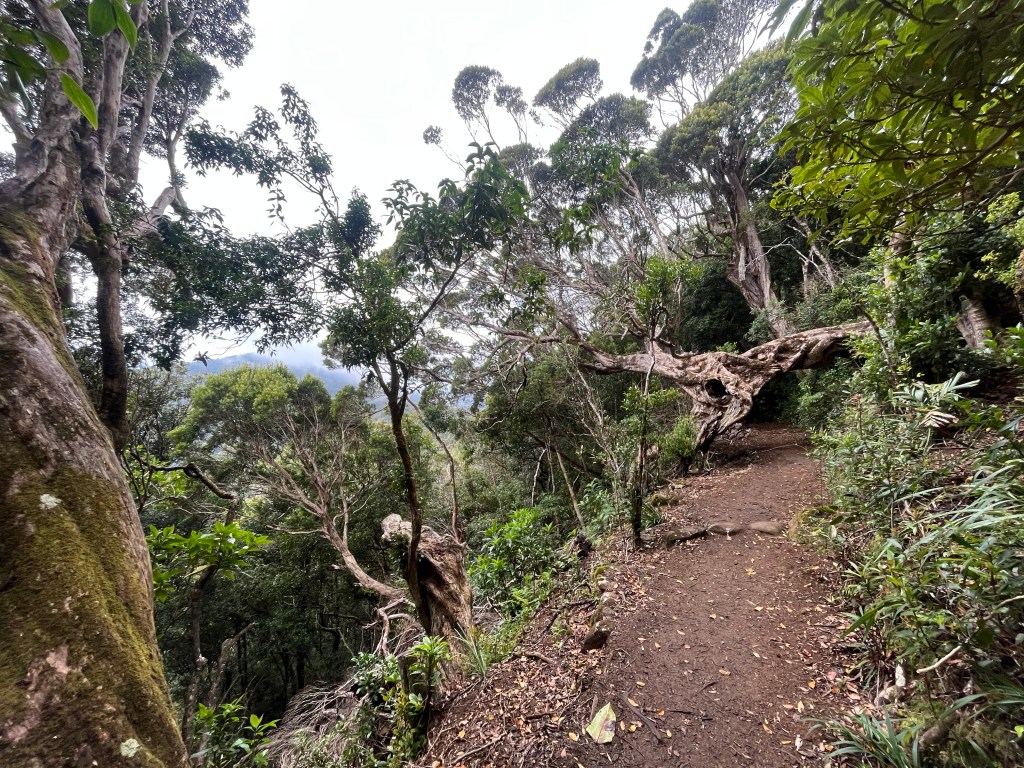
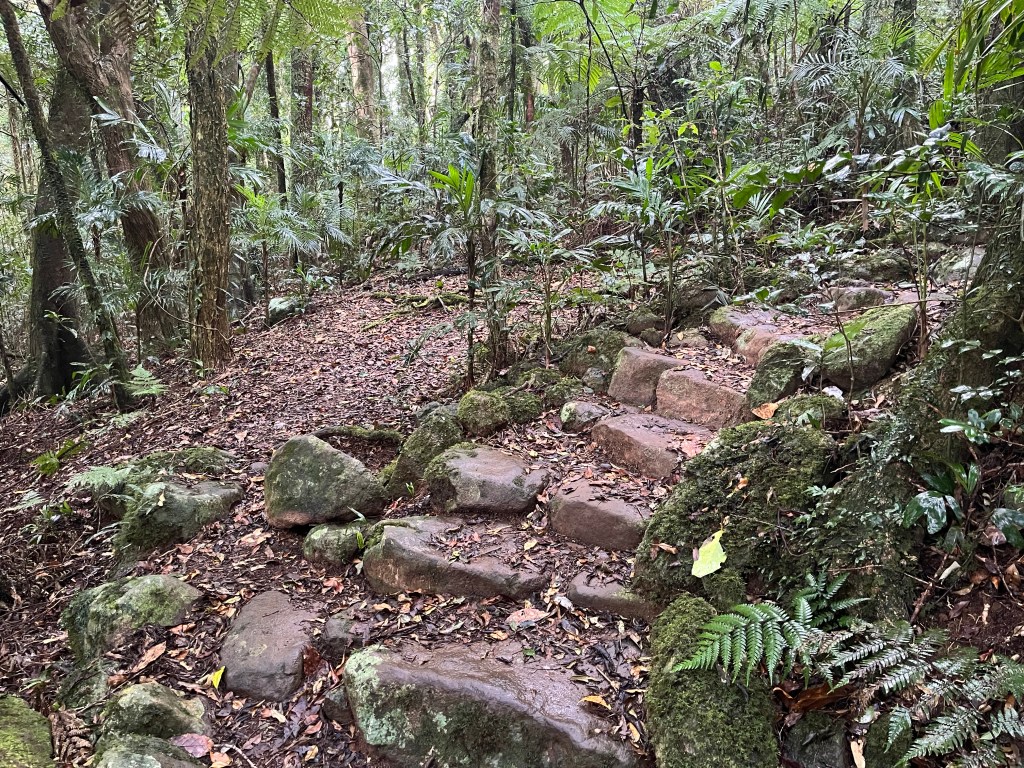
The track has a primordial forest feel. It was an overcast winters day with lots of low cloud and mist blowing up from the south. I had the place to myself and there was an abundance of trees and flora to look at as I walked. Until you get on the Border Track proper (no criss cross trails) the path is wide and flat. Once you move beyond other trails, the track narrows considerably, and is strewn with rocks and root systems.
CAUTION – EYES ON THE PRIZE

Foot placement and managing the terrain are two really important aspects of hiking. It’s unusual to be on a hike where you don’t ever have to look down to navigate the terrain. Sometimes it feels that you can’t lift your head as you are forever looking down to plan your next safe step. Beware the temptation to look at a map or your phone while mobile, chances are you’ll stack. That’s the fun of hiking, keeping your eyes on the prize and staying upright…

Getting into a Rhythm…5-10km

I must admit, rocks and root systems aren’t my favourite terrain, but you play the cards you’re dealt. As I moved through the 5km mark I was feeling great. The track narrowed again and became a little rougher. There were a few creek crossings, and whilst not in full flow, they weren’t dry either so it was a careful transit across Hobwee Creek at 5.7km, Bower Bird Creek at 6.3km and Dragoon Bird Creek at 7km.

Dragoon crossing was a slippery sucker! I can only imagine what it would be like at the height of summer with the creeks roaring with water… you’d need a snorkel and flippers to make it across.

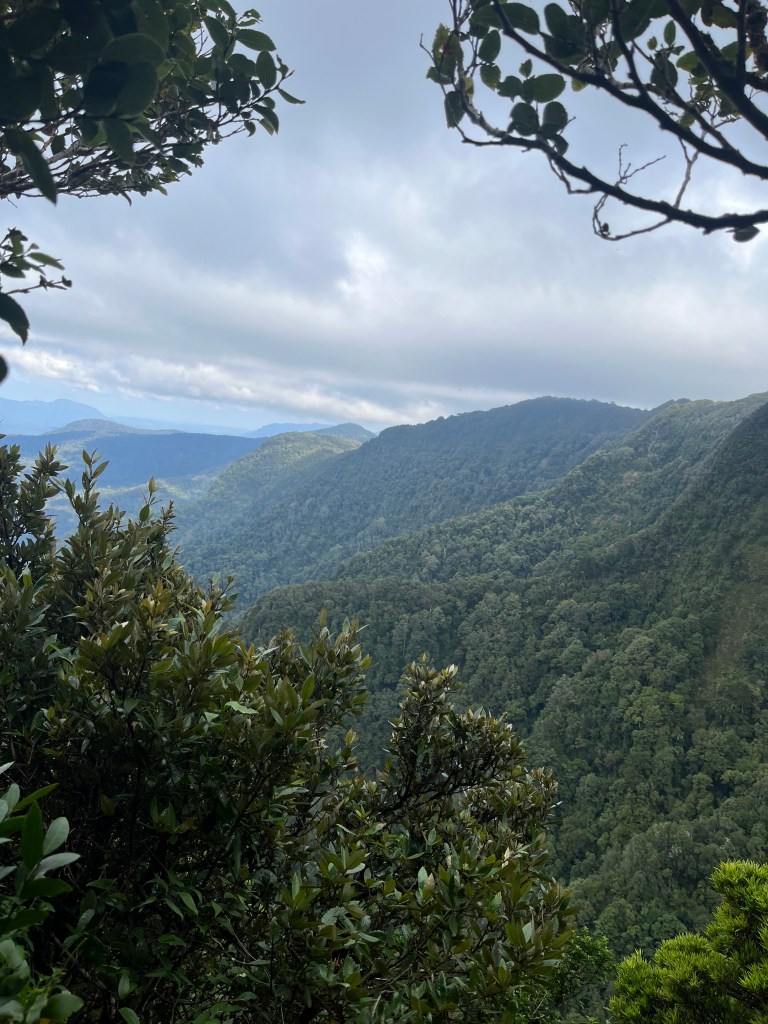
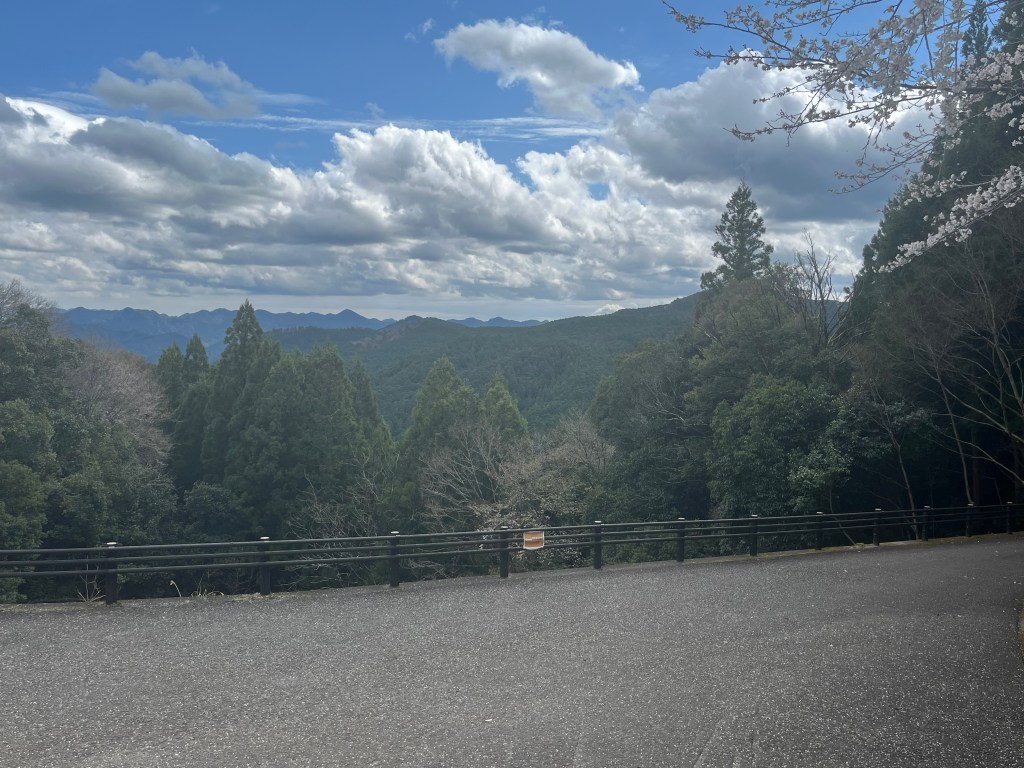
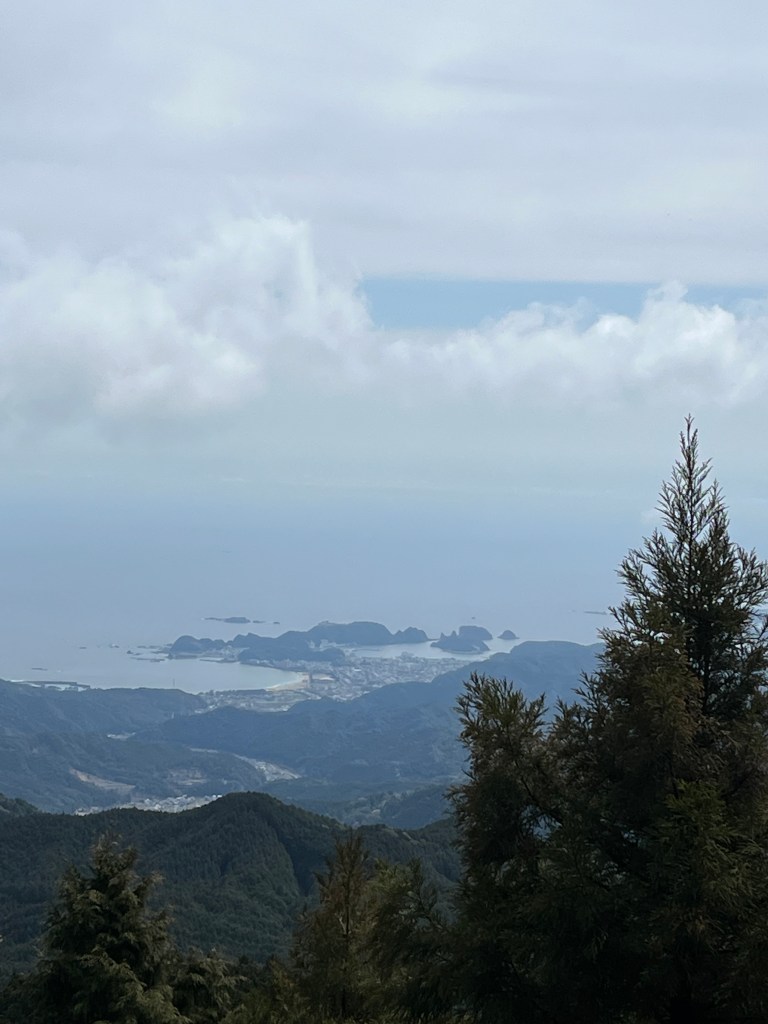
At the 8km mark there was the option to detour to the Dacelo Lookout. So far the southerly had been delivering misty squalls so I decided not to add 2km to my hike to see it. However, at around 8.5km I did sneak off the track (safely and without risk) to take a fabulous photo of the view down into the Woggunba Valley – and lo – the clouds stayed on the western side. Take a look…

How about that for a view???!!!

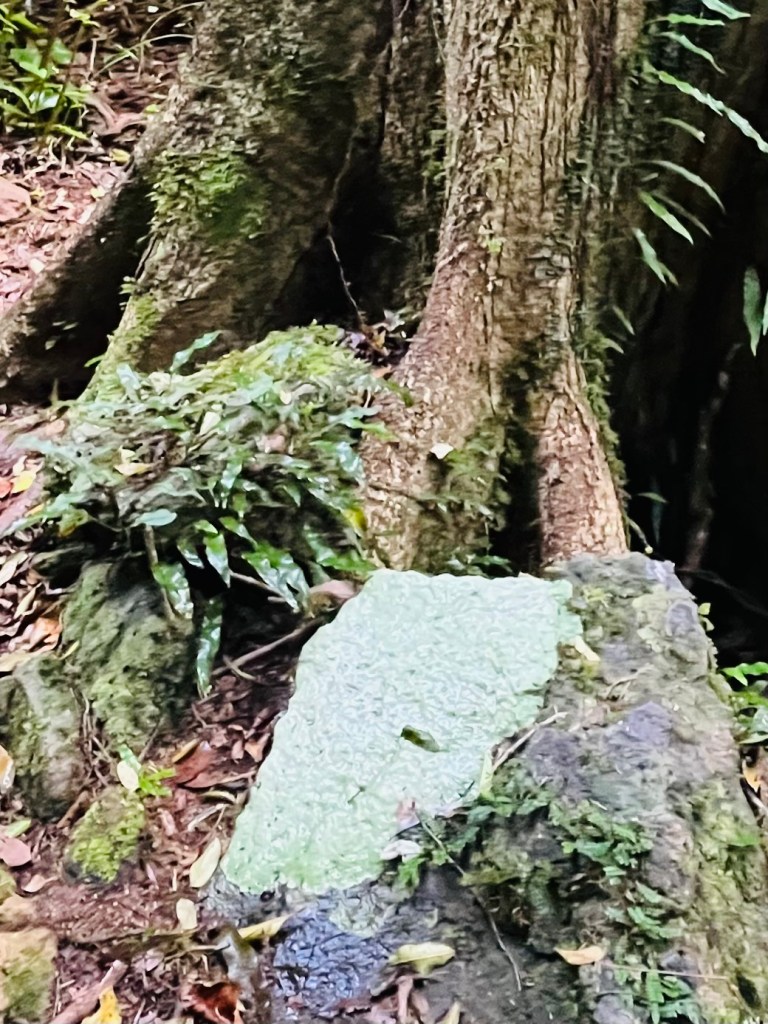
The attraction of a new trail is discovering new things, sometimes odd things. Along the track I saw stones which appeared to be covered in a light green calcification, not the whole stone but just part of it. No idea what it is, so dear readers, fill me in if you know.

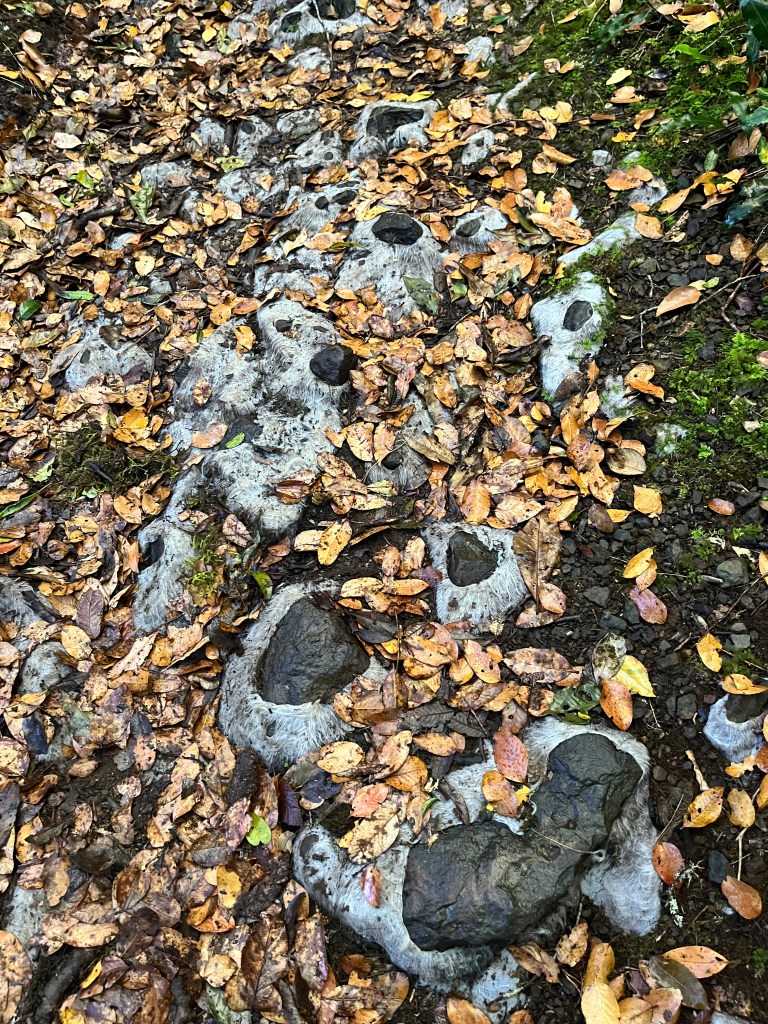
Oh, and then I saw the white stuff which I thought was a type of moss or fungus… ? Got all excited – then I realised what it was…..doh. It’s the underlay put down before gravel.
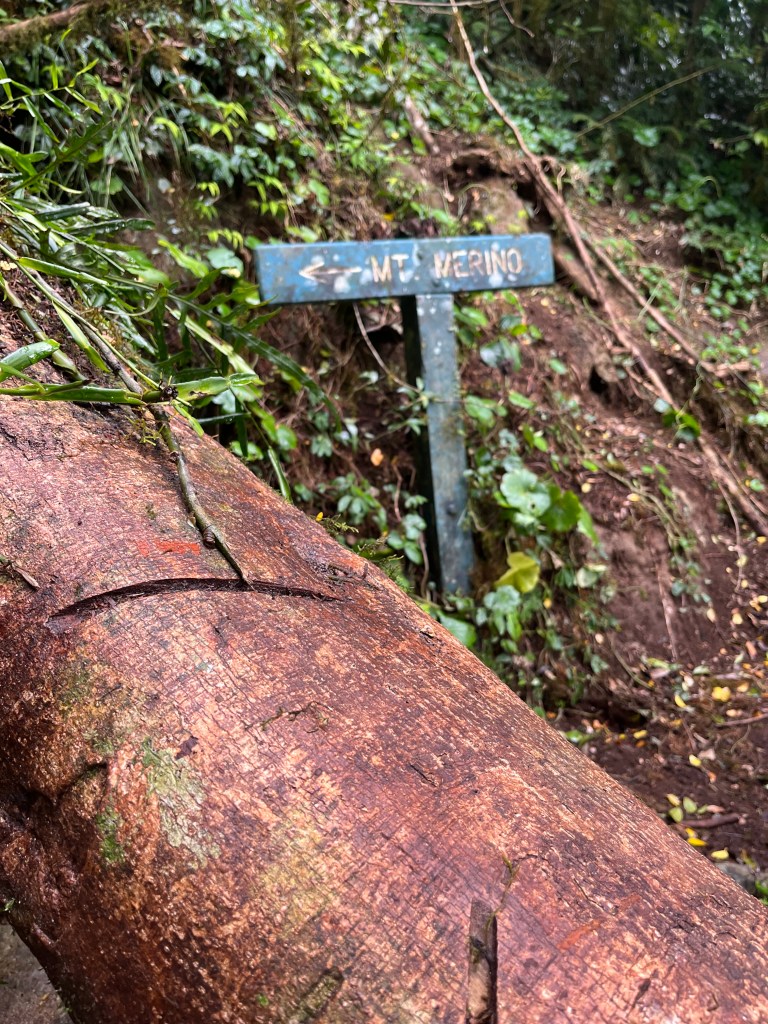
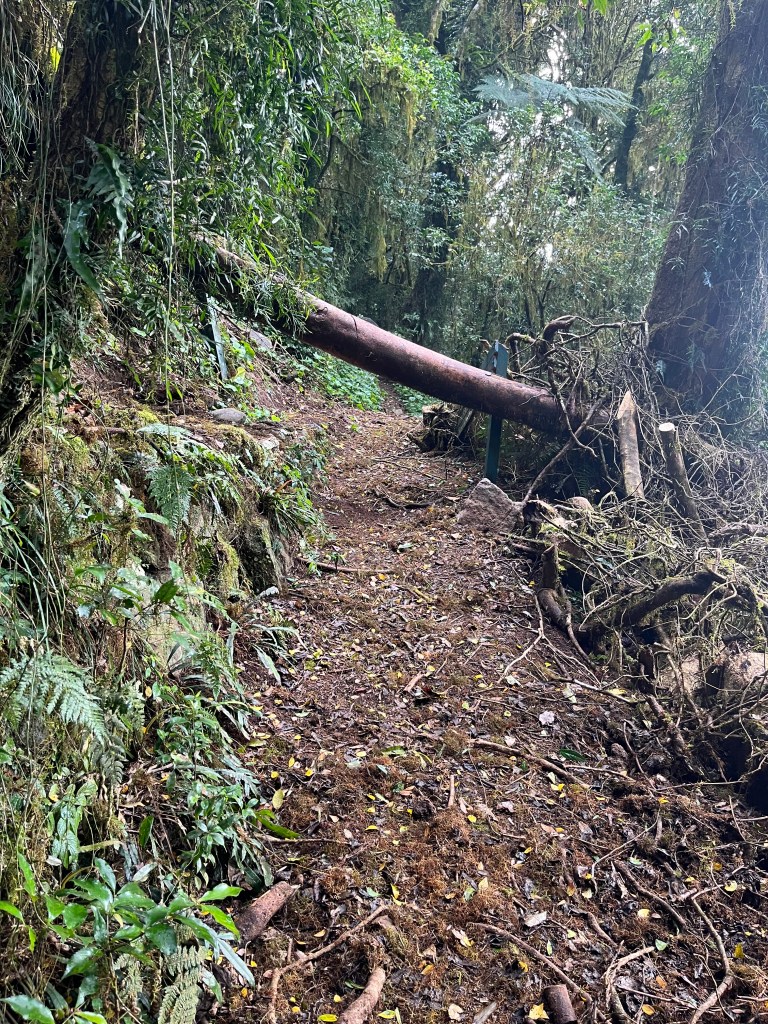
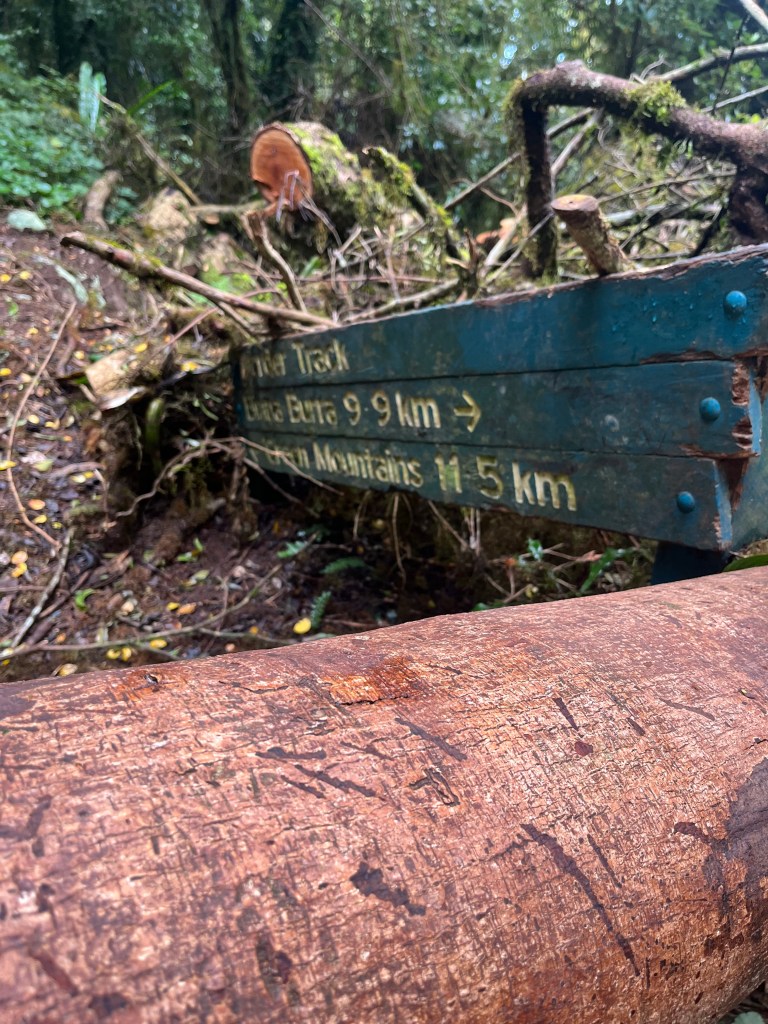
Around 9.5km I came across the sign and trail for Mt Marino. A large tree had taken exception to the sign and completely destroyed it. This quickly became the theme for the hike. There were a number of downed trees and vine entanglements to navigate over, under or around. It did provide for some interesting moments as I am not the most flexible of humans and clambering through downed foliage was a bit of a challenge.
Over Halfway…10-15km

It was time for morning tea and a break. The first half of the hike had been a gradual climb upward, with an altitude gain of around 600m. The lookout and rest opportunities had been few and far between so when I came to Chakoonya Lookout which had a view AND a place to sit, I sat.

If you squint a certain way you can see the Gold Coast skyline

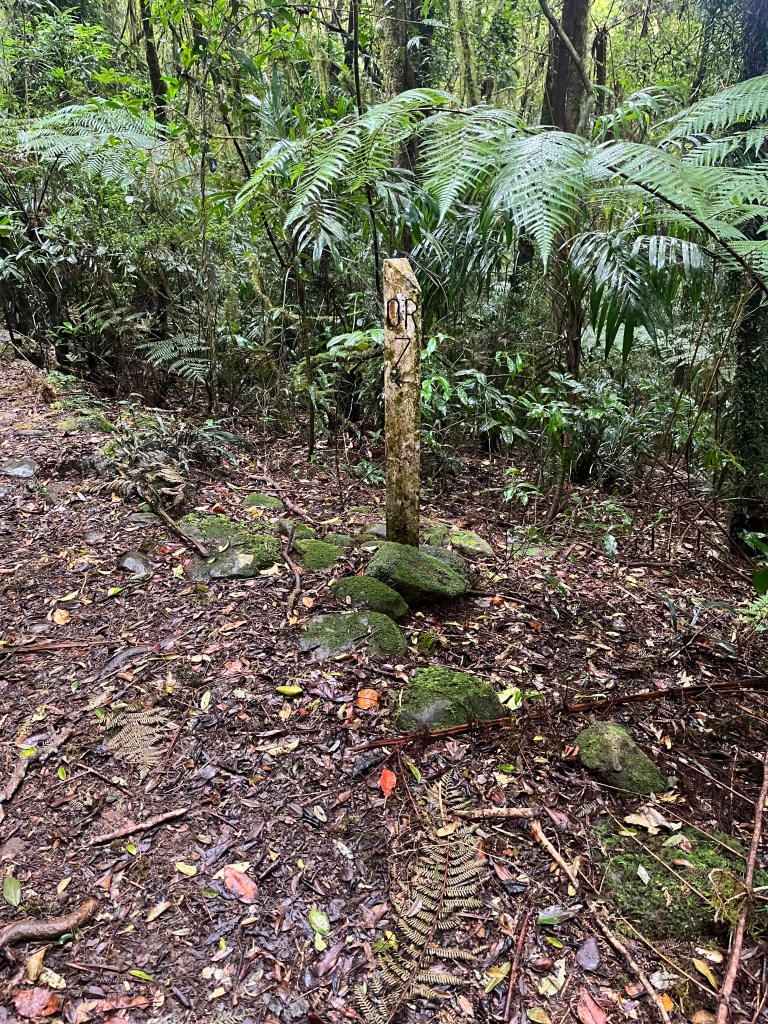
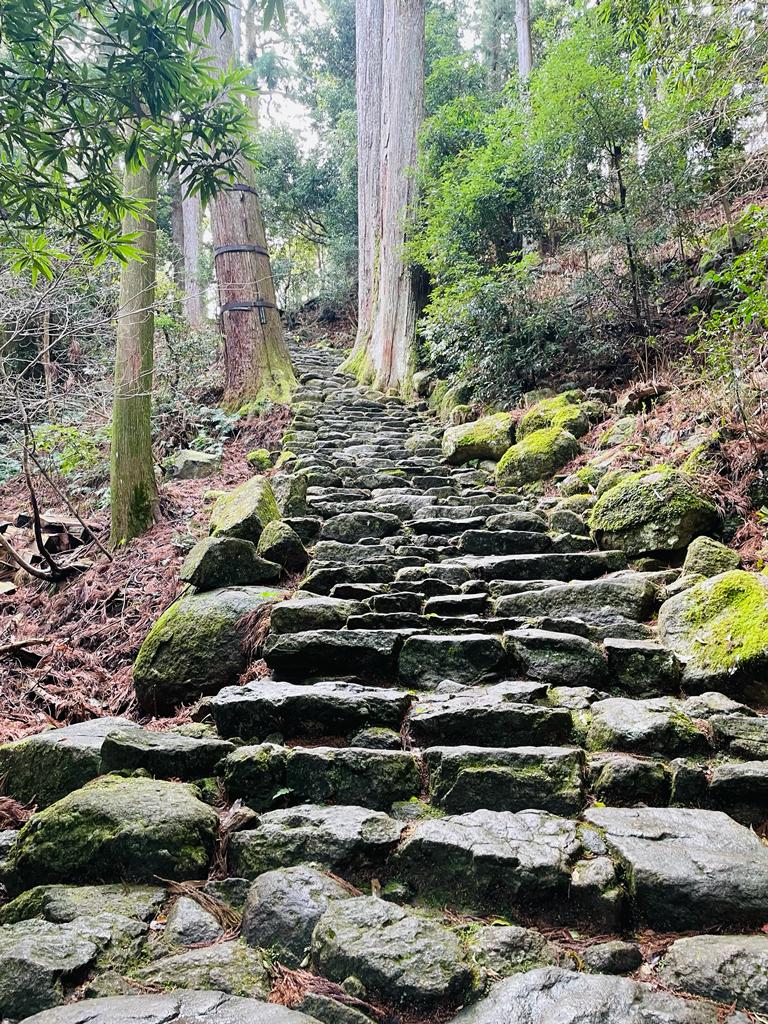
The views, when you come across them, are simply spectacular. When you can’t see the distance, you are enveloped in the green hug of the forest. You can see how narrow the track becomes and the vines were that close you are pushing your way through. However, you never feel lost thanks to the stone markers on the track floor, most of which are close to 100 years old.
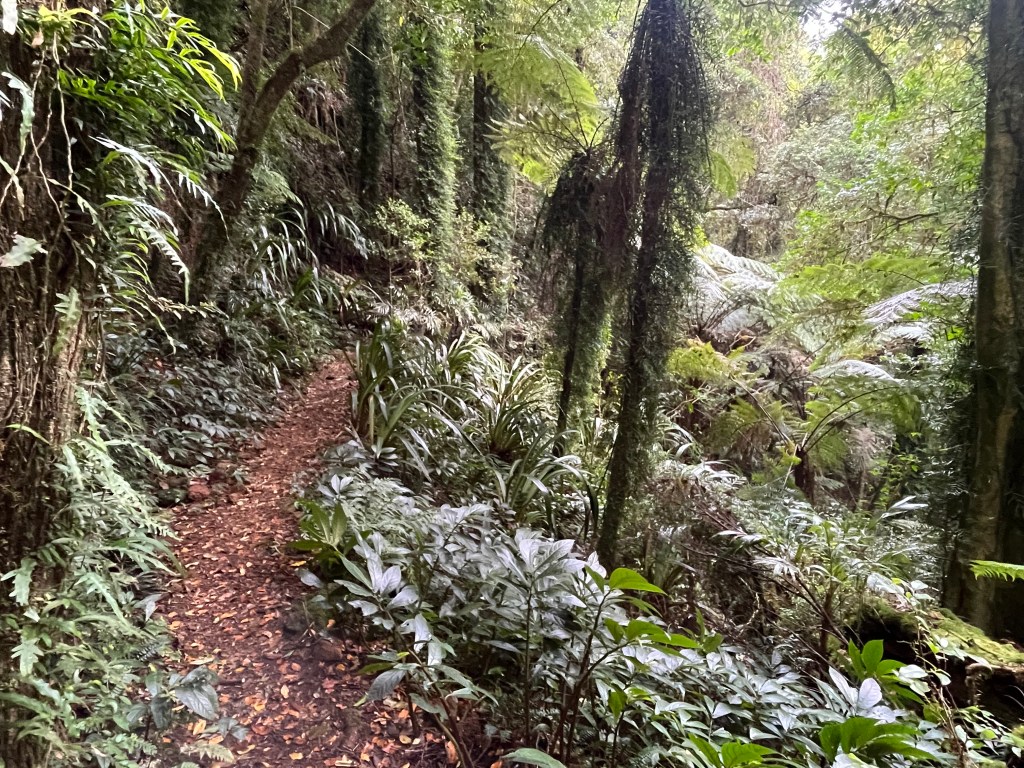
By now I was passing hikers coming from the O’Reilly’s side. For about 45 minutes, it was rush hour as we all crossed over. I also passed the original halfway marker, at around 10.5km. Luckily for the American followers, the marker shows our old imperial measurements. The Main Border Track is exactly 14 miles long and thoughtfully it shows the direction and distance for each destination.
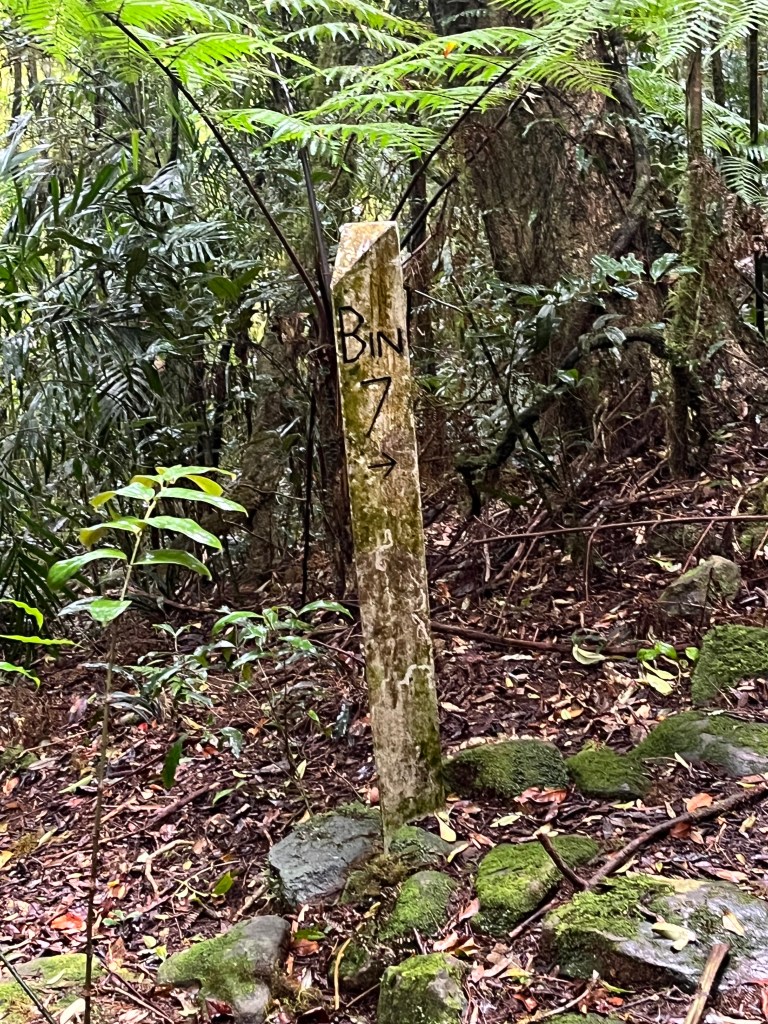
A few more lookouts, Nyamulli, Wanugara and Tooloona, so more impressive escarpment vantage points. There was a distinct lack of places to sit, which may be a small failing of the track because unless you sit on the ground for a rest, there really is nowhere else to park up. Perhaps I have been spoiled on other hikes where carefully placed rocks and logs provide welcome perching places.

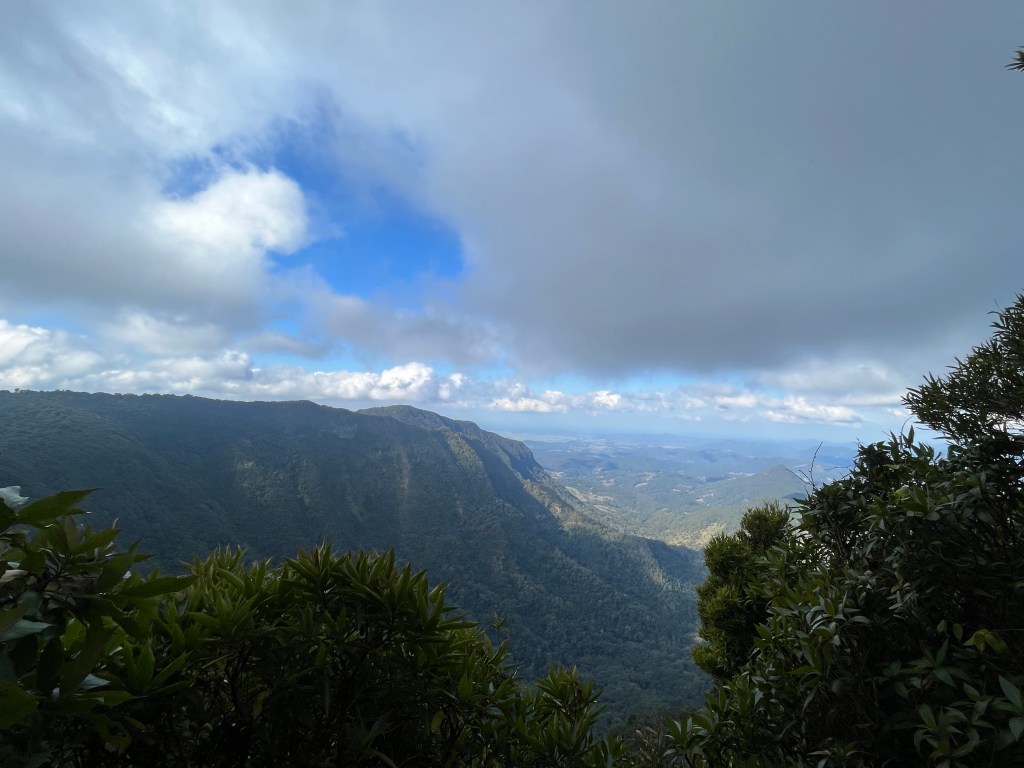
I was starting to count down the kilometres now, and each sign showed that I was getting closer to my destination. I did pass another triangular marker sign, but couldn’t work out the etchings….a mystery for another time 🙂
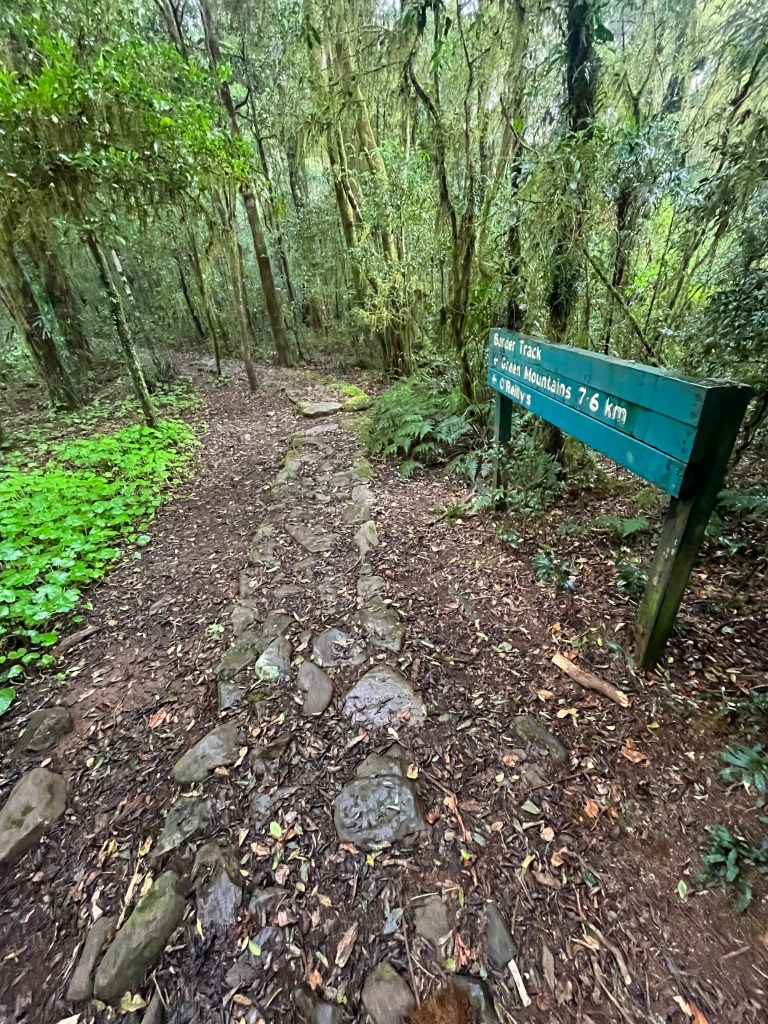
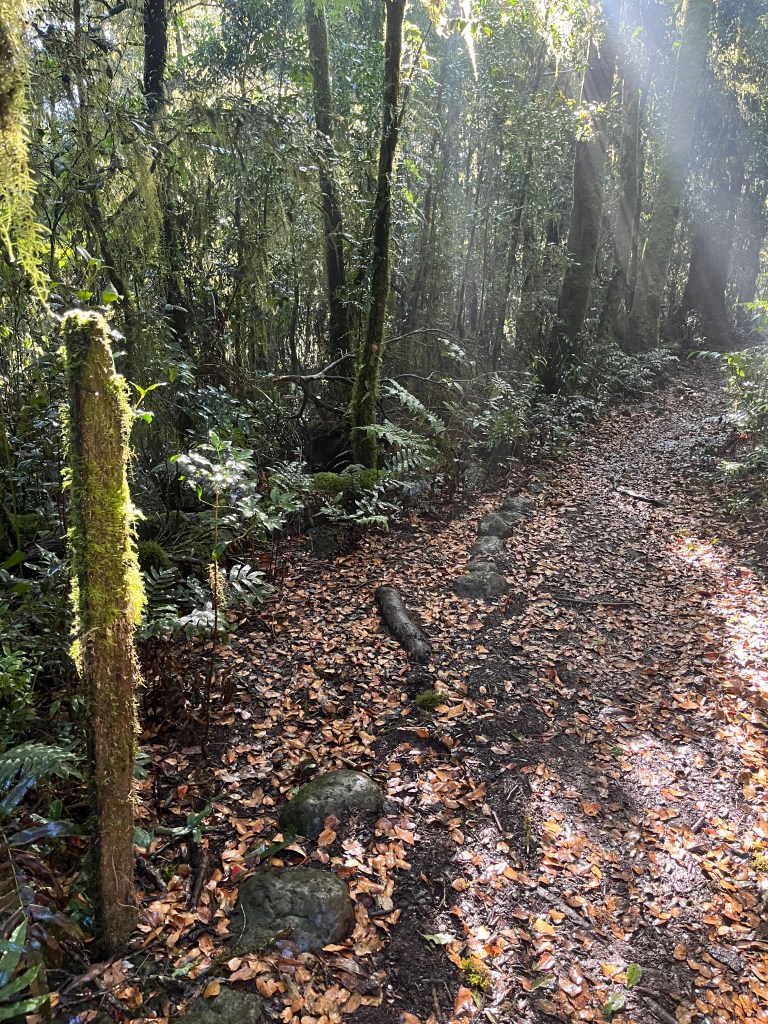
Almost There…15-22km

The Border Track is advertised as a 20km hike. It is, in fact, close to 22km. If you are dead set on accuracy, the last couple of km might be soul destroying so factor this in.

The marker for the last 6km downwards to O’Reilly’s is the Bithongabel Bush Camp sign, which is cryptically signposted as “Bithongabel”.
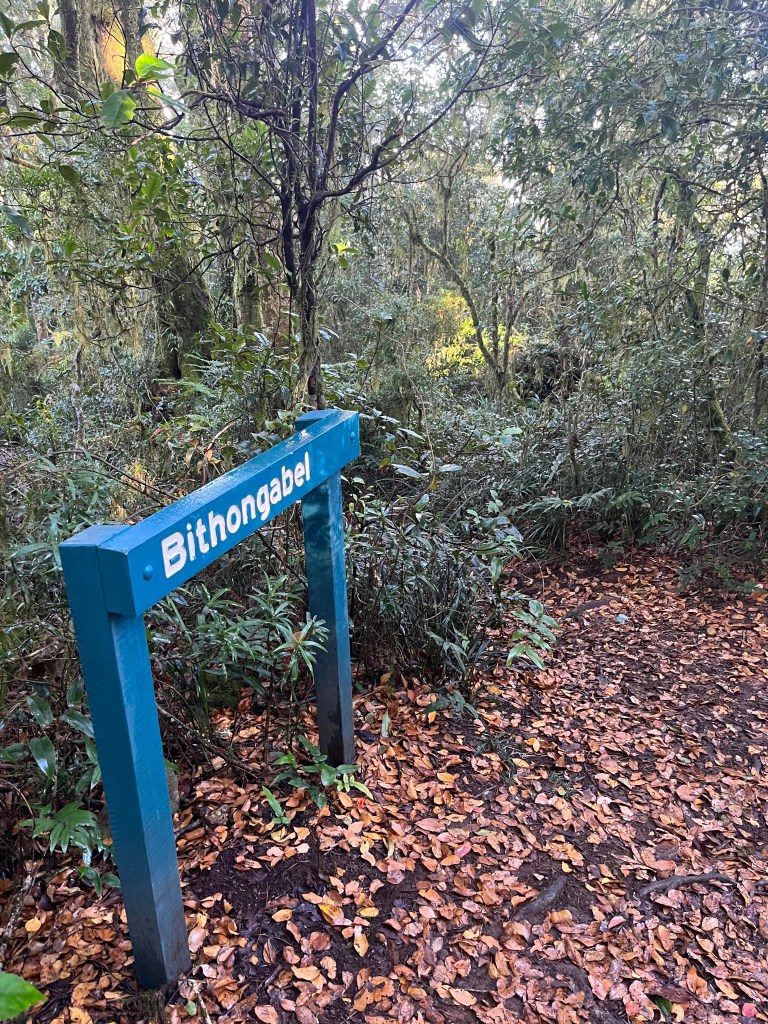
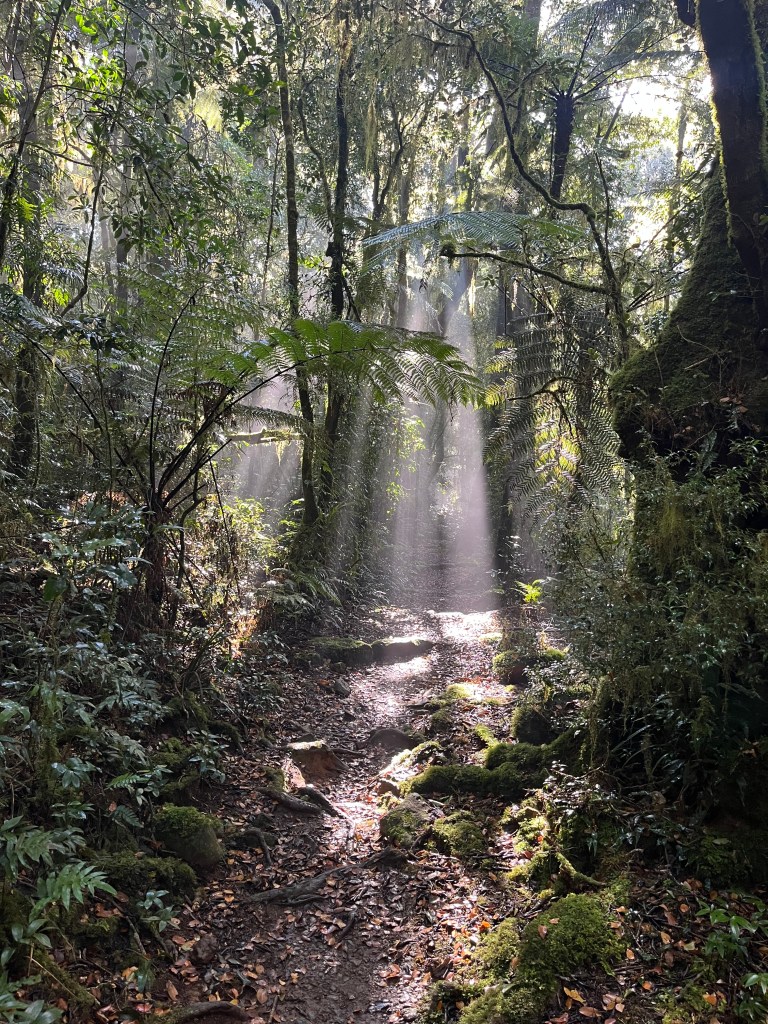
I did a bit of research, and Bithongabel is where keen hikers doing the full immersive experience of the Gold Coast Great Walk can camp overnight. So, once you arrive at this sign you’re almost done, and O’Reilly’s is not far away. The sun was out so the last couple of hours were in dappled sun and on a wider, more forgiving track. It was transitioning from 100% rocks and roots to a springy leaf litter surface. I was definitely in the Antarctic Beech Forest section now.

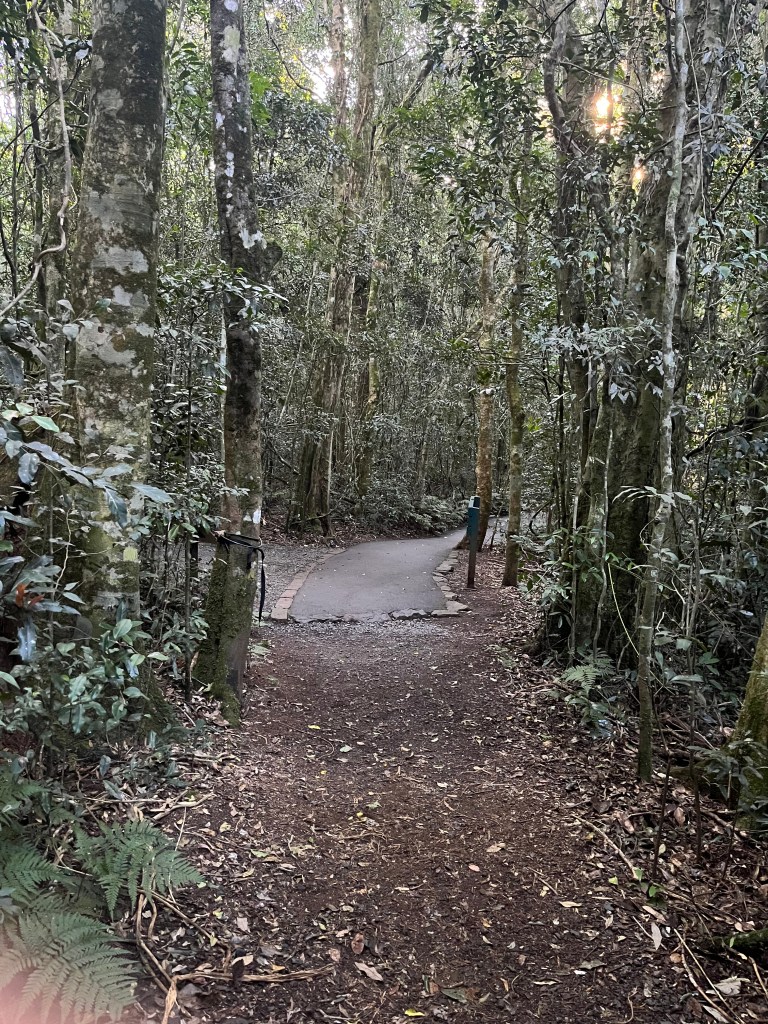
You’re almost finished when you reach the paved trail, which is about 800m from the end. It was such a lovely sight, as dusk was falling in the forest and the light starting to dim.

I knew that a warm shower and a lovely glass of O’Reilly’s Sparkling Chambourcin was awaiting me, as well as a sumptuous dinner next to a roaring fire. Funny how that put a spark in my step 🙂
In Summary…

I’m really pleased that I hiked this track solo. It was great to boost my confidence as a ‘hiker’ and tick off an achievement that was mine alone.

I was prepared. I had food, water, a headlamp, a space blanket and additional clothing in case I was delayed on the track. I sent my Strava beacon to OH, who tracked my progress and came down to meet me at the finish.

The Border Track is challenging, but not insurmountable. It’s beautiful, wild and ancient, and perfect for a solo hike.

Go on, discover what might be in your back yard and as always, embrace the experience.

See you next time out on the trails

PJ 😉

RATING THE RYOKANS – PART TWO

Hello and welcome to my LIKETHEHIKE blog.

I’m PJ and I write about the hikes I take, giving you insights, photos, commentary, tips and tools so you can enjoy hiking and embrace the experience.

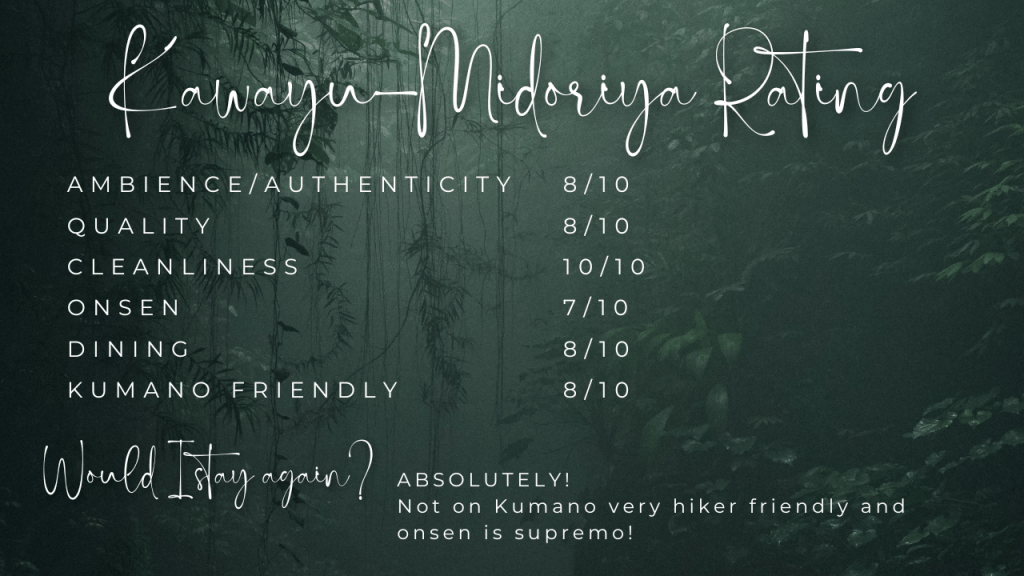
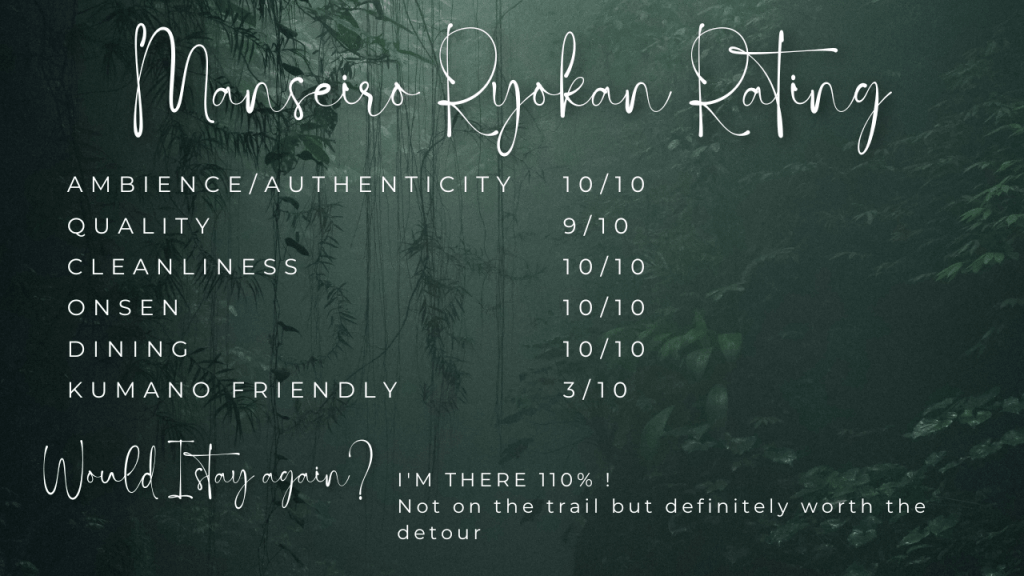
We’re back for the second instalment of “Rating the Ryokans” – with my very mathematical (!) approach that measures ambience, quality, cleanliness, onsen, dining and whether the establishment is Kumano and hiker friendly. In my last blog, TB and I had just departed the fantastic Manseiro in Kii-Katsuura which had a lovely onsen and a truly magical evening dining extravaganza.

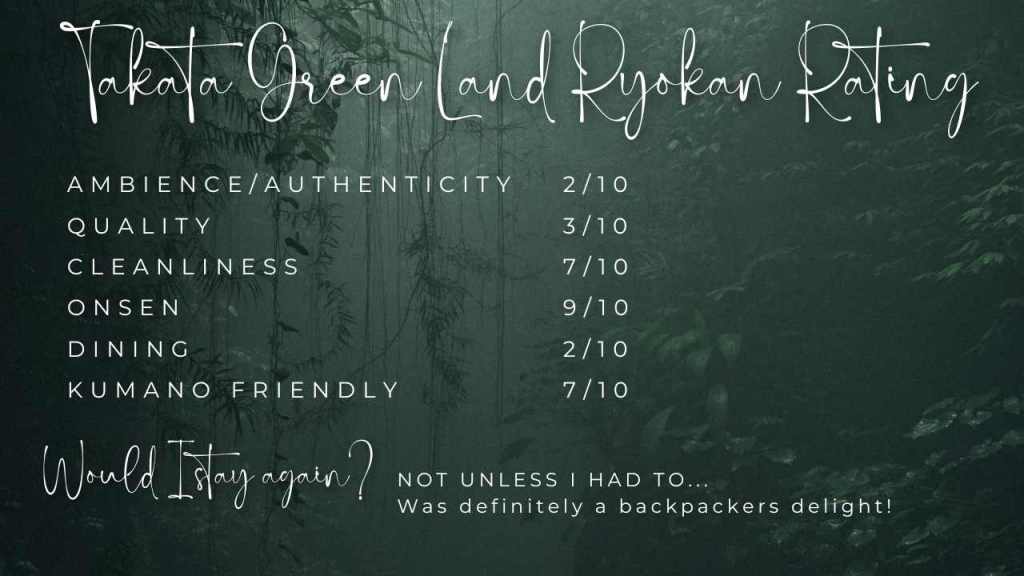
TAKATA GREEN LAND (KUMOTORI ONSEN) – SORTA RYOKAN EXPERIENCE…

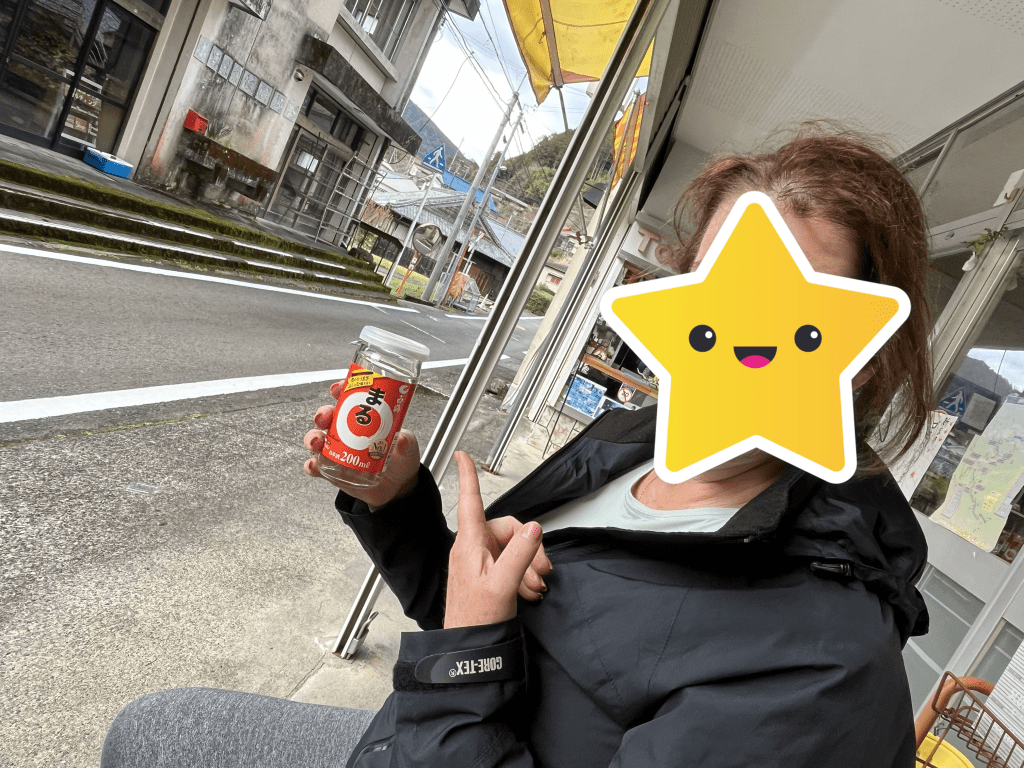
Our next stop was after our longest and most challenging day on Kumano. We did over 20km on some serious trails, finishing at a little village called Koguchi. We found a dinky corner store where we devoured drinks and snacks while waiting for our hotel shuttle.

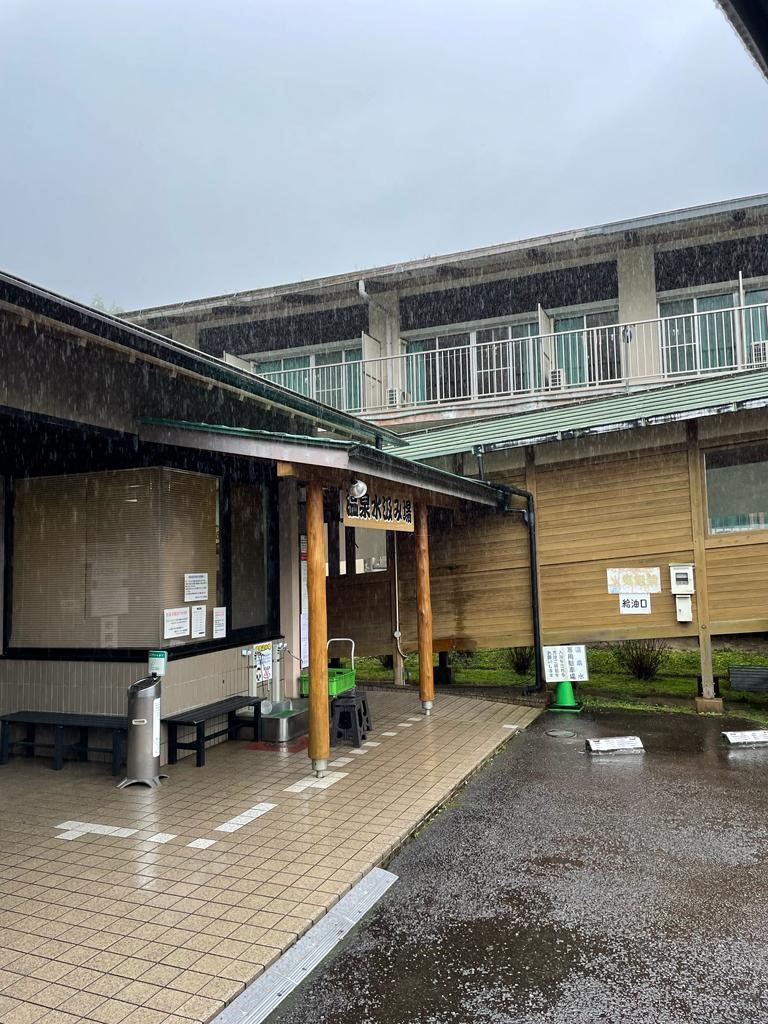
We arrived at Takata Green Land – and were perplexed. It looked like a sports complex, or perhaps a school camp destination. There were a number of interconnected buildings and the reception area gave off a very backpacker vibe, complete with worn industrial carpet, vinyl seating, pingpong table and 27,000 vending machines.

Happily our suitcases were waiting for us at reception. Unhappily we had a second floor tatami room and no lift. I almost killed me lifting cases up two flights of stairs after a 20km hike….

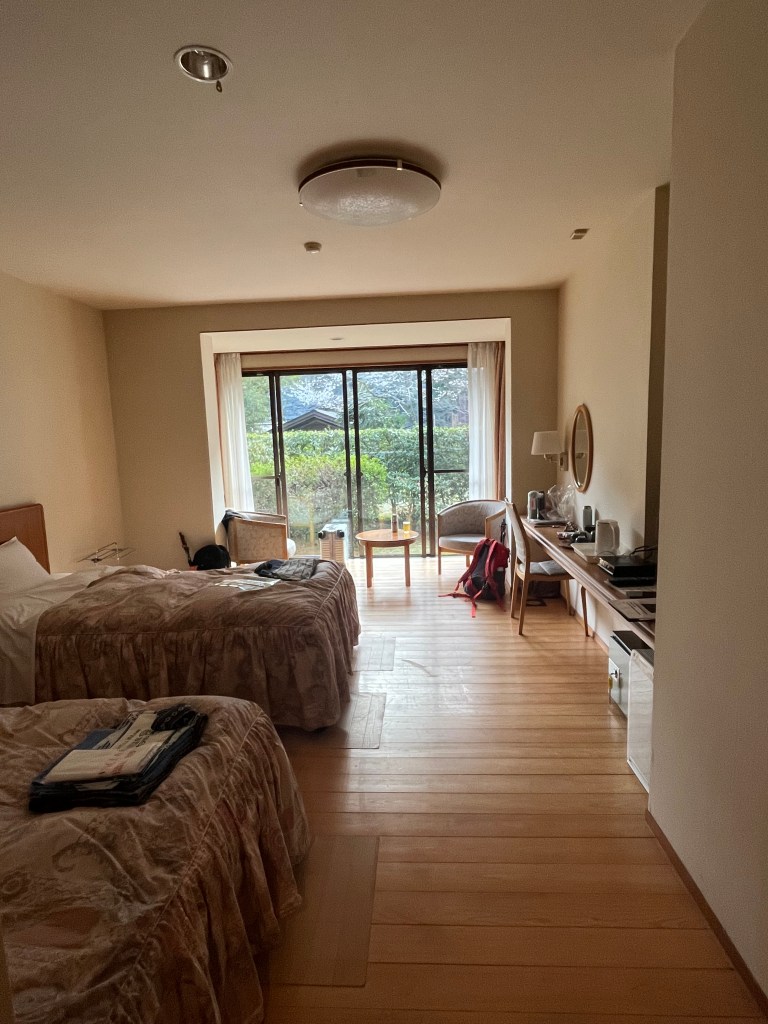
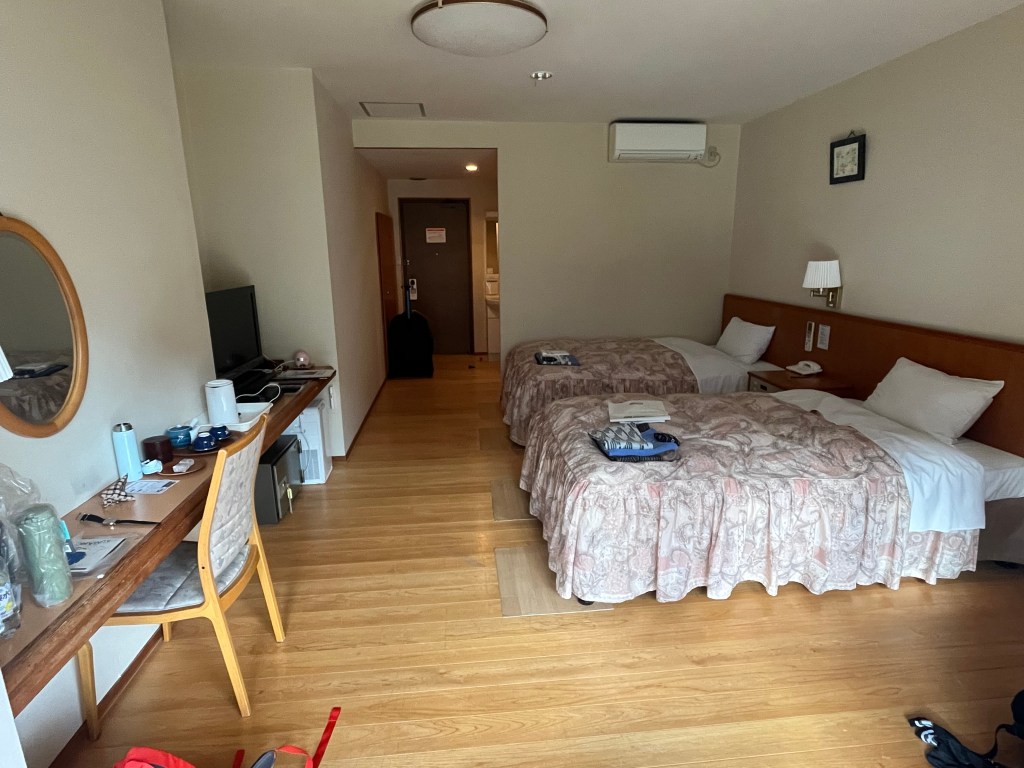
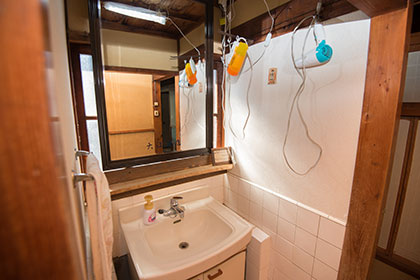
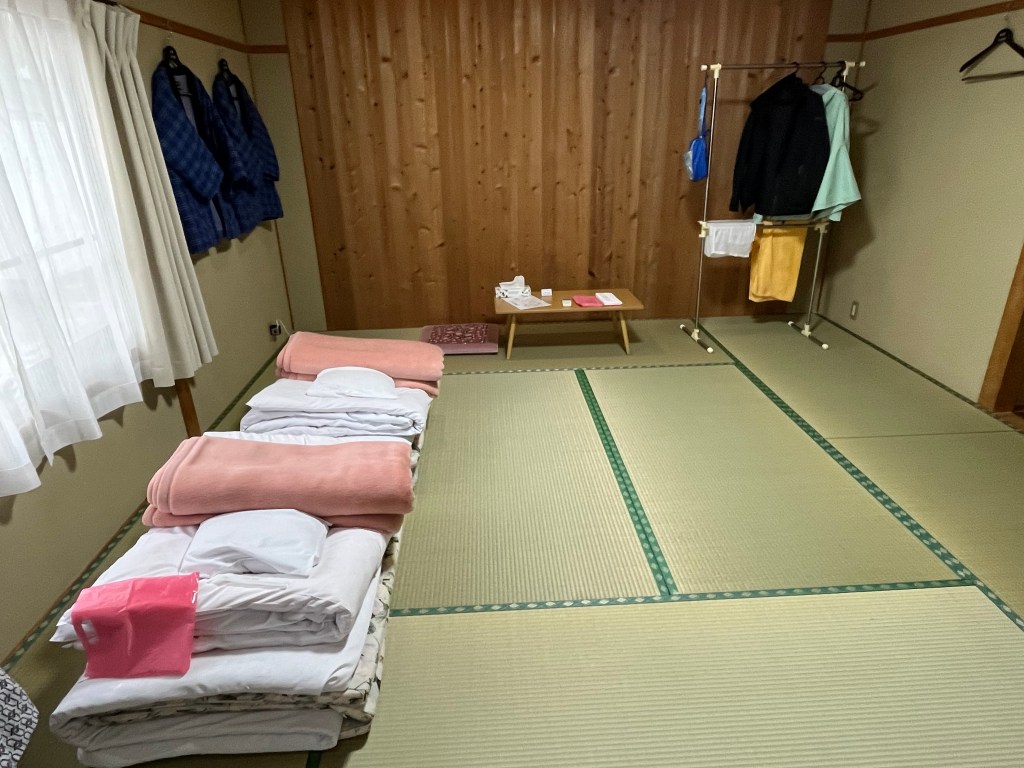
The room was very average. Clean, but sadly, much worse for wear with stained, damaged tatami matting, dings and dents in the walls. Such a shame as I suspect that it must have been quite lovely at one point in time. We had shared toilet and sink facilities right outside our room, and as it was very quiet, we pretty much had those to ourselves.

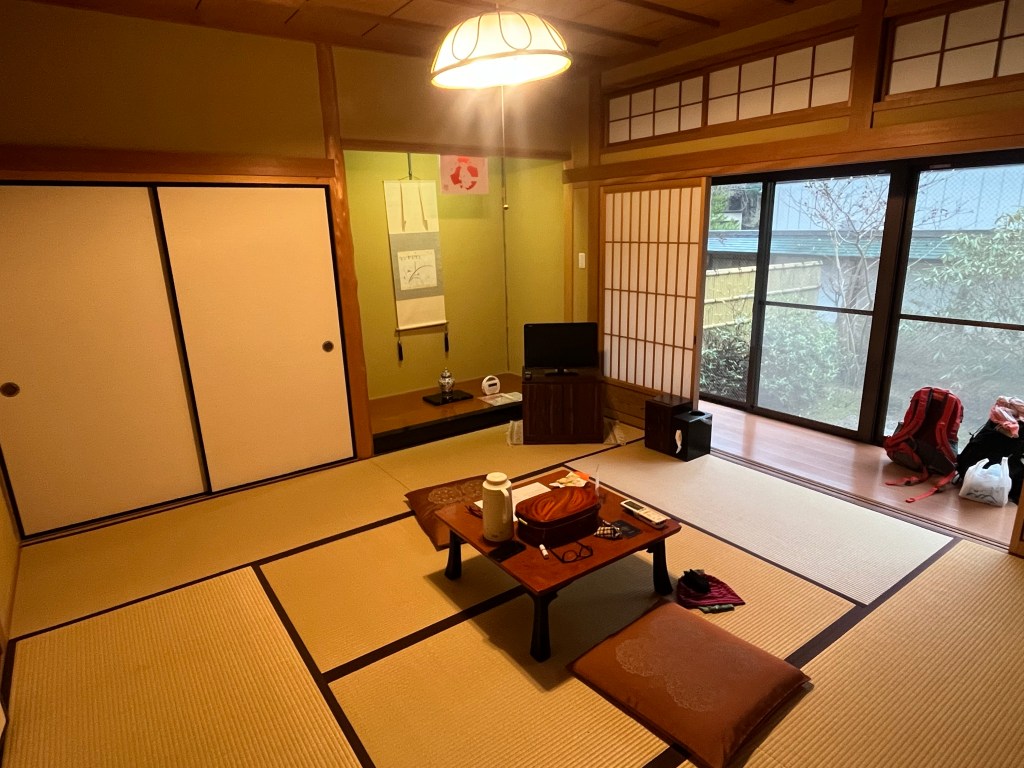
Example of room

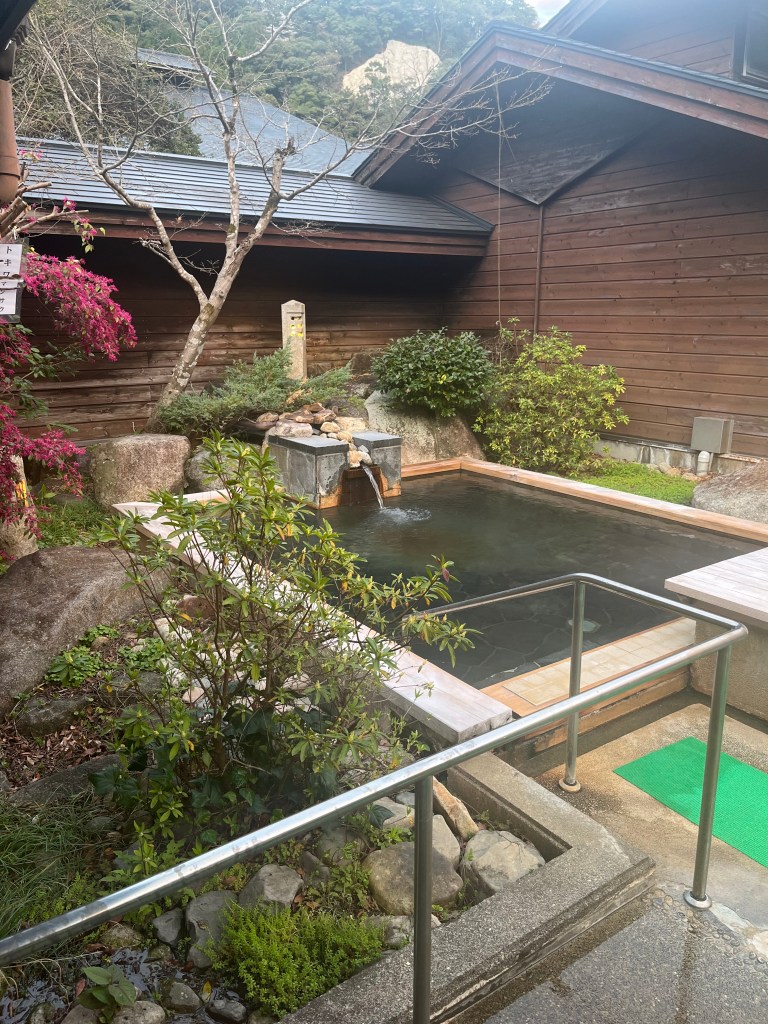
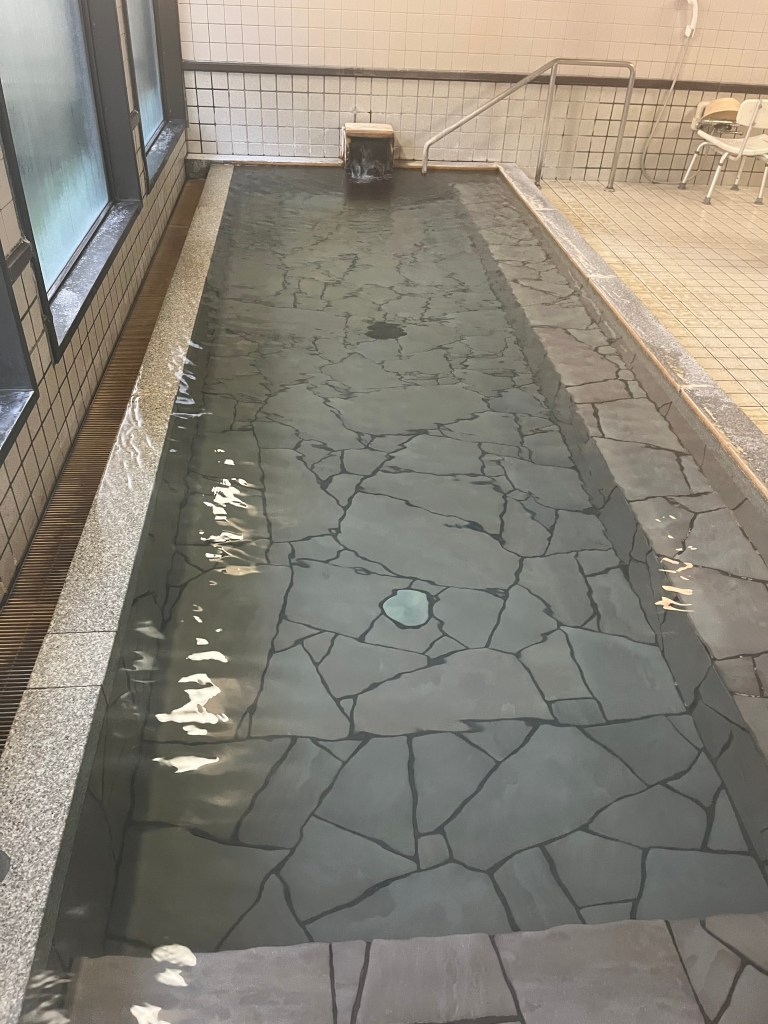
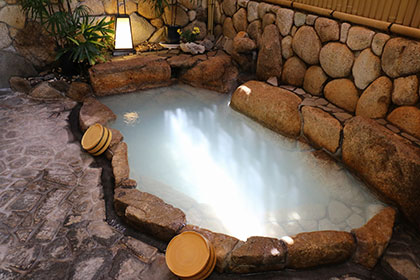
The onsen, however, was first rate. Takata Green Land had an outside onsen which we could access via a private walkway. I am not the most graceful gazelle as my family will confirm, so add the complexity of full nudity, cold misty weather, a wet wooden walkway , and speed – and you can imagine the rest. I skidded into the outside hot pool very disgracefully but to the great amusement of my sister and the other onsen users, who were far too polite to show their mirth.

Unfortunately the onsen experience was the singular highlight of our stay. Post onsen we had high hopes for our evening meal. We were ushered into what looked like a school dining hall, which was doubling as a storage facility. Along two sides of the room were an array of plastic storage containers and boxes stacked ceiling high, and stored against wall was an outdoor canteen arrangement. We were two of the three guests dining that evening, three lonely place settings on a table about 20m long.

The food was fair, with a number of courses including salad, rice, miso, fish and a shabushabu with vegetables. I have to admit, we gave up before dessert and fled to our room.

TB decided that we were staying at the local Hi-De-Hic camp off season and I reckon she was right.

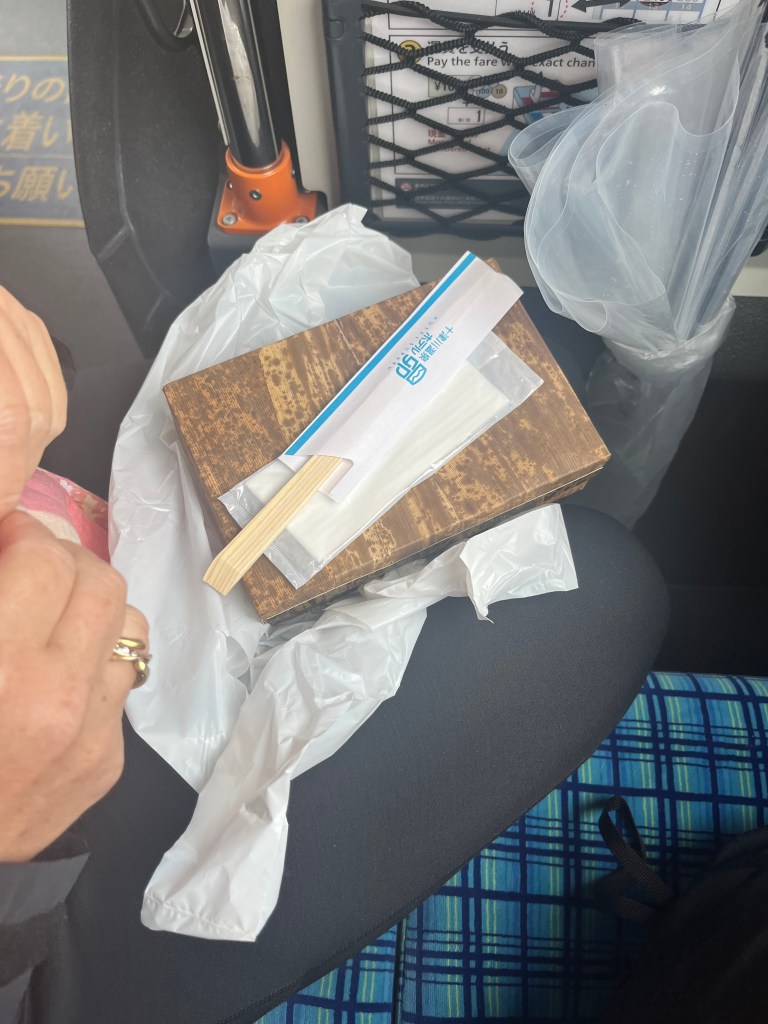
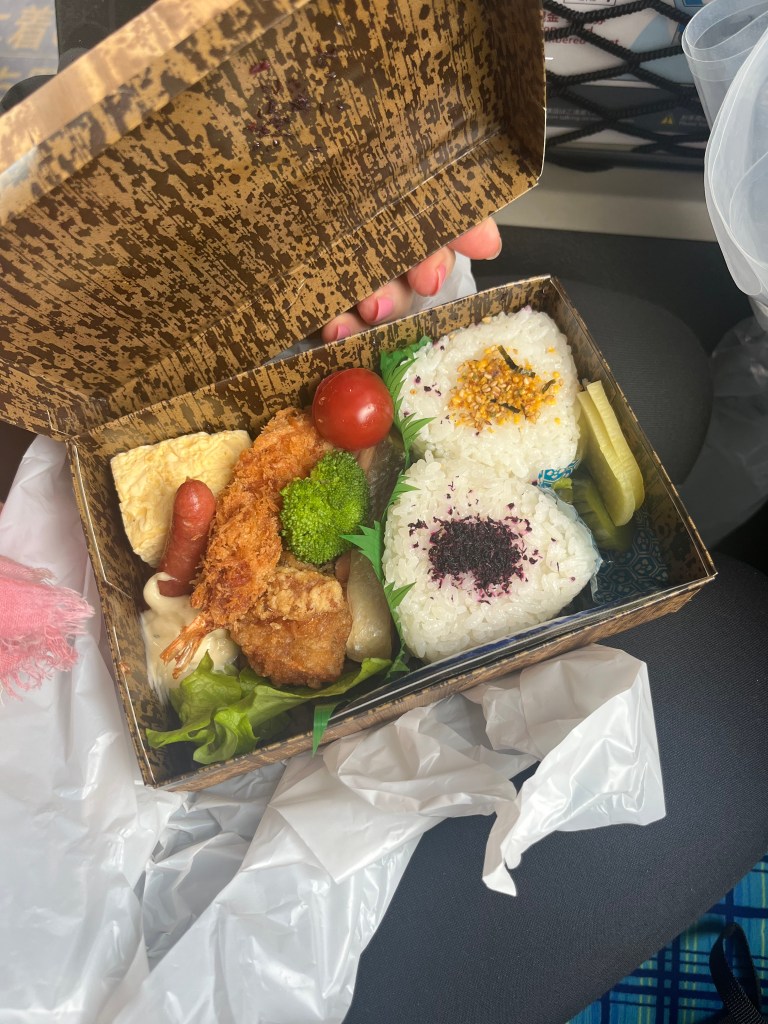
We departed early the next morning to get a bus connection to Hongu and then onto other hiking adventures. We were given a very substantial bento box, which was nice for lunch, well, more like a snack on the bus 🙂

HOTEL SUBARU – ROYKAN/HOT SPRINGS EXPERIENCE

After our Hi-De-Hi experience at Takata Green Land, I hit up Google to see what awaited us at Hotel Subaru. It looked OK – thank goodness.

Our instructions were to finish the hike, take the local bus, alight at the relevant stop and then walk down the road for 1.4km. Righto. There was a bit of excitement as the last half of the walk to the hotel was through a long road tunnel! We scurried through on a narrow pedestrian platform, and I didn’t realise how noisy a car tunnel was – deafening!

As we exited the tunnel – there was Hotel Subaru. It unfolded in front of us with a gigantic outdoor sound shell and fields to the right, and a sweeping driveway which led to the reception area.

Can I say – BEST WELCOME EVER!!!!!!

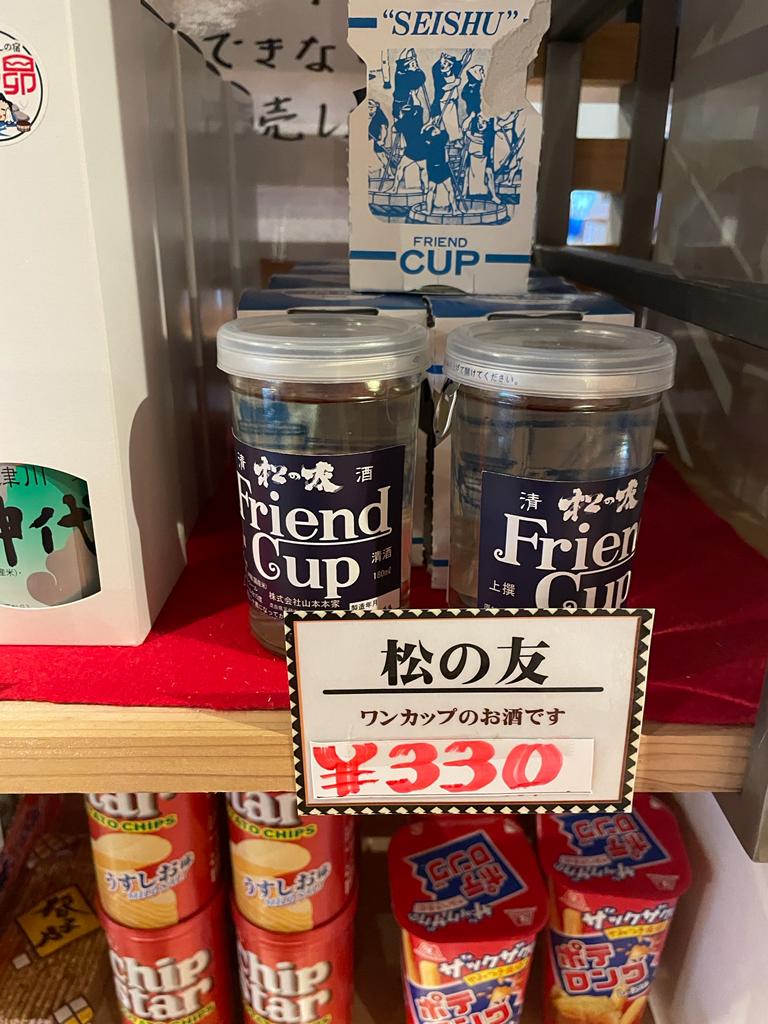
Omotenashi was in full swing at Hotel Subaru. The front desk was attentive and very helpful. The hotel lobby was immaculate and had a very well stocked (and modestly priced) convenience store where we could purchase some sake ‘friend cups’.

We had been assigned our only western room for our whole Kumano experience. The staff were very insistent on showing us every feature of the room itself, which took some time – mostly via mime as our Japanese, I’m embarrassed to say, was limited to yes, no, hello, goodbye and thank you! But we had a very enthusiastic delivery of our Japanese phrases…

Our room was very clean and tidy – AND – we had a sink and a loo – happy days!

It was, however, frozen in 1989. Complete with bed ruffles, English tea sets and matching curtains. Which provoked a fit of the giggles from TB as the earnest Assistant Manager was pointing out the room features….endlessly. I think the friend cups had a bit to do with it.

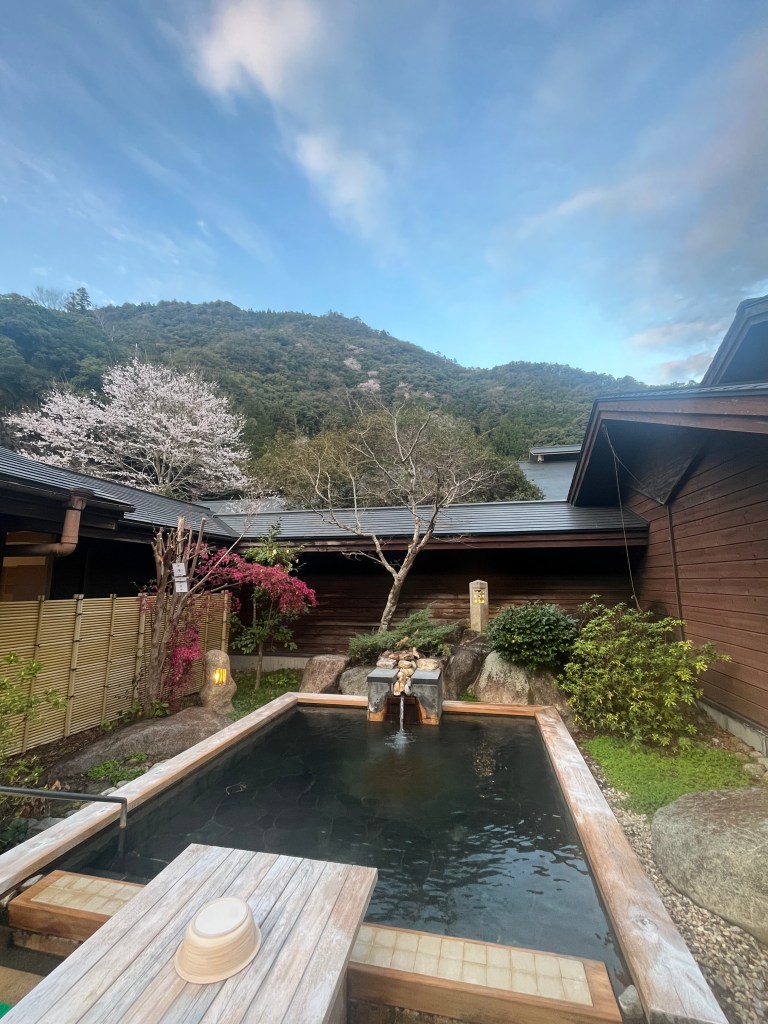
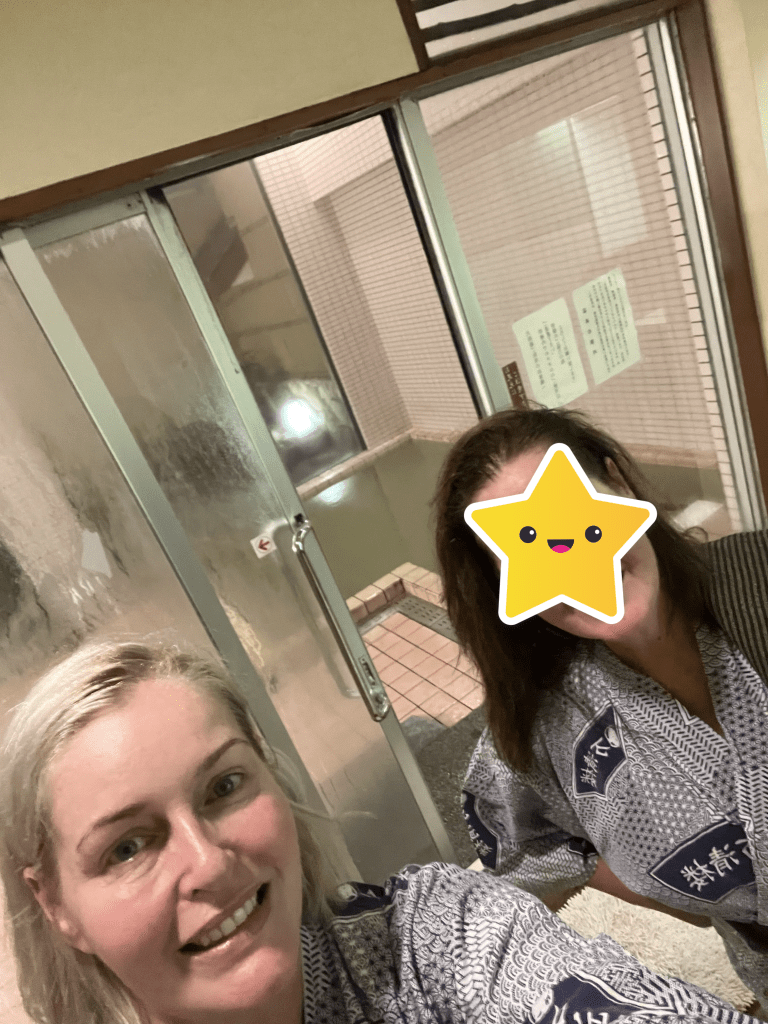
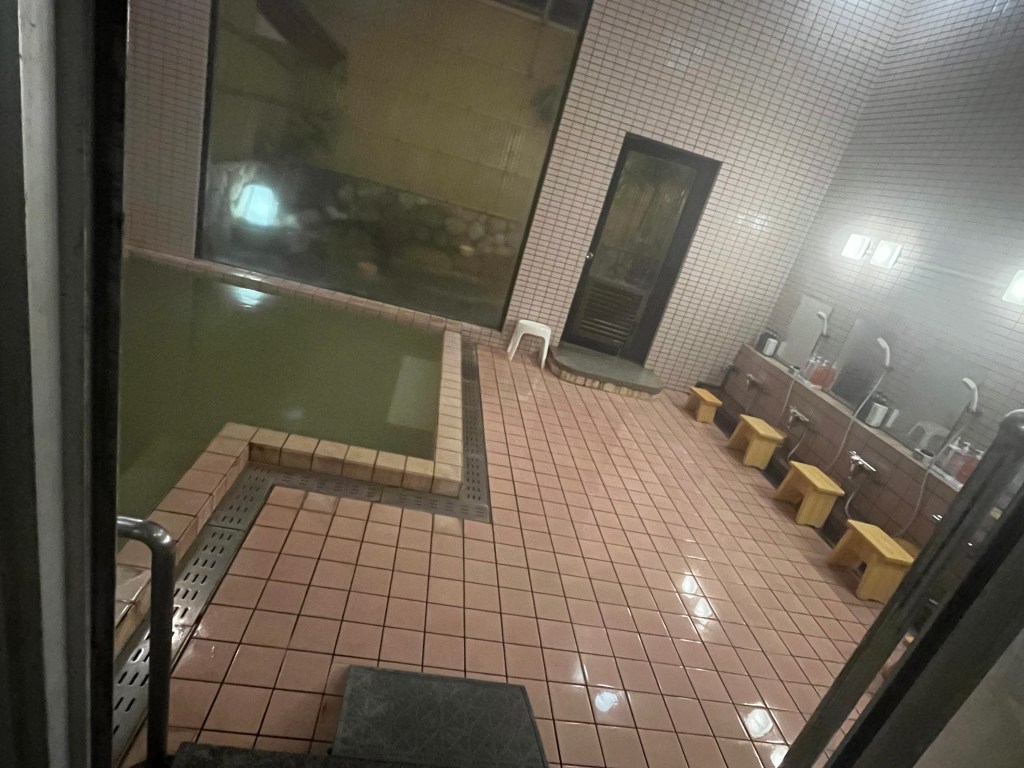
Hotel Subaru is renowned for its onsen, and wowser – hello fantastic onsen! It was a remarkable setup, indoor and out. And again, we pretty much had it to ourselves and by now TB and I regarded ourselves as onsen aficionados! Off came the hiking gear, out came the wash bag and the onsen basket and pfffft – who needs a modesty towel?!

The outside onsen was tranquil, and soothing, and we had the place to ourselves (which meant I could sneak some photos!) We emerged squeaky clean and very relaxed.

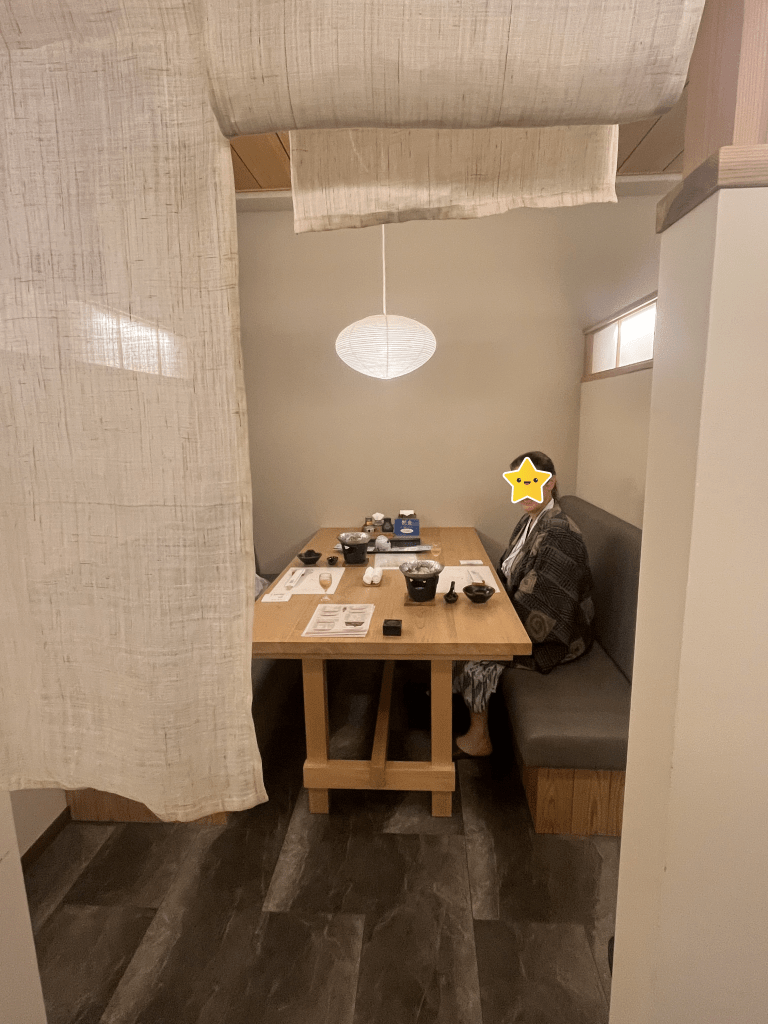
This is where we both now did a happy dance. You know dinner is going to be great when you are shown to your own little dining enclave, complete with privacy curtain and a table set for a king (actually, two majestic queens).

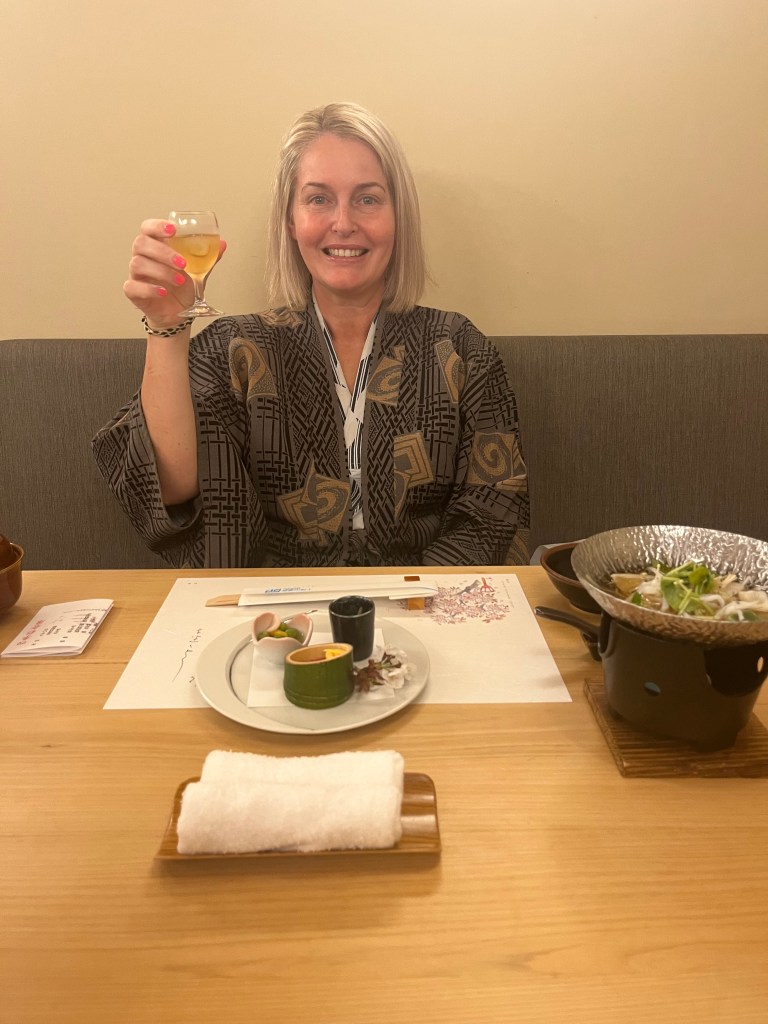
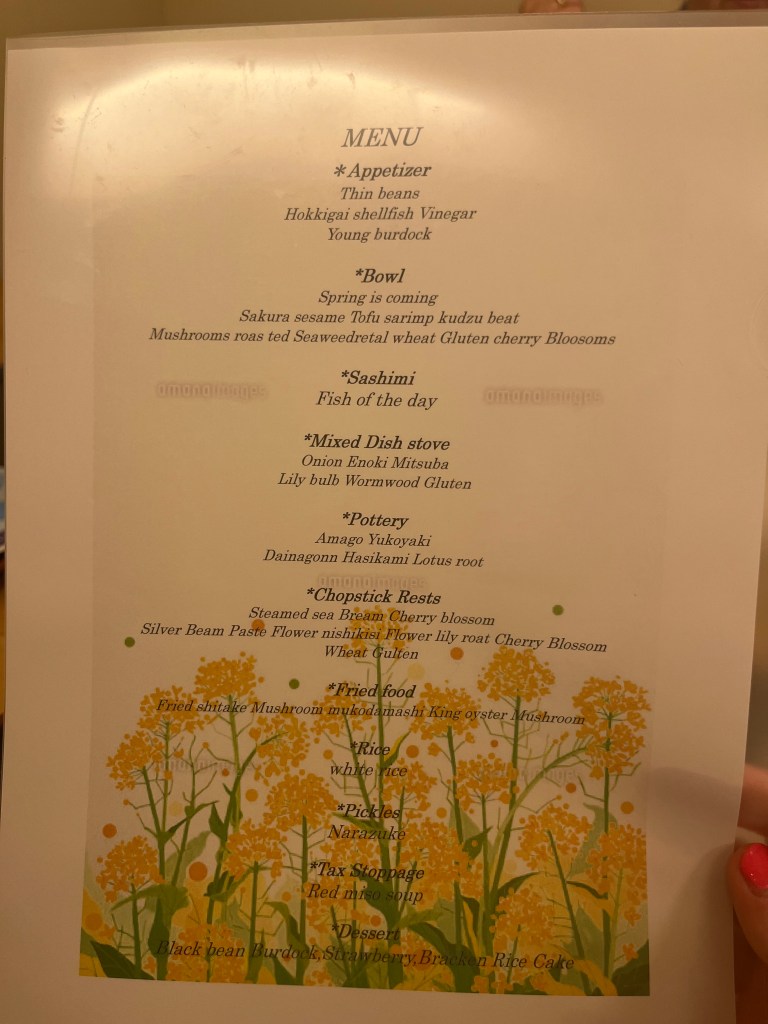
We were treated to some incredible dishes including a whole cooked fish, a shabushabu which was a meal in itself and some beautiful sake. The atmosphere really made it a treat and the attendants were impeccable in their service and attention to detail.

I can see why omotenashi is such a part of the overall Japanese hospitality experience. I felt like visiting royalty, but in a way that showed immense respect to all parties. Well done Hotel Subaru.

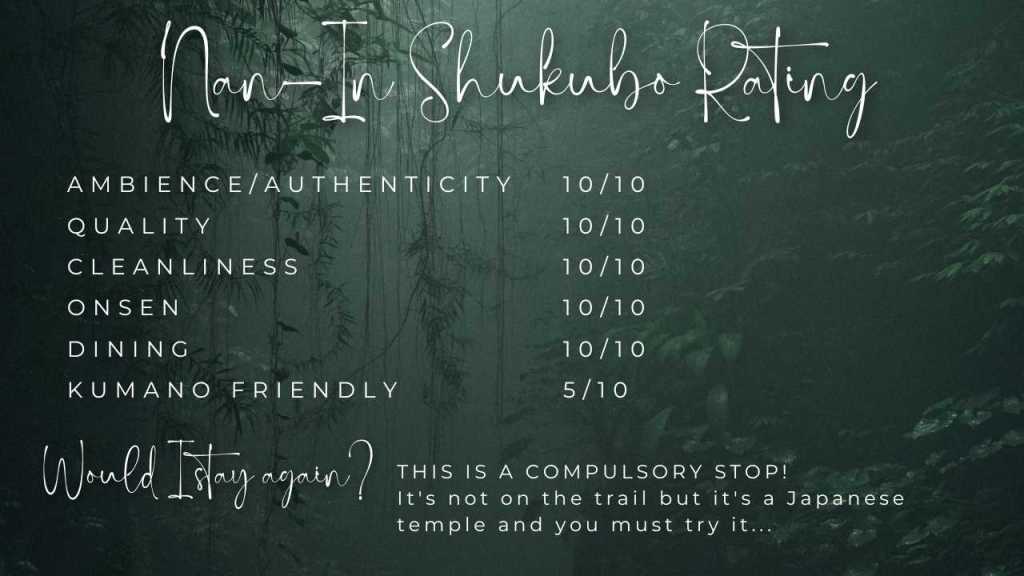
NAN-IN TEMPLE – SHUKUBO EXPERIENCE

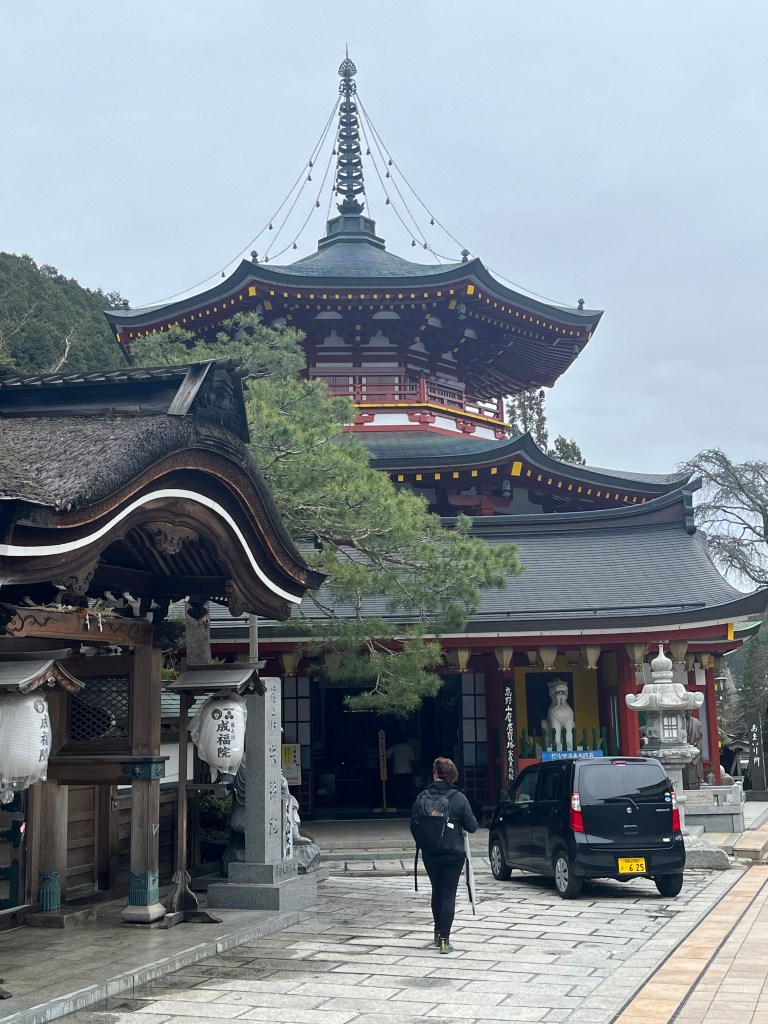
Our final destination before returning to Tokyo wasn’t on the Kumano trail, but falls within the prefecture of Wakayama, the spiritual centre of Kumano. Koyasan (Mount Koya) is the mountain of temples, comprised of 117 Buddhist temples founded over 1,200 years ago. Located high in the forest covered mountains, it won’t be a spoiler alert for me to say this was one of the most magical and spiritually affirming destinations I’ve ever had the privilege of going to.

Please put Koyasan on your list when hiking Kumano, you won’t be disappointed. And you will certainly get your walking distances in. TB and I walked 10km on our first day in Koyasan – so much to see!

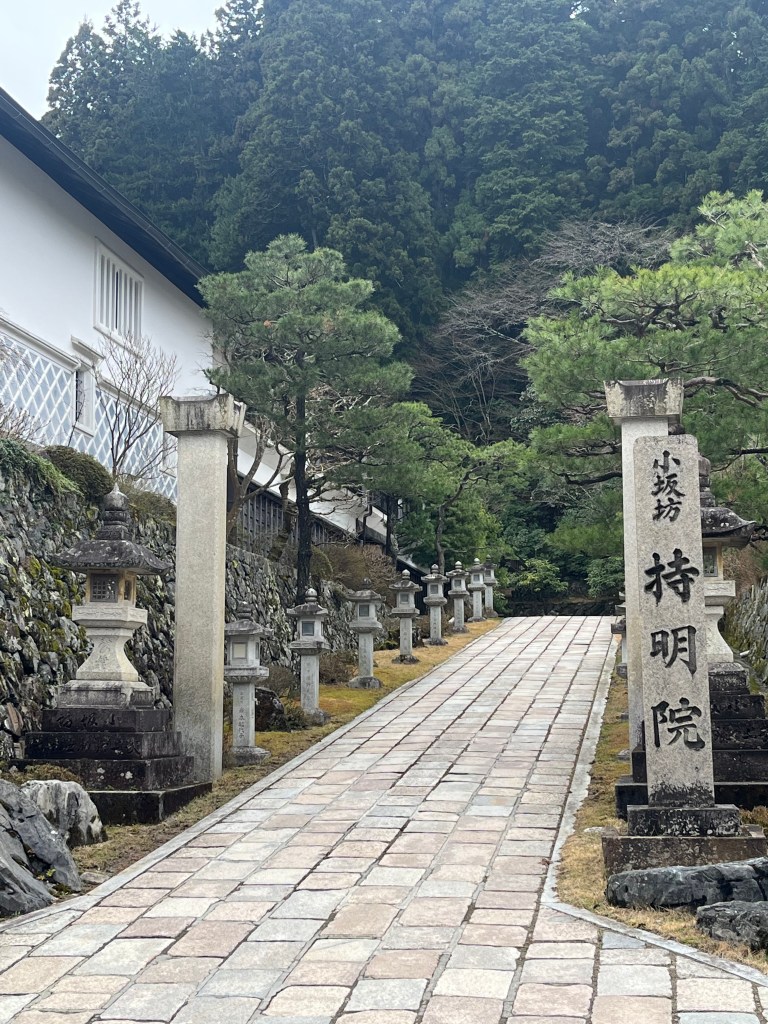
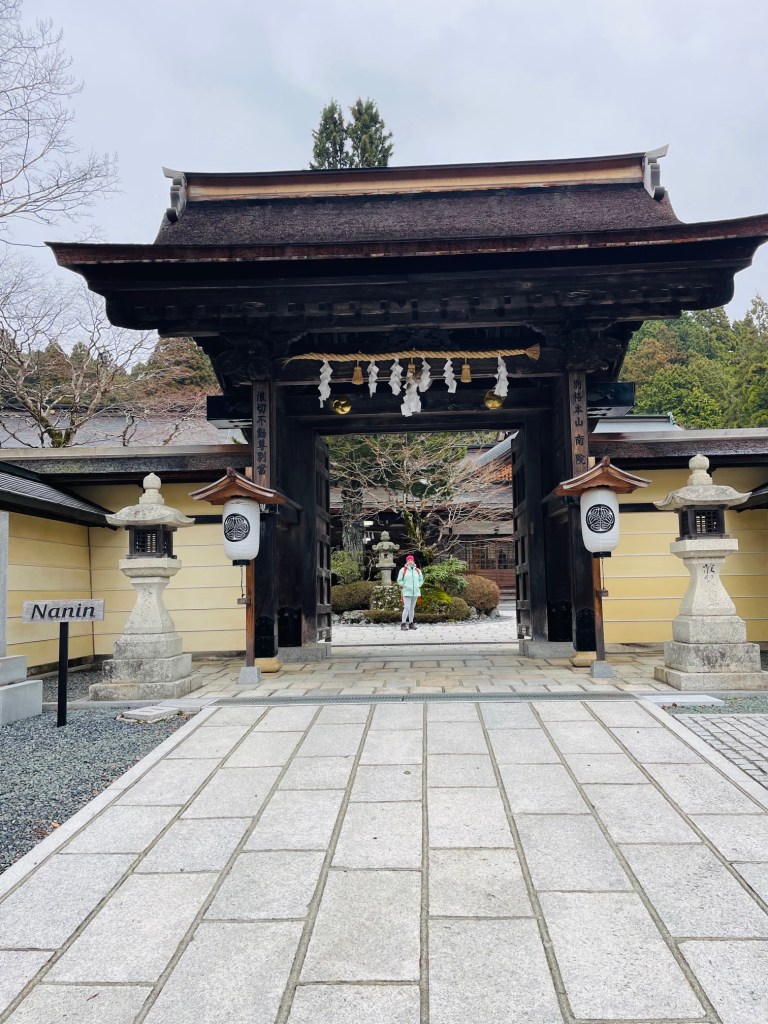
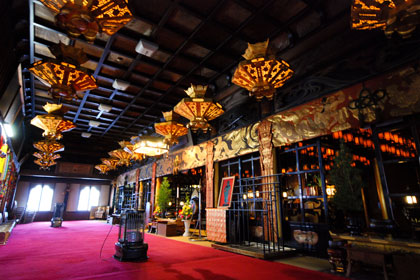
Nan-In is one of the many temples which has been partially modified to allow for overnight experiences. They offer a simple, traditional glimpse into the Buddhist life and rituals. We were very impressed with the entrance to Nan-In, which was rather ornate to honour the gods. The temple is to the left, and the accommodation on the right of the compound.

We were greeted (as we were used to now) with outstanding omotenashi. Our boots had little homes to live in outside the front door and our raincoats and packs were dried and delivered to our room. Koyasan is quite high, and it was about 6 degrees and misty rain when we arrived…brrrrrrr.

We were looked after by a young monk who spoke English, he was very patient and helpful. He seemed to be on call 24/7 for guests as whenever we popped our heads into the office door, the monks waved us out and the young monk appeared soon after. That’s omotenashi!

We were shown to our room, past the communal sinks and toilet facilities. Everything was immaculate and I am not exaggerating when I say you could have eaten off the floor. The attention to detail was incredible and could be seen in every nook and cranny as we walked through the building.

Our room was superb and had a lovely courtyard view. It consisted of an entrance space where suitcases lived, and then the main tatami space, with a sunroom out to the courtyard. We were the only guests in the wing…there’s something to be said for travelling in shoulder season… 😉

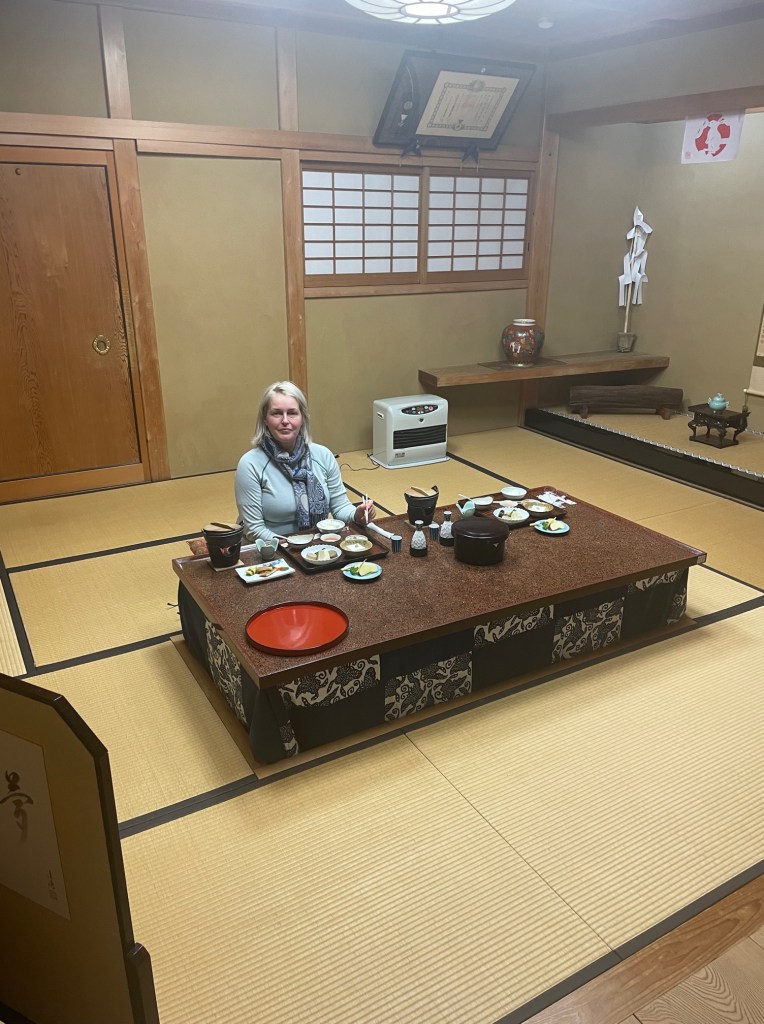
Our dinner slot was 6pm. Because we had been exploring Koyasan until quite late, we flipped things around and had dinner before the onsen. We presented ourselves at the main entry, and were ushered into a very ornate and opulent private dining room. There was a shrine in one corner, beautifully decorated sliding panels and a low dining table set for two. The only indication that we weren’t alone in the temple were the twanging American voices of a group across the hallway as they a) struggled to sit down on the floor, b) figure out the eating utensils and c) make sense of the communal bathroom facilities 🙂

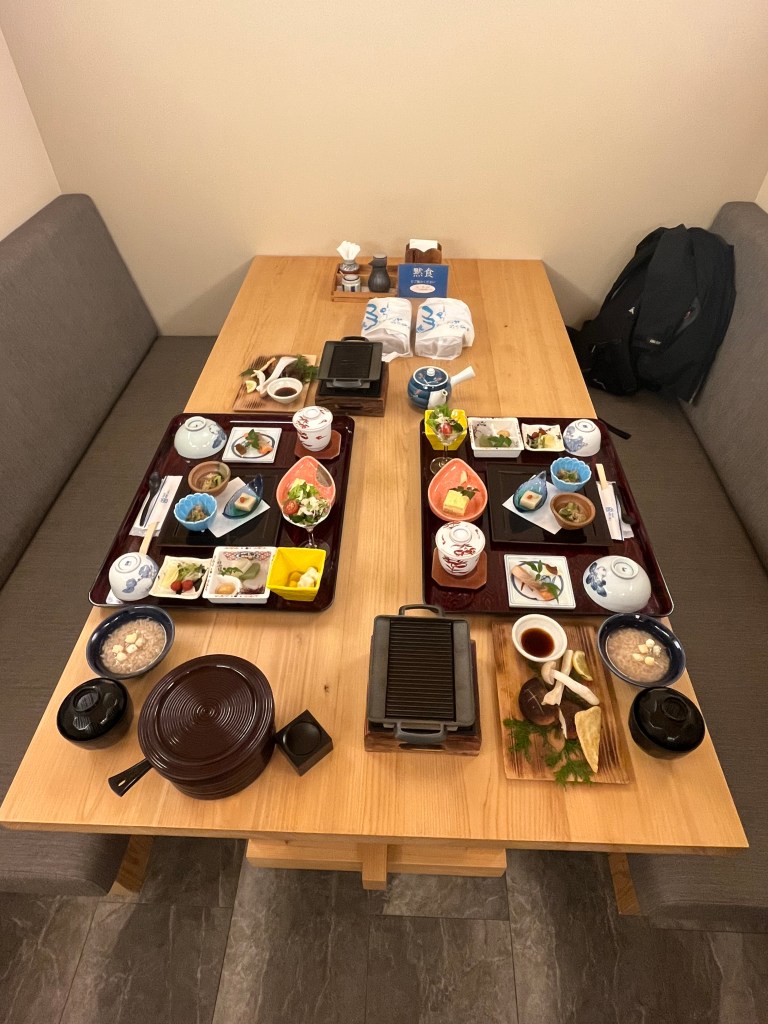
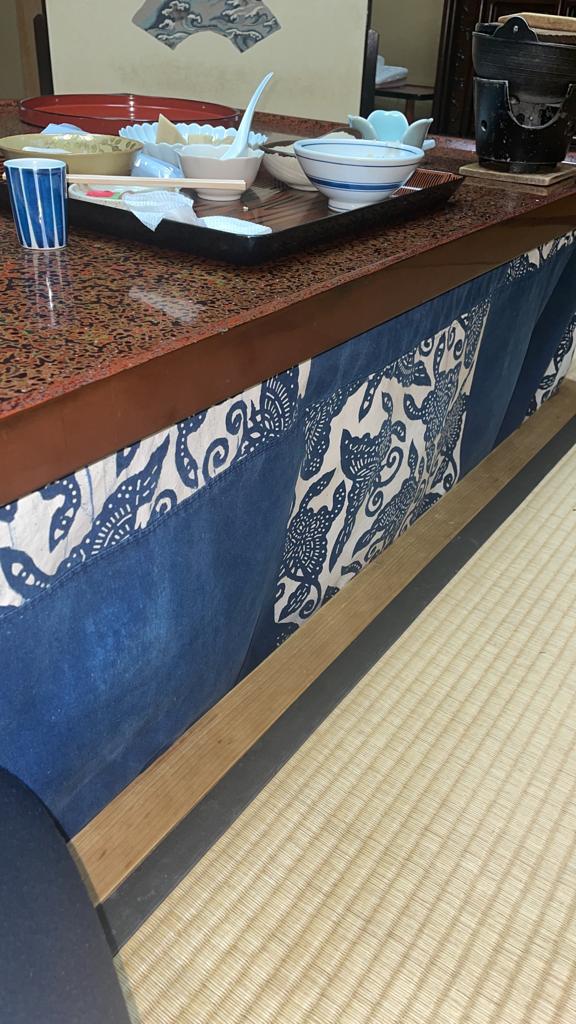
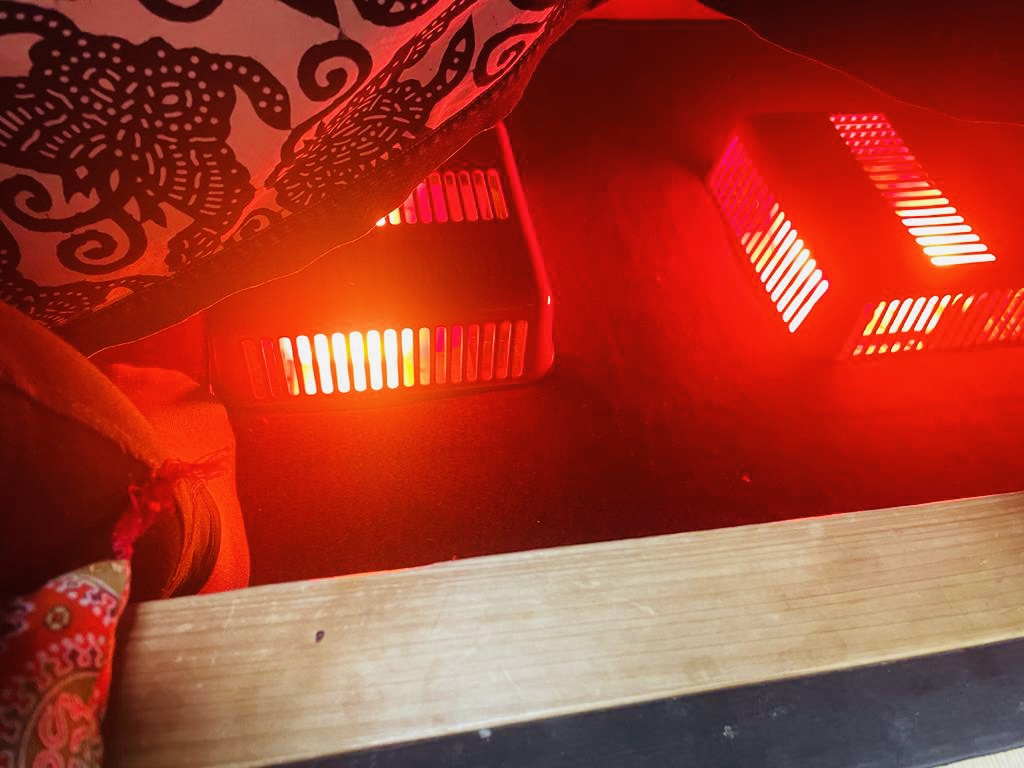
Our dining experience was a wonderful treat. Koyasan is a mountain village and was quite cold, even in late March. To counter that, we had UNDER TABLE HEATING!! Our meal was simple, but perfect. I am now an expert in how many ways tofu can be cooked and still taste lovely. All the temples are strictly vegetarian and based on what we were served, possibly plant based. We had (again) modestly priced sake and enjoyed every sip.

After our wonderful meal we went for a soak. The onsen, was very small and indoor only. It did the trick however and we were able to cleanse, bathe and soak solo. It’s not a prerequisite, but still nice to have the onsen to yourself.

Kumano Travel photo of the onsen

TIP

Most onsens are only open during the evening, not in the morning. Plan to bathe on your arrival, or after dinner. If you’re a morning bather, be prepared to adjust…or sponge bath in the loos! at Nan-In, the onsen was open from 4pm to 10pm. Look for the coloured curtains which denote gendered bathing areas – they also do swap around so always check the colours. I have no easy answer for my non-gendered readers except to follow you authentic self and enjoy your onsen experience.

Overnight, no complaints. We were warm and comfy. Except our pillows were beans. Yep, dried beans. Quite firm and small, maybe A4 size? I was clever, I ditched the pillow and went for a bundle of clothes. Worked a treat. TB persevered with her bean torture, and ended up doing emails for most of the night. Not me!

We had an invitation to attend morning prayers before breakfast. No way we were going to miss that! We almost didn’t get in as TB and I were trying to ‘pull’ a ‘slide’ door but we made it. The ceremony was very calming and beautiful to witness. I love the fact that Buddhism just assumes you’re good people, no threshold, no test, just come on in. I’m not a religious person but I appreciate anything that encourages me to stop – breathe – and centre myself.

Kumano Travel photo of worship hall

Breakfast was a cut down version of dinner, again in our own dining paradise with fabulous service and food. Lots of vegetables and tofu. I was very happy 🙂

TB and I left with our souls and tummies replenished and looking forward to our final leg in Japan.

So there you have it. my list of Rating the Ryokans. There are places I wouldn’t stay at again, but I wouldn’t change a thing.

TB and I had the trip of our lives and that included all the experiences. Ichie Cafe, the hairy snoring neighbour but wonderful chiffon cake, the Hi-De-Hi camp with a magical misty outside onsen…every less than ideal stay was also a travel moment to be treasured, embraced and remembered.

Take my rankings with a grain of salt and rather than put you off, I hope these two blogs enrich your decision making process. Not one of our nights on the trail was unpleasant. Every night was an experience – with maybe a couple I don’t need to repeat!

That’s all for now, see you out on the trails

PJ 🙂

RATING THE RYOKANS – PART ONE

Hello and welcome to my LIKETHEHIKE blog.

I’m PJ and I write about the hikes I take, giving you insights, photos, commentary, tips and tools so you can enjoy hiking and embrace the experience.

I’ve just returned from an amazing hiking experience on the Kumano Kodo and what better way to help you plan your Kumano adventure than for me to share my experiences on ryokans 🙂

One big consideration when planning your Kumano kike is accommodation and deciding where to stay. Modern? Traditional? Backpacker? Five Star?

There are many options available to the discerning hiker (you’re welcome) and it’s both fun and frantic navigating the plethora of options.

These two blogs pull back the curtain on what you can expect from your overnights. I will cover off the good, the bad and the ugly as I rate the ryokans! Note – our accommodation was booked via our Kumano travel company, Raw Travel.

WHAT IS A RYOKAN?

First, lets talk specifics. There are a few names used when discussing accommodation in Japan. It’s important to know the difference before you start making your bookings or confirming with your travel company.

RYOKAN – traditional style inn, usually adjacent to a hot spring area or resort. Private room, sometimes with bathroom.

MINSHUKU – traditional bed and breakfast house, usually family operated. Private or shared rooms, shared bathroom.

MINPAKU – older houses converted into accommodation. Usually unattended. Basic facilities.

SHUKUBO – Buddhist temples converted to tourist accommodation. Private room, shared bathroom.

WESTERN HOTEL – as it sounds, larger chain hotels with western rooms and bathrooms.

CAPSULE HOTEL – also known as pod hotels, rows of compact, self contained capsules with shared bathroom.

ONSEN – the natural hot springs, bathing facilities and resort areas surrounding the hot springs.

For ease of reference (and my love of alliteration), I have titled these blogs Rating the Ryokans, but I did stay in a range of accommodation experiences beyond ryokans during my time on Kumano Kodo.

ICHIE CAFE & GUESTHOUSE – MINPAKU EXPERIENCE

Our first night on our Kumano hike was in Kii-Tanabe. We travelled down from Tokyo via Osaka which took most of the day, and were booked to stay at Kii-Tanabe, and leave early the next morning. Kii-Tanabe is the jump point for most hikers to start Kumano, which is located about 20 minutes away at Takijiri.

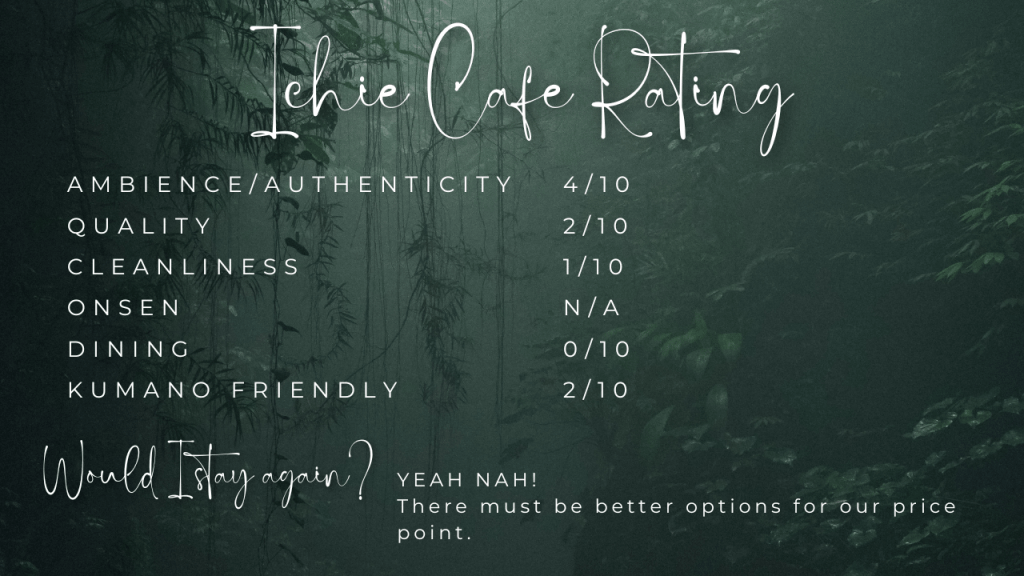
We were a little perplexed about our first night’s accommodation. Ichie Cafe is exactly that – a cafe which specialised in chiffon cake. It was expansively described as “authentic“. I would describe it as “bare bones backpacker“.

We stayed in one of two guest rooms adjacent to the cafe area, set up in traditional tatami style with futons on the floor. The walls were paper, and our host provided ear plugs, which gives you an indication of what to expect. And sure enough, we scored not only a snoring neighbour, but his partner who felt the need to use a hairdryer at 1.17am. For quite some time….

Access after 3pm was via a key lockbox as the host was not on site after hours. We shared a grubby shower area which was liberally festooned with very long black hairs, and a kitchenette. We didn’t use any of the facilities beyond the toilet and the sink for teeth brushing. The shower was just too much for me to tackle 😦

Breakfast was packaged chiffon cake in the fridge. Not ideal fuel for tackling a 14km steep hike. Chiffon cake is usually a delightful afternoon snack, but holds zero nutritional value for any exercise.

Our host was very pleasant and familiar with Kumano hikers so was used to the suitcase transfer arrangement.

CHIKATSUYU – MINSHUKU EXPERIENCE

After our first night on the Kumano, were were very unsure about what to expect for our second lodgings. We had walked about 15km from Takijiri all the way to Chikatsuyu and arrived at the village on dusk – very tired.

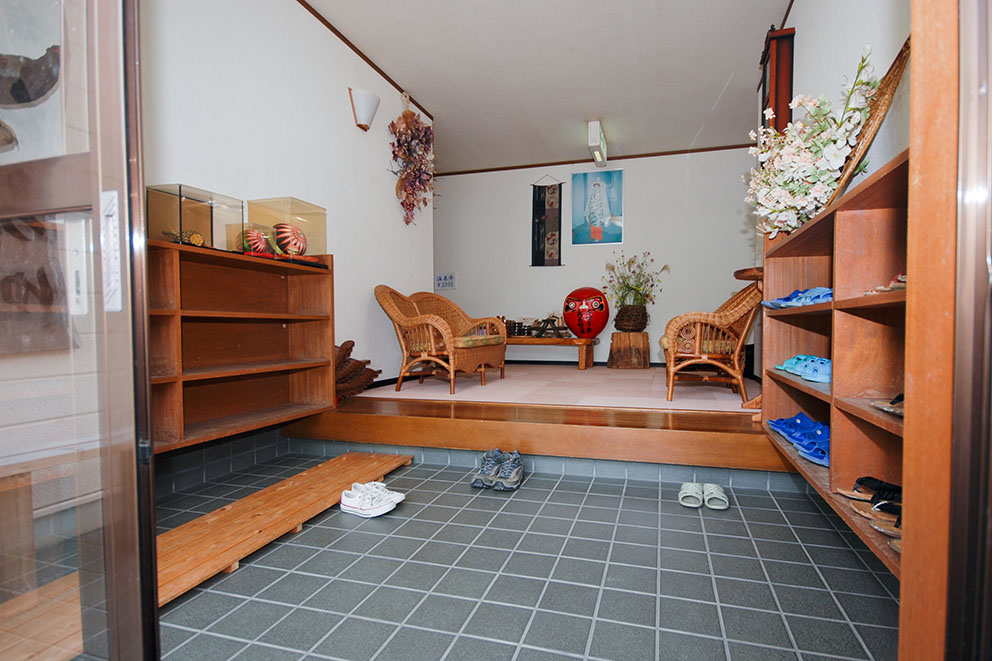
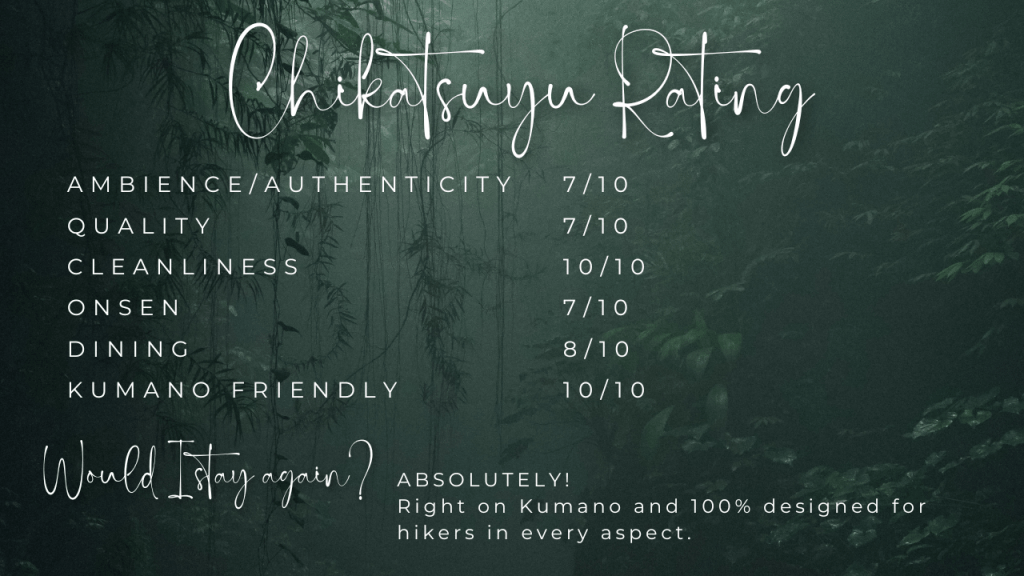
WOW – what a fabulous experience! A family owned and run establishment with separate tatami and shared facilities which were immaculate. It also had a hot spring onsen which was divine after our hiking day.

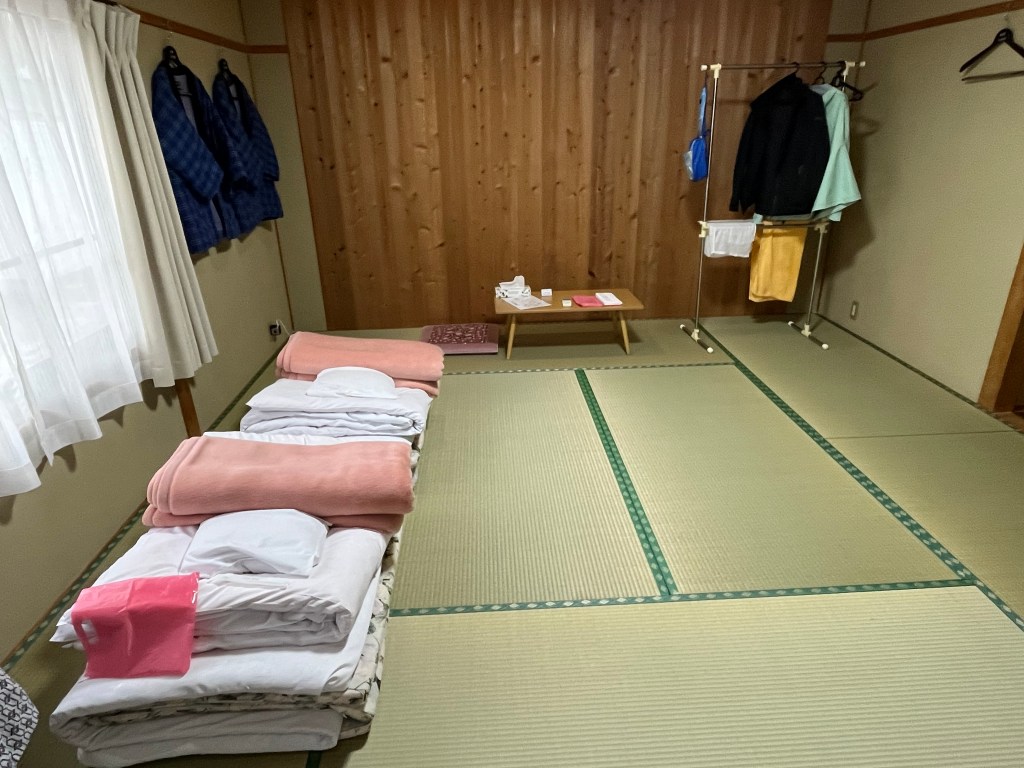
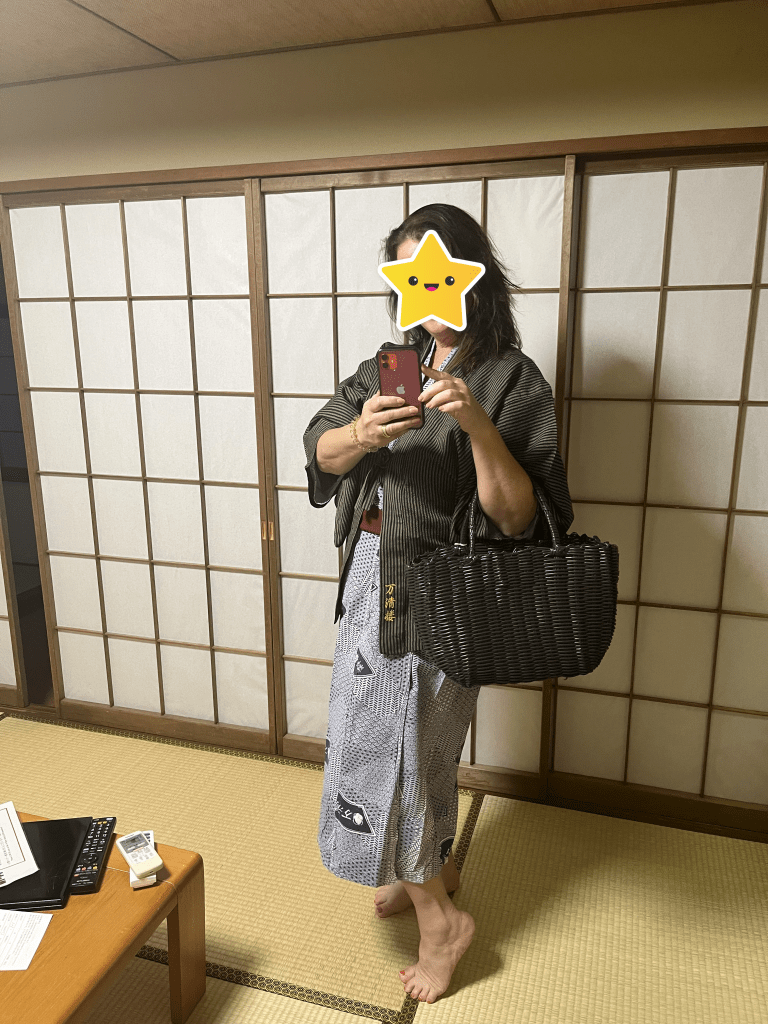
The room we had was large with crisp, clean bedding (see above) and lovely yukata to wear after onsen. Our suitcases arrived before us and were in the room, thoughtfully placed on a plastic sheet so as not to damage the tatami mats. We then used that same mat to dump and sort our dirty gear.

Dinner (kaiseki ryori) was a lovely shared dining experience and we had the ability to purchase very modestly priced drinks. Our room was equipped with fluffy doonas, additional blankets and had heating as well as windows you could open for fresh air. The building itself appeared quite new and everything was in tip top condition and exceptionally clean.

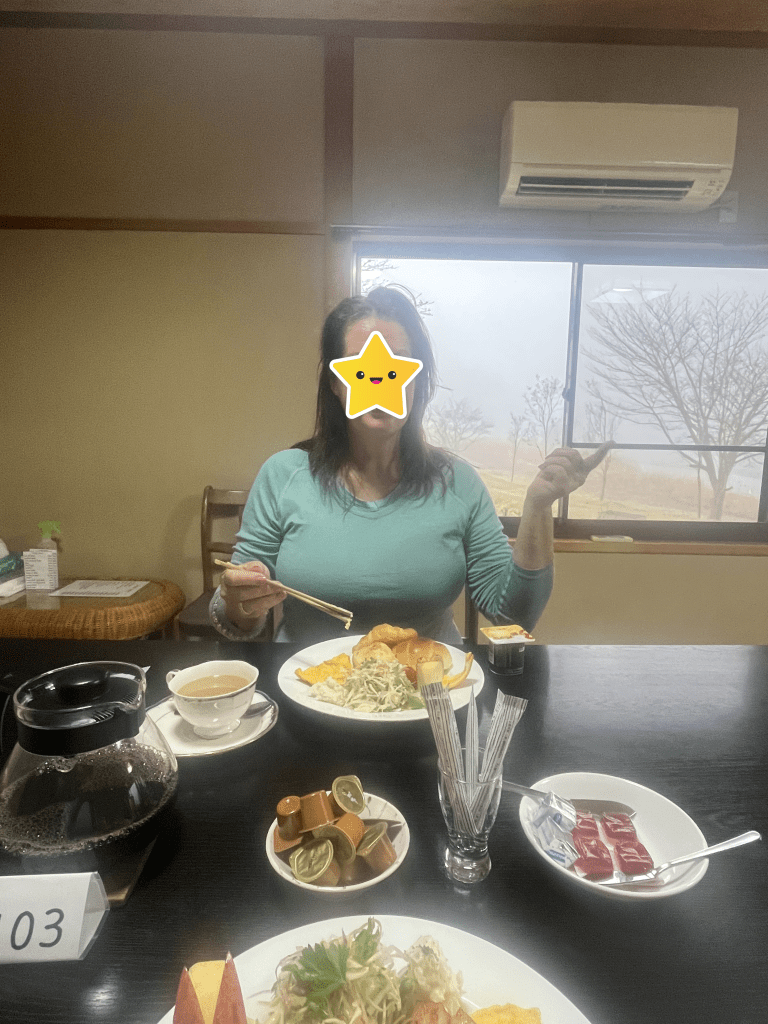
Not only did we have a wonderful dinner, but then did it all again at breakfast before we left – along with our lunch bento box.

Breakfast Banquet!

Our hosts could not do enough for us. They were responsive, extremely welcoming and very proud of their lodgings – as they should be. Everything was sparkling clean, the bathroom facilities were spotless and I was very happy to enjoy their riverside onsen!

KAWAYU MIDORIYA – RYOKAN EXPERIENCE

This was our first exposure to a ryokan – albeit a rather large one! Kawayu Modoriya is located about 4km outside of Hongu, in a cluster of onsen villages scattered in the mountains.

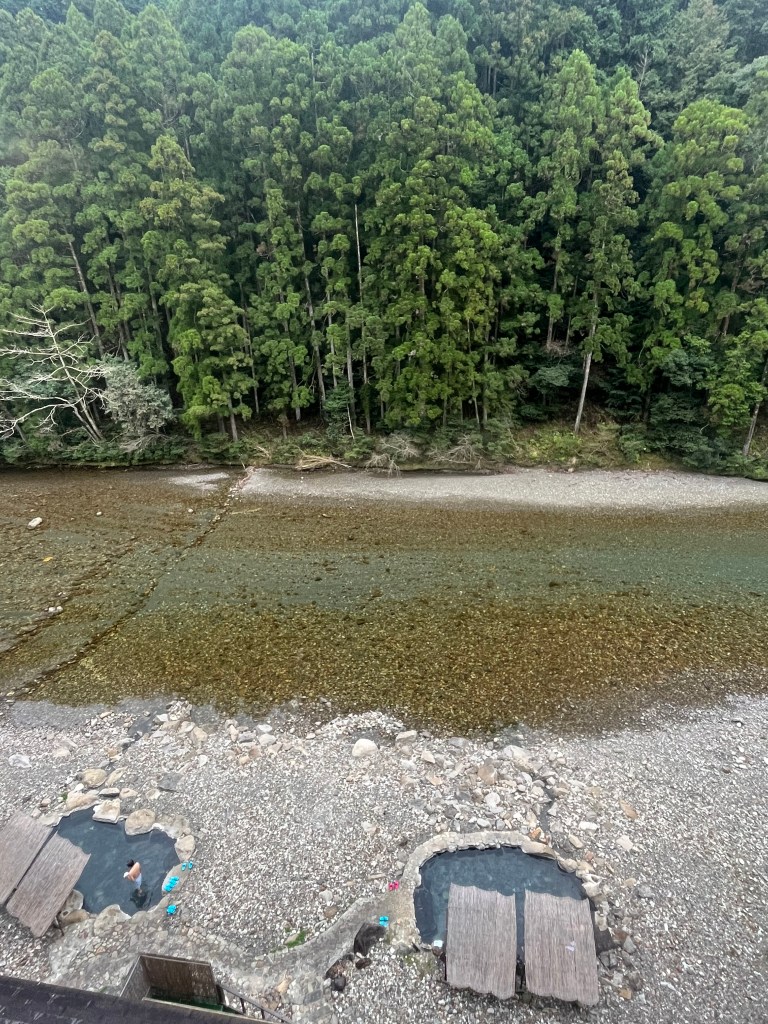
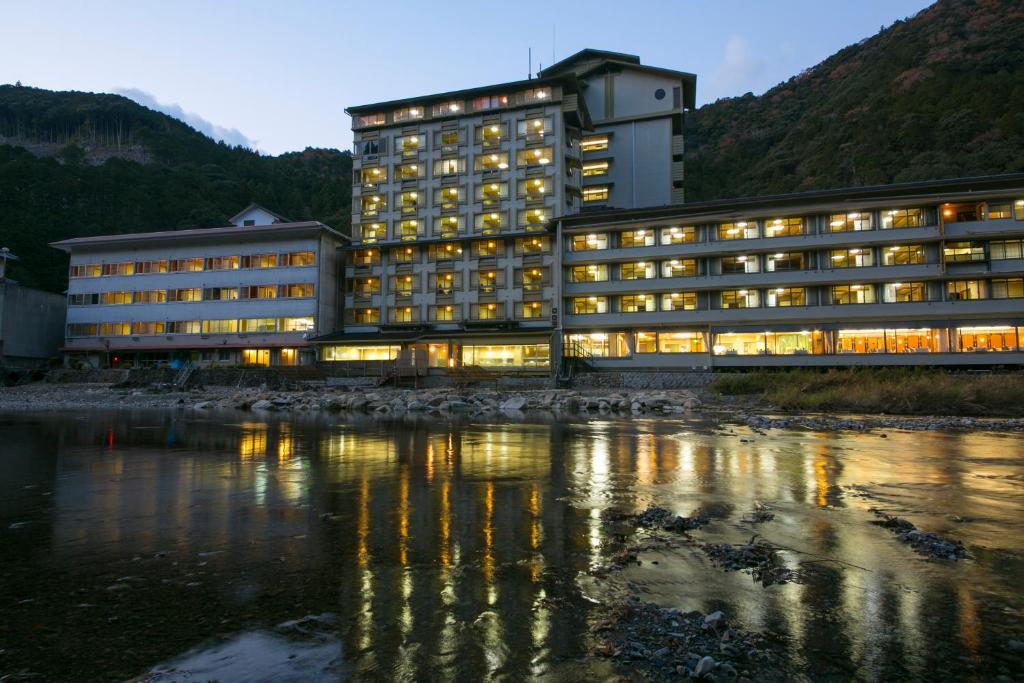
It has a fantastic indoor and outdoor onsen located on the River Oto, which is one of the reasons it’s a very popular destination with tourists and locals. The building itself is seven stories and very much a traditional hotel, but the experience within is driven by the Japanese practice of omotenashi, which I can best describe as mindful, authentic hospitality. Omotenashi extended from the front desk staff, to the restaurant staff, to the lovely room attendant refreshing the ikebana arrangements on our floor.

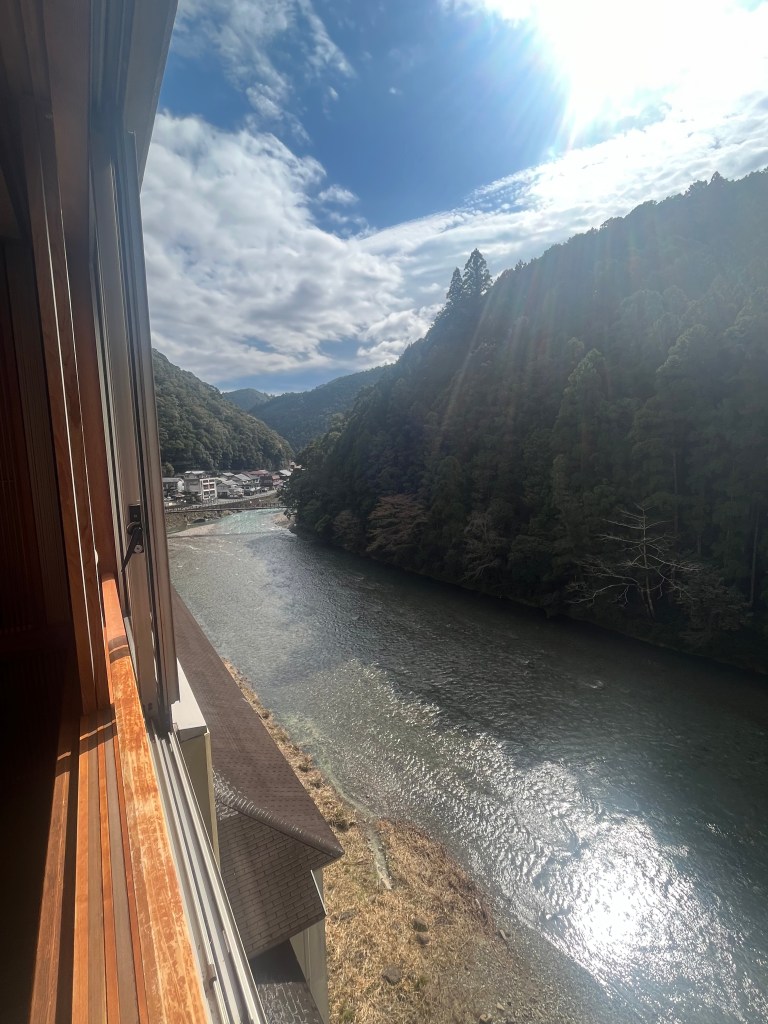
Our room was a tatami style on level six overlooking the river and outdoor onsen. This was the first time we had a full amenities bathroom – so pretty exciting. Everything was immaculately clean and staff laid out your bedding when you were at dinner, no need to wrestle the futons onto the floor.

The onsen was outstanding. Not only did we have full indoor facilities, but there were two mixed outdoor pools (see above). No nudity outside though (whew), we had yukata that we could wear in the pool – all very decent.

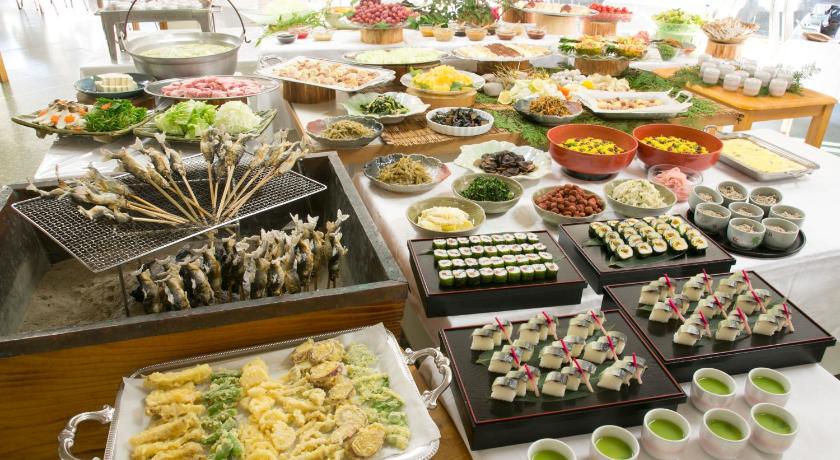
Dinner at Kawayu Midoriya was an experience all of its own. It was a combination of shabushabu at the table, and then a sumptuous buffet to choose from. We cooked up a storm and then proceeded to try everything on offer. We were stylishly dressed in our lovely hotel yukata, slippers and jacket – very fancy!

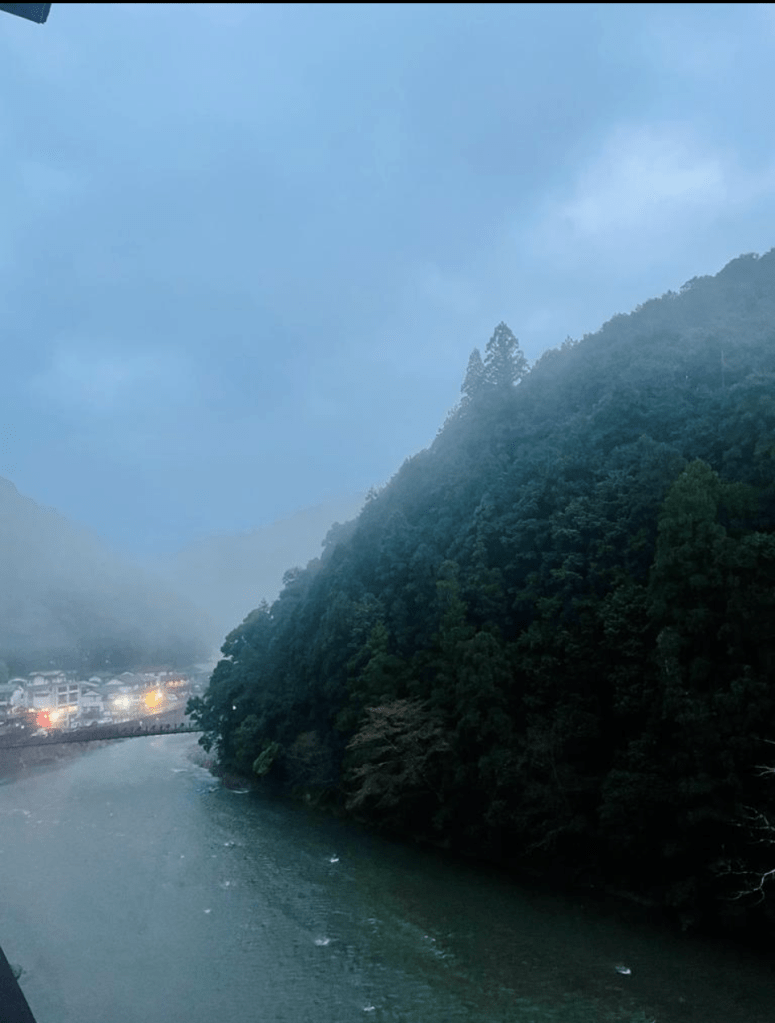
The location of this hotel is simply stunning. It sits next to the River Oto and our room not only was riverside, but facing a beautiful forest. We stayed here twice on non-consecutive nights as we were hiking different sections of Kumano, and watching the river gently bubble past with rain mist hovering and the twinkling village lights in the distance was very special.

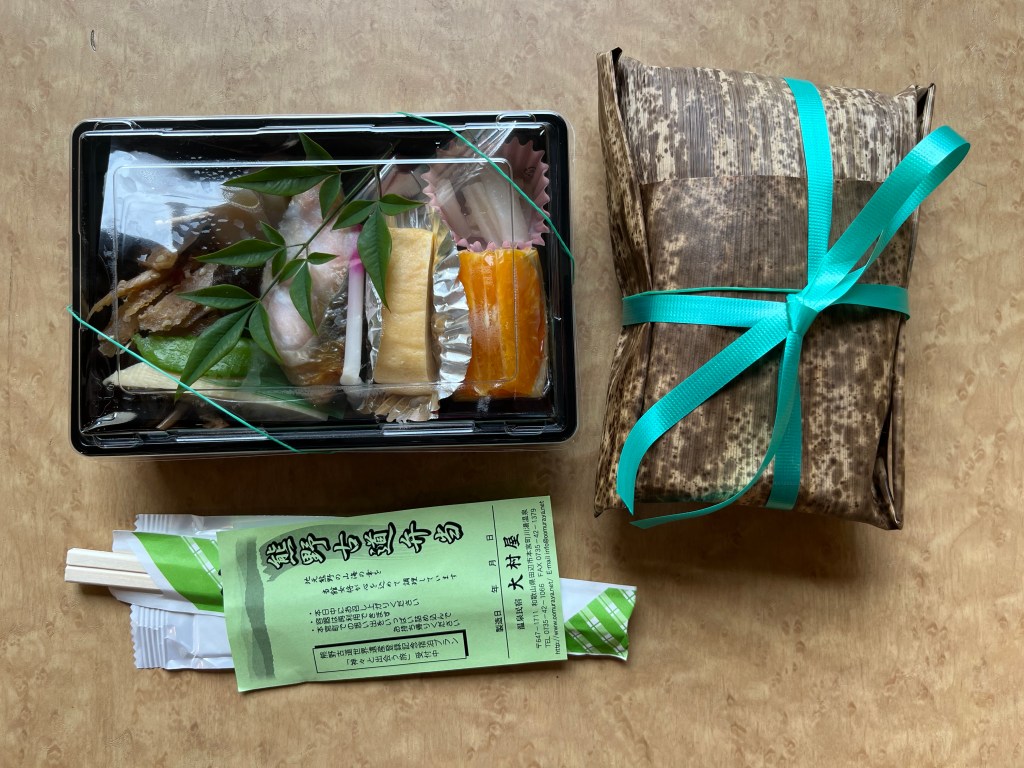
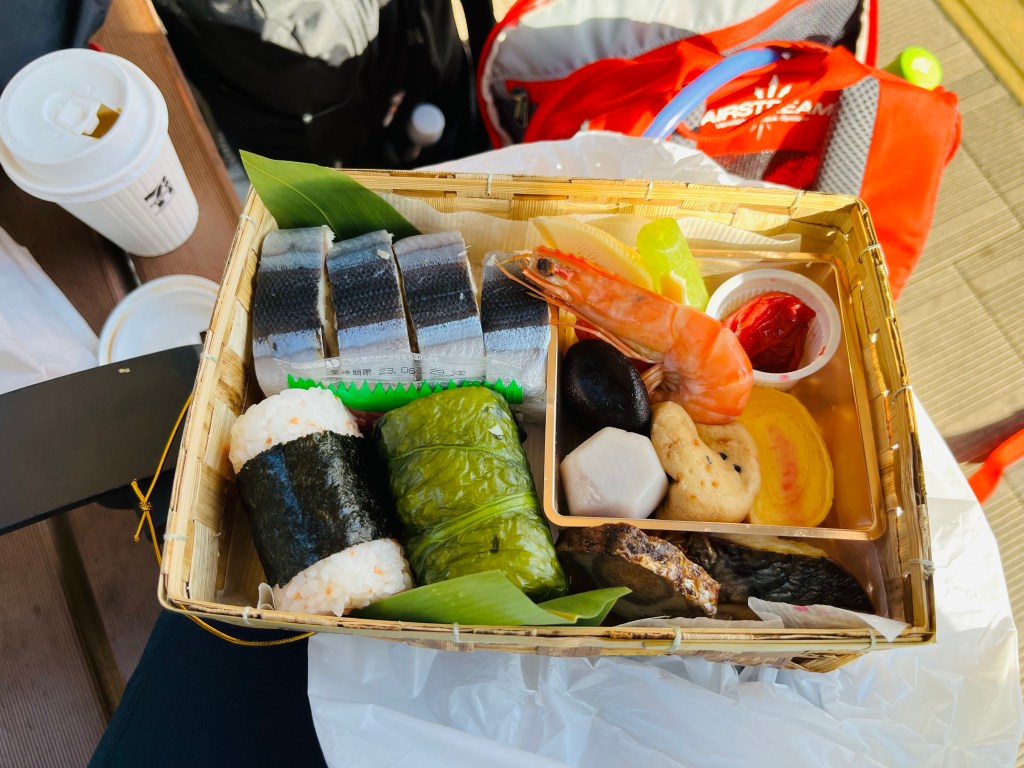
Our farewell gift from Kawayu Midoriya was a bento box for our hiking lunch – packed full of goodies. A fitting goodbye from a fabulous place to stay.

The banana leaf package had lovely nigiri and rice balls… 🙂

MANSEIRO – RYOKAN EXPERIENCE

Our next stop was the seaside town of Kii-Katsuura, about 30 minutes south of Shingu. We had travelled down the Kumano River by traditional boat and spent some time at the Shingu Kumano Shrine, and our overnight stay was at the lovely Manseiro.

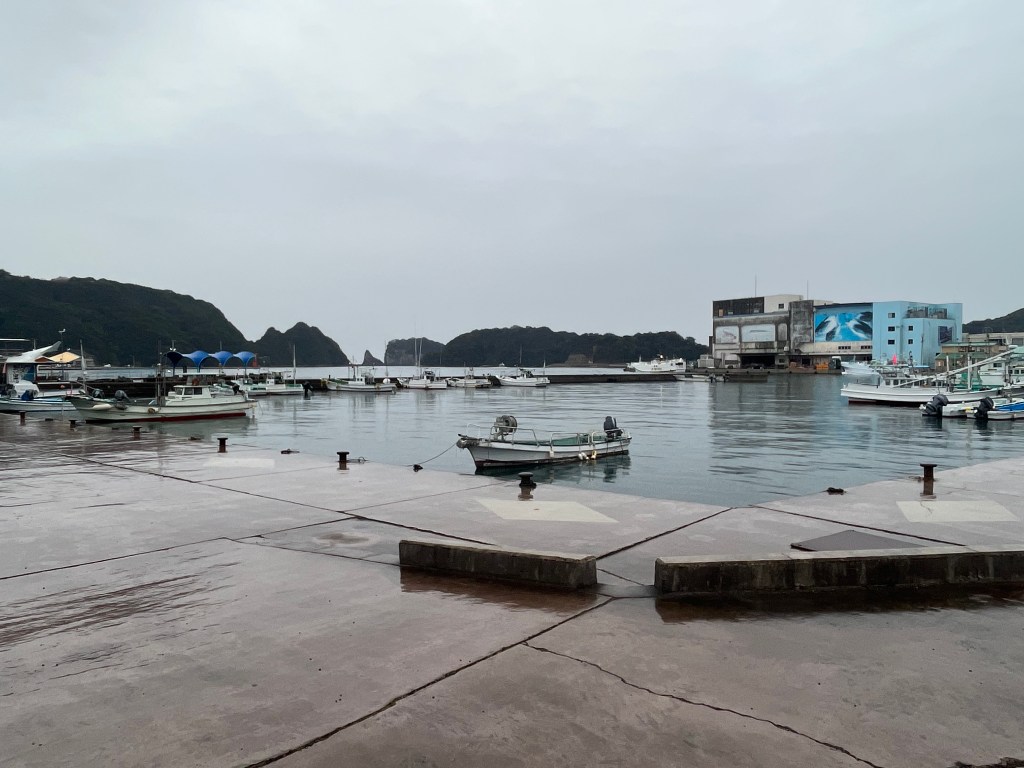
Manseiro is a small boutique hotel on the Kii-Katsuura waterfront, facing the fishing harbour. Kii-Katsuura is a working town, so expect a very authentic fishing vibe. If you’re vegan or don’t enjoy fish – give this overnight a miss…if not, then read on!

Fun fact, the tuna market in town boasts the largest haul of fresh tuna in Japan and holds daily tuna auctions, much like the Tokyo fish market, but to scale. TB is a sashimi fan so we had a LOT of fun in the market food hall.

Back to Manseiro. A small hotel, perhaps 20 rooms, but very tidy and well presented. Less multilingual staff than we had encountered so far, one front desk staff member spoke English and he was very excited to talk to us. We were the only ‘western’ tourists there – so we felt quite special. Google Translate got a good workout.

Our room was actually two rooms and a bathroom, tatami style. Very spacious. We used one room for our bags and gear, and the other for sleeping. Immaculately clean and well presented – which we realised was the norm, and Ichie Cafe was the exception. We weren’t harbourside, but overlooked the back street which was quite entertaining. It was a very traditional town so our view was very old Japanese architecture – fine by me.

Our next treat was the onsen, with both indoor and outdoor facilities – and we had it to ourselves so I could take some photos! It’s very bad form to take photos in the onsen when other people are present, understandable as I wouldn’t want to be in someone’s background in all my birthday glory…

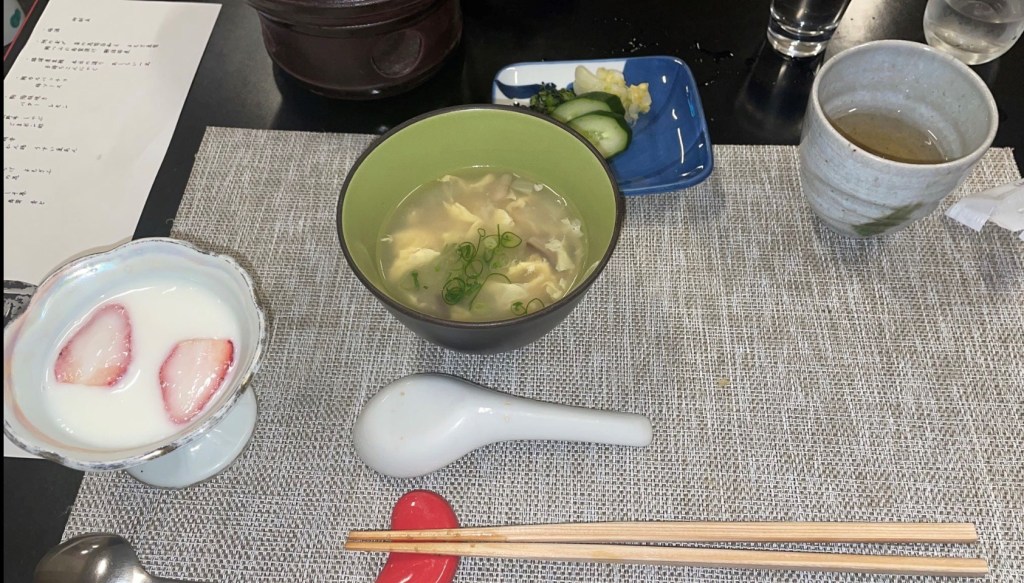
After our onsen it was time for dinner. OH MY. I thought we had experienced some great kaiseki ryori and omotenashi – we were in for an 11 course delight at Manseiro. We were ushered to our sectioned off table – the dining area is made up of little private dining spaces where guests can enjoy the company and the food.

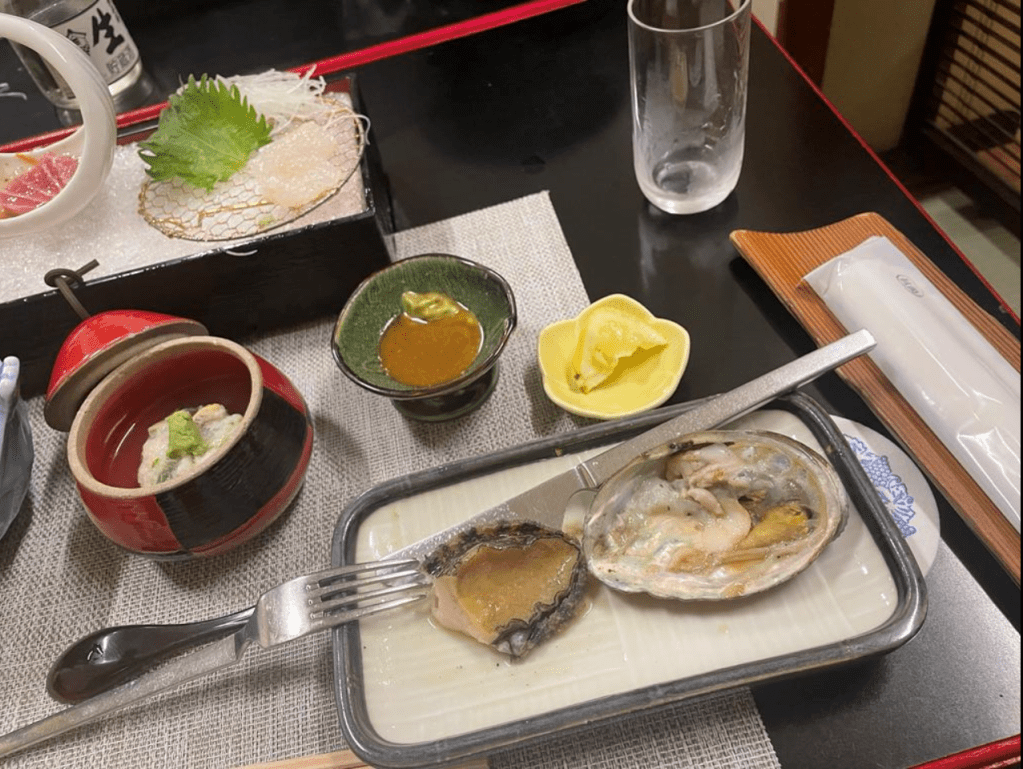
It was a seafood extravaganza, delectable finery served by highly professional staff. TB and I dined on (in no particular order) salmon, scallop, tofu, rice, white fish, octopus, mushrooms, beef, tuna and….wait for it……white abalone! (or for those from Aotearoa, paua). It was tabled raw and we simmered it in our shabushabu with butter for about 10 minutes, and finished it with a squeeze of lemon.

We had the loveliest server who was our immediate adopted nana. She sorted us out, checked our abalone cooking skills were up to scratch, said yes and now, and gave us big smiles when we got it right. All without a shared language except a love of food. I felt appreciated as a guest, and I deeply appreciated the omotenashi extended to me.

I don’t recall eating the dessert, by then I think I had fallen into a happy food coma. This was a dining experience I won’t forget in a hurry.

TB and I departed Manseiro with a deep respect for a fishing town full of quality, culture, experiences and tuna 🙂

SUMMARY (for now)

Given that I have sooooooo much to share with you about the places TB and I stayed on our Kumano Kodo trip, I’ve split this blog into part one and part two. Next time I’ll tell you all about a very odd ryokan/training camp setup, a western style hotel in the middle of nowhere and to round out our magical experience, our stay in a Koyasan shukubo!!!!

See you out on the trails.

PB.

TOP 10 “MUST HAVES” FOR KUMANO KODO

Hello and welcome to my LIKETHEHIKE blog.

I’m PJ and I write about the hikes I take, giving you insights, photos, commentary, tips and tools so you can enjoy hiking and embrace the experience.

I’ve just returned from an amazing hiking experience on the Kumano Kodo and I thought I’d share with you my top 10 ‘must haves‘ to hike the Kumano.

So – you want to hike in Japan. You start by doing a bit of research. You google all the things, decide whether you will go through a company or plan it all yourself. You decide what trails you are going to experience, when you’re going and who you’re going with. You book airline tickets, you pay all your money and then the hard bit begins.

WHAT DO YOU TAKE WITH YOU??!

For a good place to start, have a look at my blog “What to Pack for a 10 Day Hike on Kumano Kodo” which I wrote before I went. Happily, I was pretty much on the money with what came with me, however, now I’m back I can, with absolute authority, tell you the top 10 ‘must haves‘ to take with you on your hike in Japan.

Let’s begin the countdown. You’ll be surprised at what came in at #1…

#10 – ANTIHISTAMINES

Seems an odd thing to have on a top 10 list, but I found them invaluable. We hiked through forests, paddocks, villages and up and down mountains – if you have allergies you will react at some point. Also, and this is something I didn’t expect, my hiking partner and sister TB had an allergic reaction to the tatami mats in the ryokan. Tatami mats are made out of woven sea rush and rice straw. After a couple of nights, TB’s eyes looked like she had gone ten rounds with Mike Tyson!

I packed a couple of different types of antihistamine just in case – Nasonex and Zyrtec. They did the trick.

#9 – COFFEE SACHETS

So, we heard through our research, that most ryokans don’t do coffee. And that’s absolutely correct. If they do, it’s not very nice. Definitely no skinny lattes or flat whites on order!

We decided to take some instant coffee sachets with us. And we used them every day. All you need is hot water. Admittedly, if you take your coffee without sugar they might not be ideal, but TB used half a sachet and combined it with a good old Nescafé instant sachet and boom – a halfway decent coffee.

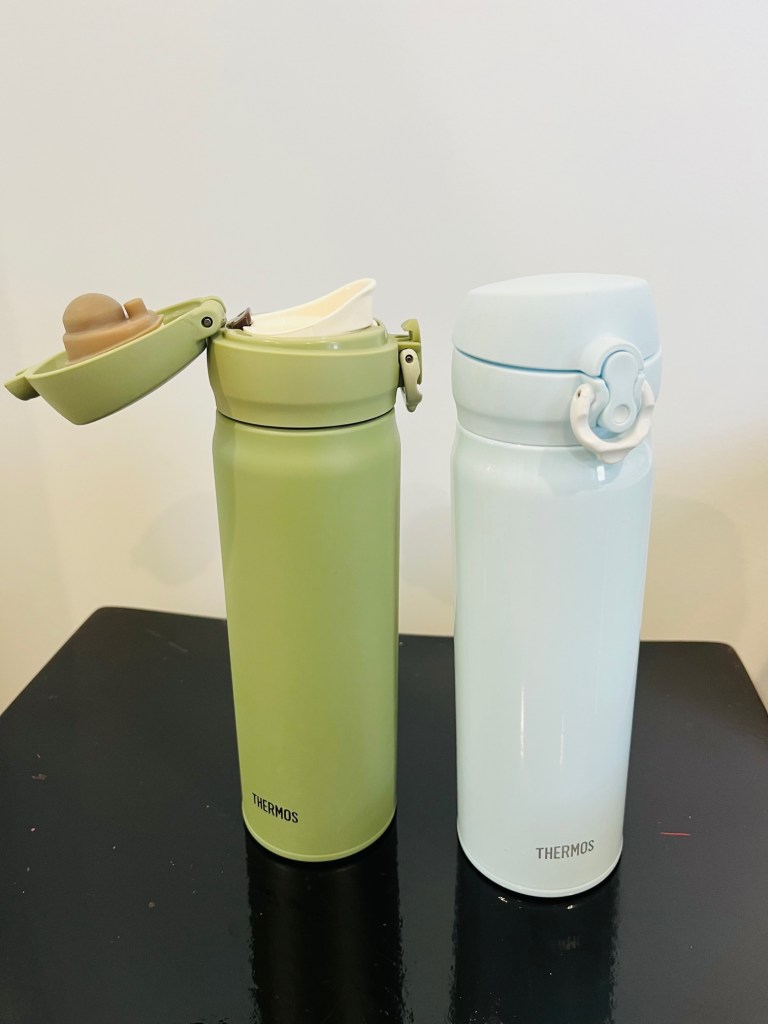
We bought some ridiculously cheap Thermos’s in Tokyo before we started hiking and then used them all around the Kumano – hot coffee for morning tea was just perfect.

#8 – CASH

Seems obvious – right? Of course you take cash on a holiday, but mostly use a travel card, a credit card or apple pay etc….right? WRONG. Local buses all over the Kii Peninsula DON’T TAKE CARDS. The vending machines all along Kumano take cards but may not be secure and the little stores, village shops, and trinket places are pretty much cash only businesses. So not only is cash king, but coins are the king of kings as buses usually take exact change only for fares and Kapan has a 1,000JPY coin. Smart!

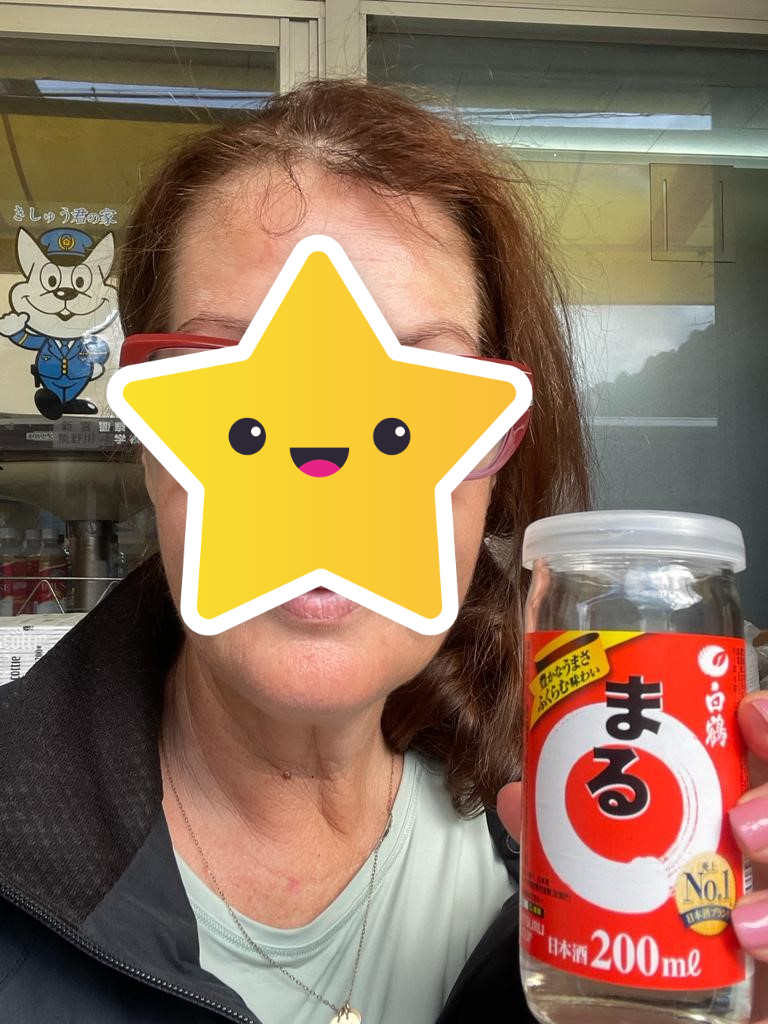
I even bought a lovely little coin purse to use because I was taking out my wallet multiple times a day to pay for things as we journeyed along Kumano. I was pleasantly surprised at how affordable Japan was, and we really enjoyed the $2AUD 500ml Asahi cans and the $2.50AUD ‘friend pot’ sakes. We found these two at a tiny grocery store in the middle of nowhere in Koguchi after hiking 25km. Yum!

Take a bit more than you think you will need, I allowed $60AUD a day (6,000JPY) and spent my last 4,000JPY at Haneda airport on the way home 🙂

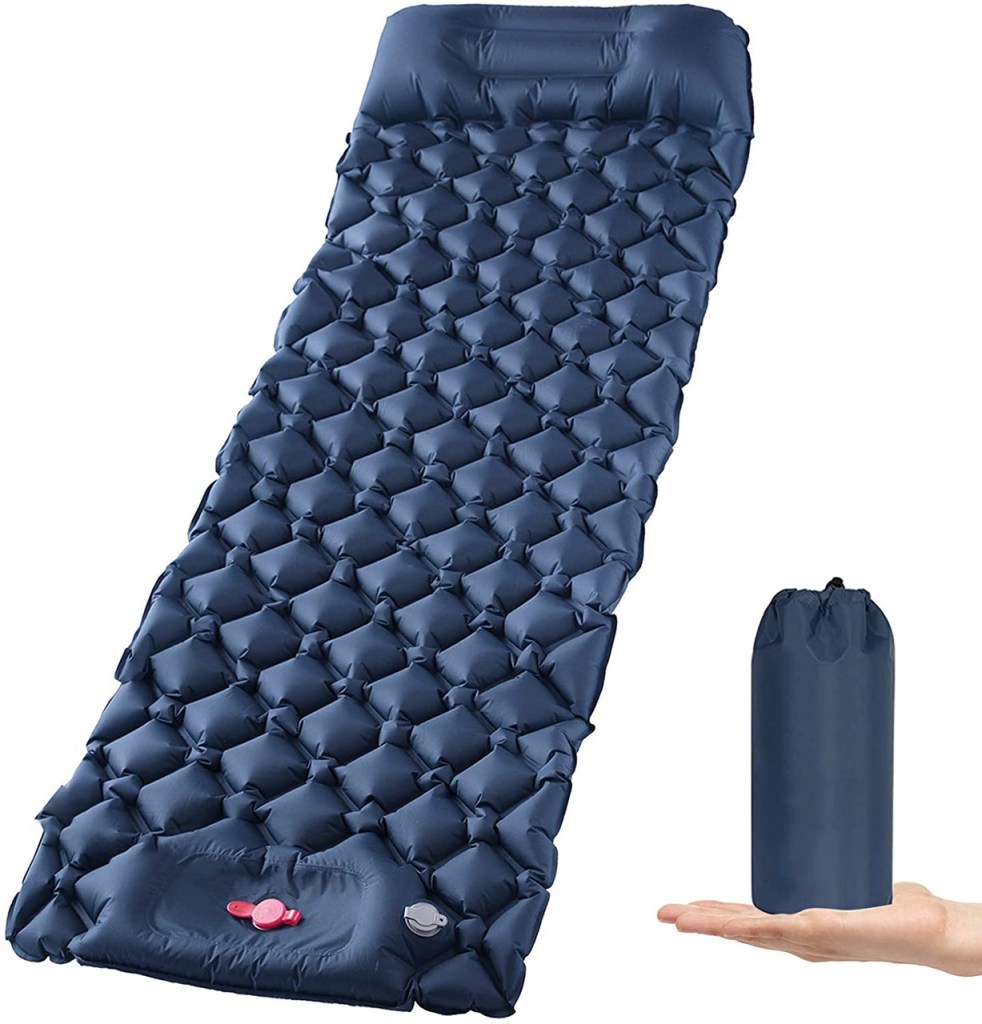
#7 – BLOW UP CAMPING MATTRESS

I know, I know. But hear me out.

Traditional tatami and futon rooms in Japan can be quite firm. My family and I holidayed in Tokyo about four years ago and stayed in a traditional ryokan. The futon was QUITE FIRM.

So, I jumped online and purchased a camping mattress for less than $40. If I used it, happy days, and if not, then I hadn’t spent a fortune.

Weighed about 500g and really did pack down to nothing

I used it every night we slept in a tatami room. Yep. Honest.

It had a foot pump, took 3 minutes to inflate and I just slipped it under the futon. It really did make a difference for me and I woke each morning well rested and ready to tackle the day.

#6 – WATER SUPPLEMENTS

I get leg cramps at night, often after prolonged exercise, so it seemed logical to take some form of magnesium with me. TB had a mineral supplement that her son, a competitive tennis player, uses so we took that and added it to our water each day. I had a protein supplement that I also threw in, which enabled to me to keep hydrated as well as fuelled without having to snack constantly.

Both supplements worked really well – no cramps and good recovery each day.

#5 – HYDRATION PACK

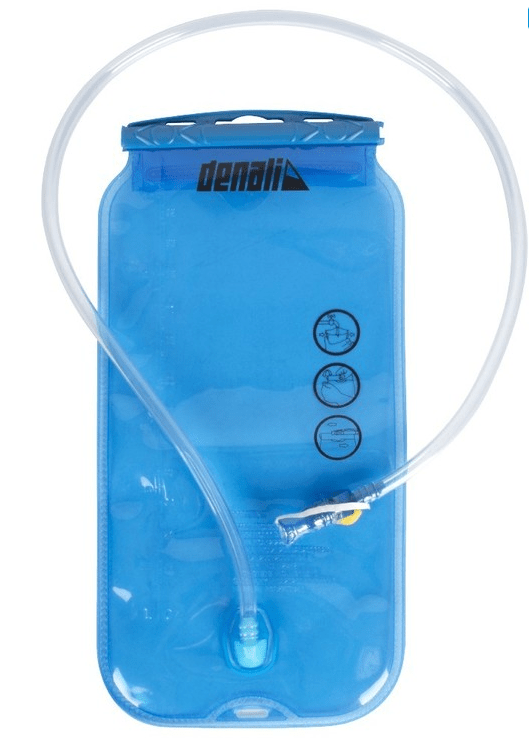
Speaking of water, rather than use a water bottle, I decided to use a hydration pack. I have a 3L one that I have used for long hikes like the Gold Coast Kokoda Challenge, and I like the style, easy to clean and easy to drink when moving. The tube sits across my shoulder so I don’t need to twist or take my backpack off to access water. It also means that I tend to drink more as it’s literally right in my face. Win/Win.

My 3L option, easy to clean and use.

#4 – WATERPROOF RAINCOAT

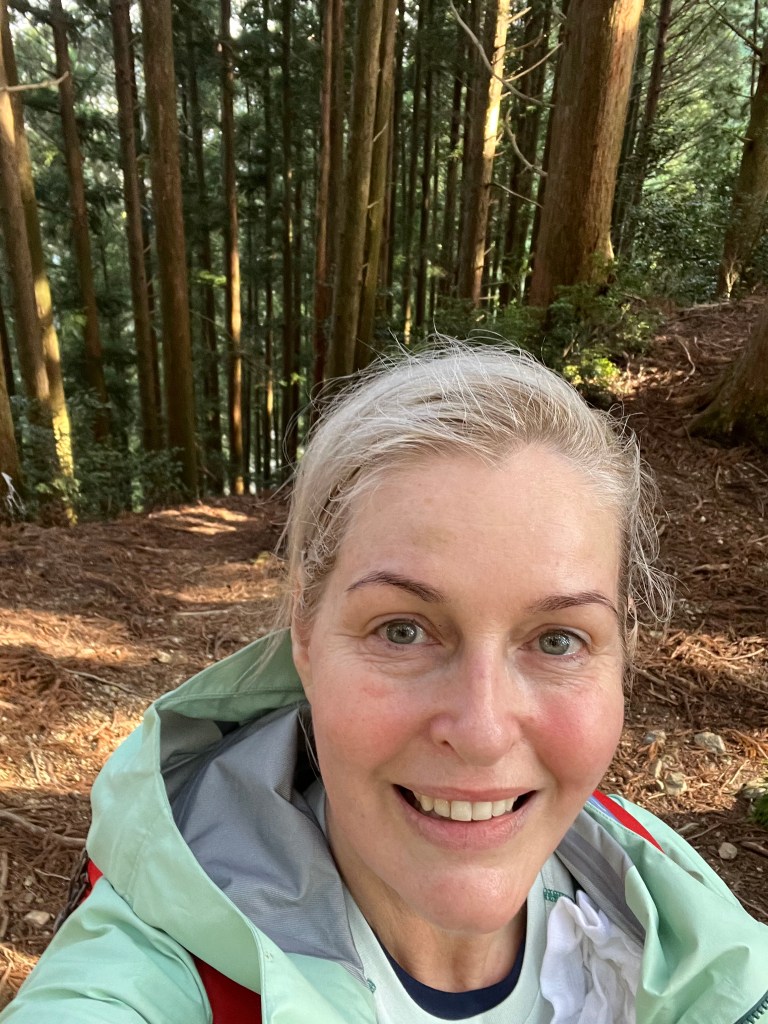
And I do mean waterproof! I spent a lot of time shopping around to find the best possible, highest quality waterproof raincoat in my budget, and finally settled on a Kathmandu Flinders waterproof/windproof/breathable hiking rain jacket. It set me back about $200AUD but the fabric is the equivalent of Gore-Tex so I knew it would stand up. And it did. I wore it every day for warmth and then when the heavens opened for three days I was dry and happy. Fantastic value and wouldn’t hike without it – who doesn’t love a mint green jacket?!

#3 – HIKING BOOTS

Not shoes. Boots.

Kumano Kodo is a thousand years old, but that doesn’t mean that it’s a smooth and flat hiking trail. Sections of it are particularly challenging due to the use of large numbers of stones for stairs and paths. It can be slippery and treacherous even without rain. Having decent ankle support made such a difference – I couldn’t even imagine hiking Kumano in a shoe – EEEEEK!

My preference was a Merrell waterproof boot, pictured on the right. Didn’t put a foot wrong (*boomtish*)

My hybrid trail shoes and the faithful hiking boots.

Thankfully there were no spills but there were quite a few near misses, I’m not the most graceful biped at the best of times so firm ankle support was a must.

#2 – HIKING POLES

Almost at #1! And yes, poles are right up there with hiking boots. I must have blessed my little hiking poles a thousand times along the Kumano, mainly for downhill support as we traversed some serious mountains. There are two options with downhill. Firstly, you can slip, trip and scoot down, either on your butt or trying not to be. Or, you can use hiking poles to steady and anchor yourself. I found they increased my speed and confidence, and when you’re trying to get off the trails before dusk, they are incredibly handy. I chose collapsible for travel reasons, but it also meant that when they weren’t in use, they simply slotted into my backpack. Simples.

#1 – GLOBAL ROAMING/INTERNATIONAL SIM

Bet you didn’t pick this as #1!!!!

Can I say we would have been lost (literally) without access to Google Maps, Google Translator and a million other apps and ‘things’. Free wifi was great in the ryokans of an evening, but that’s not when we needed to see the ‘things’. We accessed mobile data constantly when out and about. On the trail, at train stations, in the villages, in shops, in Osaka, in Tokyo – everywhere for everything.

Knowing you can look something up gives an immense peace of mind, and when you’re in a new country, not speaking the language and no real knowledge of where you are supposed to be – it’s very reassuring.

Hiking is all about maps and trails. Getting from point A to point B. Measuring distance and time. Tracking progress and achieving milestones. I loved the fact I could push the Strava button and in 8 hours, I could document my amazing achievement – but all in the background.

Invest in a daily roaming rate or snap up an international SIM deal. I paid $5 a day via Vodafone for my mobile data in Japan and it was money well spent.

So, there you have it.

My top 10 “must haves” when heading to Japan to walk the Kumano Kodo. I hope this helps as you plan, prepare, pack, pay and play!

Stay tuned for my next couple of blogs where I will Rate the Ryokans and Own the Onsens….. 🙂

See you next time out on the trails.

PJ.

HIKING THE KUMANO KODO #4

Hello and welcome to my LIKETHEHIKE blog.

I’m PJ and I write about the hikes I take, giving you insights, photos, commentary, tips and tools so you can enjoy hiking and embrace the experience.

DAY SIX & DAY SEVEN – KOGUCHI TO UKEGAWA, TAKIO TO TOTSUKAWA

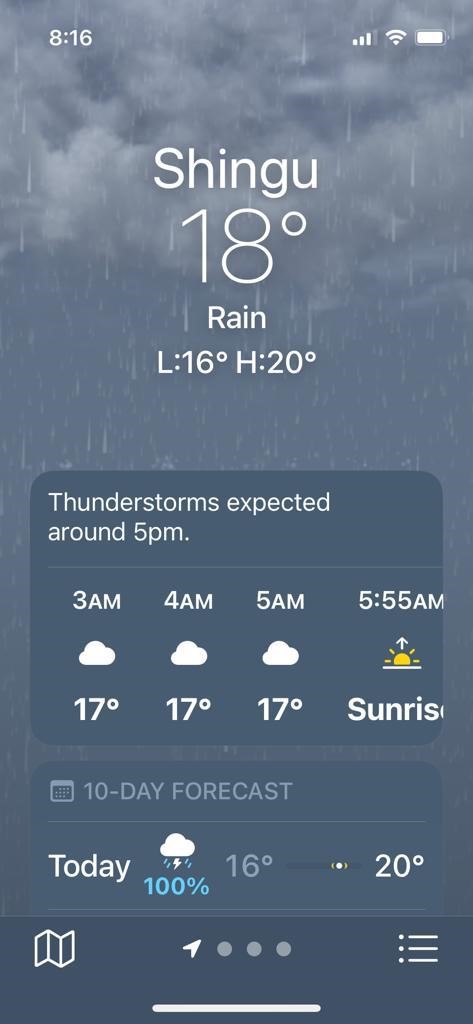
After three days on the trails and a rest day, we were ready for our next adventure. However, the rain gods had other ideas. Overnight the heavens opened and we woke to this.

Not the best forecast for forest hiking

It was forecast to rain for 24-36 hours solid. And it wasn’t a drizzle here or there, it was rain with regular thunderstorms just to spice it up.

TB and I did a hike maybe three years ago in the Gold Coast hinterland called the Warrie Circuit. It’s a 14km loop – 7km down into the forest floor, past some majestic waterfalls and then 7km back up. Usually it’s a lovely hike. Except if its raining. Then it becomes 8 hours of unpleasant, gluggy, muddy hot mess. The enjoyment of the hike disappeared as the day became an injury prevention exercise…

So, hiking the Koguchi to Ukegawa leg in steady rain on an unknown trail, steep terrain and slippery stones didn’t appeal to either of us.

Challenging even on a good day

TIP – KNOW YOUR LIMITS

Everyone has a fair idea of what their body and mind can do on a hike. Pushing beyond those limits can be done when you’re in a safe space and for a short period, however, everyone has a tip point where they feel unsafe or out of control. Knowing when to stop, or not start at all isn’t failing, it’s understanding what you can safely achieve and importantly, what you can enjoy. I prefer to live to fight another day than take unnecessary risks and make life miserable.

Day six turned into a tourist day in Shingu and Kii-Katsuura, ducking the rain and exploring. PS – I was very happy with the waterproof performance of my Kathmandu rain jacket 🙂

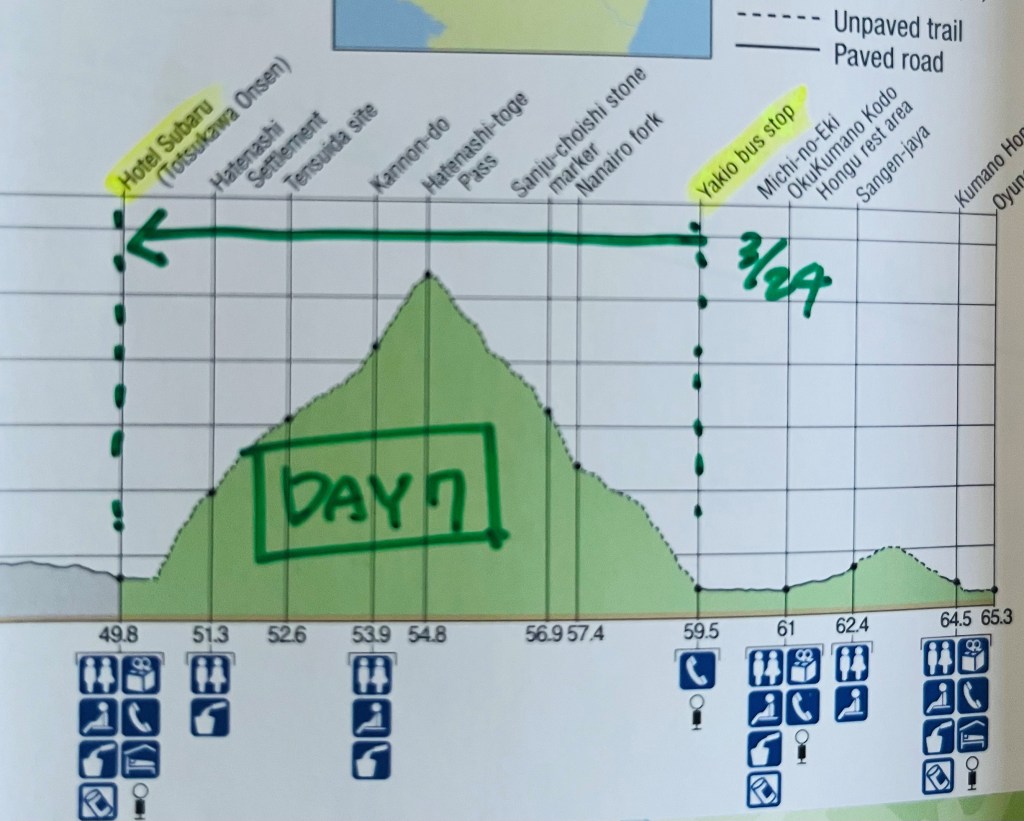
Day seven we awoke to pretty much the same conditions as the day before – rain. It was supposed to clear late morning, but that meant we would need to start on the Yakio to Totsugawa leg in the train and after 36 hours worth of rain had fallen on the trail. The terrain map told quite a scary story……

ummmmm…

So, rather than tackle the above, we decided to hike the Hongu to Fushiogami-oji trail up and back. Less risky but still meaningful. Life is nothing without compromise.

A good outing for a half day.

Kumano Hongu Taisha to Fushiogami-oji and back

As we discovered, tourists take a bus up from Hongu to the shrine at Hosshinmon and then walk back down the mountainside, about 7km. This meant as we walked up, we encountered a number of tourists wandering back down. We got some odd looks, I’m guessing we were the only ones heading up the hill, and the only ones in hiking gear. Good news – the rain had stopped and the skies cleared pretty quickly to a nice day.

We started the hike by climbing the stairs up to the Hongu shrine precinct. I didn’t do a count, but it was a good way to loosen up leg muscles.

The long stone staircase leading to the shrine. Funnily, you keep to the right…not left.

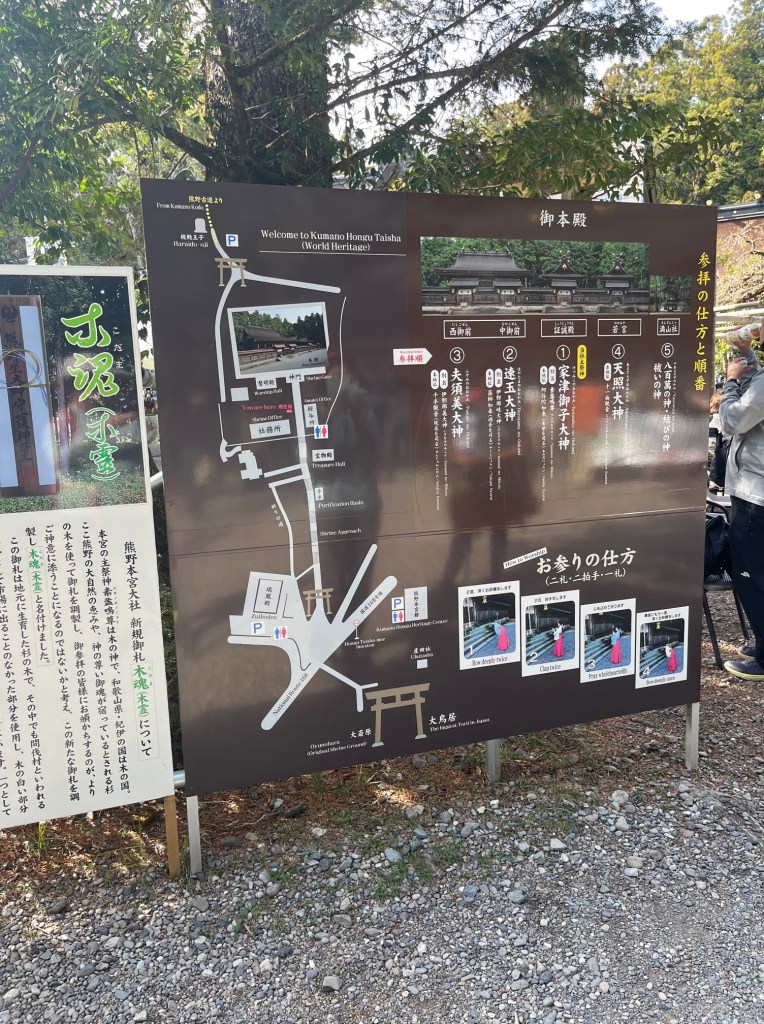
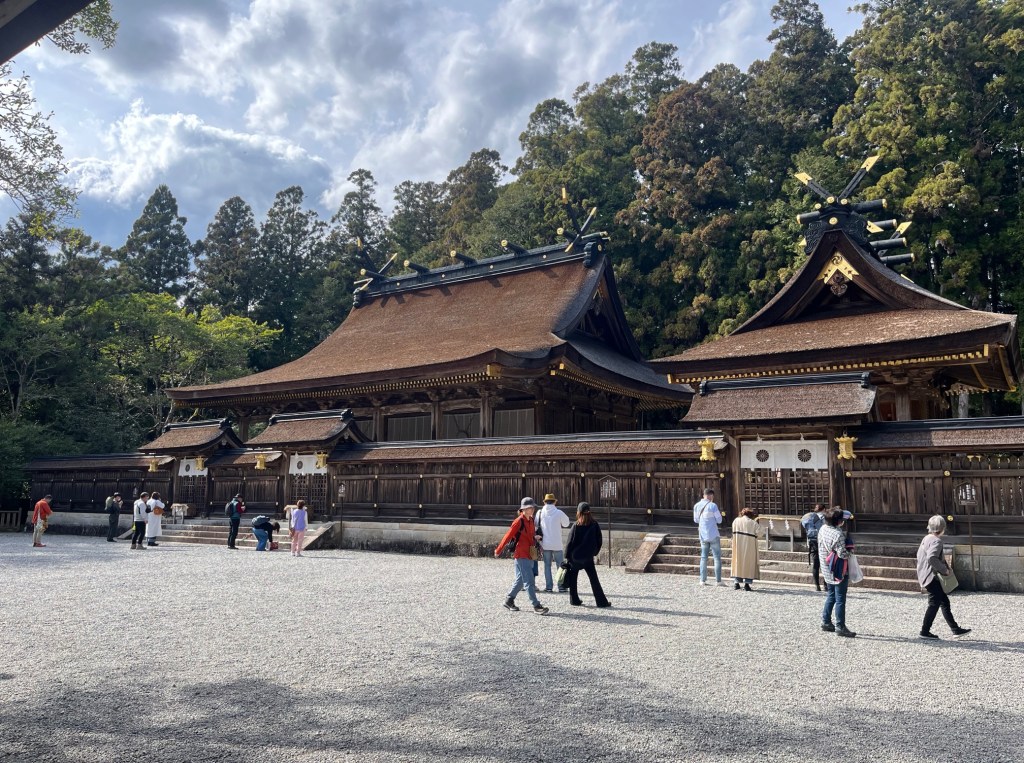
The grounds of the shrine precinct remind me of a bustling little village, with something always happening. There are shops, pilgrims, tour groups, a working post box and then the three main shrine areas. TB and I actually got to pray at the shrine, I was terrified I would get the order of “clap and bow” wrong – but it all worked out OK. Whew.

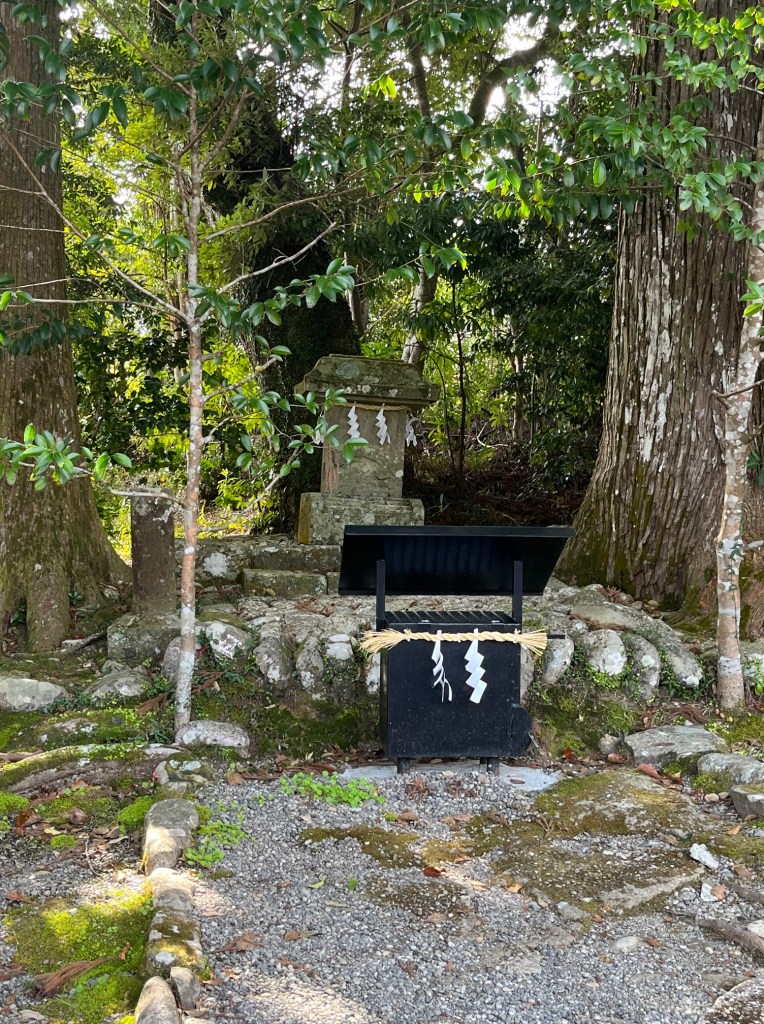
The trail picks up on the street at the ‘back’ of the shrine precinct. It’s easy to find, just walk ‘upstream’ through the tourists! A stone staircase takes you up to the start of the forest, past a lovely little shrine and a small, peaceful cemetery with beautiful traditional headstones.

The rain had stopped, but the trail heading up the mountain was still pretty soggy with the wide steps forming little swimming pools. Not sure how the tourists in sneakers were managing coming down, I’m guessing there were some wet feet!

About 1.5km up the trail, there was a loop deviation up to a viewing area where we decided to have a coffee. It gave us a majestic view of the Oyunohara O-torii, the largest torii shrine gate in the world at 34m tall and 42m wide. We had seen it up close earlier in the week – pretty impressive.

TB and I had a bit of fun on the hike taking lots of photos. We passed a rest pavilion adjacent to the Sangen-jaya Teahouse Remains and crossed a cute bridge to get over the road. So many things to look at – and we got to see them going up and coming back down!

We arrived at our destination around 1pm, and we had our bento box from our ryokan so it seemed only logical to sit, look at the view and eat.

The teahouse was shut so no ‘forest juice’ to be purchased, but we could still sit and relax. The seating area overlooked a small tea plantation, and it was during lunch that we noticed that the bushes were ‘moving’, as if there was a wind blowing, but it was a still day.

It was then that we saw them. MONKEYS!!!!!!!!!!!!!!!!!!!!

About the size of a golden retriever, and brown in colour. Once you saw one, you started to see them everywhere. There was a troop of about 30 monkeys in the plantation and in the surrounding trees. What a treat!

After a very entertaining lunch break, we retraced our steps back down the mountain to Hongu.

It certainly wasn’t a long hike compared to what we had achieved overall on Kumano Kodo, but it certainly was an enjoyable one. There and back was about 10km and well worth it.

This was our last hike on the Kumano, as we were heading further into the mountains to stay at Koyasan and explore for a couple of days, and then back to Tokyo and Australia.

MY THOUGHTS ON KUMANO KODO

Taking time out from my life to hike in a forest wasn’t a lifelong goal, but as you get older, priorities shift and hiking in Japan became something that TB and I wanted to do together.

With families and jobs, going away for 10 days would be a challenge, and there is never a good time – but we found a slot that worked and went for it. And I’m so pleased we did.

Look at what we hiked…AMAZING!! All of this!!!

This experience was one in a million. It allowed me to relax and breathe. It allowed me to think just of myself and my needs. It allowed me to smile and laugh. A lot. It allowed me to embrace physical challenges and see what I could really do. It allowed me to dip into a different culture and experience some amazing hospitality.

And finally, after over 30 years it allowed me to travel and holiday with my sister. For the first time.

Pretty special huh… 🙂

PJ and TB – boots on and ready for an adventure!

I got to walk along paths that are over one thousand years old, through remote villages that housed people six hundred years ago. I got to touch shrines that have been touched by generations and generations of pilgrims. I got to smell the forests, feel the rain and see some amazing things.

I returned home refreshed and energised, looking forward to my next hiking adventure. What better accolade could there be than wanting to do it all again ?!

Thanks Kumano Kodo for an incredible experience.

See you out on the trails.

PJ

HIKING THE KUMANO KODO #3

Hello and welcome to my LIKETHEHIKE blog.

I’m PJ and I write about the hikes I take, giving you insights, photos, commentary, tips and tools so you can enjoy hiking and embrace the experience.

TB and I are back – day three of hiking Kumano….and it’s still bloody FANTASTIC!

DAY THREE – KUMANO NACHI TAISHA TO KOGUCHI

After a non-hiking day exploring Shingu and the seaside town of Kii-Katsuura, TB and I were ready to hit the trails. Today was going to be a challenging day – hiking Ogumotori-goe in reverse.

More ups and downs than a rollercoaster!

FIRST LEG – KII-KATSUURA TO KUMANO NACHI-TAISHA

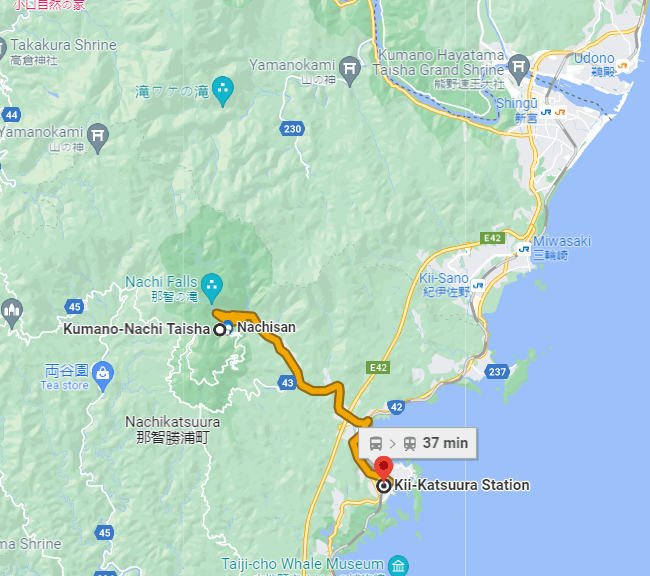
However, before we got onto the trail, we needed to get from Kii-Katsuura on the coast, up to Kumano Nachi Taisha. Our travel company advised that there was no accommodation at Nachi, so we stayed down in Kii-Katsuura which was amazing – except for the timing when we left on day five or our trip.

Breakfast didn’t commence until 7.30am (and we needed brekkie!), and we also had to buy some lunch in town, and then catch the 8.25 bus. This got us to Nachisan around 9am.

The bus trip was quite spectacular. We followed Nachi River up into the foothills, wound our way up to and past the famous Seigantoji pagoda and the Nachi no Taki waterfall.

We jumped off the bus at Nachisan, and it was at this point we got a little confused. We walked back down through the village to have a look at the shrine and torii – and peeked at the waterfall – but really struggled to find the start of the trail. Up the hill there were a number of buildings and shrines and we could see that the trail started somewhere there, but DO YOU THINK WE COULD FIND IT???!

It was like playing Where’s Wally…..

Time was ticking and I was getting nervous about actually getting started. We had 15km to hike and the terrain looked quite challenging. There weren’t any other hikers around (we were doing the section in reverse) so there wasn’t a stream of people to follow.

Via a process of elimination and toilet spotting, TB and I FINALLY found the stone staircase trailhead adjacent to the second building, right at the top around 10am. We were off! Albeit late, but we were determined to make it work.

SECOND LEG – KUMANO NACHI TAISHA TO FUNAMI-JAYA TEAHOUSE REMAINS

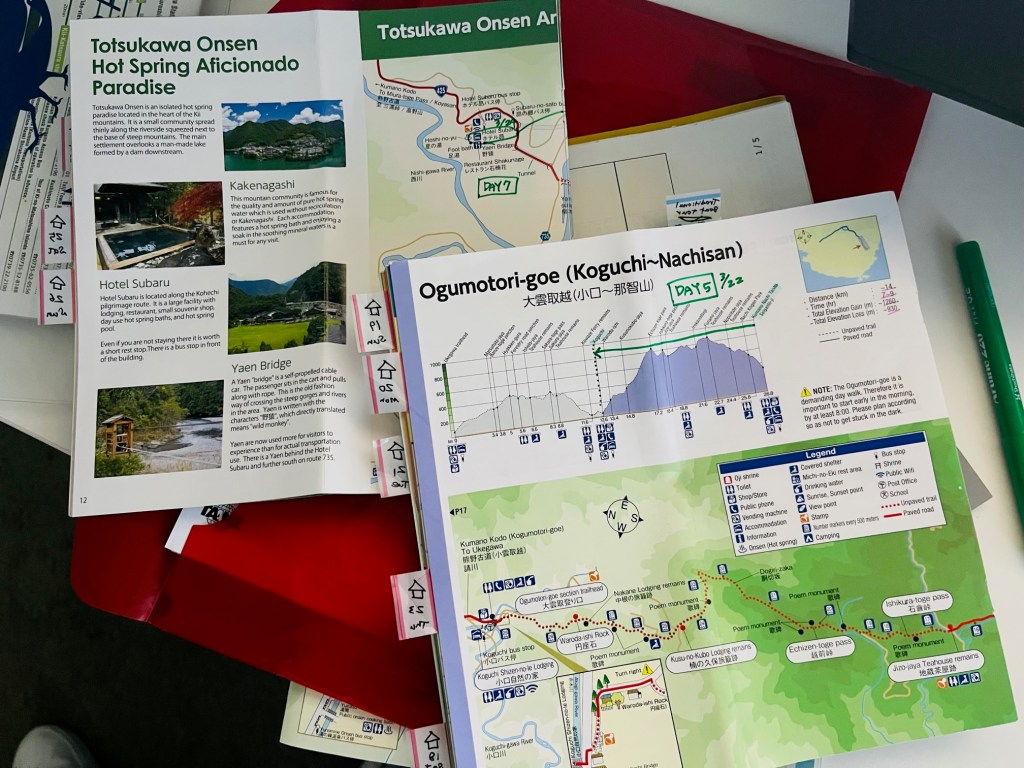
We knew from the outset that this would be a challenging hike – but one we were looking forward to. Ogumotori-goe is described by the Tanabe Tourism Bureau as “one of the toughest sections of the Nakahechi Route…a climb and descent over three passes and is mostly in forested mountains”. The total elevation gain is 1,260m and loss is 930m so lots of ups and downs.

Admittedly, hiking north from Nachisan to Koguchi would appear to be the more strategic choice given the terrain (no flies on me!) but it’s still a decent cardio commitment.

The first 2km took us through the start of the trail – and up some beautiful stone stairs which seemed to stretch forever. It was a good opportunity to engage my ‘mindful hiking’ mode, and put the drama of our late start behind me.

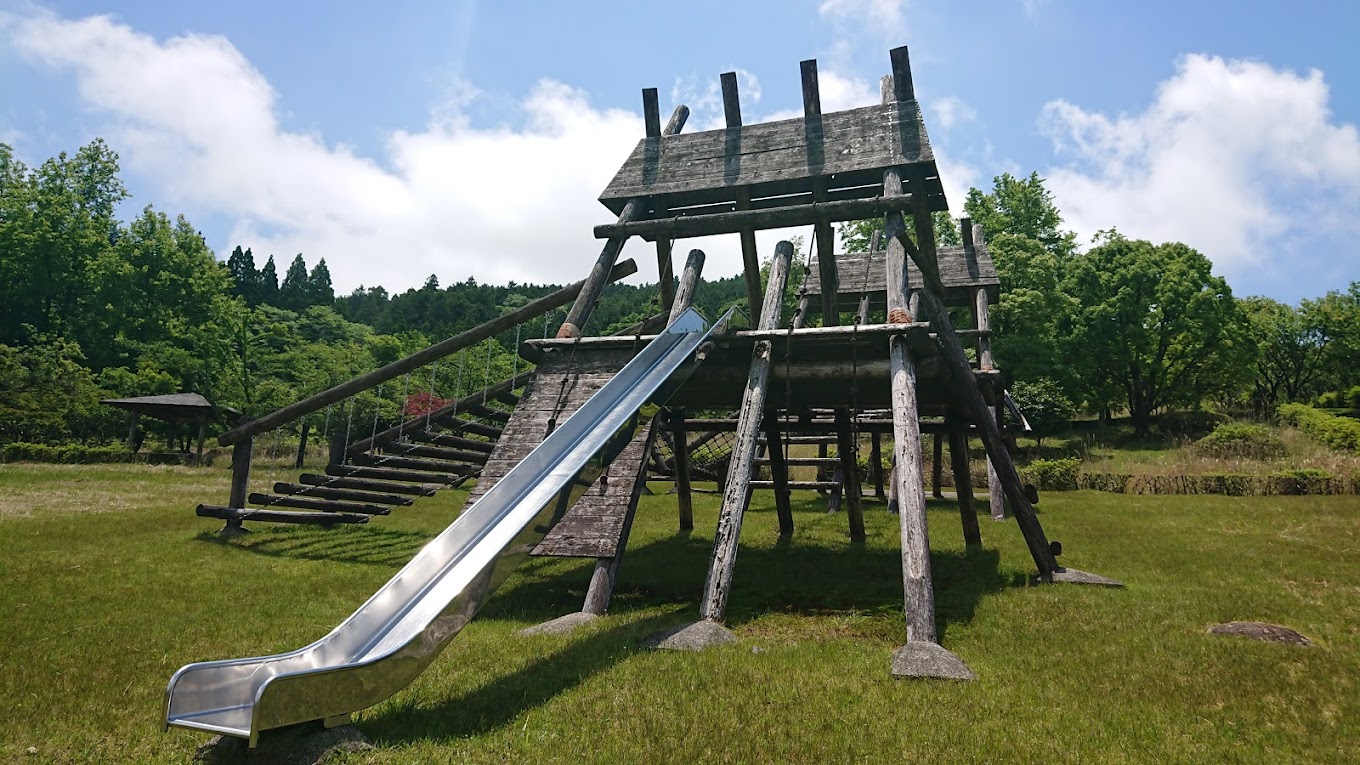
About a km along the trail we entered Nachi Kogen Park – which was a bit of a surprise. It’s an outdoor family adventure park with slides, climbing equipment and other outdoorsy entertainment, and the Kumano trail went up and through it…

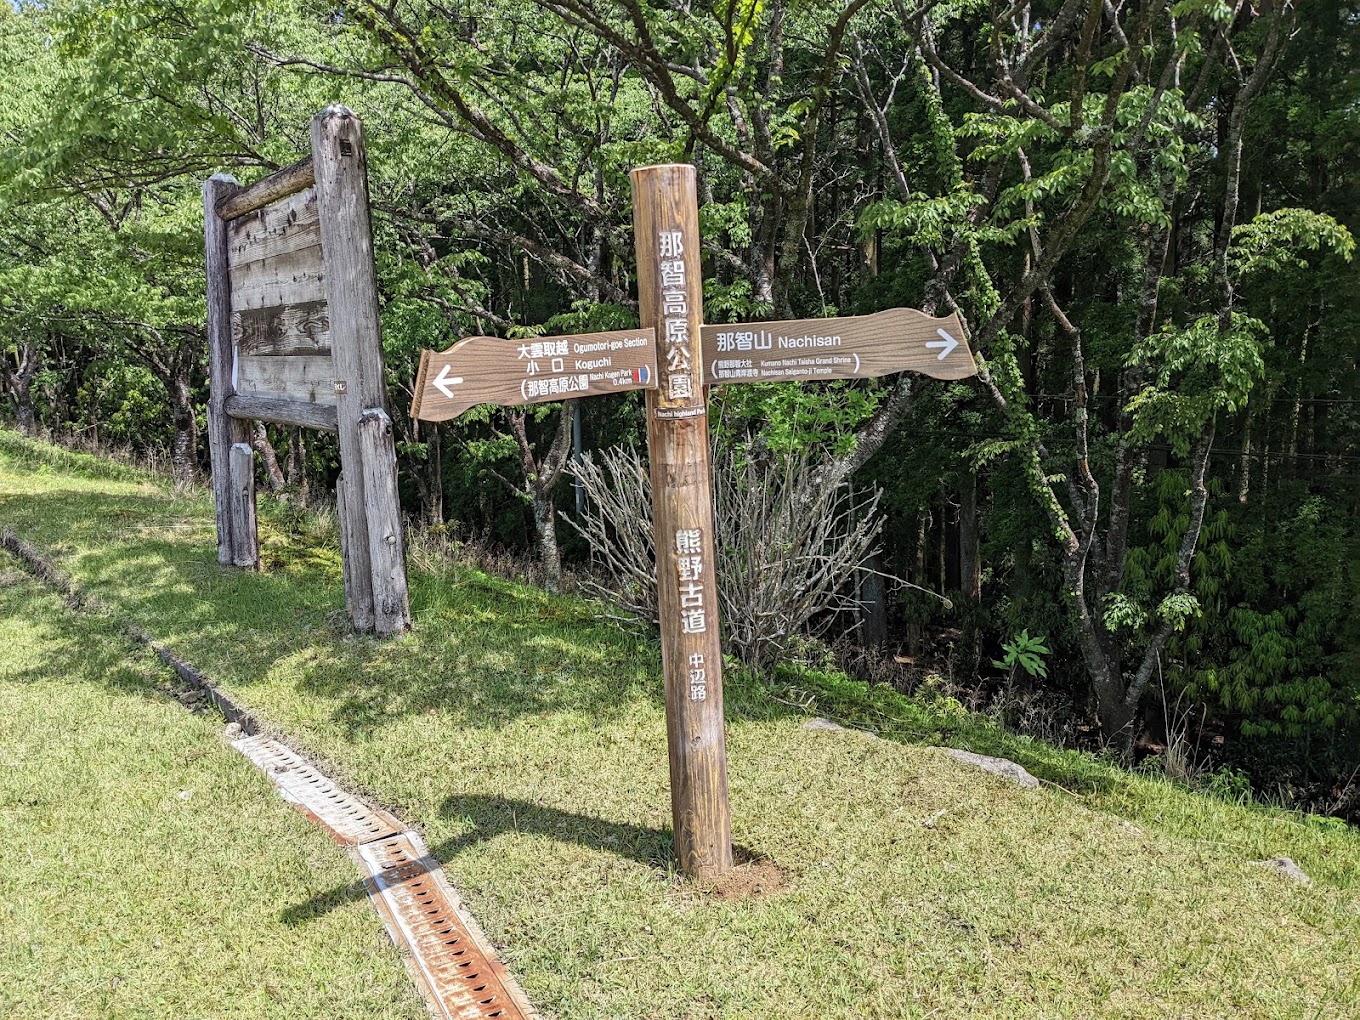
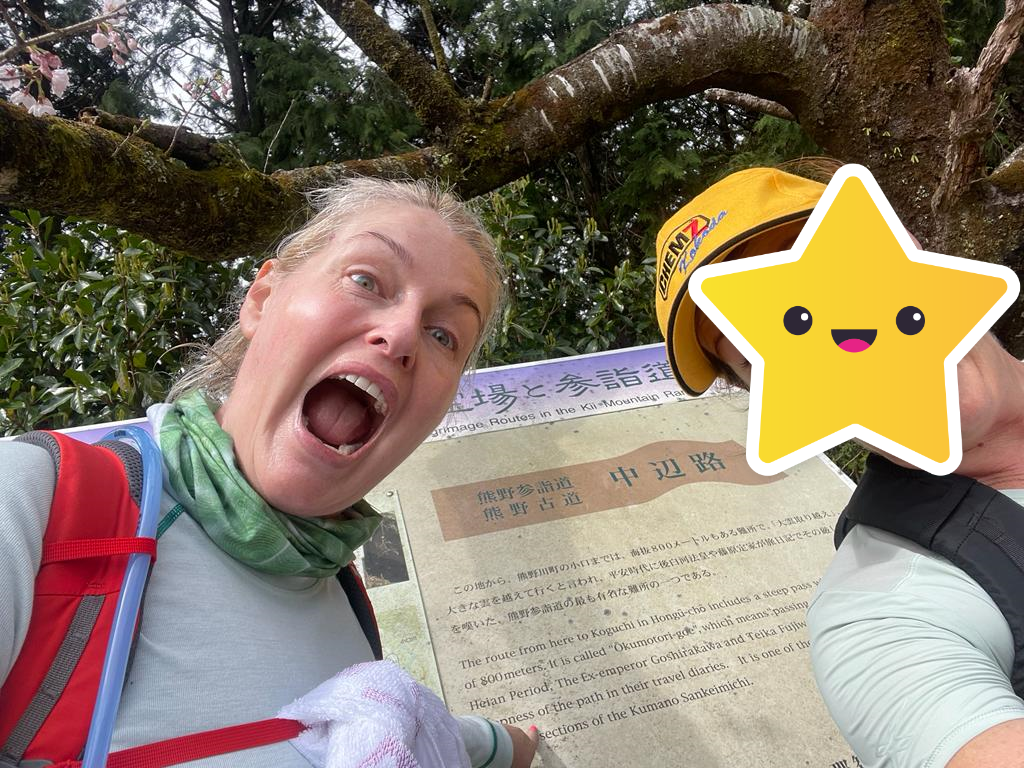
We followed the signs and kept walking up and through the park, which was completely deserted. At the crest of the hill was an access road, and on the other side, the trail running into the forest. It was here that we encountered ‘the sign’. Even the emperors from centuries ago recorded the steepness and challenge of the three passes which make up the Ogumotori-goe…!

our collective horror at the warning sign!

And then the climb began. I settled into a slow but steady uphill rhythm which proved to be handy as the sections weren’t ultra-steep, but they just kept going. The trails still had morning dampness on them, so quite pleased were were going uphill, not down. Our signage was a little different also, gone were the brown wood posts, we now had stone markers.

After about 90 minutes we arrived at our first stop – Funami-toge Pass, where the teahouse remains were. We figured this would be a good place to have a 15 minute break, drink some coffee and regroup after a hectic and delayed start to the day. And we weren’t wrong – check out the view all the way our to the Pacific Ocean!

As with the previous days, we had the trail completely to ourselves….and hadn’t bumped into any other hikers so far. This allowed us to really embrace the trail experience and soak up all that the Kumano Kodo had to offer.

THIRD LEG – FUNAMI-JAYA TEAHOUSE REMAINS TO JIZO-JAYA TEAHOUSE REMAINS

Feeling well fortified after hot coffee and some lovely snacks, courtesy of a Katsuura supermarket spree, TB and I departed Funami-jaya. We had climbed over 500m in the last 4km so quite an energetic hike so far.

As we hiked deeper into the forest, the temperature dropped, not significantly but still noticeable. The forest canopy was high, but thick and kept the light at bay, so it felt like we were traversing an alternate universe as honoured guests. Every second step we found new things to marvel at – and of course I kept forgetting to take photos – but did take some…

This leg kept us quite high on the pass, and it was about midday when we passed our first hikers heading in the other direction. I was keen to find out what time they set off, and to assuage my fears that we were in trouble time wise! I chatted with a couple of them, and they had covered off their section in about 4-5 hours, so that was good news for us. We hoped to be off the trail by dusk.

We emerged from the forest and onto an asphalt access road which promised to take us down to our lunch destination, the Jizo-jaya Teahouse. We encountered another ‘elastic’ distance marker which showed the teahouse was 1.5km down the road. It took us 45 minutes at a fast trot to get there….which means it was more like 3-4km!

Lunchtime – yay!

The teahouse shelter was a great location by the river and had two completely full vending machines with all manner of drinks, hot and cold. The toilets were lovely and clean, our lunch was oishii – what more do you need on a hike 🙂

FOURTH LEG – JIZO-JAYA TEAHOUSE TO KOGUCHI

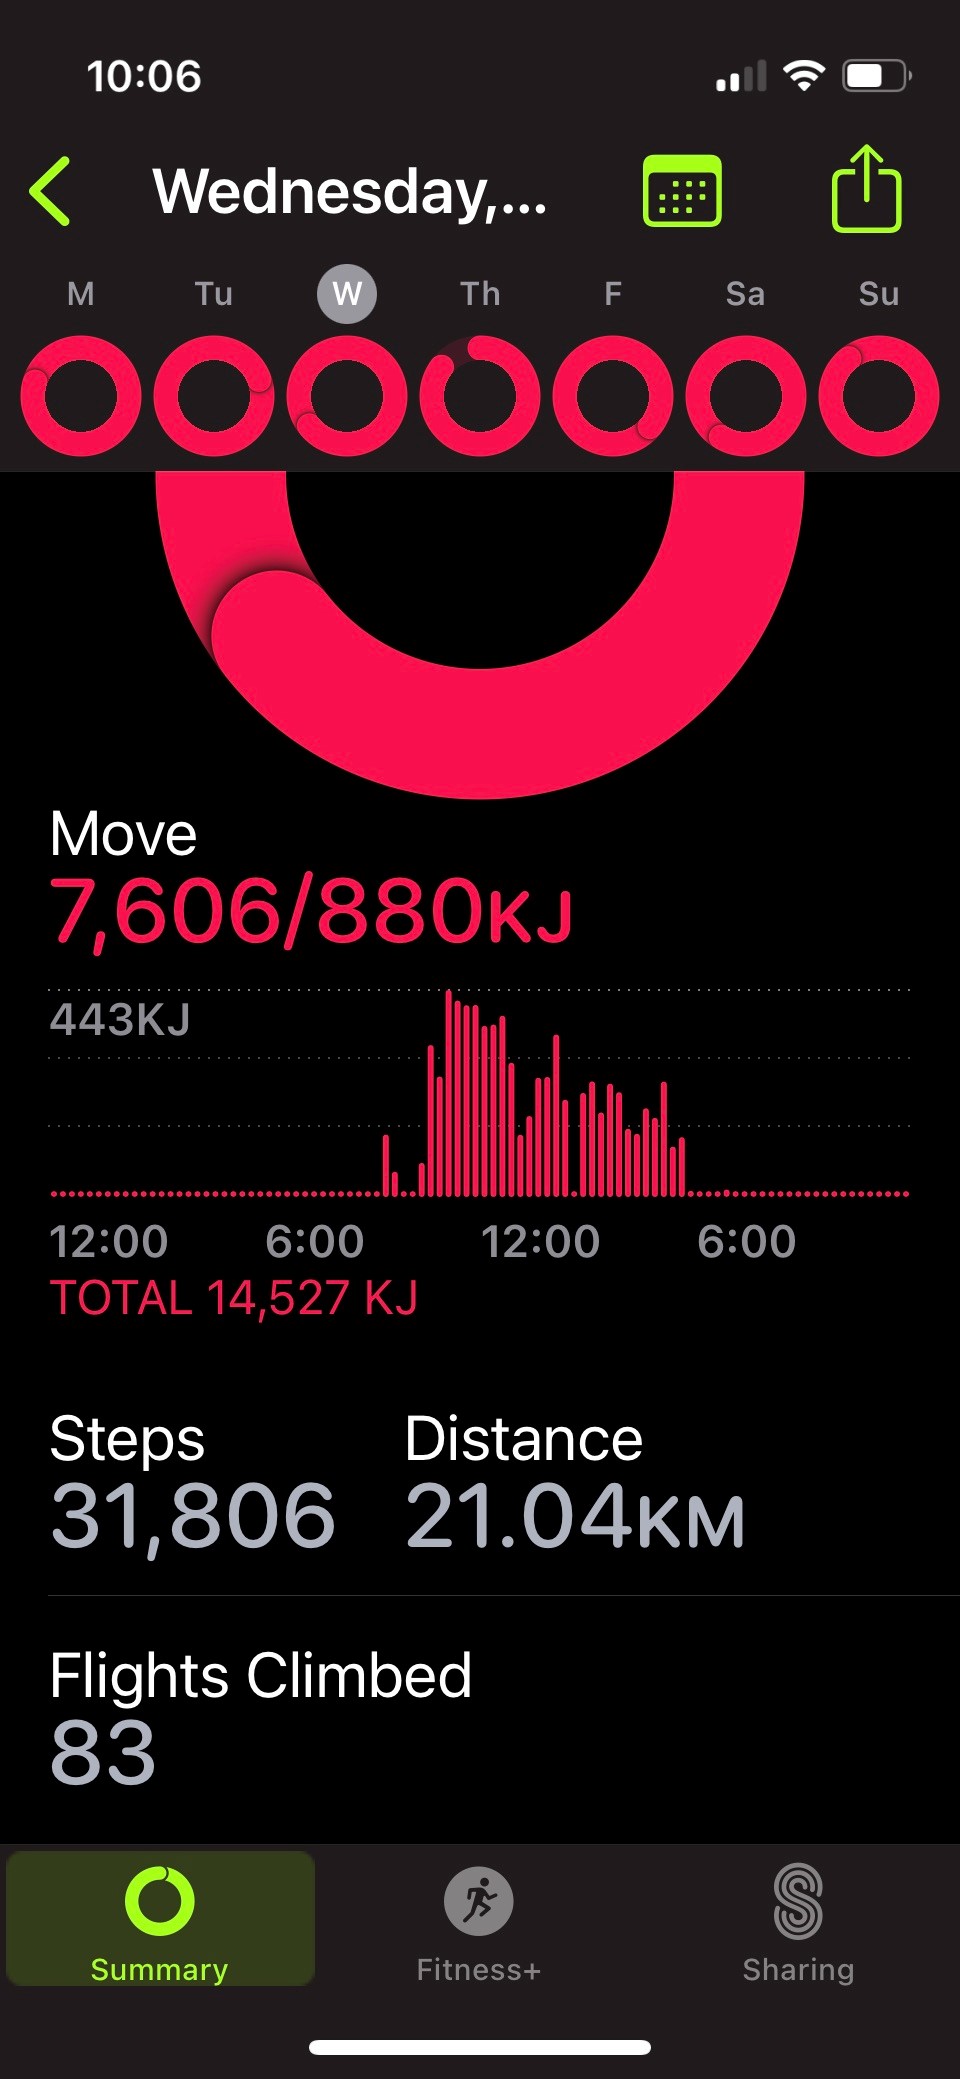
The final push – only 6.2km according to the map. I had my doubts as AppleFit and Strava seem to tell a different tale (as did my legs!) but the distance was actually immaterial – were were HIKING THE KUMANO KODO!!!

Once we left the teahouse it was upward again – but a short sharp incline. The area looked like a slip had ripped through, it was a bit desolate and had been reinforced.

It was here we passed our last hiker of the day, a lovely young Slovakian person who made the trail look like a stroll through a dog park! We chatted for a bit and discovered she was supremely confident she would be in Nachisan in a couple of hours. I sincerely hope she was correct 😮

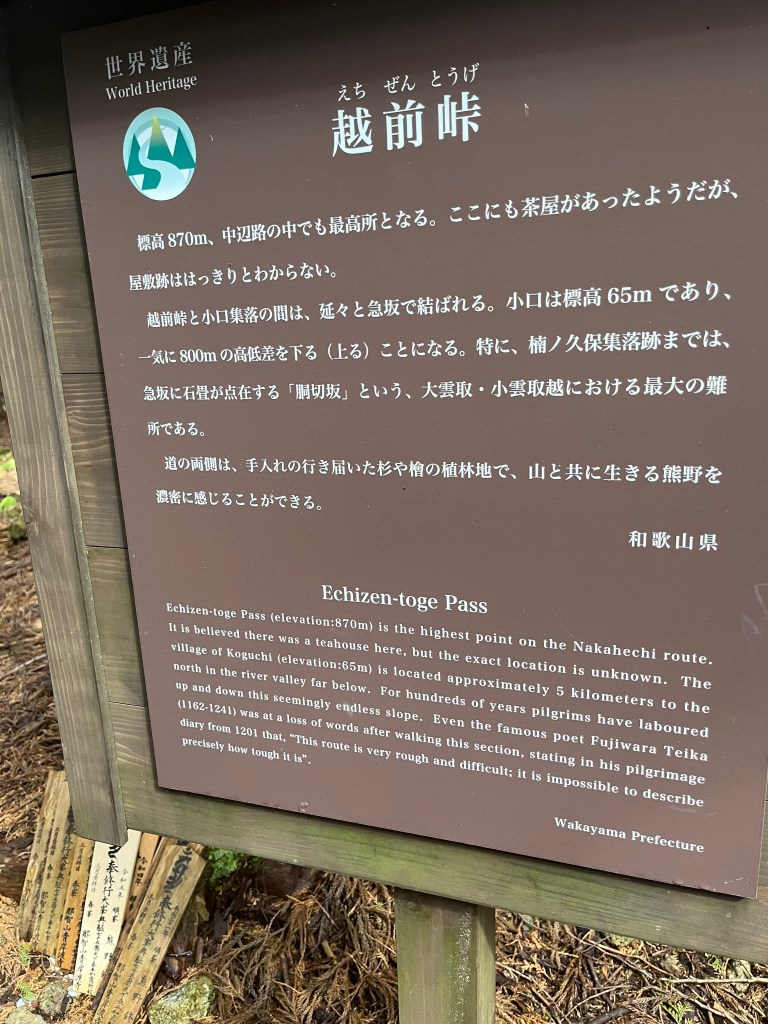
Another hour brought us to the highest point for the day – Echizen-toge Pass.

A famous 10th century poet was at a loss for words after walking this section “this route is very rough and difficult; it is impossible to describe precisely how tough it is”

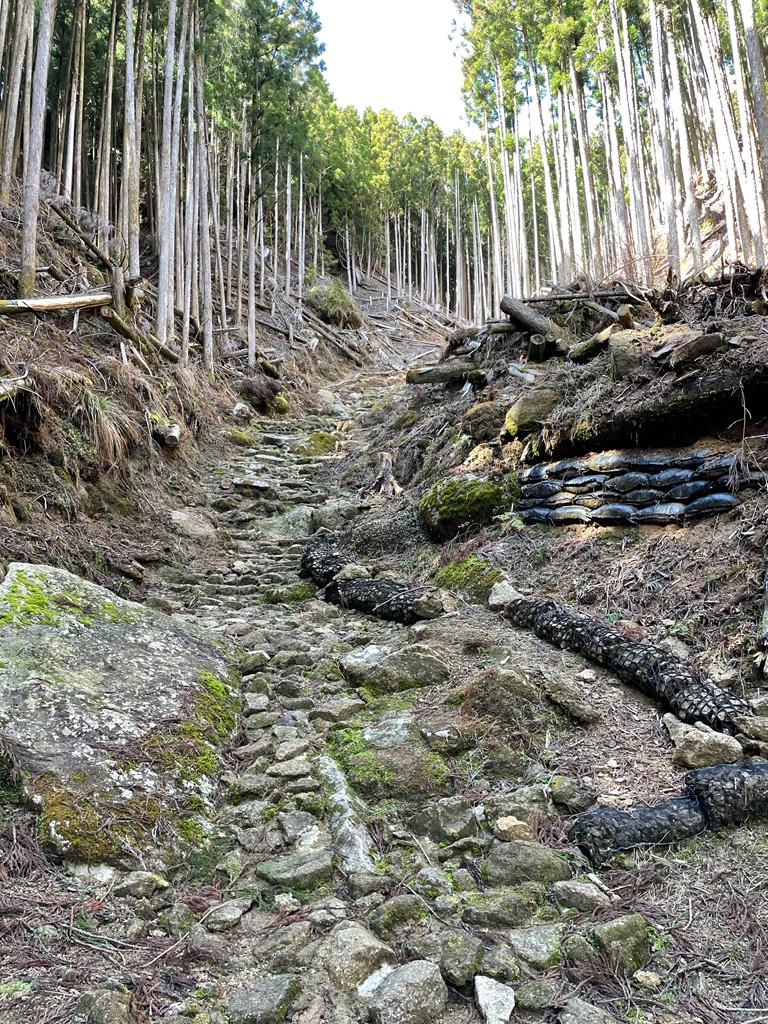
From here it was downhill all the way. The section is known as ‘dogiri-zaka’ which can roughly be translated as ‘body breaking slope‘. Working on the premise you’re coming up the hill. Which, thankfully, we weren’t.

The next couple of hours can only be described as a mad scramble descent. Our deadline of 4.30pm was forefront in our minds and as we descended, the light was slowly becoming dimmer.

downward forever…

I was supremely grateful for two things – sturdy hiking boots and walking poles.

These two items meant we could power down the stone stairs, paths and trails with accuracy and support. We passed some incredible ryokan ruins at Kusuonkubo-jaya and from there, the steep slope became less treacherous and more gentle.

The history and grace that resides in the Kumano Kodo is quite simply – awe inspiring. Around every corner is another historical delight to enjoy. I didn’t get my own photos of everything, but above are two images from the Tourist Centre – see what I mean?!

DESTINATION – KOGUCHI

After the final two km dropping gently down into the valley, we popped out into Koguchi – but not before clambering down the final set of perilous moss covered stone stairs! With aching legs, I do believe this was the most dangerous part of the day 🙂

Our instructions were to phone our accommodation providers (Takata Green Land) for a pickup when we arrived and wait outside the Minakata grocery store. Very specific. I’m good at following instructions, so we duly phoned and our pickup was booked for 30 mins time.

Happily the store was open, so a refreshing beverage was in order. We sat outside the store and can I tell you, it was the best beer I’VE EVER HAD… and TB advised that it was the best sake she had tasted that day (ha!)

I can’t help myself – here are the distance comparisions:

Paper map = 14.2km

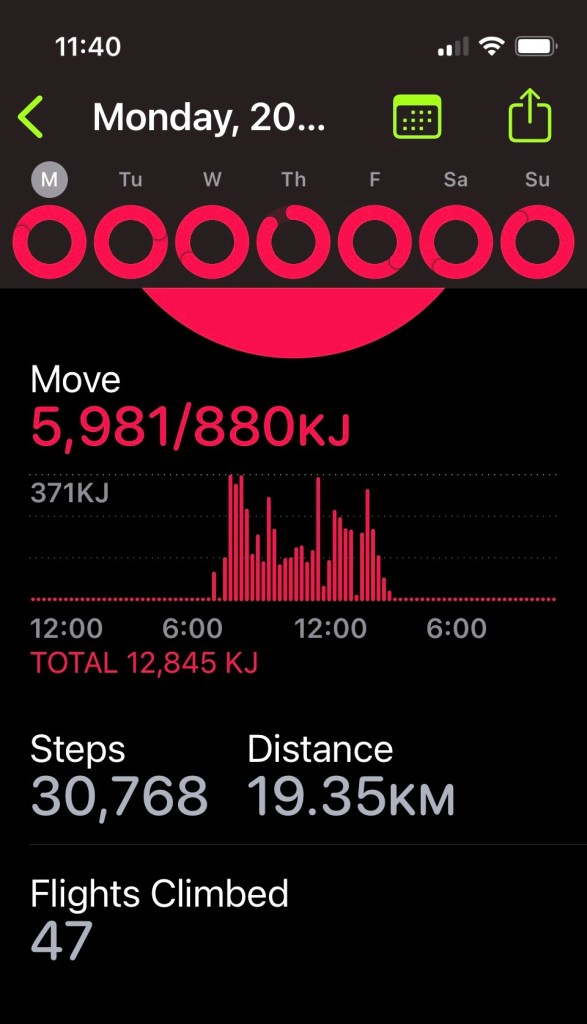
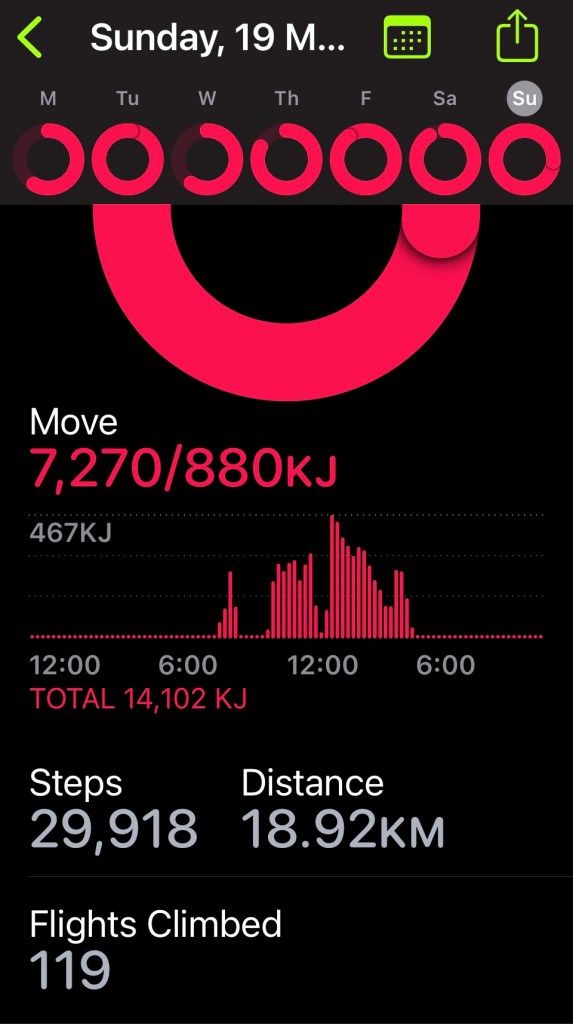
AppleFit = 21.04km

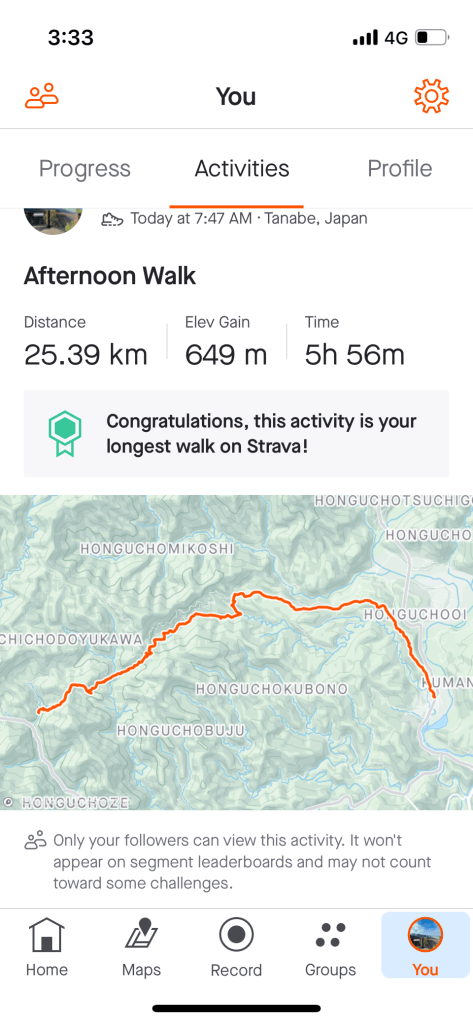
Strava = 29.1km

hmmm.

OUR ACCOMMODATION – TAKATA GREEN LAND

Our shuttle arrived, and 20 minutes later we were at Takata Green Land, aka Kumotori Onsen, a “low key hot spring inn”.

The best way to describe the accommodation was compliments of TB – it was “Hi-De-Hi during off season”. For those of you not in the know, Hi-De-Hi was an English sitcom set in the 1960’s when families went to holiday camps complete with dining halls, communal loos, and kitsch everything – all in perpetual rain. Everything appeared a little grubby, and the dining room was in use as a very large storage cupboard. Our tatami room was a bit battered and didn’t’ have any toilet facilities, they were communal in the hall. There were hardly any guests around – only three of us for dinner and breakfast, so I’m assuming it really was off season.

The onsen was lovely though – we wallowed outside in the hot pool in the misty rain, very warm and relaxing for tired muscles. Ditto the food, it was plentiful, tasty and did the trick.

Day three of hiking the Kumano was done and dusted. We were happy, health and injury free – what a great way to finish a great day.

Stay tuned for our final day on the Kumano, as well as some blogs on ryokans, onsens and other Japanese adventures – yippee!!

Thanks for tagging along – see you out on the trails.

PJ 🙂

HIKING THE KUMANO KODO #2

Hello and welcome to my LIKETHEHIKE blog.

I’m PJ and I write about the hikes I take, giving you insights, photos, commentary, tips and tools so you can enjoy hiking and embrace the experience.

It’s day two of our hiking adventure on Kumano Kodo, and when we last chatted, we had completed our first epic day on the trails!

DAY TWO – CHIKATSUYU TO HONGU TAISHA GRAND SHRINE

TB and I set off from our wonderful ryokan accommodation in Chikatsuyu at around 7am. It was a chilly morning, maybe around 5 degrees but the sun was shining and all was well with the world. I was slightly stiff in my legs, but not sore and certainly not impeded after a great night’s sleep.

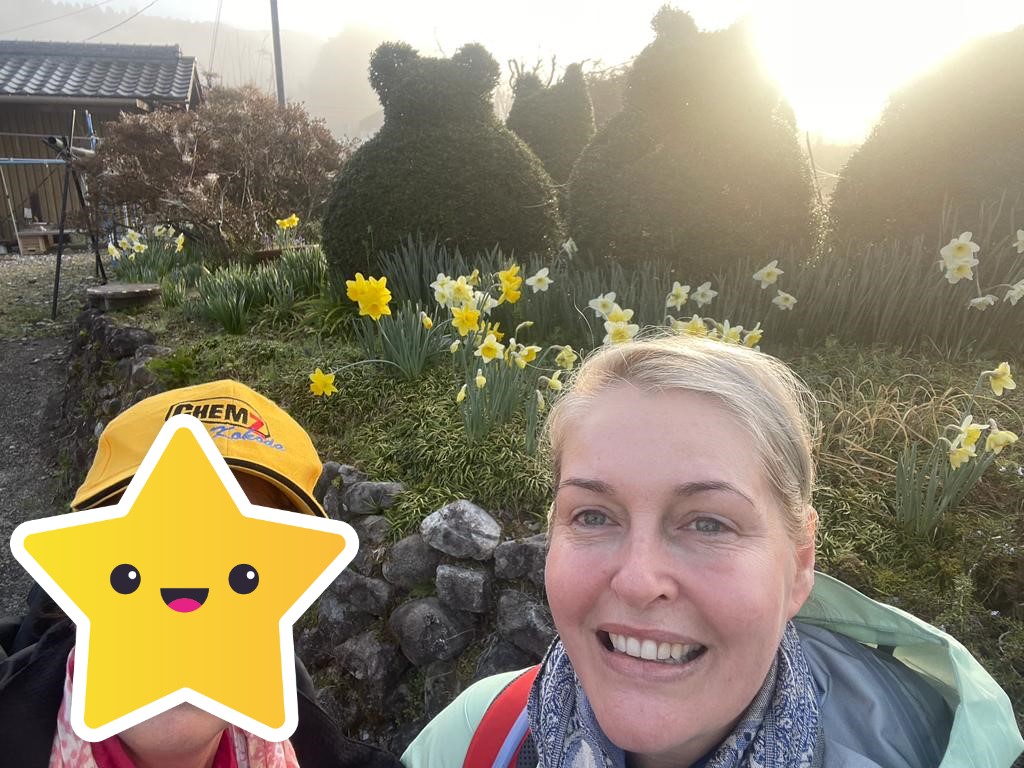
Adjacent to the ryokan we found a green thumbed local who had created a series of topiary bushes – of pandas!! Or perhaps Asiatic black bears…? Very cute.

This is as close as you want to be to a black bear!

FIRST LEG – CHIKATSUYU TO KOBIRO-OJI

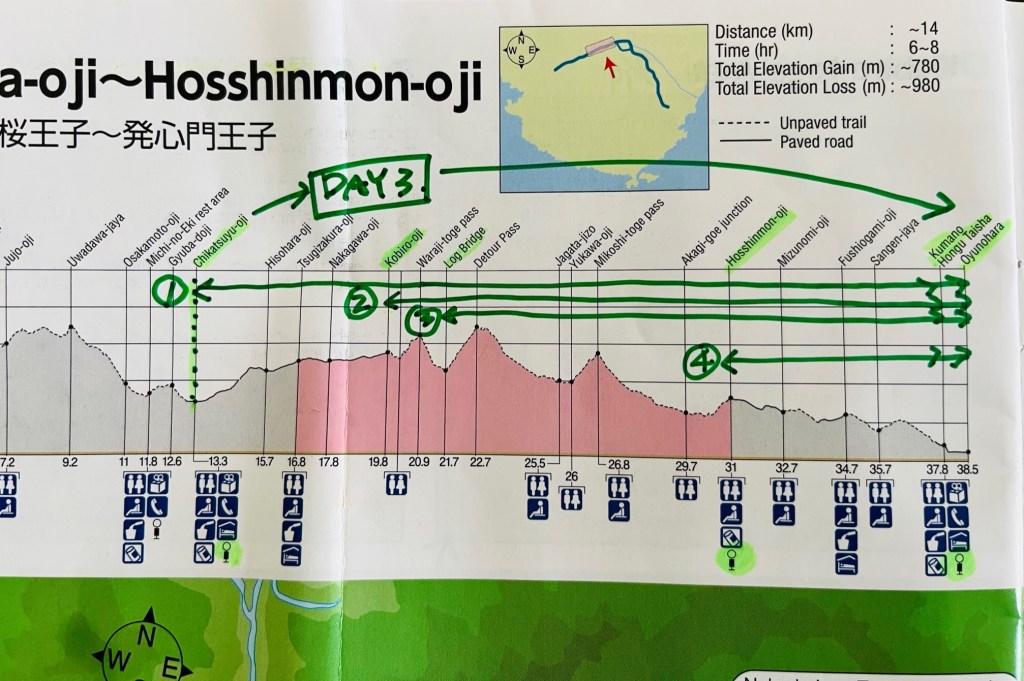
So, first things first. Here’s the map for our second day hiking. Ignore the day 3 notation, that’s day 3 of our total trip including travel days. And ignore the pink bit, were were scheduled to hike from the green dotted line ALL THE WAY TO THE END OF THE MAP.

That’s a lot of ups and downs…

TB and I spent some time the previous evening going over the plans for today, specifically our timings. After the first day we were conscious of the need to be off the trail by 4.30pm at the latest. We decided that 25km through challenging terrain was a bit of a stretch for one day, even with an early start.

Our ryokan hosts were very obliging with bus information, and they said we could take a local bus from the end of the street to Kobiro-Oji, departing around 7.10am. This would trim off about 8km and make the day a workable 18km. Also, if you look closely, the first section from Chikatsuyu to Kobiro was on a paved surface, so not in the forests.

So, we caught the bus and lived to fight another day 🙂

SECOND LEG – KOBIRO-OJI TO MIKOSHI-TOGE PASS

The bus trip to Kobiro was pretty quick, around 20 minutes. We were sorted – poles out and ready to walk before 8am. We had our lunch on board (chicken sandwiches) and off we went. It was a gentle downhill gradient to start with, which gave leg muscles time to warm up, then it was up the mountain.

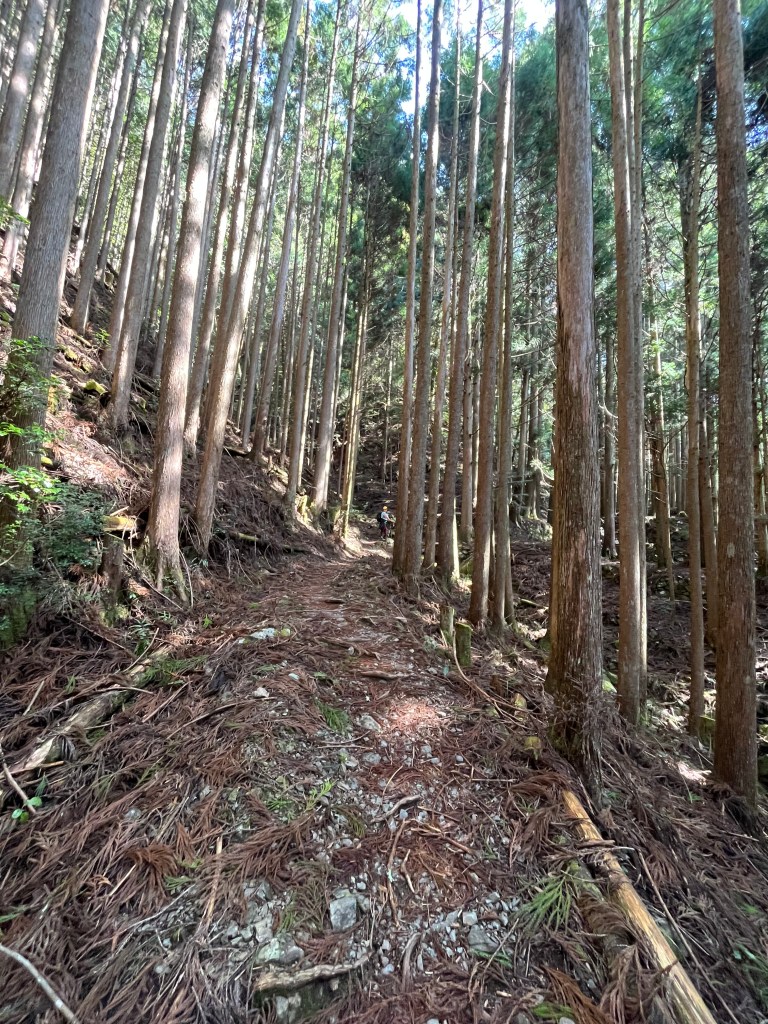
We wound our way upward, and rather than going straight up, the trail switched back and forth, and then tracked along the side of the mountain. When we had a view, it was quite lovely, but the hiking vista of the trails was just as pretty.

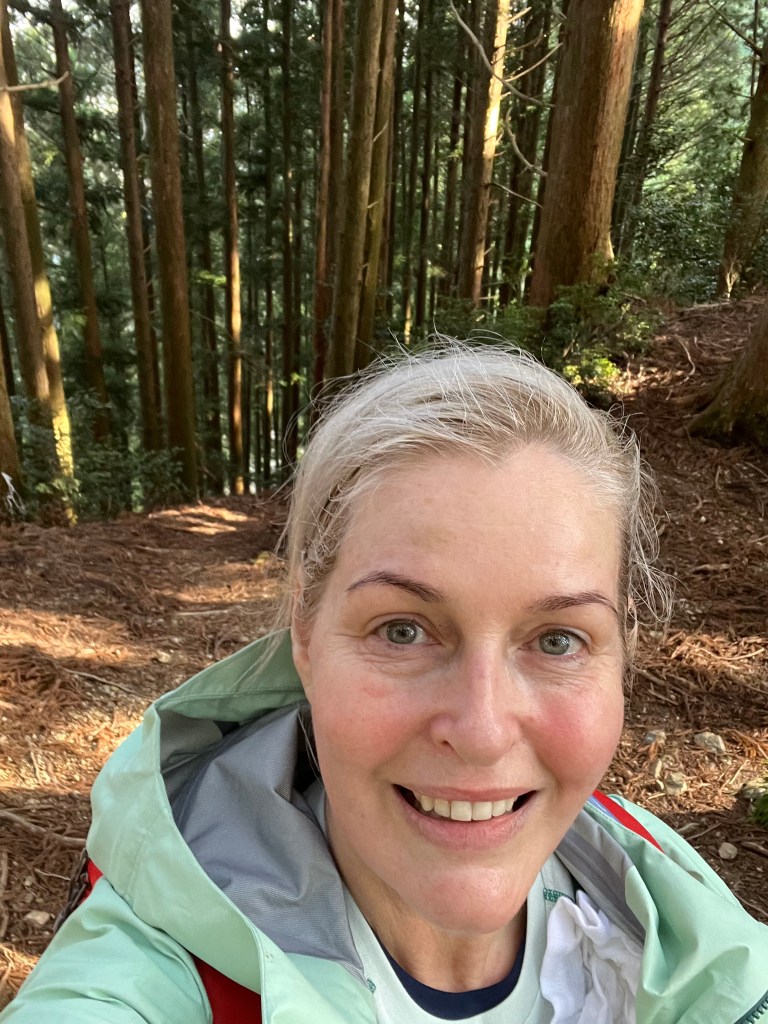
That’s me at the top of Detour Pass, a little ‘perspired’. Notice that the scarf and other warm clothing is now gone – and pretty soon the jacket came off! It was a cardio morning session, but definitely easier than day one.

The next section was a lovely downward treat for about 3km. We wandered through forests, passed little shrines, crossed old bridges and started to see the famous stone pathways and stairs that make Kumano globally recognised.

We could slow down and really drink in the sights, the sounds – the ambience of the trail.

It’s very difficult to capture in a photo how Kumano impacts you. It makes you feel special way deep down – at the point of who you are, and just as importantly, who you want to be. It gives you the space, time and simplicity to think about things. You feel part of something so much bigger than yourself and to have that mental and emotional space to reflect is very precious.

CAUTION – MANIC vs MINDFUL HIKING

When I start a hike, I do a bit of a self check. How am I feeling physically? Mentally? Emotionally? What do I want to get out of this hike? I can then decide who I want to set myself up mindfully. However, on day one of Kumano, I started manic hiking. It was all about getting to the top, getting to the end, getting to the finish, taking all the photos, not being last. It took about an hour for me to calm down. I reminded myself that it was my hike, my holiday – I set the pace and the rules. It’s important to approach hiking in a mindful way so you get the most out of the experience. There is incredible value in setting a pace that allows you to enjoy the day – just be off the trail by dusk!

Mikoshi-toge Pass is at the crest of the mountain, and is marked by a lovely pavilion with amenities and a covered sitting area to rest if you need to. We had a beautiful spring day, so we stopped in the sunshine for a coffee break.

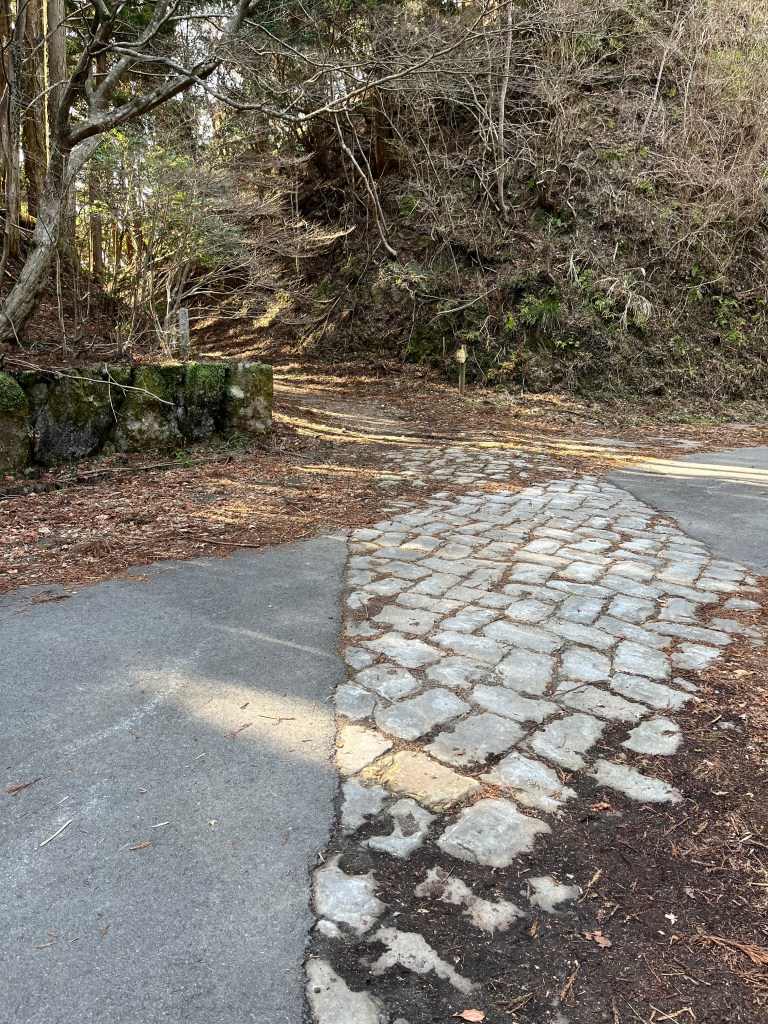
Where Kumano crosses roads, there are often pavers inlaid to keep you on track.

We had been hiking during the morning within sight of Mrs and Ms Melbourne who we met the previous evening (see Hiking the Kumano #1). Mr Melbourne was a crazy fit hiker, he left Chikatsuyu the same time as we did (he was walking and we were bussing). And he caught up with us here! HIKING LEGEND!

TIP – HOT REFRESHING BEVERAGE ANYONE?

Full and multi day hikes need food and fluid to keep you sustained and hydrated. Water isn’t a lot of fun, even when you add flavour or supplements. Coffee, tea and other beverages can really perk (*boomtish*) up your hike. We found some amazing Thermos options in Tokyo for a ridiculously cheap price, probably 75% less than what they cost in Australia. We had our coffee sachets, so we simply added hot water every morning, and enjoyed a hot drink during the hike. Well worth the investment.
Two of the three 500ml Thermos’s picked up in Tokyo. I paid about $22AUD for each one…bargain, considering they’re about $80 at home…

THIRD LEG – MIKOSHI -TOGE PASS TO HOSSHINMON-OJI

Twice in one day – we were hiking downhill again. The descent from Mikoshi to Hosshinmon was another 2-3km which was a blessing as we could slow right down and enjoy what was unfolding around us. Most of the time we followed Otonashi-gawa River downstream. We also wandered through a couple of abandoned villages – one was closed as recently as 1970 by the local council. Historically there were no bridges across the river, so pilgrims traversed the water to purify themselves on the way to the grand temple at Hongu.

From the Akagi-goe Junction to Hosshinmon it was uphill again, but a short sharp one. TB and I were so enjoying our surroundings that we missed the Kumano signpost going up – and found a dead end…..!

There’s a reason they have the signs – doh.

Once up the hill we had arrived at Hosshinmon-oji, which is a large Shinto shrine with an equally impressive torii. We had the shrine to ourselves until a couple of hikers made it up the hill behind us. TB and I decided that with only 8km to go, it was the perfect place to have lunch. Sandwiches on a wooden bench looking at a centuries old shrine. Perfect.

Fun fact – Hosshinmon is known as the ‘gate of awakening of the aspiration to enlightenment‘ and is the outermost entrance to Kumano Hongu Taisha’s sacred precincts. I think after two days hiking, this about summed up how TB and I felt walking along a thousand year old pilgrim trail.

FINAL LEG – HOSSHINMON TO HONGU

According to the map, we were only about 8km from our destination, the Hongu Taisha Grand Shrine. And it appeared it was a gentle up and down for the final leg – happy days!

This last leg was different to anything we had walked so far. It was road and trail walking as we wound our way down the mountainside through little hamlets and past houses. We peeked into back gardens and marvelled at the number of what appeared to be concrete fish tanks in yards, along with very well maintained veggie lots, orchards and tea plantations. There were lots of driveway honesty boxes with local produce for sale – it’s the same the world over 🙂

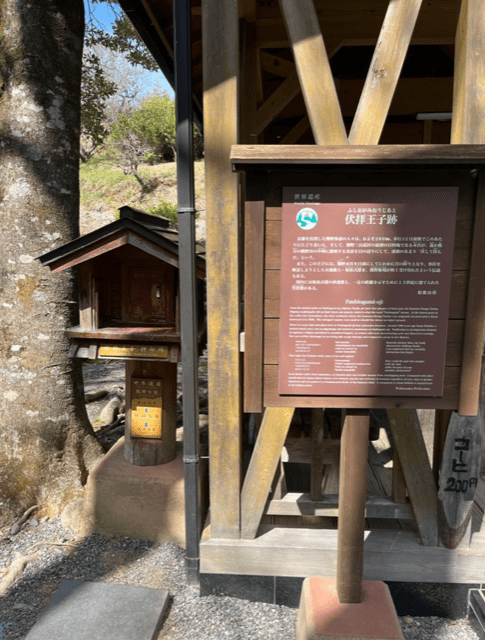
After about 90 minutes we arrived at Fushiogami-oji. Fushiogami translates as ‘kneeling down in prayer’, and as the crest provided the first sighting of Kumano Hongu Taisha, pilgrims often knelt to give thanks. There’s a lovely shrine here, along with a working teahouse which was open when we came through. We stopped for two outrageously priced ‘forest juices’ which tasted suspiciously like cordial, but who were we to argue with the ancient triumvirate who were obviously in charge?!

Now, I’m going to jump a bit in my storytelling here. We actually walked the last section from Fushiogami down to Hongu three times so I’ll save the tale (including our monkey encounter!!) for a later blog.

DESTINATION – HONGU TAISHA GRAND SHRINE

We made it! Our first grand shrine, and what a shrine! TB and I hiked for six hours and depending if you used the paper map, the AppleFitness tracker or Strava, we hiked 18.7km, 19.4km or 25.4km!

It really was a magical day. The weather was perfect, the scenery was varied and the terrain manageable. We had oodles of time to explore Hongu Shrine and really enjoyed arriving early at our destination.

We had the final challenge of getting from Hongu to our next ryokan, which was in Kawayu Onsen, about 4km out of town. However, it is really valuable to have a chat to the lovely staff at the Tourist Information Centre, who not only advised us that our accommodation had a courtesy shuttle, but they actually made the pickup call for us 🙂

ACCOMMODATION

Our accommodation for our second night on the Kumano was at Sansuikan Kawayu Midoriya which was actually a hotel on the banks of the Oto-gawa river.

Again, the hospitality was faultless. We were expected and our luggage was waiting for us, and we couldn’t wait to get unpacked in our traditional tatami room and head to the onsen.

We were lucky to be in a hotel that had both an indoor onsen and outdoor natural hot pools. The outdoor pools were great – thankfully we had yakutas to wear soaking outside – all very modest.

Dinner was an extravagant buffet in a large dining area that I’d say sat around 200 people. It appeared to be very popular with locals and tourists alike, so the place was buzzing. We were able to cook some of our dinner in a hotpot at the table – hugely entertaining to manage liquids, flames and chopsticks….We also participated in the buffet which was incredibly sumptuous. It’s quite amazing what you can pack into a tummy that’s been fuelling a long hike 🙂

TIP – GOTTA LOVE THE FOOD

Don’t skimp on your body fuel. Eating good food helps you to stay warm, move at a good pace and hike safely. When I’m hungry I tend to trip and stumble, not ideal when hiking! Carbs are your friend, especially complex carbs like rice and vegetables. Simple food works best for me. I do carry protein bars etc, but after hiking 20km, I crave clean, unprocessed food. Your body needs good fuel to operate optimally, make sure you give it the best you possibly can.

After dinner we both hit the wall.

We survived two long days back to back, and our itinerary had something different planned for day three – a traditional river cruise from Hongu down to the sea and the second major shrine at Shingu. So, day three wasn’t to be a hiking day, but a rest and recovery day. So far, so good. Stay tuned for days three and four of our hikes, as well as some blogs on ryokans and our other adventures – yay!

Thanks for tagging along, and see you out on the trails.

PJ 🙂

HIKING THE KUMANO KODO #1

Hello and welcome to my LIKETHEHIKE blog. I’m PJ and I write about the hikes I take, giving you insights, photos, commentary, tips and tools so you can enjoy hiking and embrace the experience.

I’m back from Japan and have LOTS to share with you. I thought I’d start at the beginning and cover off the hiking days, then delve a little more into things like ryokan accommodation, onsens and the like. SO MUCH to share!! Here we go…..

DAY ONE – TAKIJIRI TO CHIKATSUYU

TB and I arrived in Tokyo on the Thursday evening. We gave ourselves 24 hours to have a speedy look at the city, then used Saturday as our transit day to get down to our jump point, Kii-Tanabe on the western side of the Kii Peninsula. After a dodgy overnight at a ‘unique’ BnB in Tanabe (more on that later) and a google interpreter assisted briefing from our Kumano Travel contact, we woke on Sunday morning, sorted our packs out, picked up our bento box lunch and caught the local bus for Takijiri. What a bento box!! While we waited for the bus, I had a little peek inside – magnificent! Only downside, it weighed about 2kg and with the hike we had in store for us, that did make a difference…

Don’t worry about public transport and making your way around in Japan. Buses and trains are easy to identify and most also use English. Bus drivers and the public are incredibly helpful, just make sure you have cash for the local bus services as there is no capacity to pay by card. You don’t need exact change, buses have a neat little change maker you can use when you pay and disembark.

TIP

At the start of your holiday, get your hotel or a local bank to break down some of your larger yen notes. 10,000Y is a great note to carry around, but not for shop owners and bus drivers who can’t make change for a 200Y purchase. Coins are KING in Japan. I even bought a dinky little coin purse to make life easier 🙂

ARRIVING AT TAKIJIRI-OJI

We weren’t the only Kumano hikers on the bus from Tanabe to Takijiri-oji, so it was pretty easy to figure out where we were supposed to disembark. Also, the bus conveniently displays the next stop, and shows you exactly the fare you need to pay – all very organised. Oji is Japanese for shrine. Many of the Kumano locations have oji after the name, which indicates the presence of a shrine, usually Shinto. Shinto is one of two main Japanese religions, the other is Buddhism.

Shinto has shrines, Buddhism has temples.

Takiri-Oji is the spiritual entrance to the sacred Kumano mountains. TB and I were a little apprehensive when we arrived – we had planned this day for a long time – and it had finally arrived! We did a quick flyby of the Tourist Centre, did a high five, took some photos for posterity and started walking the trail.

FIRST LEG – TAKIJIRI-OJI TO TAKAHARA

And this is where the rubber hit the road. 4km up a hill. No, not a hill. A mountainside. A steep mountainside. Kumano is in the mountains. You will either be going up or traversing down. Maybe, if you’re lucky, there will be some gentle bits in between.

Day one schedule and terrain. Note the ups!

I spent the first couple of km sorting out my walking rhythm, looking at all the things, taking photos of things, tripping over things…you name it. There were a few hikers setting off at the same time as us, but only a few and they quickly pulled ahead. TB and I wanted to take our time and embrace the experience…so we had the trail to ourselves which was very special. Usually our hiking pace sits at an average of 4km an hour, but this dropped down to around 1.2km a hour as we picked our way up the side of the mountain.

We thought it was a 13km day from start to finish. Which is what the map advised. Yeah nah. It ended up being an 18km day.

CAUTION – WHEN IS A KM NOT A KM?

We did realise early into our hikes that there are different measurements on the trails. Some appear to be point to point distance, and some are walking, or trail distance. Kumano has trail markers ostensibly at 500m points, however some of these are up to 800m apart….Then there were the distance readings from py iPhone Fit App and Strava. So, always allow more hiking time than you think you will need.
13.3km on the map, 18.9km on the Fit App…

LUNCHTIME AT TAKAHARA

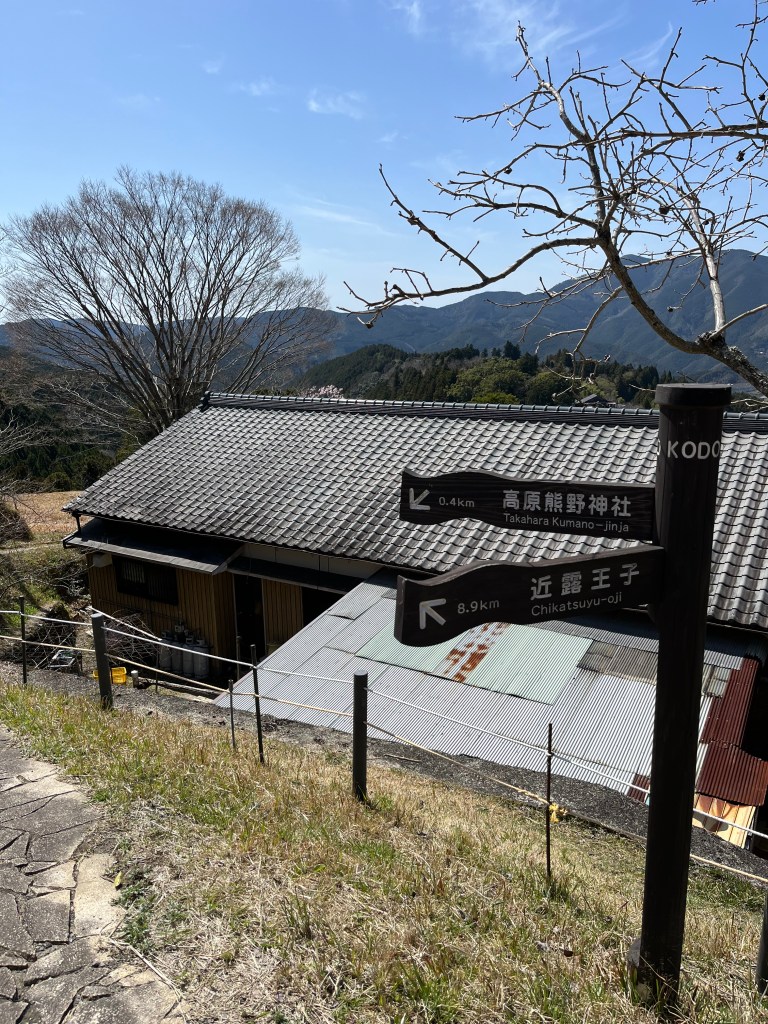
After much huffing and puffing, we made it to Takahara. Perched up on the ridge, it’s a lovely place to stop and take in the views. There is also a Community Centre, vending machines and immaculate public conveniences. Everywhere we went in Japan, we were immensely impressed with the loos. Public toilets were clean as a whistle, fully stocked and open. Even on the trails, the remotest of toilet facilities were impressive. Definitely took the pressure off a nature wee….

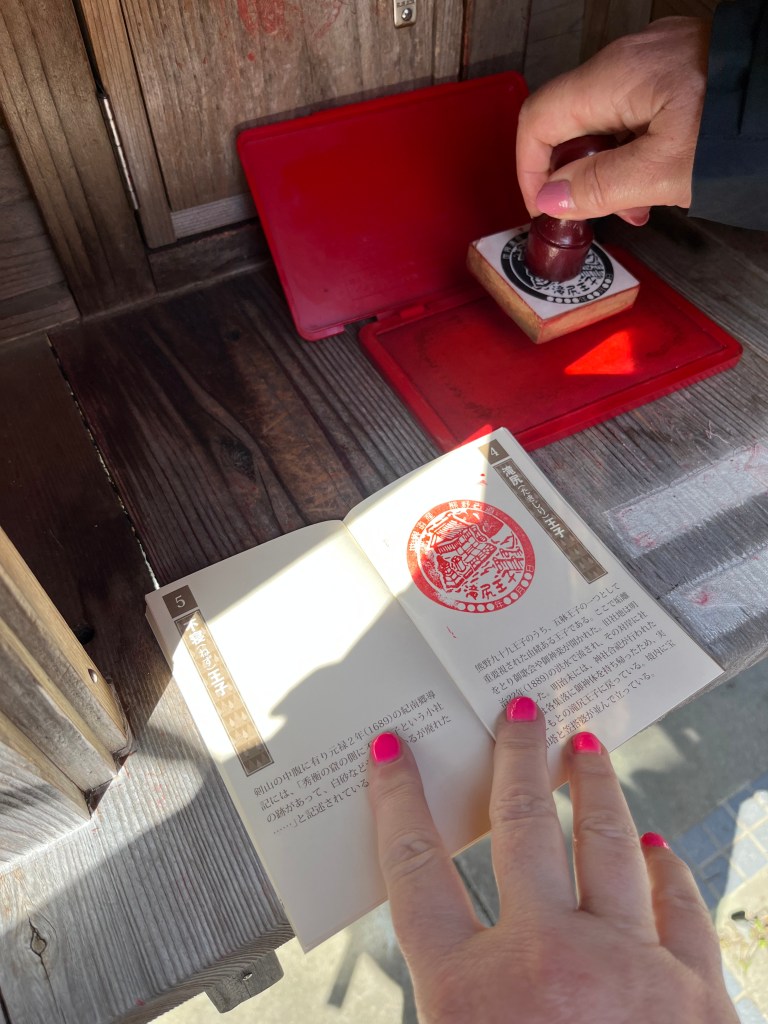
We devoured our bento boxes which were delicious, filling, nutritious and we couldn’t’ ask for anything better after hiking up a mountain for 2 hours. We stamped our books at the shrine and headed off. What books you ask? Well…

My Kumano Heritage Stamp Book

As part of the Kumano Heritage Trail Series, each shrine has a unique stamp, which lives in it’s own little stamp house. You collect the stamps as you hike the trails. It’s a great way to evidence your progress and adds a definite ‘feel good’ factor.

SECOND LEG – TAKAHARA TO CHIKATSUYU

Chikatsuyu was our destination for day one, our ryokan awaited us there. But first, we had to tackle another 10km, according to the map. The elevation map book was proving to be incredibly handy as not only did it detail the ups and downs of the trail, but also the way points for us to track progress. The Kumano trails are incredibly easy to navigate. You will only be walking on one trail, in one direction. Very occasionally there may be a trail intersection, but signage is very clear, even where not to go.

The second leg was really where we started to appreciate the beauty and tranquillity of Kumano. To be walking along trails up to 1,000 years old was both inspirational and humbling. We walked past small village settlements, traveller shrines, redwood forests and all manner of historical sites with some great information.

Interestingly at this point in our day we had only passed maybe two groups of hikers. We were starting to realise that we basically had the trail to ourselves. We definitely felt very blessed and thankful.

The pinnacle of the second leg was the Uwadawa-Jaya Teahouse Remains. We knew this because the elevation map told us! From here we figured it was largely a downhill romp to our ryokan in Chikatsuyu. We spent the downhill section traversing a river as we made our way down the valley. The foliage changed from upper forest to a more forest floor feel with the river providing a damper, more enclosed environment. It also grew a little dimmer. By now, time was ticking and as all good hikers know,, daylight disappears an hour earlier in the forest. We knew we had to be clear of the trail by 4.30pm at the latest.

CAUTION – TIME TICKS FASTER IN THE FOREST

Watch your start and finish times when hiking unfamiliar trails. I always allow more time than I think I’ll need as something will delay you. It could be going up a steep section, or taking your time coming down a slippery slope. You don’t want to be hiking out of a forest at dusk – it’s stressful and adds complexity and risk that you just don’t need.

Happily, TB and I arrived on the outskirts of Chikatsuyu around 4pm. Whew. Not as early as we would have liked but not in the dark either.

Not our ryokan but a welcome sign nonetheless

Imagine our surprise to see a sign on the bridge (which I didn’t take a photo of to my ETERNAL regret) which said “BEWARE OF THE BEARS”. What???? I mean WTF???!!! Turns out the area is popular with Asiatic black bears – a cranky wee animal which thankfully still hibernates in March. I think. We walked just a little faster after seeing that sign, but I did realise, all I had to do was outrun TB and I would be fine… 🙂

OUR RYOKAN – MINSHUKU CHIKATSUYU

Our first rkykan and my oh my – what a fabulous place to finish on day one. We followed our very clear directions and landed on the doorstep about 4.30pm, tired but happy. Located on the banks of the Hiki-Gawa River, this ryokan has traditional tatami rooms in the main house, as well as a delicious hot spring onsen (bath). We saw the line-up of hiking books in the entranceway and realised we were among future friends.

TB and I booked tatami twin share for our holiday (cost effective and immersive) and upon arrival were were effusively greeted by our hosts, and shown to our room (above). Toilet and sink facilities were shared, but immaculate and more than enough. Happily, our luggage awaited us in the room. I can’t recommend highly enough the luggage transfer service. It was timely, stress free and 110% reliable.

Ahhhh – you have no idea how good the onsen was after our first day of hiking. I will go into much more detail about the ryokans in another blog – look out for “Ranking the Ryokans” soon. Once we overcame the initial “western white woman speed wobbles” about washing nude and communally, the onsens became a place we really looked forward to. We simply watched what the locals did, and then did the same. Easy peasy. I will give you all the gory details in a future blog about “Owning the Onsen” soon.

TB and I ‘onsened’ and then presented ourselves for the communal dinner at 6pm. WOW. And then WOW again.

We had the most fantastic dining experience provided by our outstanding ryokan hosts. TB and I quickly realised that our holiday may just be an equal balance of hiking and food photos…the quality and the service was faultless. We purchased a modestly priced and delicious sake from our hosts, and then enjoyed the company of fellow hikers for our meal – Miss Oregon, Mr Singapore and Mr, Mrs and Miss Melbourne.

TIP – TAKE THE TIME TO SAY HELLO

Whether its on the trail or in the dining room, take the time to say hello to fellow hikers. I’m a chatty person by nature, as is TB, so talking is our happy place. Even if you’re a little hesitant, remember you have a shared love of hiking – what a great place to start. No need for names, as you can see I remember people based on where they come from. PS – we crossed paths with Oregon, Singapore and the Melbourne clan over the following few days, and it was great to see them and compare notes.

OVERNIGHT

This was our second night in a traditional tatami room, but about 1000% better than our first night! The futon setup was perfect and as it was going to be quite cold overnight, we had additional blankets to snuggle into. If you saw my previous blog on packing for Japan, you’ll recall that I said I was taking a hiking mattress. Well, I got it out, pumped it up and slipped it under the futon – it worked a treat. It gave my tired old bones a little more padding than I currently provide, and I had a great nights sleep.

We decided to be on the road by 7am for day two, and hoped this would get us off the mountain before it started to get cold and dark….and give us time for more adventures!

Look our for my Day Two blog – coming your way soon

Happy hiking from Kumano,

PJ

WHAT TO PACK FOR A 10 DAY HIKE ON KUMANO KODO

Hi and welcome to my LikeTheHike blog. I’m PJ and I write about the hikes I take, giving you insight, photos, commentary, tips and tools so you can enjoy hiking and embrace the experience.

So, there are a million blogs and resources available for travel packing, how to pack light, how to pack smart, how to pack three items of clothing to last 3 weeks…etcetcetc. I won’t be covering any of that in this blog. This is a post about packing for 10 days hiking the amazing Kumano Kodo trail in Japan!!!!! BEYOND EXCITED!!!!!

Where are we going?

TB (sister) and I are heading to the Kumano Kodo Trail, a series of ancient pilgrimage routes that cross the Kii Hanto, the largest peninsula in Japan. For 1,000 years, pilgrims have been walking the routes as they undertook religious acts of worship and purification. In 2004, the Kuman Kodo routes were UNESCO world heritage listed, one of two alongside the Camino de Santiago in Spain. So, we are heading to a VERY COOL part of the world.

We have selected a 10 day self guided trek of the core section of Kumano Kodo called Nakahechi. It runs from Kii-Tanabe on the south western side of the peninsula, up into the mountains and finishes at Kii-Katsuura. It links the three Grand Shrines of Kumano, and has an incredibly rich historical and spiritual atmosphere.

The trek itself is 68km split into 7 days of hiking with 2 experience days and 1 rest day. We didn’t plan the whole trip ourselves, but decided to use an Aussie based trekking company called Raw Travel.

WHEN TO USE THE EXPERTS

When my husband and I travel for a holiday, I’m very happy to plot, plan and book as sorting the logistics for a holiday is part of the fun. However, this holiday is a bit different. We didn’t know exactly where we were going, what would happen, where to book overnights or what to expect. So, we decided to use a travel company that specialises in self-guided treks. Our accommodation, meals and daily luggage transfers are all sorted, we have maps, briefings, and in country support. All we have to do is walk! So far our experience with http://www.rawtravel.com has been excellent. Ask for Chris, she’s the Japan guru.

Why are we going?

Shouldn’t the question be why not? The window in which a person can both afford to travel and is fit enough to tackle multi day hikes is quite small – so we are seizing the day. And, this was a birthday trip planned for 2020, but scuttled thanks to COVID.

What am I packing?

I am a regular traveller so packing for a standard trip isn’t a challenge. However, this is a 13 day hiking trip, and 10 of those days are through terrain that doesn’t offer immediate access to amenities such as cafes, supermarkets or ATM machines. The good news is that our luggage is transferred each day to the next ryokan (B&B lodging) so we only have to carry a day pack.

So, what’s going to Japan??

1. CLOTHES

10 days of hiking in weather that may be cold, warm, gusty or raining – it’s tricky. I don’t want to pack too much, but conversely, I want to make sure I have enough so I’m not wearing crusty socks for 4 days in a row. Here’s my list from the inside out:

  • Undies – 14 – minimal seams and super comfy for all day walking
  • Bras – 3 – 1 standard sports bra (Berlei) and 2 wire free bras (Enell)
  • Socks – 8 – 5 2XU knee length compression socks (Vectr Light) and 3 merino blend
  • Swimsuit – although ryokan onsens are strictly a modesty towel only (yikes), the outside natural onsens on the trails are swimsuit friendly so I’m planning to frolic in the water. We are also transiting via Changi Airport on the way home, and I hear there’s a pool we can use there during layover!
  • Pjyamas – 2 – singlets and shortie sets
  • Tops – 7 – 3 short sleeved and 4 long sleeved (3 merino in total)
  • Bottoms – 4 – 3 full length and 1 calf length. Not a fan of hiking trousers…prefer stretchy.
  • Head & Hands – gloves, beanie and ear wraps (my ears ache in the cold), baseball cap and sun hat.
  • Vest – 1 – Kathmandu Heli down vest. I’m not sure how cold it will be in the mornings, and this packs down to nothing so it’s an easy inclusion. And it’s apricot – a good safe colour in the forest 🙂
  • Jackets – 2 – 1 waterproof raincoat (Kathmandu NGX3 Trailhead Jacket) and 1 softshell travel jacket (TK Maxx last winter)

WATCH THE RUB

When I hiked the Kokoda Challenge (49km over 15 hours non-stop), a small seam irritation or issue with clothes quickly escalates into something intolerable. Having clothing fit properly and lie smoothly under your backpack is critical. Ladies, I’m talking bras here! Try different bras, t-shirts, jumpers and jackets on your training hikes so you know what works, and more importantly, what doesn’t.

2. HIKING GEAR & EQUIPMENT

It’s the “too much vs not enough” argument here. What if it rains for 3 days straight and I can’t dry gear? What if the trail is actually really easy and light trail shoes are better than waterproof boots – or vice versa?

  • Footwear – North Face Vectiv Infinite trail shoes, Merrell waterproof hiking boots
  • Rainwear – Kathmandu NGX3 Trailhead Jacket (see above), and disposable ponchos. I’m not taking over-trousers because I just can’t walk in them. I’ll get wet, then dry off at the end of the day.
  • Day Pack – MacPac Rapaki Airstream 28L. ( I love the ventilated back – less “sweaty betty” and it can hold a lot of stuff)
  • Water – 3L MacPac camelpak which sits very nicely in the day pack and feeds out with a water tube. It’s not absolutely necessary for longer hikes like Kumano Kodo, but it means I have water on tap (*boomtish*) for the day.
  • Poles – MacPac telescopic hiking poles
  • Sleeping Pad – hear me out! When I was researching ryokan accommodation, there was mention that tatami mats and pillows can be quite firm. I really don’t want to be uncomfortable, so I bought a foot press inflatable air mattress that I can use under a tatami. Its only 500g and fits really nicely into the bottom of my pack. If I don’t need it – happy days.
  • Plastic Bags and Drinking Things – yes, I need plastic bags for wet gear, dirty shoes, dirty clothes and to protect my phone, laptop and passport. I am also taking a drink bottle which I can use for my protein water, and a little coffee mug to keep me happy in the mornings 🙂

UHOH…WE’VE LOST YOUR LUGGAGE

Lost and delayed luggage is a sad reality of travel. If my suitcase doesn’t make it to Tokyo in time to start Kumano Kodo, I can buy most things, but there are some things like boots and inserts which are worn in, and certain bits of clothing which I really prefer. So, I will be using my daypack as carry on, and will be packing non-negotiables such as hiking boots, inserts, one hiking outfit, medicine, laptop etc. Just in case…

3. MEDICAL & FIRST AID

I always carry a range of medications when travelling, Usually it’s gastro-stop, gaviscon, cold and flu tablets, panadol – drugs that keep you going as travel plans wait for no one! This trip is a little different as it’s post COVID, out of the main tourist areas, and we are hiking almost 70km in forests so the things I’m packing are:

  • Anti-inflammatory meds, a footcare kit, hikers wool, muscle ointment, strapping tape, allergy tablets, gastro-stop, bug spray, magphos tissue salts and a shaker of table salt (leeches…. 😦 )

I’m also taking face masks (Japan still requires masks to be worn on public transport and some flights) and a couple of packs of antiseptic wipes for hands and surfaces.

HIKERS WOOL

I grew up in New Zealand, and Hikers Wool is a fantastic kiwi product. My mum (SJ), an avid hiker in her time, swears by it and shared it when I started hiking seriously. It wraps around and underneath individual toes, moulds to your footprint, wicks away moisture and prevents friction – and therefore prevents blisters and damage. Don’t ask me the mechanics – it just works! See for yourself http://www.hikerswool.co.nz

4. FOOD

Another recommendation from Raw Travel was to take along hiking snacks. The Nakahechi section runs through some very traditional areas of the Kii Peninsula, so the ability to pop out for a latte will be limited. Corner stores are not on every corner so that means minimal access to snacks etc. TB and I are caffeine fiends, but only via the traditional coffee option and the feedback is most ryokans offer lovely tea, but not really coffee.

So, here’s what I’m taking sustenance wise:

  • Coffee – Avalanche Sugar Free Latte 10 pack. Its not a freshly made flat white, but it will do for that caffeine hit. Maybe it’s a good detox opportunity…!
  • Protein – FeedGood Tasteless Protein/Collagen which I add to my water bottle. It allows for easy protein delivery when you’re walking and you don’t want to be eating all the time. And it really is tasteless. Really!
  • Snacks – Carman’s Snack Bars and Aldi “On the Go” mixed nuts.

My snack needs are pretty simple when hiking. As you hike for longer periods of time, you find out what fuel works for your body, when and in what volume. I’m happy to have the same snacks each day 🙂 and then dive into the local delicacies at the evening meal.

5. OTHER STUFF

So, what else needs to be in my suitcase to ensure an amazing Kumano Kodo experience?

Electronics – laptop and phone, plug converter and charging cords. I’m still on the fence about taking a battery pack. They’re really heavy and we will be at a ryokan each night, so will be able to charge up. We also have access to an itinerary app via Raw Travel so we can track our daily instructions – what could go wrong?!

Cash – another tip from my research – take cash. There are very few EFTPOS and ATM facilities on Nakahechi. If we want a sake or two in the evenings, or buy things on the trail, it will most likely be a cash transaction. So, I did some complex calculations and decided on 5,000JPY a day ($55AUD). And, it was a nice round figure for the lovely Travelex kiosk lady. 🙂

Documentation – Japan travel requirements are pretty self explanatory, and they do require a COVID vaccination certificate at airport checkin, and there are a range of customs, immigration and quarantine forms online, which also have printouts you can take as backup. I’m not a luddite by any means, but I just don’t trust phones, links and screen shots when you’re next in line at customs. I’m a super law abiding traveller, but put me in front of a customers officer and I turn into a female version of Inspector Clouseau, complete with a severe case of the ‘dropsies’. So, I’m taking print copies of all of the above, as well as insurance docs, itinerary, train travel planning screen shots. I have a “folder”…. 🙂

Suitcase – this trip I’m trialling a soft shell Pacsafe Toursafe 96L anti-theft two wheel case. TBH I was quite surprised I got into this with all my stuff, so it’s deceptively roomy. I’ve paced around the house and driveway a couple of times fully loaded to see about wheel and handle robustness – so far so good.

Is That Everything?

After covering off all eventualities, all possibilities, all weather events and circumstances – I THINK I’M READY. AND SUPER EXCITED!!!

This is a once in a lifetime opportunity to experience something that is so different, so exciting and a hike that will, I feel, add to my growth as a human. I will be journaling on the hike, but will also be capturing some great stories (as I’m sure TB will do something very entertaining with her modesty towel in the onsens), so stay tuned for some more Kumano Kodo blogs!!!

See you on the trails,

PJ

URBAN HIKING SERIES -#1 SYDNEY CBD

Hello and welcome to my LIKETHEHIKE blog. I’m PJ and I write about the hikes I take, giving you insights, photos, commentary, tips and tools so you can enjoy hiking and embrace the experience.

Let’s talk URBAN HIKING. Yep. URBAN HIKING

What is Urban Hiking?

Urban hiking is walking in a city – usually on a route you haven’t explored before – taking new paths, up hills, down stairs, through parks and reserves, following signs, seeing new things. Sounds pretty good huh?!

Urban hiking is easy to plan and execute. You can use maps, or simply start walking and see where the hike takes you. If you’re staying at a hotel, ask the front desk. Locals are very happy to point you in the right direction.

What Do You Need?

Urban hiking is a bit different to trail hiking.

  1. No Backpack. I do wear exercise tights with pockets so I can carry a mobile, glasses and ever present lip salve. If I’m feeling like a long urban hike I’ll dust off the bum bag (fanny pack). Food and water I buy as I need it.
  2. No Hiking Boots. I wear a hybrid or trail sneaker. I find that asphalt walking can be a bit harder on my knees and hips, so I like the additional padding a trail shoe provides. My latest find was at North Face, Vectiv Infinite Trail Shoes. Super padded and comfy. Another tried and true option is New Balance Fresh Foam Hierro v6. Both are great for urban hiking.
  3. Keep the Hat! I still wear a hat and sunscreen. I’m a child of the 70’s and we weren’t very sun smart back then. Skin protection is EVERYTHING. I use a full brim hat rather than a baseball cap.
  4. Time of Day. Is important for an urban hike. A city has so many personalities that change according to the time of day. I prefer early morning, but have also hiked later in the day for a change of pace. Don’t worry too much about distance, but look for interesting destinations, happenings, landmarks or people. This will create a great urban hiking experience.

Urban Hike #1 – Sydney CBD

I was in Sydney for work and needed to stretch my legs. I mapped out a cheeky wee 8km urban hike which took in Darling Harbour, Barangaroo, Walsh Bay, the Harbour Bridge, The Rocks and the CBD.

Darling Harbour

Always a favourite destination for either revitalisation or rest, Darling Harbour sits just west of the Sydney CBD. It’s home to restaurants, ships, parks, art trails, ferries, you name it. It was home to the maritime industry through the 1800’s, Sydney’s first gasworks and during the 1980’s underwent a decade long gentrification project.

For about 3km I walked along the reclaimed wharf, past ferries and a very still harbour. At this time of morning it’s you, some keen exercisers and a whole heap of tradies coming down to work on the construction sites scattered around. It’s still a working harbour but very pedestrian friendly.

Barangaroo Reserve

Barangaroo is part of Gadigal country and is named after a powerful female Cammeraygal leader of the Eora nation. Barangaroo Reserve is a landmark waterfront destination, made up of hotels, entertainment precincts, reserves and water. It’s marked by over 75,000 native trees and bushes as well as very distinct square sandstone blocks lining the foreshore. It provides incredible views onto the harbour and passing aquatic traffic. It’s a very visually powerful space to walk though at dawn.

Millers Point, Walsh Bay, Dawes Point

At about the 3.5km mark (just around the point you can see in the pic above), you will exit Barangaroo Reserve and enter Millers Point, then Walsh Bay. You could simply follow the road, but I try to stay away from roads wherever possible. With a little bit of trial and error, I found I could walk through the refurbished wharves in Walsh Bay, now home to cafes, residences and a cultural precinct. AND – you get to walk underneath the Sydney Harbour Bridge…!

The Rocks

Coming out of Dawes and Walsh Bay, the vibe is very historic and utilitarian. This used to be a working area, and the streetscape reflects that. One of the fun parts of this walk is actually walking right under the Sydney Harbour Bridge!

This would have to be one of my recommended destinations in Sydney. Nestled into the side of the sandstone headland supporting the Harbour Bridge, this tiny neighbourhood is a maze of historic laneways, colonial terrace houses, old pubs and a working harbourfront, dating back to 1788.

The Rocks is also home to a passenger ship terminal, The Museum of Contemporary Art and over 50 heritage listed buildings. Your urban hike might slow down a bit as you walk through this fantastic slice of Sydney history, or might even go on pause for a quick coffee break.

George St & Sydney CBD

Once through The Rocks it’s a brisk troy up the middle of Sydney CBD via George St. Running for 3km from Circular Quay to Chinatown, it was Sydney’s original high street, and is still home to a number of the city’s most prestigious buildings and precincts. I walked George St around 7.30am and it was still relatively quiet, with only the first office workers trotting to work. By 11am, George St is awash with humanity. It’s mainly a pedestrian and light rail thoroughfare, so very easy to walk.

Compulsory Stop – QVB Time

It was about 7km into my urban hike when I felt the need for sustenance. Another great destination in Sydney CBD presented itself – the Queen Victoria Building (or QVB in Aussie vernacular).

QVB is a five-level heritage listed building which is now home to premium retailers such as Bally, Camilla, Coach, Furla, Jimmy Choo, Longines, Georg Jensen, Dior – it’s a shopping destination! It’s also home to a range of eateries, and my breakfast destination.

My visit to Sydney coincided with 2023 Pride Week, so the city was packed with pride related activities, events and decorations. Hence the temporary re-naming of QVB.

Stopping somewhere on your urban hike provides two benefits:

  1. Sustenance, in both solid and liquid form; and
  2. An opportunity to people what, to get a sense of the flow in the area.

I had a quick but delicious breakfast and coffee at Manon Brassier, and watched a film crew outside the café as they hustled and bustled very busily filming an ‘as yet unnamed’ movie adjacent to the Queen Victoria statue. By now Sydney was well and truly awake with workers, shoppers, tradies and all the madness of a large CBD.

Last Leg

It was a final 2km up George St to Chinatown, past the Town Hall to my hotel and the start of my working day.

Sydney has a wide range of walking trails/tracks/areas for visitors to explore. I also love walking around the Opera House, the botanic gardens, the harbour, Woolloomooloo (yep, that’s a real place), the Domain, and there’s a great 10km circuit that takes in most of these places.

Take the time to explore your city – or take advantage of travel and explore a new city. You’ll be surprised at what you find.

See you next time out on the urban trails 🙂

PJ.