-
HIKING THE KUMANO KODO #3
Hello and welcome to my LIKETHEHIKE blog.
I’m PJ and I write about the hikes I take, giving you insights, photos, commentary, tips and tools so you can enjoy hiking and embrace the experience.
TB and I are back – day three of hiking Kumano….and it’s still bloody FANTASTIC!
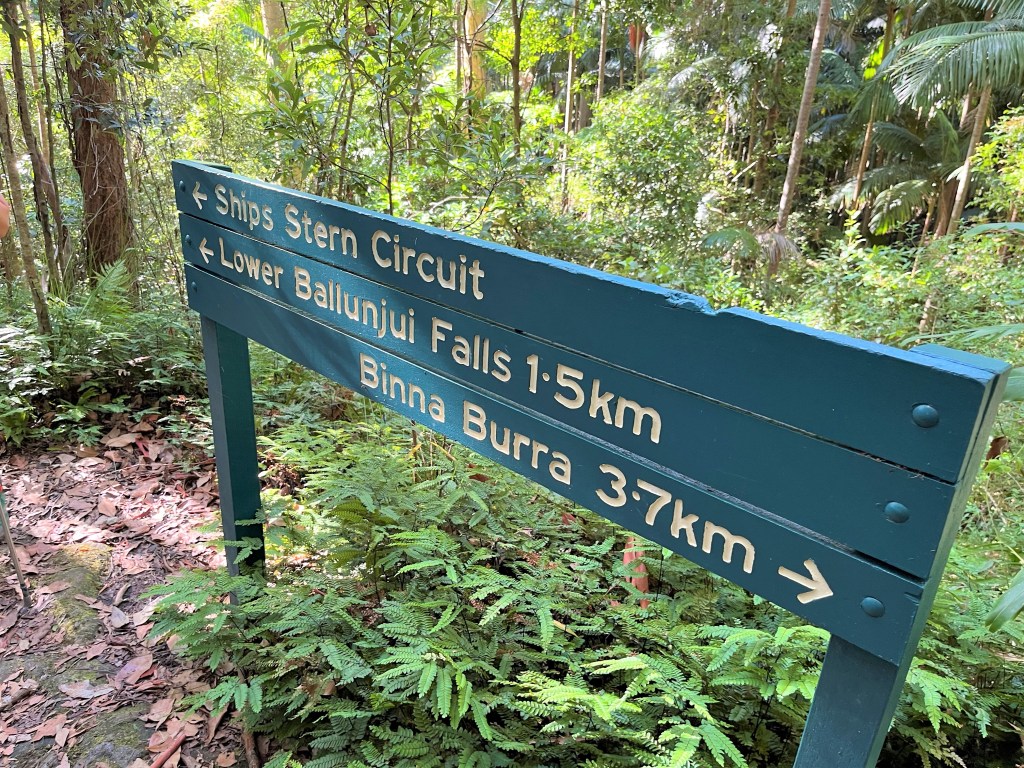
DAY THREE – KUMANO NACHI TAISHA TO KOGUCHI
After a non-hiking day exploring Shingu and the seaside town of Kii-Katsuura, TB and I were ready to hit the trails. Today was going to be a challenging day – hiking Ogumotori-goe in reverse.

More ups and downs than a rollercoaster! FIRST LEG – KII-KATSUURA TO KUMANO NACHI-TAISHA
However, before we got onto the trail, we needed to get from Kii-Katsuura on the coast, up to Kumano Nachi Taisha. Our travel company advised that there was no accommodation at Nachi, so we stayed down in Kii-Katsuura which was amazing – except for the timing when we left on day five or our trip.
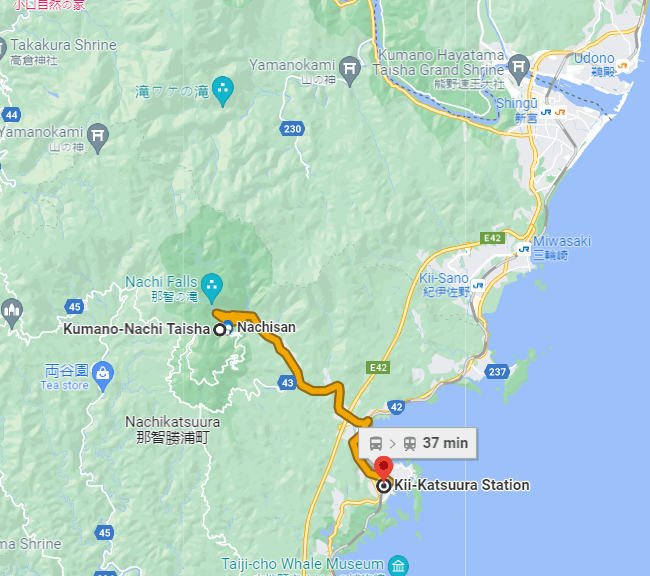
Breakfast didn’t commence until 7.30am (and we needed brekkie!), and we also had to buy some lunch in town, and then catch the 8.25 bus. This got us to Nachisan around 9am.
The bus trip was quite spectacular. We followed Nachi River up into the foothills, wound our way up to and past the famous Seigantoji pagoda and the Nachi no Taki waterfall.


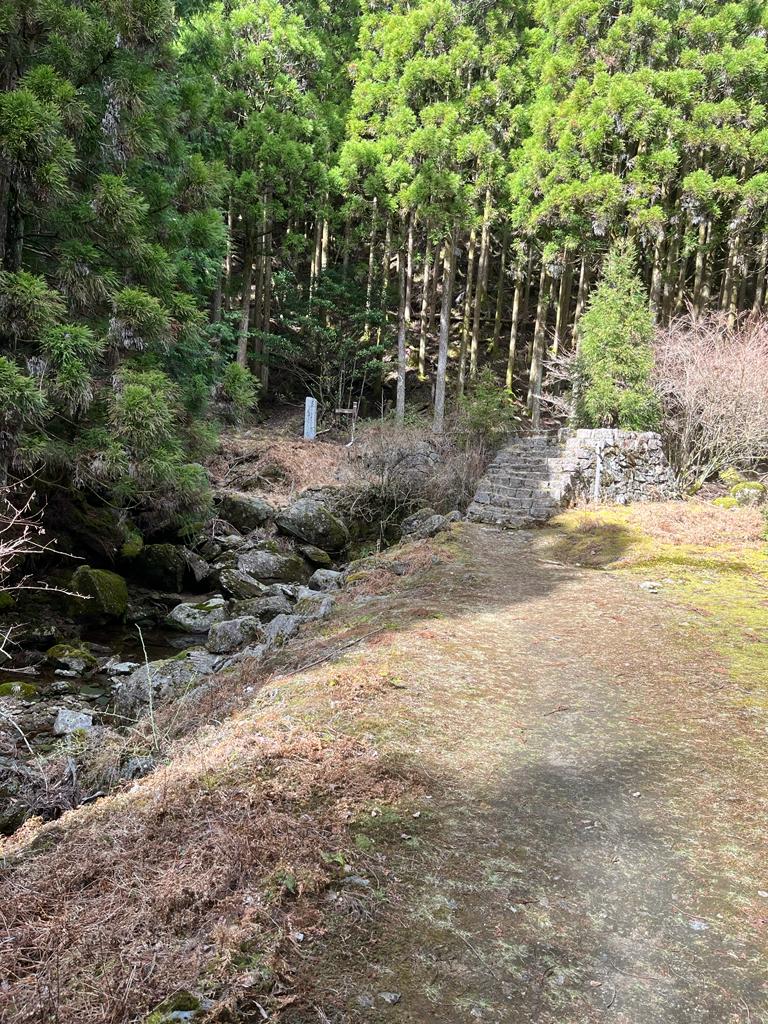
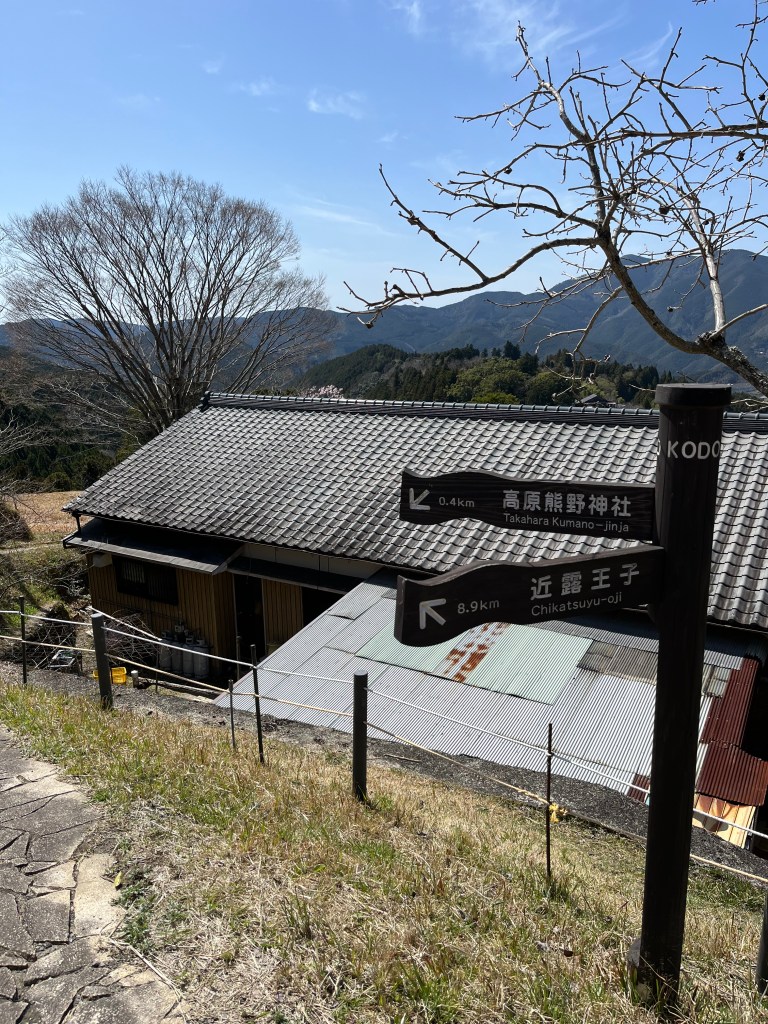
We jumped off the bus at Nachisan, and it was at this point we got a little confused. We walked back down through the village to have a look at the shrine and torii – and peeked at the waterfall – but really struggled to find the start of the trail. Up the hill there were a number of buildings and shrines and we could see that the trail started somewhere there, but DO YOU THINK WE COULD FIND IT???!

It was like playing Where’s Wally….. Time was ticking and I was getting nervous about actually getting started. We had 15km to hike and the terrain looked quite challenging. There weren’t any other hikers around (we were doing the section in reverse) so there wasn’t a stream of people to follow.
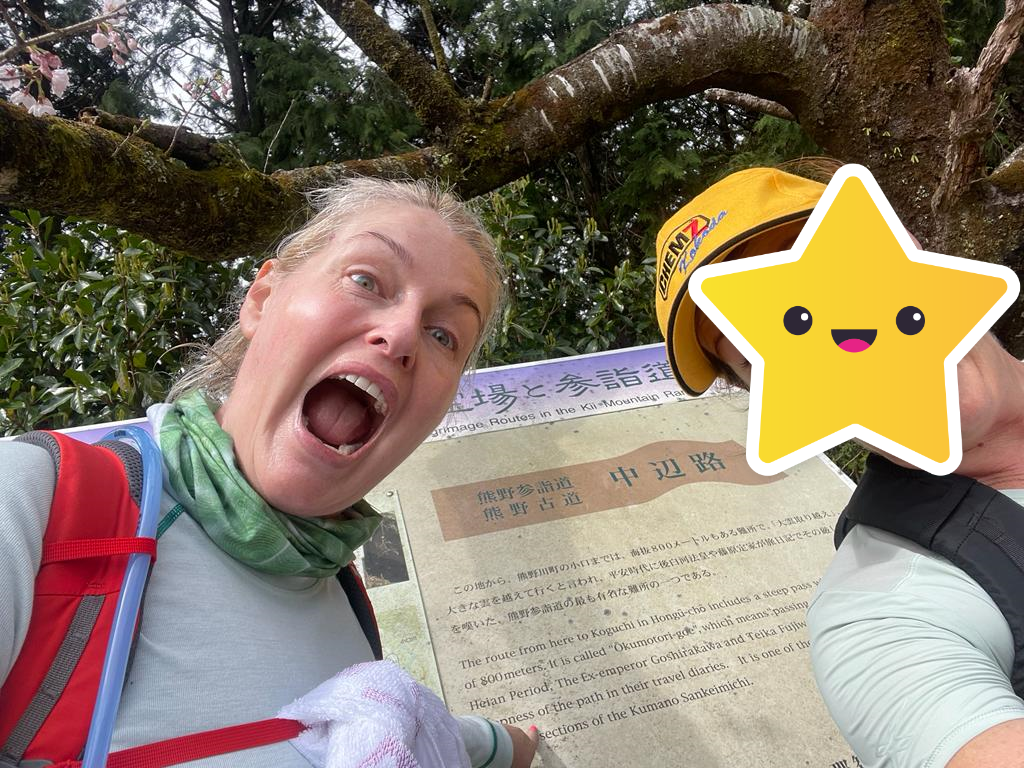
Via a process of elimination and toilet spotting, TB and I FINALLY found the stone staircase trailhead adjacent to the second building, right at the top around 10am. We were off! Albeit late, but we were determined to make it work.
SECOND LEG – KUMANO NACHI TAISHA TO FUNAMI-JAYA TEAHOUSE REMAINS
We knew from the outset that this would be a challenging hike – but one we were looking forward to. Ogumotori-goe is described by the Tanabe Tourism Bureau as “one of the toughest sections of the Nakahechi Route…a climb and descent over three passes and is mostly in forested mountains”. The total elevation gain is 1,260m and loss is 930m so lots of ups and downs.
Admittedly, hiking north from Nachisan to Koguchi would appear to be the more strategic choice given the terrain (no flies on me!) but it’s still a decent cardio commitment.
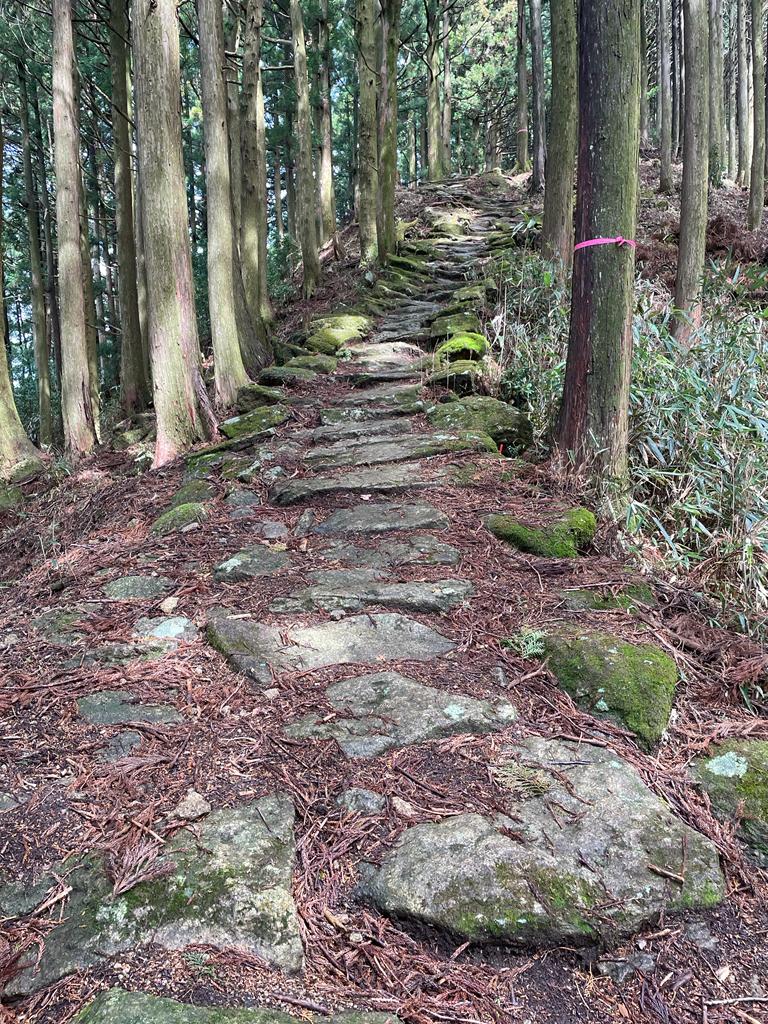
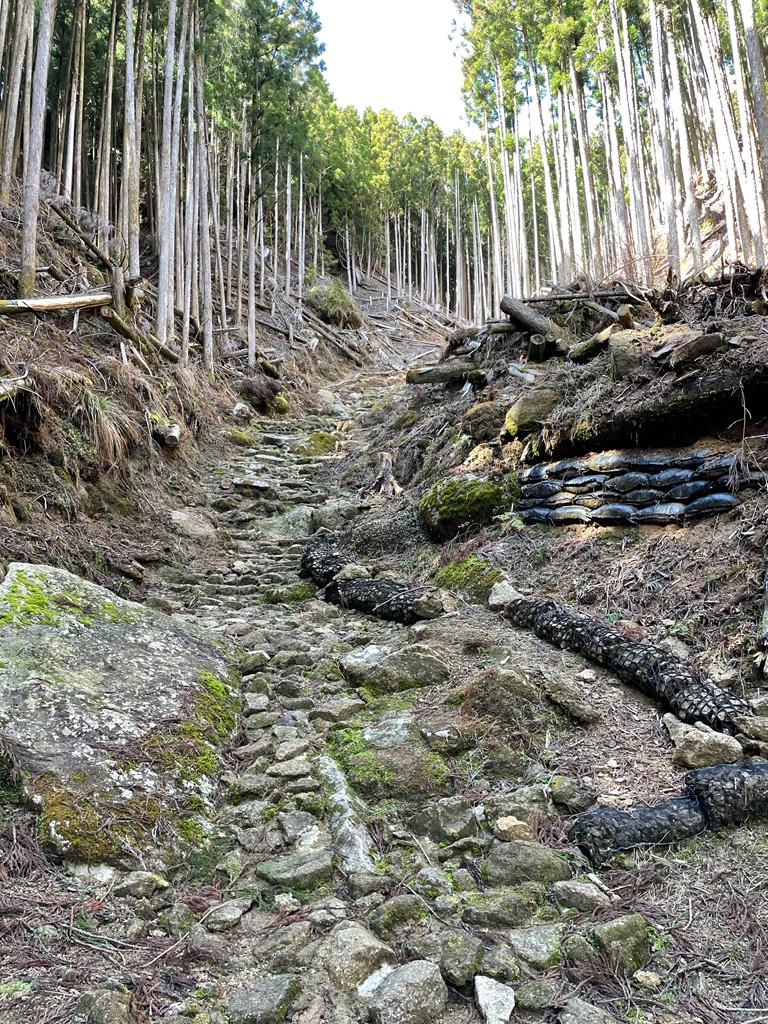
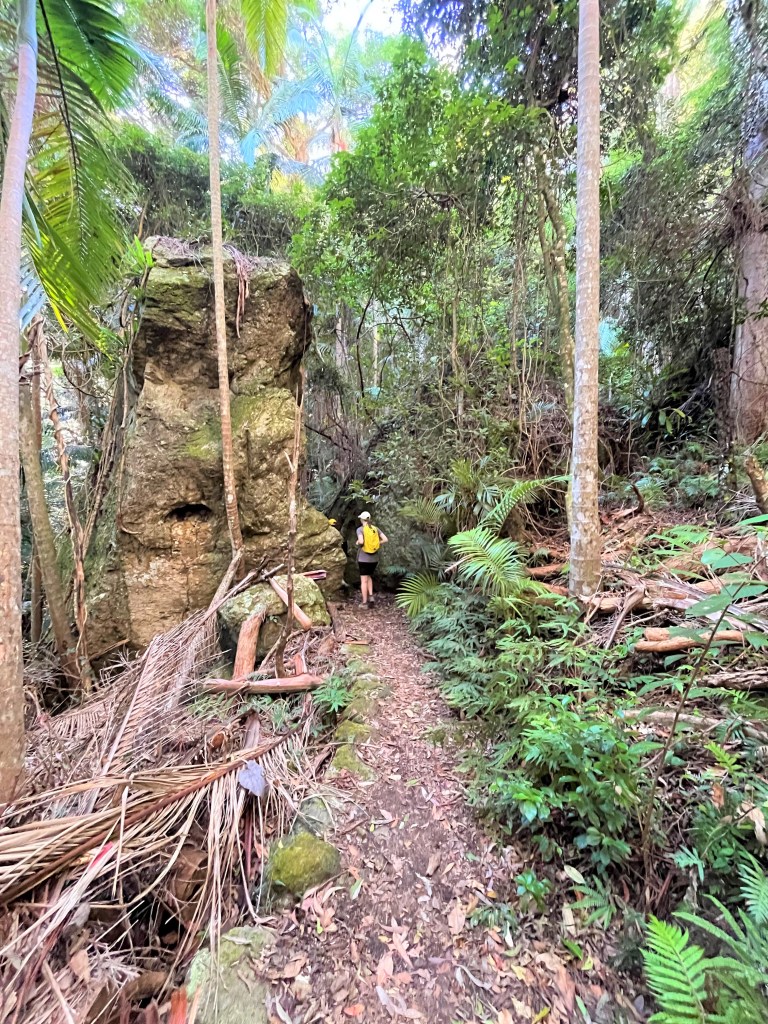
The first 2km took us through the start of the trail – and up some beautiful stone stairs which seemed to stretch forever. It was a good opportunity to engage my ‘mindful hiking’ mode, and put the drama of our late start behind me.
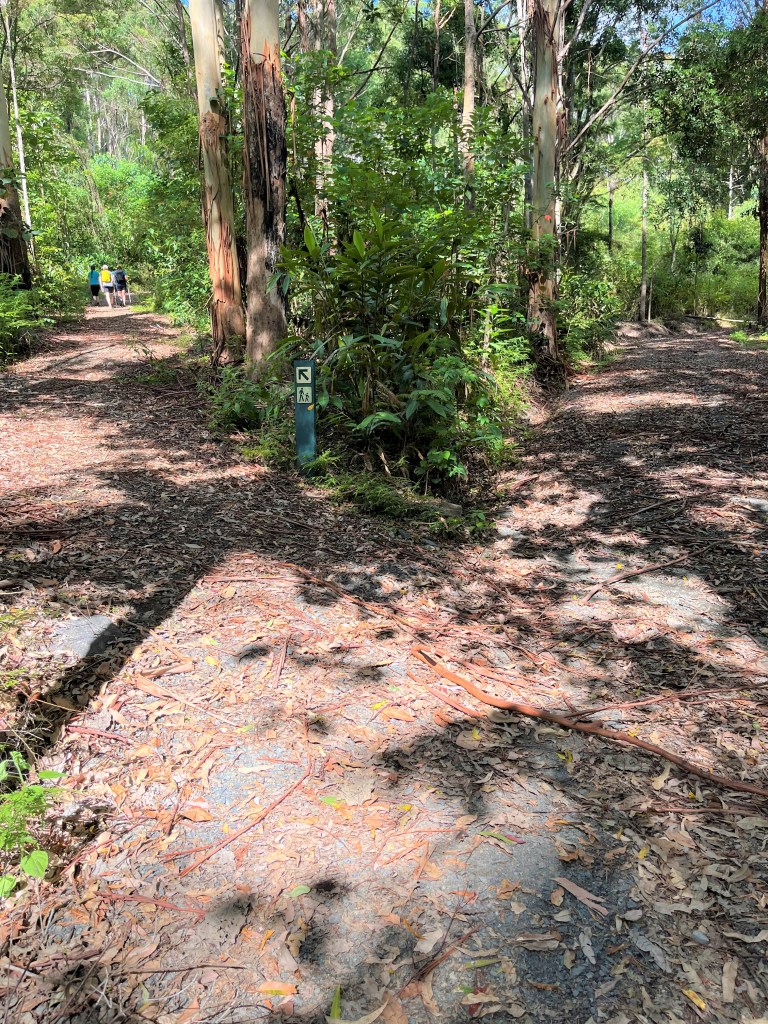
About a km along the trail we entered Nachi Kogen Park – which was a bit of a surprise. It’s an outdoor family adventure park with slides, climbing equipment and other outdoorsy entertainment, and the Kumano trail went up and through it…
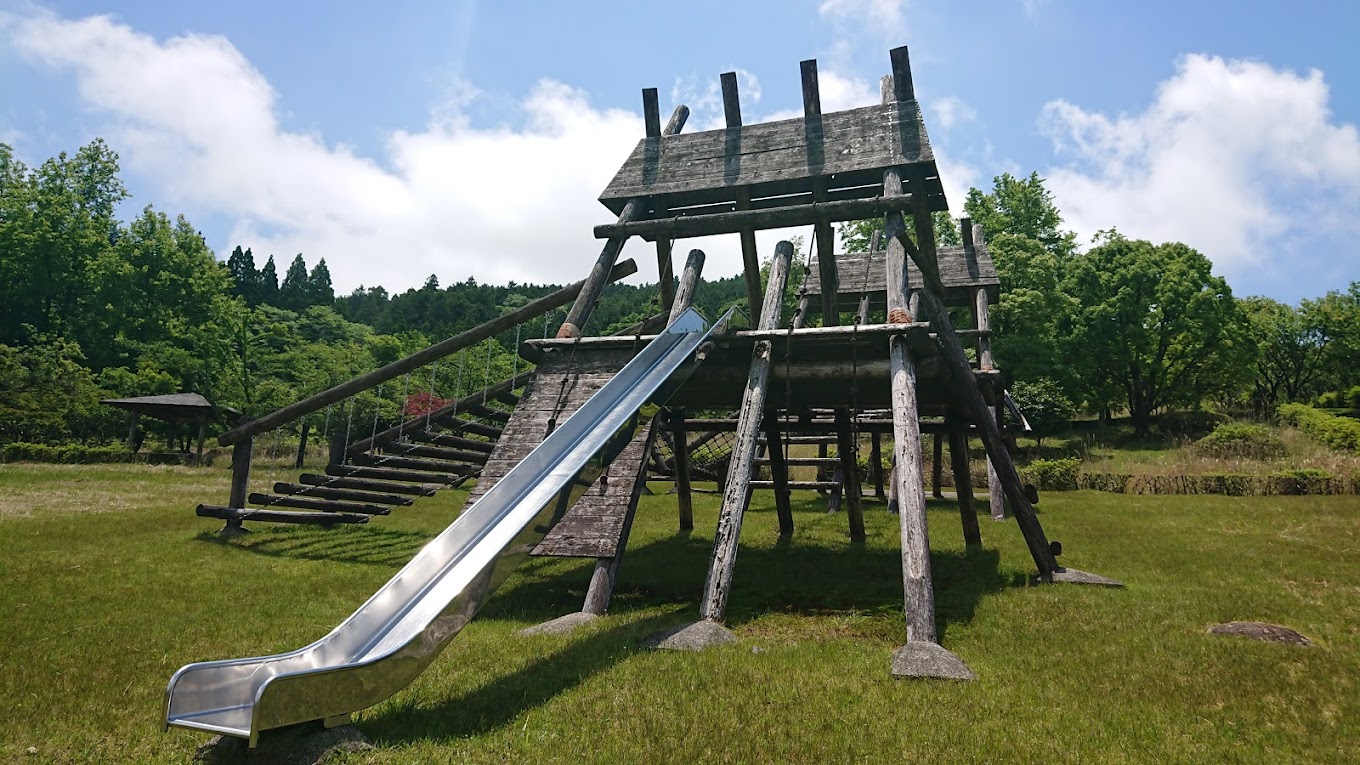
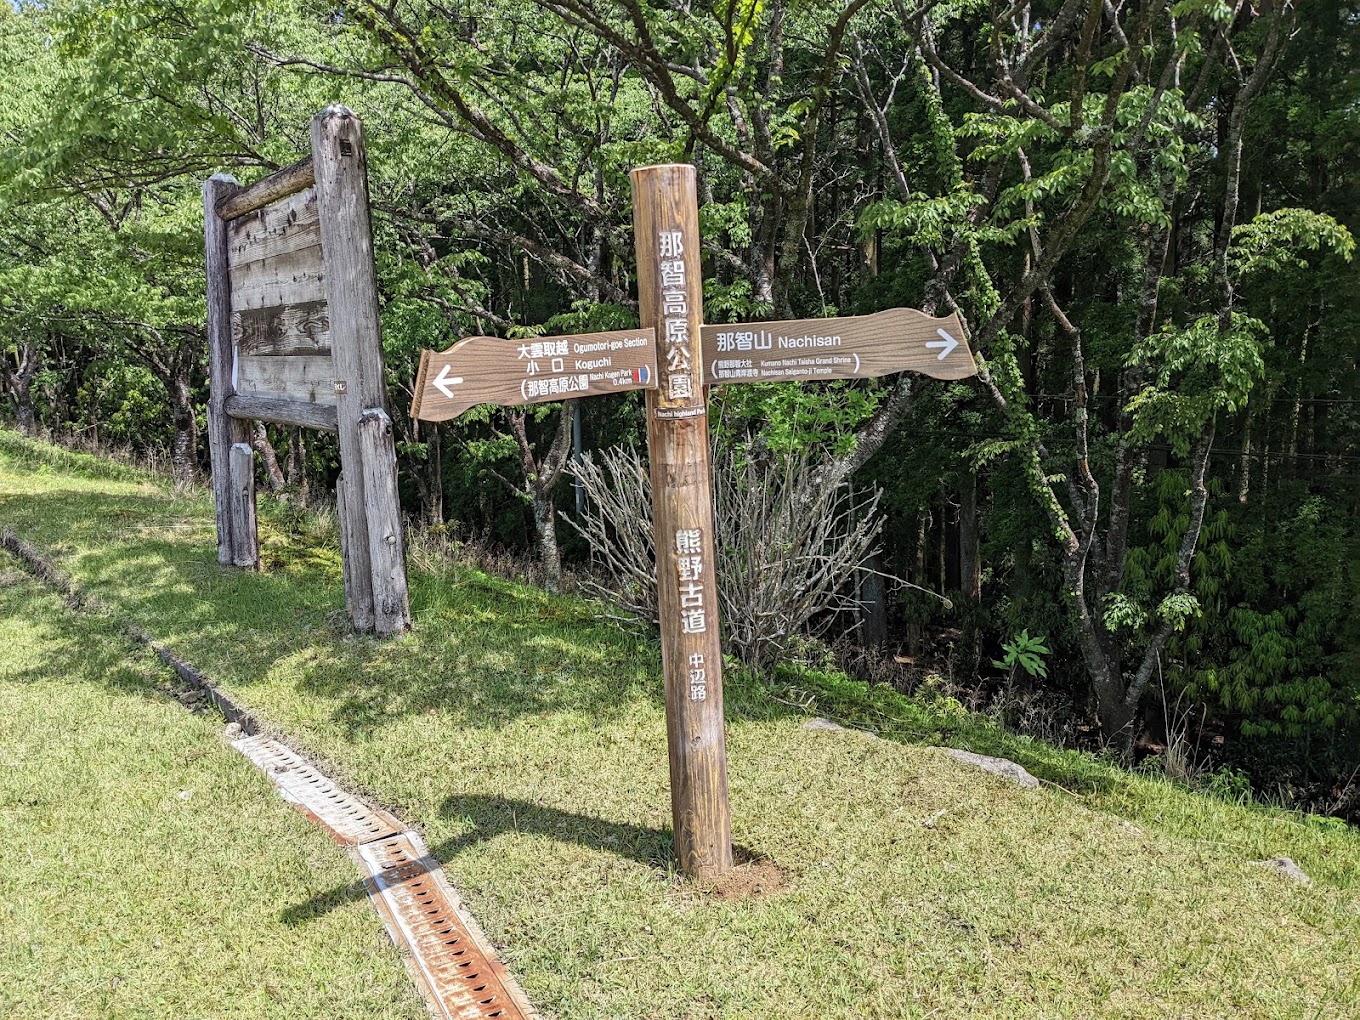
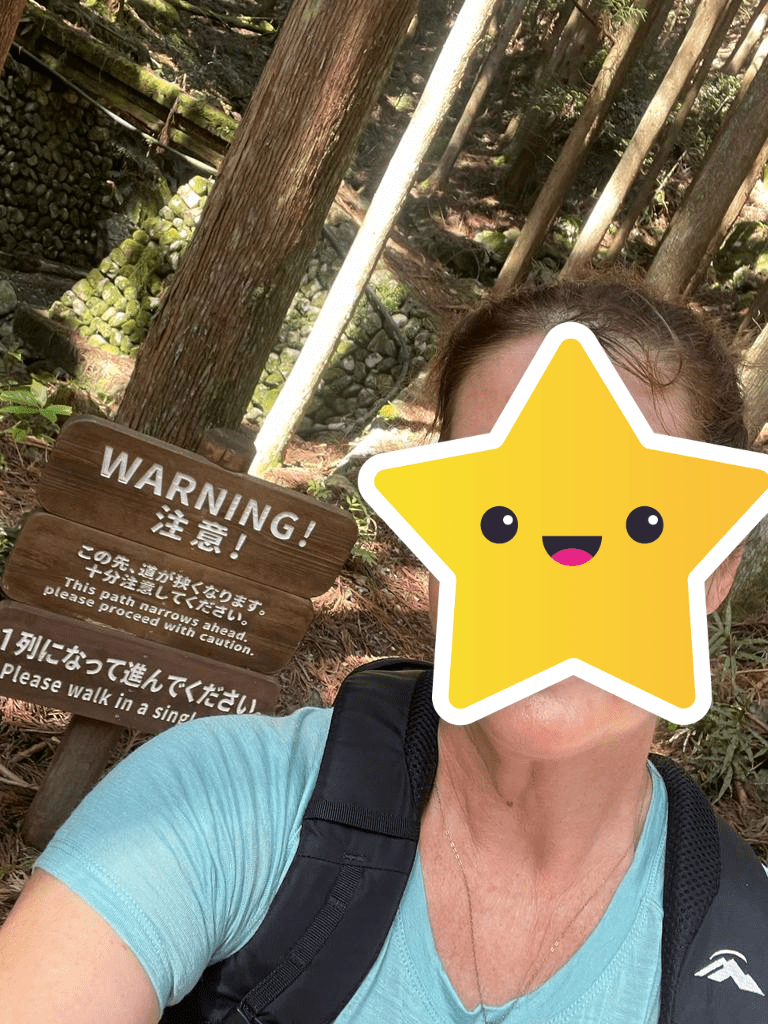
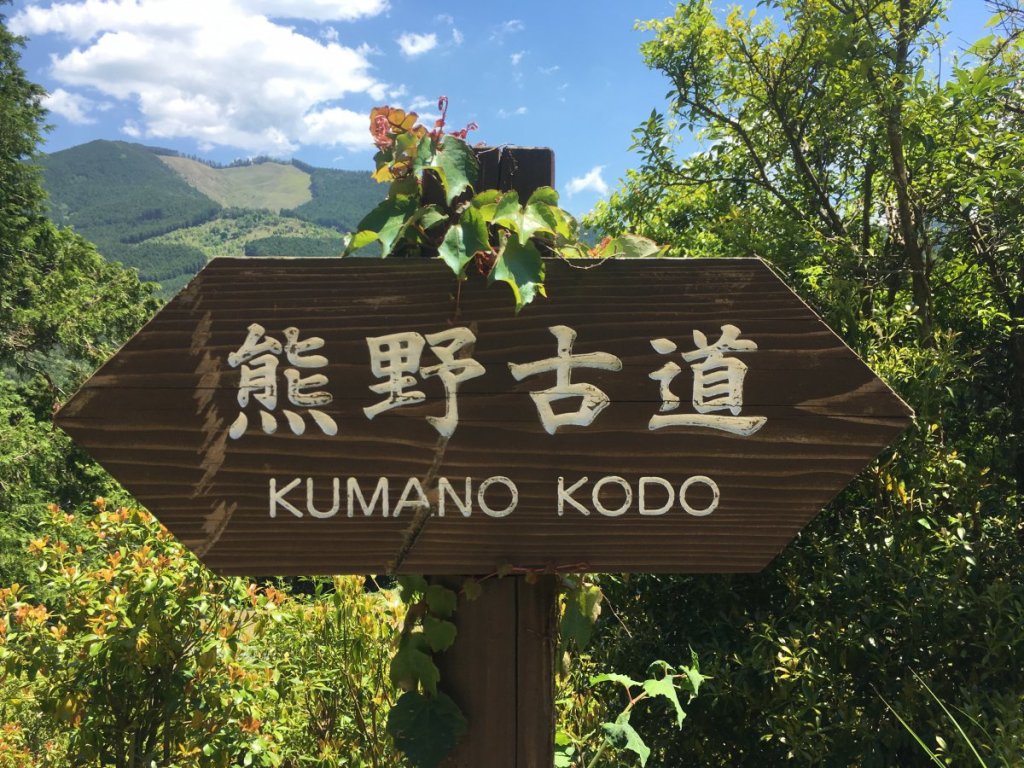
We followed the signs and kept walking up and through the park, which was completely deserted. At the crest of the hill was an access road, and on the other side, the trail running into the forest. It was here that we encountered ‘the sign’. Even the emperors from centuries ago recorded the steepness and challenge of the three passes which make up the Ogumotori-goe…!
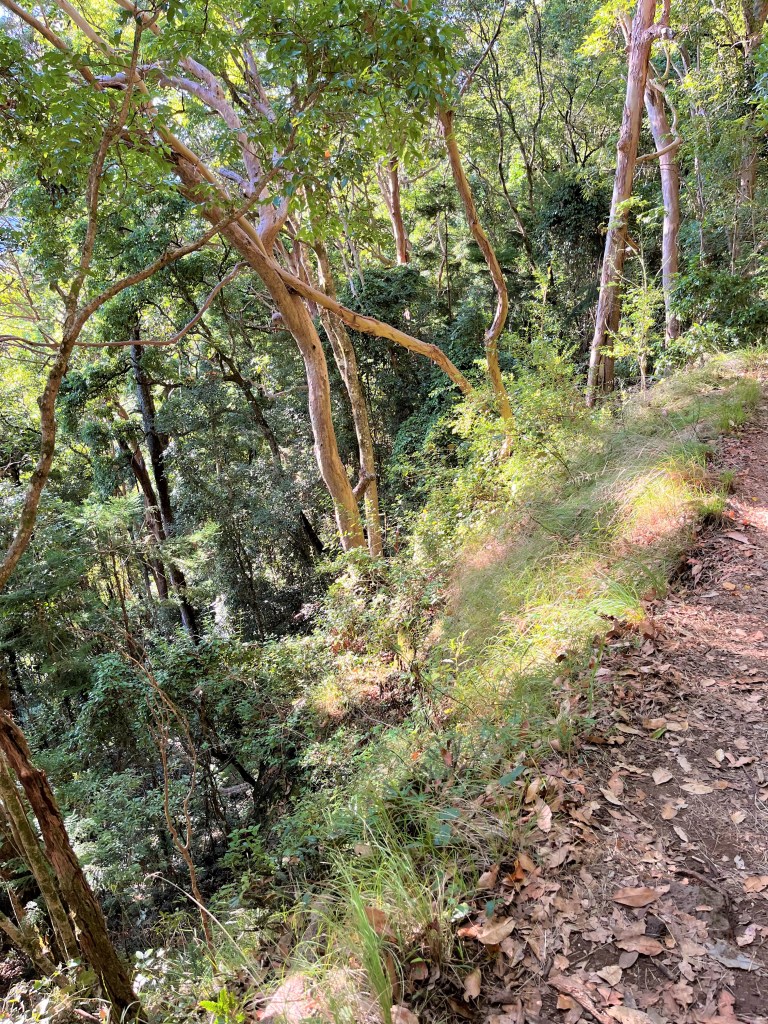
our collective horror at the warning sign! And then the climb began. I settled into a slow but steady uphill rhythm which proved to be handy as the sections weren’t ultra-steep, but they just kept going. The trails still had morning dampness on them, so quite pleased were were going uphill, not down. Our signage was a little different also, gone were the brown wood posts, we now had stone markers.

only 13km to go… 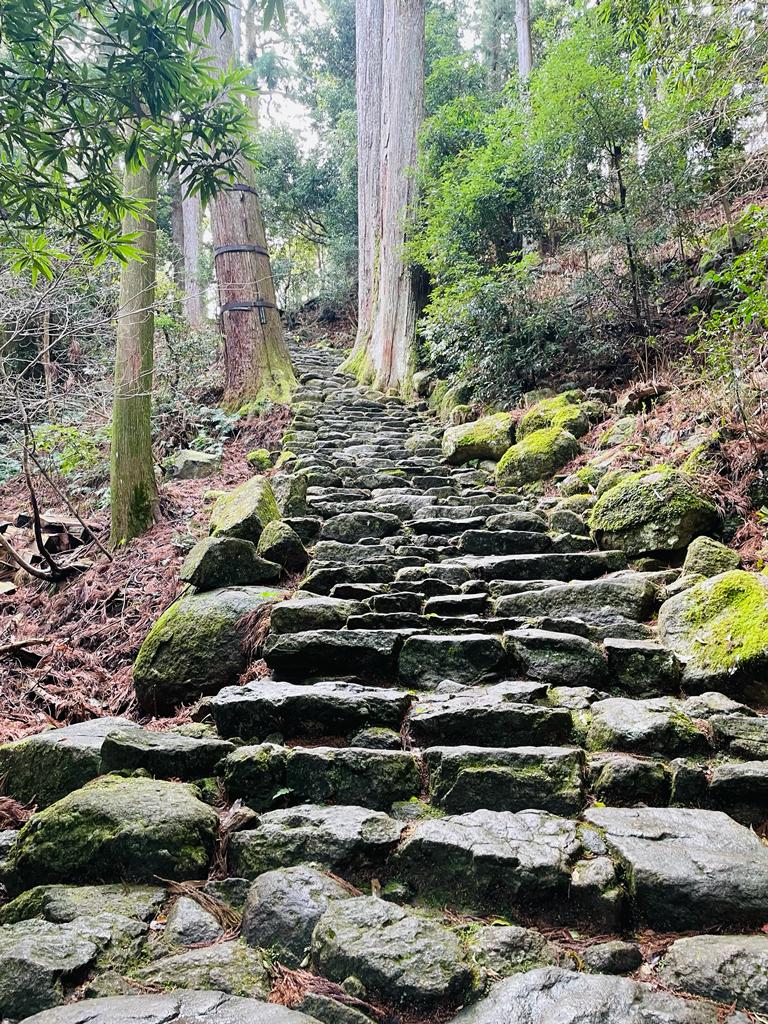
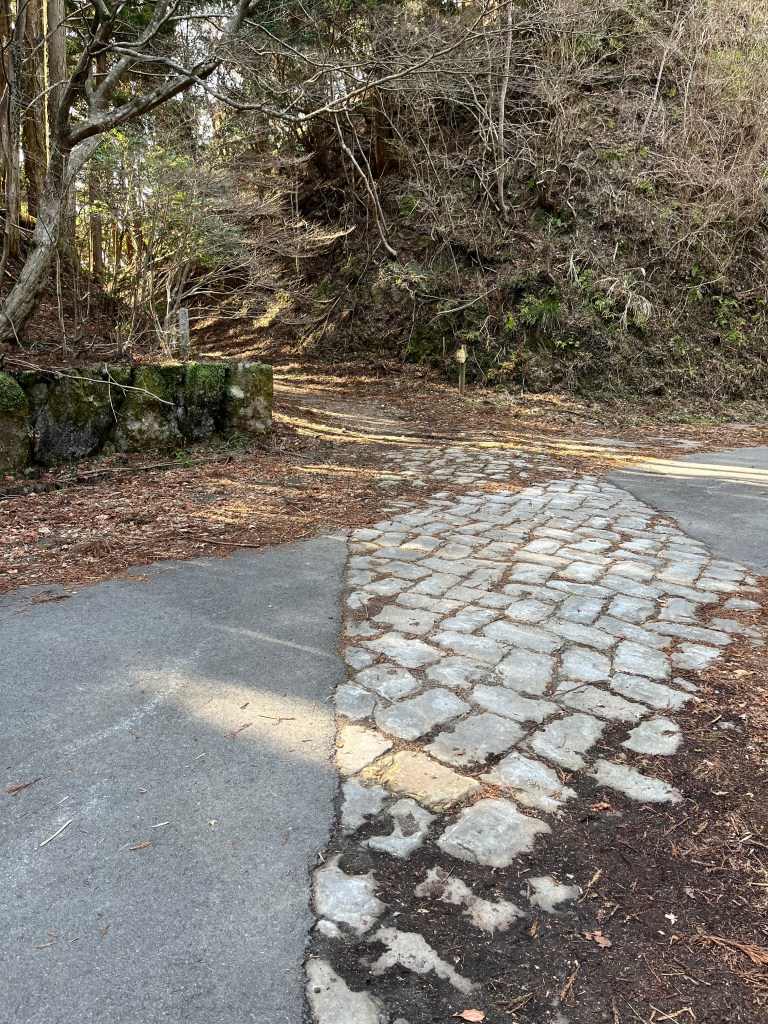
miles and miles of beautiful stone staircases 
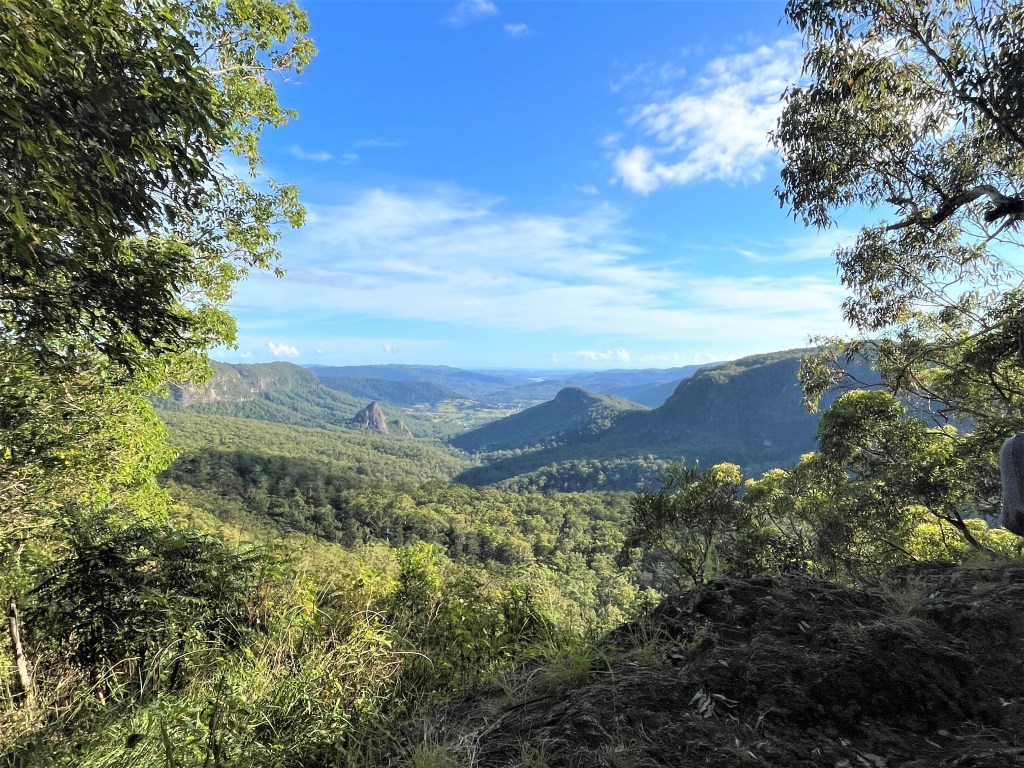
me picking my way uphill….the moss slowed us down a bit After about 90 minutes we arrived at our first stop – Funami-toge Pass, where the teahouse remains were. We figured this would be a good place to have a 15 minute break, drink some coffee and regroup after a hectic and delayed start to the day. And we weren’t wrong – check out the view all the way our to the Pacific Ocean!
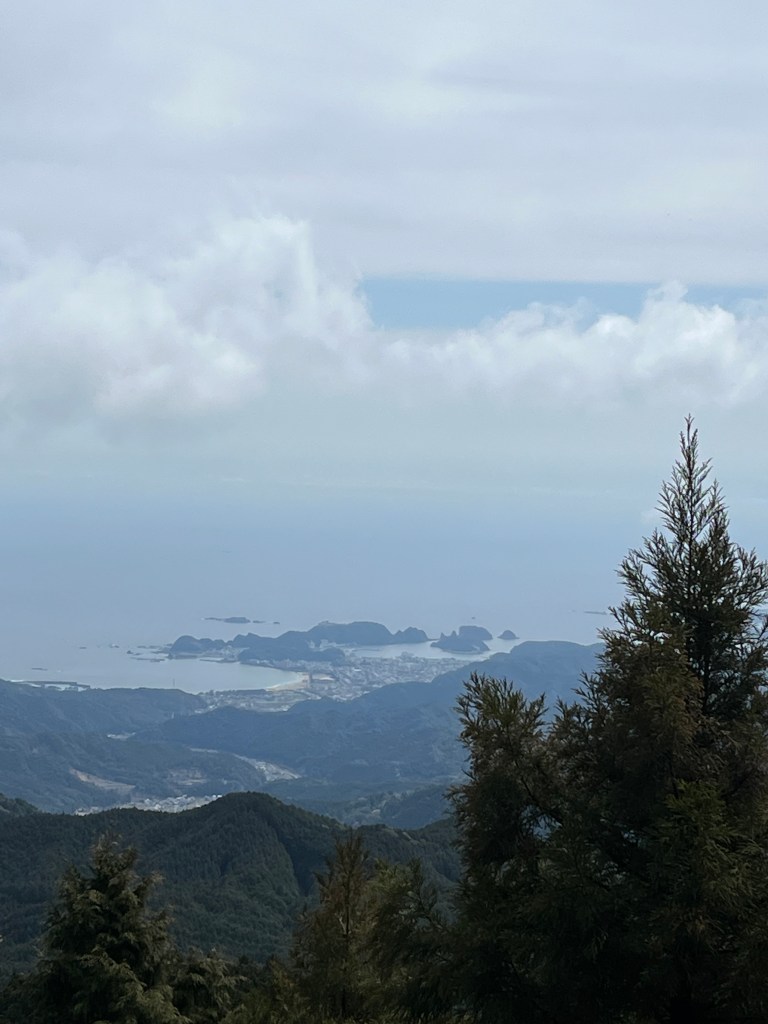
over 800m above sea level…almost touching the clouds 
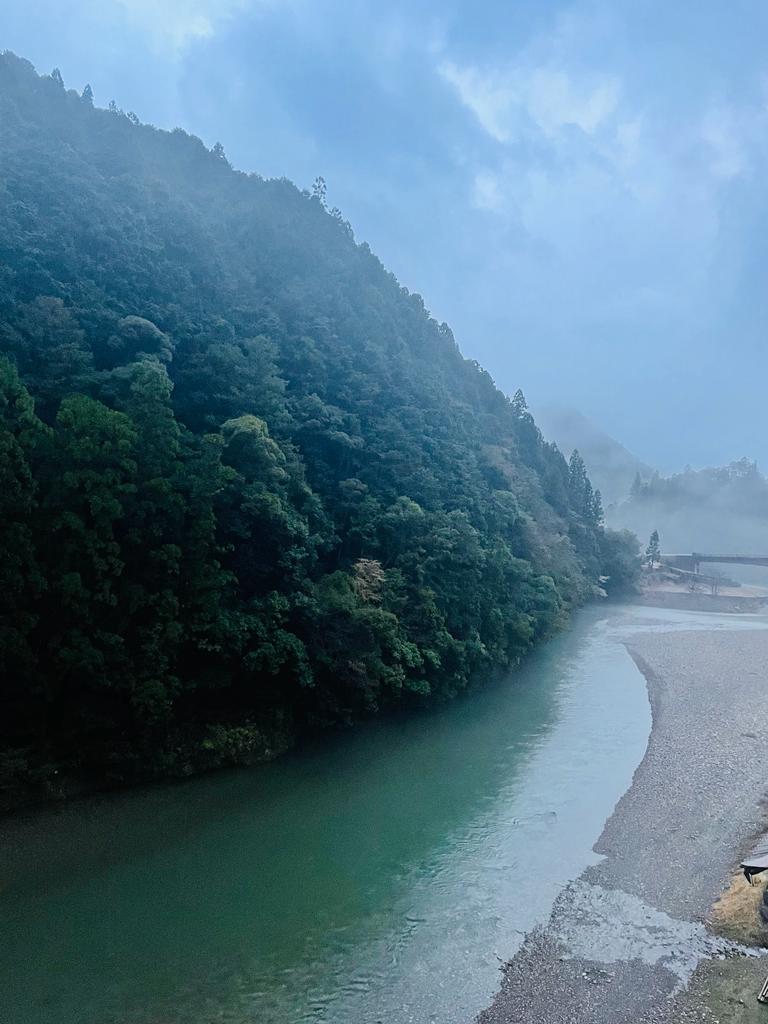
we started our day down there…in Kii-Katsuura As with the previous days, we had the trail completely to ourselves….and hadn’t bumped into any other hikers so far. This allowed us to really embrace the trail experience and soak up all that the Kumano Kodo had to offer.
THIRD LEG – FUNAMI-JAYA TEAHOUSE REMAINS TO JIZO-JAYA TEAHOUSE REMAINS
Feeling well fortified after hot coffee and some lovely snacks, courtesy of a Katsuura supermarket spree, TB and I departed Funami-jaya. We had climbed over 500m in the last 4km so quite an energetic hike so far.
As we hiked deeper into the forest, the temperature dropped, not significantly but still noticeable. The forest canopy was high, but thick and kept the light at bay, so it felt like we were traversing an alternate universe as honoured guests. Every second step we found new things to marvel at – and of course I kept forgetting to take photos – but did take some…
a stone cairn to cross the creek 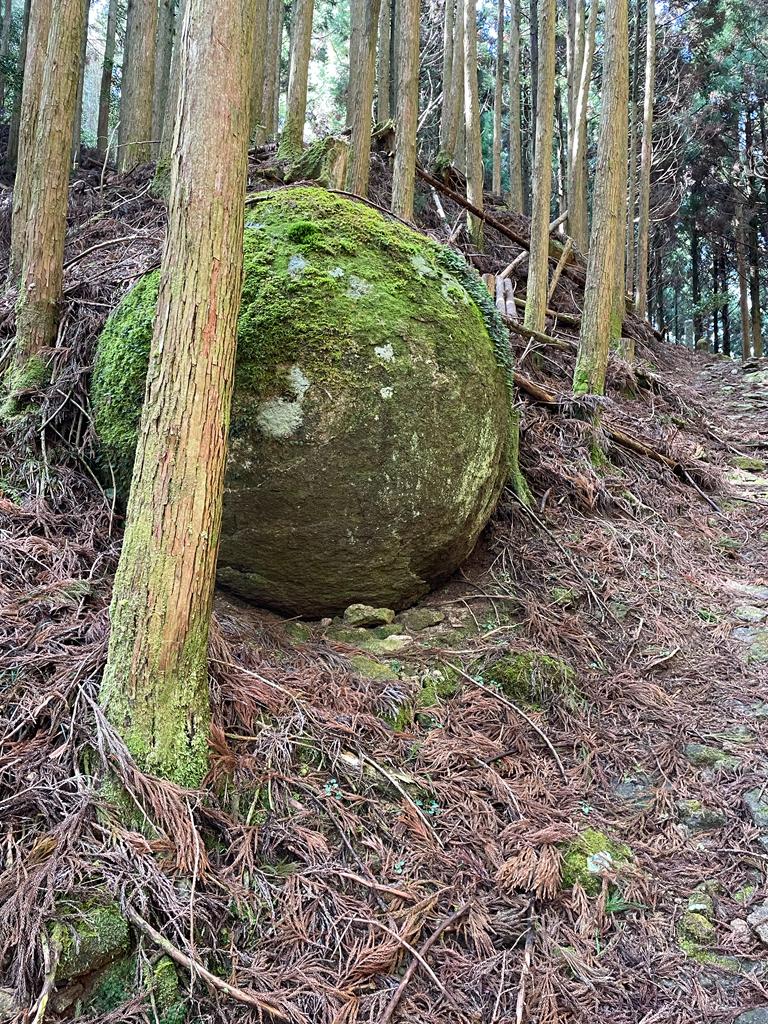
a giant marble 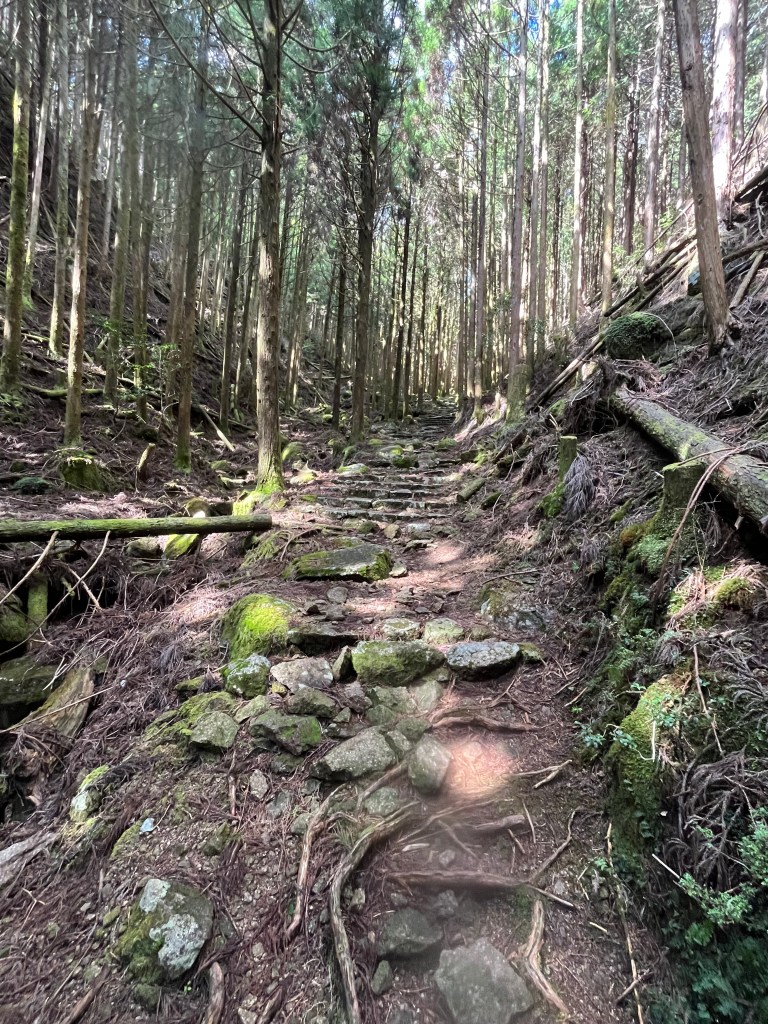
upward and upward 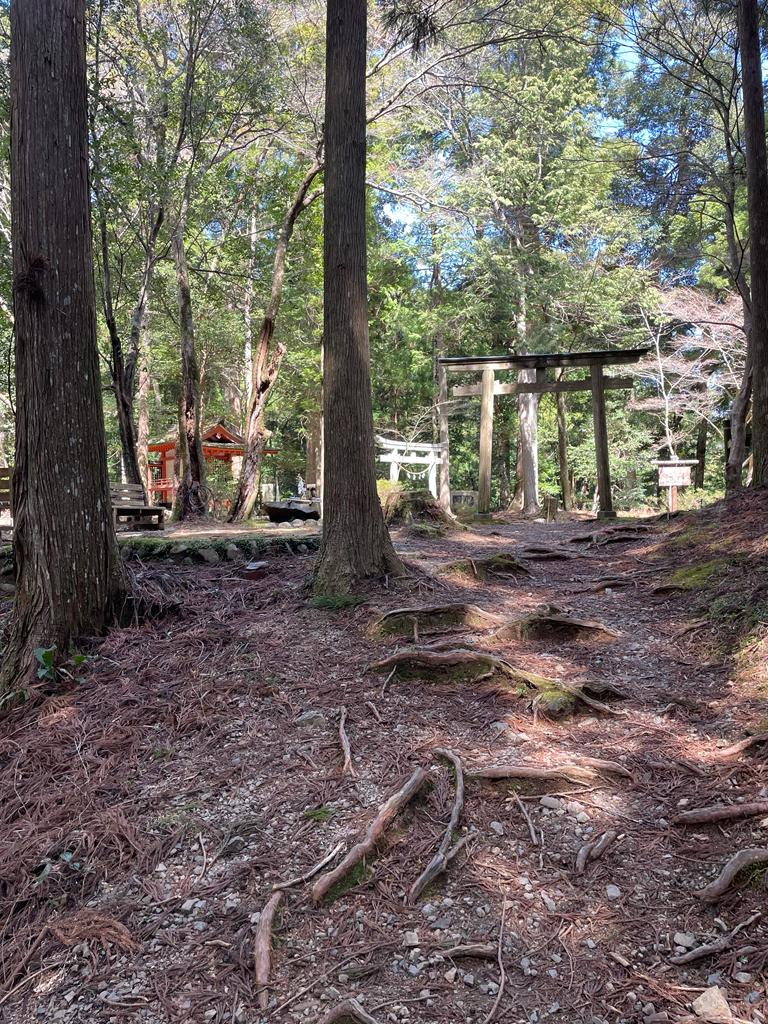
one of the shinto shrines in the middle of the forest This leg kept us quite high on the pass, and it was about midday when we passed our first hikers heading in the other direction. I was keen to find out what time they set off, and to assuage my fears that we were in trouble time wise! I chatted with a couple of them, and they had covered off their section in about 4-5 hours, so that was good news for us. We hoped to be off the trail by dusk.
We emerged from the forest and onto an asphalt access road which promised to take us down to our lunch destination, the Jizo-jaya Teahouse. We encountered another ‘elastic’ distance marker which showed the teahouse was 1.5km down the road. It took us 45 minutes at a fast trot to get there….which means it was more like 3-4km!
Lunchtime – yay!

Fantastic lunch stop 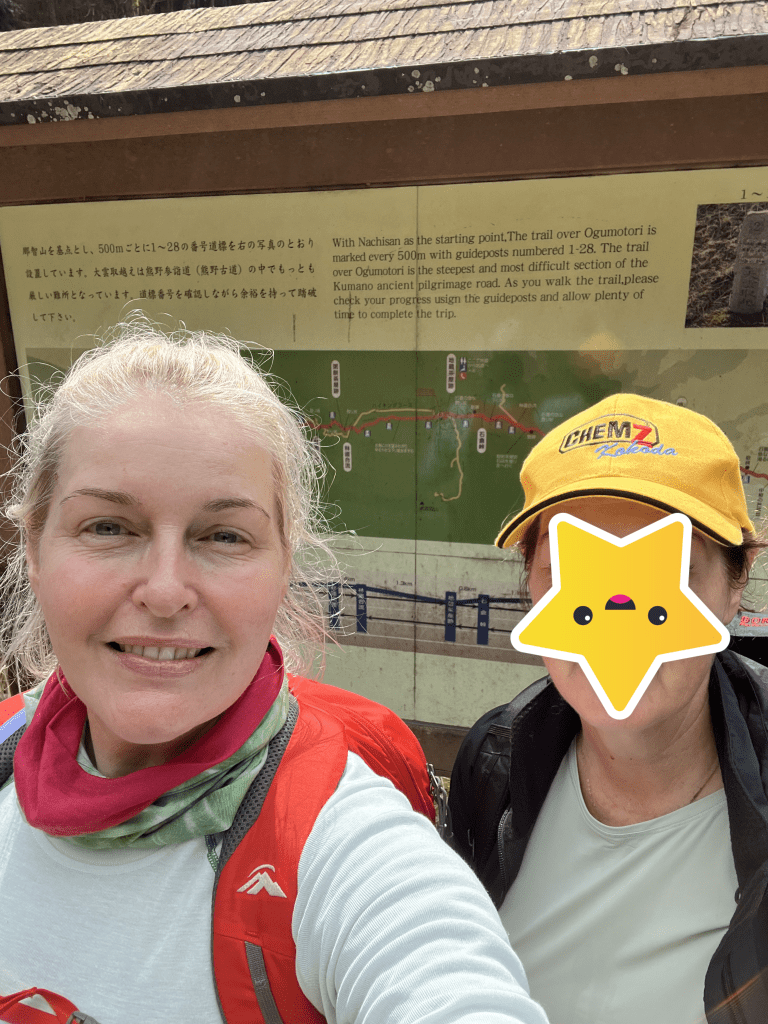
it’s a smile, but I was a bit pooped – it was taken before lunch! The teahouse shelter was a great location by the river and had two completely full vending machines with all manner of drinks, hot and cold. The toilets were lovely and clean, our lunch was oishii – what more do you need on a hike 🙂
FOURTH LEG – JIZO-JAYA TEAHOUSE TO KOGUCHI
The final push – only 6.2km according to the map. I had my doubts as AppleFit and Strava seem to tell a different tale (as did my legs!) but the distance was actually immaterial – were were HIKING THE KUMANO KODO!!!
Once we left the teahouse it was upward again – but a short sharp incline. The area looked like a slip had ripped through, it was a bit desolate and had been reinforced.
It was here we passed our last hiker of the day, a lovely young Slovakian person who made the trail look like a stroll through a dog park! We chatted for a bit and discovered she was supremely confident she would be in Nachisan in a couple of hours. I sincerely hope she was correct 😮
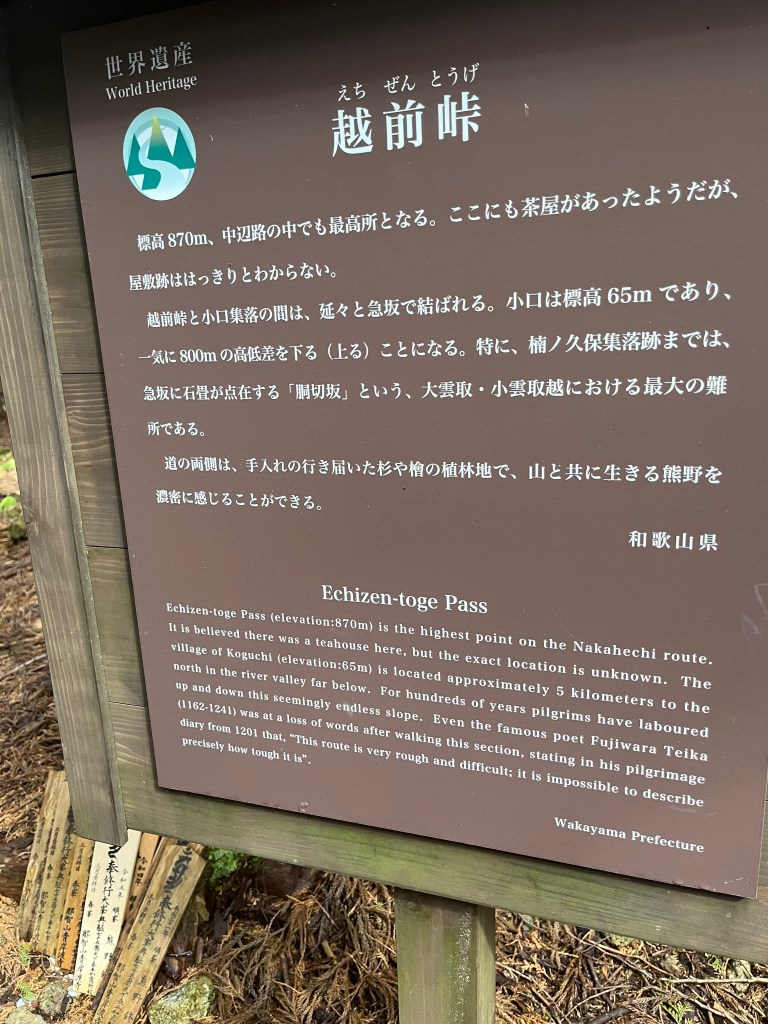
Another hour brought us to the highest point for the day – Echizen-toge Pass.
5km down to Koguchi – lets see! 
views for days A famous 10th century poet was at a loss for words after walking this section “this route is very rough and difficult; it is impossible to describe precisely how tough it is”
From here it was downhill all the way. The section is known as ‘dogiri-zaka’ which can roughly be translated as ‘body breaking slope‘. Working on the premise you’re coming up the hill. Which, thankfully, we weren’t.
The next couple of hours can only be described as a mad scramble descent. Our deadline of 4.30pm was forefront in our minds and as we descended, the light was slowly becoming dimmer.

downward forever… I was supremely grateful for two things – sturdy hiking boots and walking poles.
These two items meant we could power down the stone stairs, paths and trails with accuracy and support. We passed some incredible ryokan ruins at Kusuonkubo-jaya and from there, the steep slope became less treacherous and more gentle.
Kusunokubo-jaya 
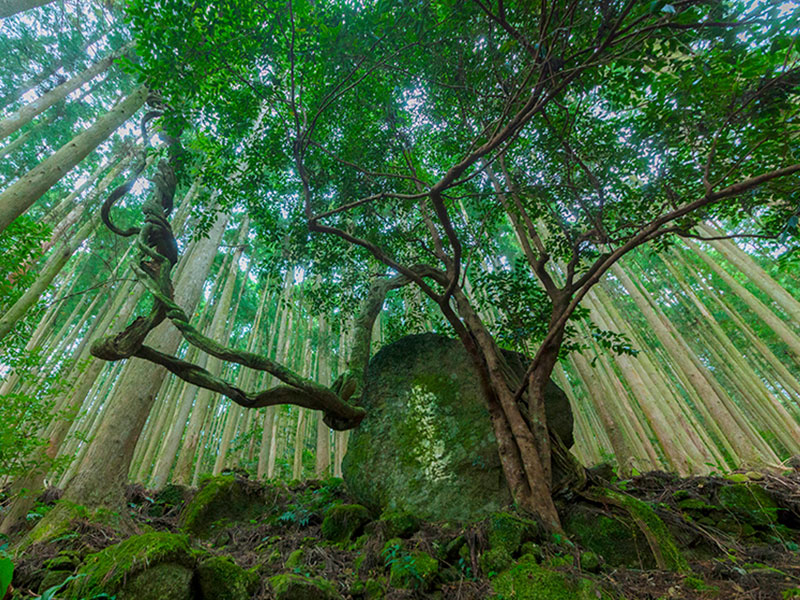
the gods acknowledged The history and grace that resides in the Kumano Kodo is quite simply – awe inspiring. Around every corner is another historical delight to enjoy. I didn’t get my own photos of everything, but above are two images from the Tourist Centre – see what I mean?!
DESTINATION – KOGUCHI
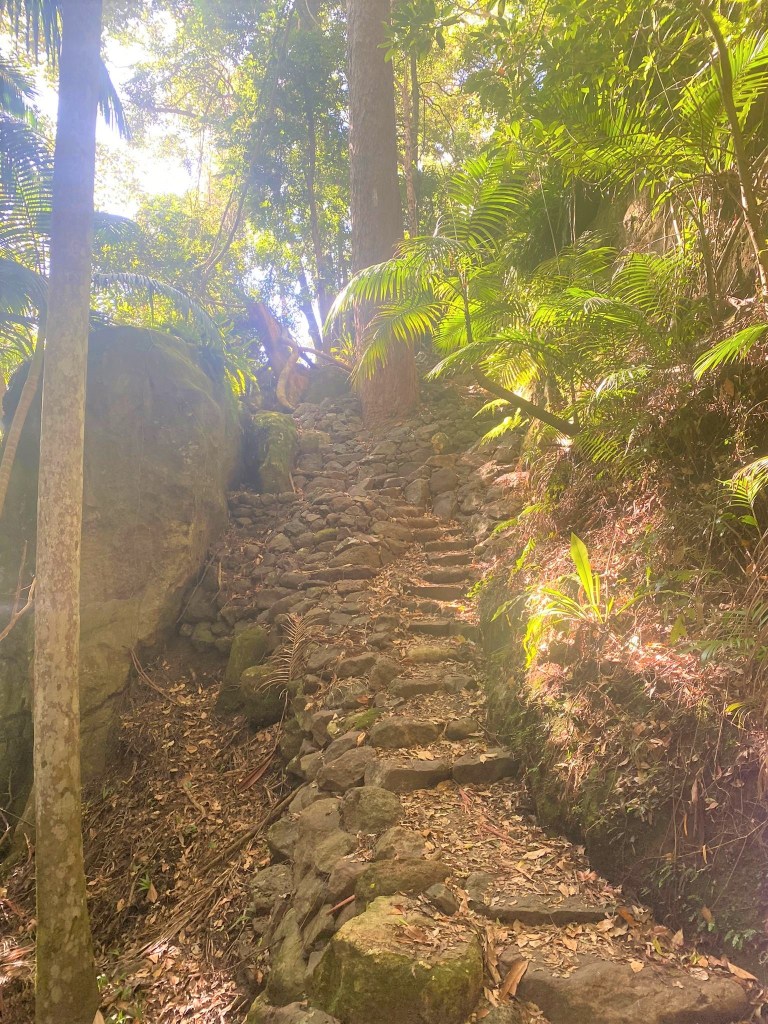
After the final two km dropping gently down into the valley, we popped out into Koguchi – but not before clambering down the final set of perilous moss covered stone stairs! With aching legs, I do believe this was the most dangerous part of the day 🙂
Our instructions were to phone our accommodation providers (Takata Green Land) for a pickup when we arrived and wait outside the Minakata grocery store. Very specific. I’m good at following instructions, so we duly phoned and our pickup was booked for 30 mins time.
Happily the store was open, so a refreshing beverage was in order. We sat outside the store and can I tell you, it was the best beer I’VE EVER HAD… and TB advised that it was the best sake she had tasted that day (ha!)

$2AUD for a 500ml Asahi – heaven! 
Perhaps not best quality, but best on the day 
the hustle and bustle of Koguchi I can’t help myself – here are the distance comparisions:
Paper map = 14.2km
AppleFit = 21.04km
Strava = 29.1km
hmmm.

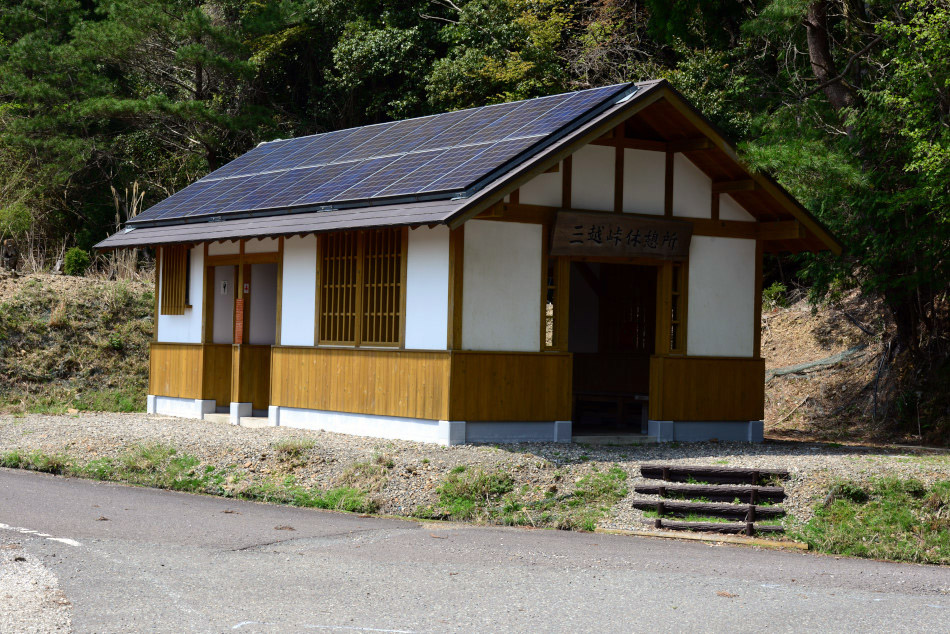
OUR ACCOMMODATION – TAKATA GREEN LAND
Our shuttle arrived, and 20 minutes later we were at Takata Green Land, aka Kumotori Onsen, a “low key hot spring inn”.
The best way to describe the accommodation was compliments of TB – it was “Hi-De-Hi during off season”. For those of you not in the know, Hi-De-Hi was an English sitcom set in the 1960’s when families went to holiday camps complete with dining halls, communal loos, and kitsch everything – all in perpetual rain. Everything appeared a little grubby, and the dining room was in use as a very large storage cupboard. Our tatami room was a bit battered and didn’t’ have any toilet facilities, they were communal in the hall. There were hardly any guests around – only three of us for dinner and breakfast, so I’m assuming it really was off season.
The onsen was lovely though – we wallowed outside in the hot pool in the misty rain, very warm and relaxing for tired muscles. Ditto the food, it was plentiful, tasty and did the trick.
Day three of hiking the Kumano was done and dusted. We were happy, health and injury free – what a great way to finish a great day.
Stay tuned for our final day on the Kumano, as well as some blogs on ryokans, onsens and other Japanese adventures – yippee!!
Thanks for tagging along – see you out on the trails.
PJ 🙂

-
HIKING THE KUMANO KODO #2
Hello and welcome to my LIKETHEHIKE blog.
I’m PJ and I write about the hikes I take, giving you insights, photos, commentary, tips and tools so you can enjoy hiking and embrace the experience.
It’s day two of our hiking adventure on Kumano Kodo, and when we last chatted, we had completed our first epic day on the trails!
DAY TWO – CHIKATSUYU TO HONGU TAISHA GRAND SHRINE
TB and I set off from our wonderful ryokan accommodation in Chikatsuyu at around 7am. It was a chilly morning, maybe around 5 degrees but the sun was shining and all was well with the world. I was slightly stiff in my legs, but not sore and certainly not impeded after a great night’s sleep.
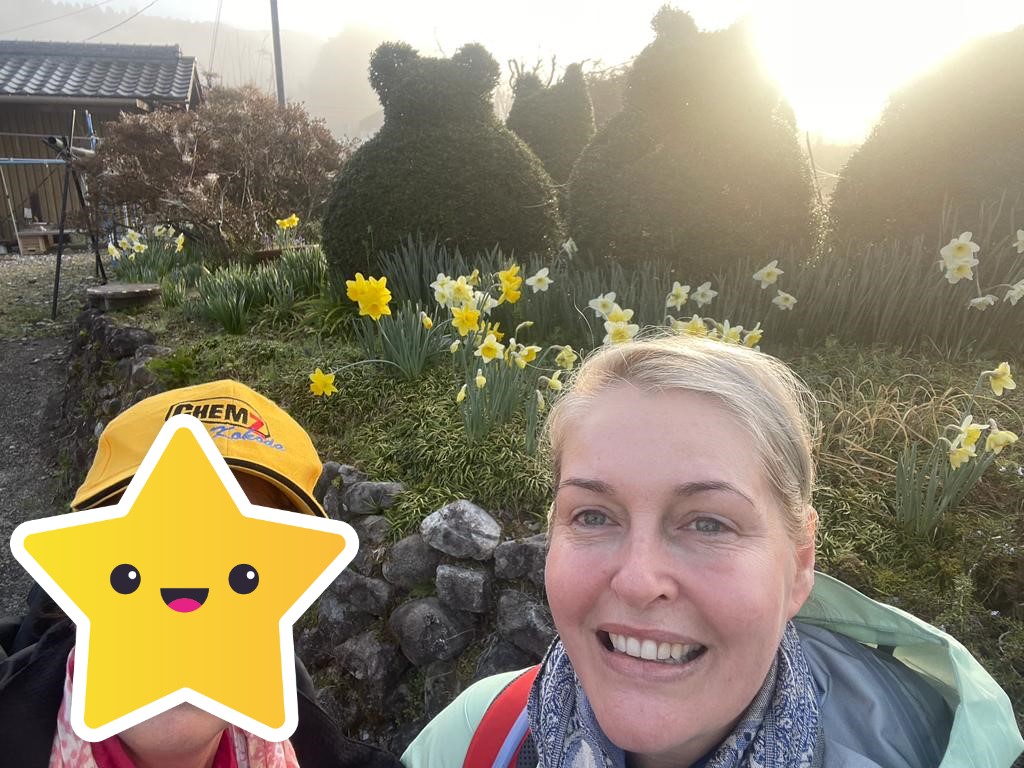
Adjacent to the ryokan we found a green thumbed local who had created a series of topiary bushes – of pandas!! Or perhaps Asiatic black bears…? Very cute.
This is as close as you want to be to a black bear! FIRST LEG – CHIKATSUYU TO KOBIRO-OJI
So, first things first. Here’s the map for our second day hiking. Ignore the day 3 notation, that’s day 3 of our total trip including travel days. And ignore the pink bit, were were scheduled to hike from the green dotted line ALL THE WAY TO THE END OF THE MAP.
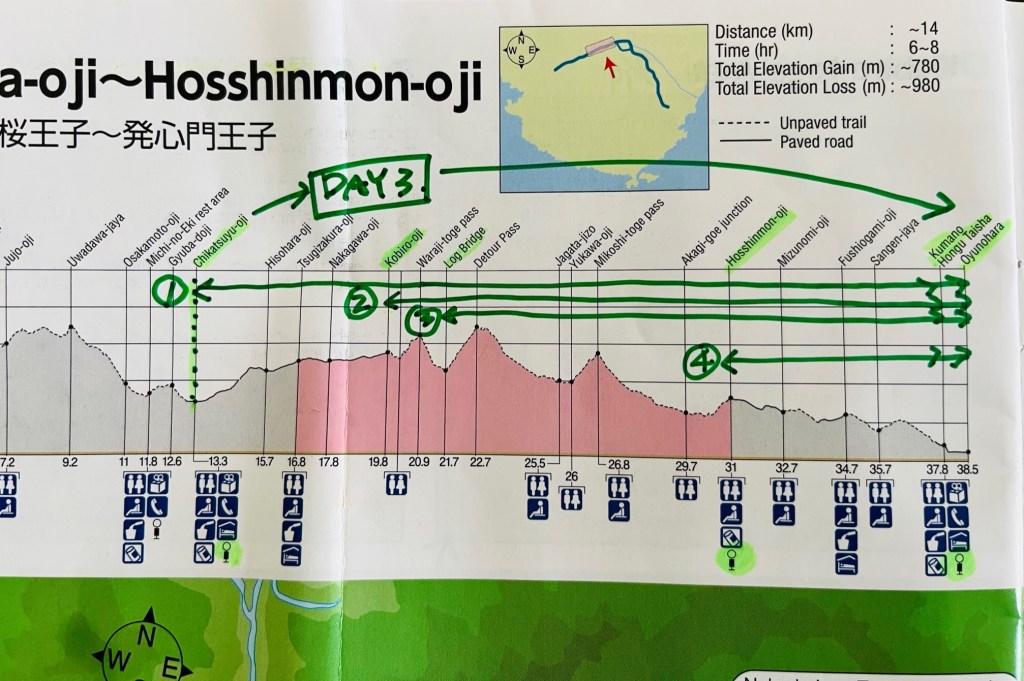
That’s a lot of ups and downs… TB and I spent some time the previous evening going over the plans for today, specifically our timings. After the first day we were conscious of the need to be off the trail by 4.30pm at the latest. We decided that 25km through challenging terrain was a bit of a stretch for one day, even with an early start.
Our ryokan hosts were very obliging with bus information, and they said we could take a local bus from the end of the street to Kobiro-Oji, departing around 7.10am. This would trim off about 8km and make the day a workable 18km. Also, if you look closely, the first section from Chikatsuyu to Kobiro was on a paved surface, so not in the forests.
So, we caught the bus and lived to fight another day 🙂
SECOND LEG – KOBIRO-OJI TO MIKOSHI-TOGE PASS
The bus trip to Kobiro was pretty quick, around 20 minutes. We were sorted – poles out and ready to walk before 8am. We had our lunch on board (chicken sandwiches) and off we went. It was a gentle downhill gradient to start with, which gave leg muscles time to warm up, then it was up the mountain.
We wound our way upward, and rather than going straight up, the trail switched back and forth, and then tracked along the side of the mountain. When we had a view, it was quite lovely, but the hiking vista of the trails was just as pretty.

Gently going up 
Morning vistas 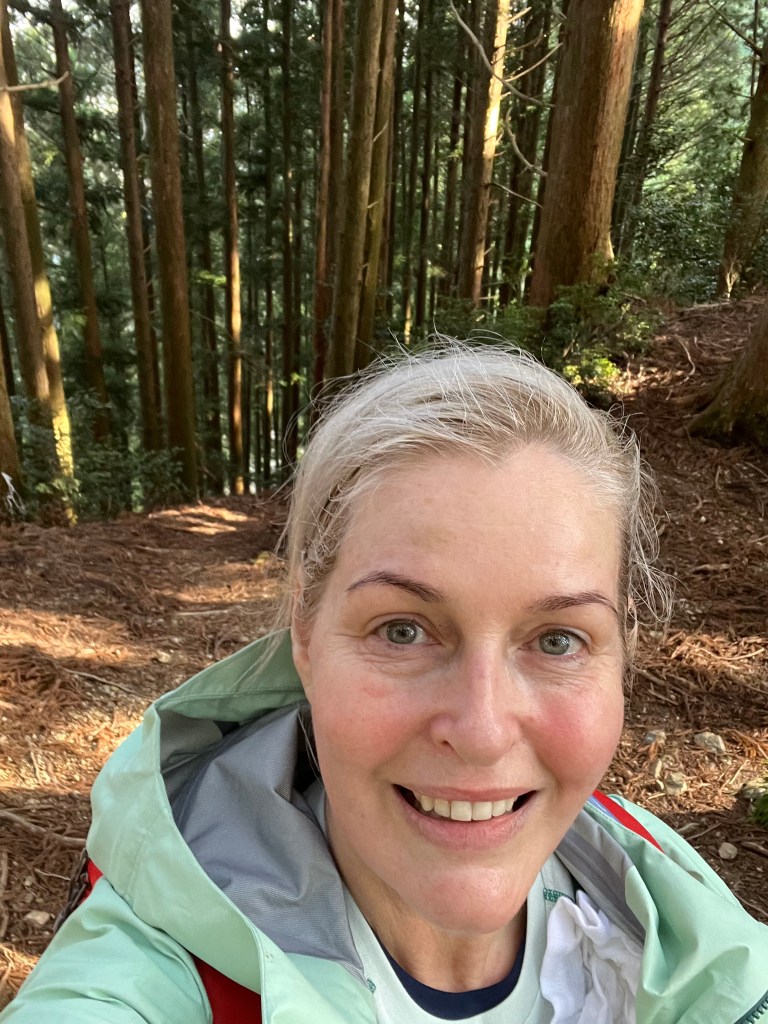
Made it! That’s me at the top of Detour Pass, a little ‘perspired’. Notice that the scarf and other warm clothing is now gone – and pretty soon the jacket came off! It was a cardio morning session, but definitely easier than day one.
The next section was a lovely downward treat for about 3km. We wandered through forests, passed little shrines, crossed old bridges and started to see the famous stone pathways and stairs that make Kumano globally recognised.

peeking through the forest 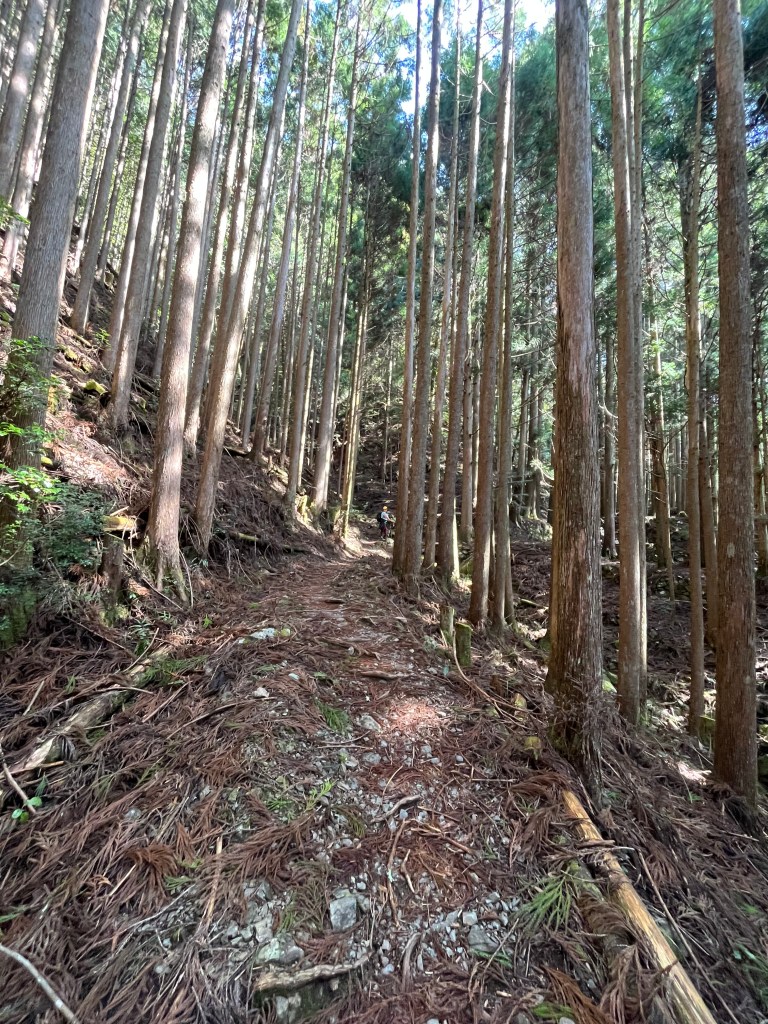
pathways 
TB tackling a dangerous crossing 🙂 We could slow down and really drink in the sights, the sounds – the ambience of the trail.
It’s very difficult to capture in a photo how Kumano impacts you. It makes you feel special way deep down – at the point of who you are, and just as importantly, who you want to be. It gives you the space, time and simplicity to think about things. You feel part of something so much bigger than yourself and to have that mental and emotional space to reflect is very precious.

Shinto shrine 
Me braving another dangerous crossing 🙂 CAUTION – MANIC vs MINDFUL HIKING
When I start a hike, I do a bit of a self check. How am I feeling physically? Mentally? Emotionally? What do I want to get out of this hike? I can then decide who I want to set myself up mindfully. However, on day one of Kumano, I started manic hiking. It was all about getting to the top, getting to the end, getting to the finish, taking all the photos, not being last. It took about an hour for me to calm down. I reminded myself that it was my hike, my holiday – I set the pace and the rules. It’s important to approach hiking in a mindful way so you get the most out of the experience. There is incredible value in setting a pace that allows you to enjoy the day – just be off the trail by dusk!Mikoshi-toge Pass is at the crest of the mountain, and is marked by a lovely pavilion with amenities and a covered sitting area to rest if you need to. We had a beautiful spring day, so we stopped in the sunshine for a coffee break.
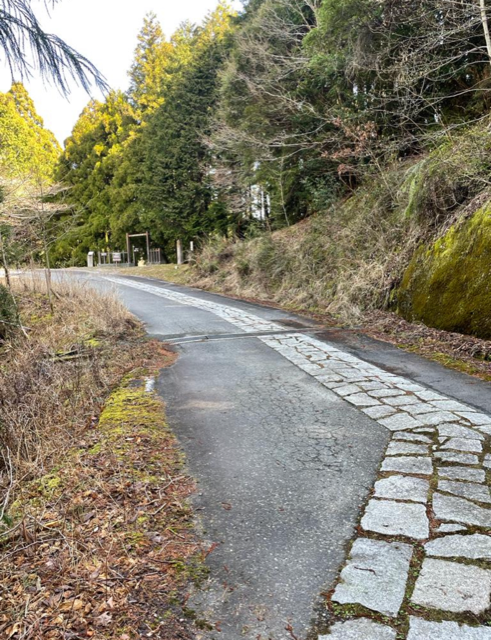
Where Kumano crosses roads, there are often pavers inlaid to keep you on track.
We had been hiking during the morning within sight of Mrs and Ms Melbourne who we met the previous evening (see Hiking the Kumano #1). Mr Melbourne was a crazy fit hiker, he left Chikatsuyu the same time as we did (he was walking and we were bussing). And he caught up with us here! HIKING LEGEND!
TIP – HOT REFRESHING BEVERAGE ANYONE?
Full and multi day hikes need food and fluid to keep you sustained and hydrated. Water isn’t a lot of fun, even when you add flavour or supplements. Coffee, tea and other beverages can really perk (*boomtish*) up your hike. We found some amazing Thermos options in Tokyo for a ridiculously cheap price, probably 75% less than what they cost in Australia. We had our coffee sachets, so we simply added hot water every morning, and enjoyed a hot drink during the hike. Well worth the investment.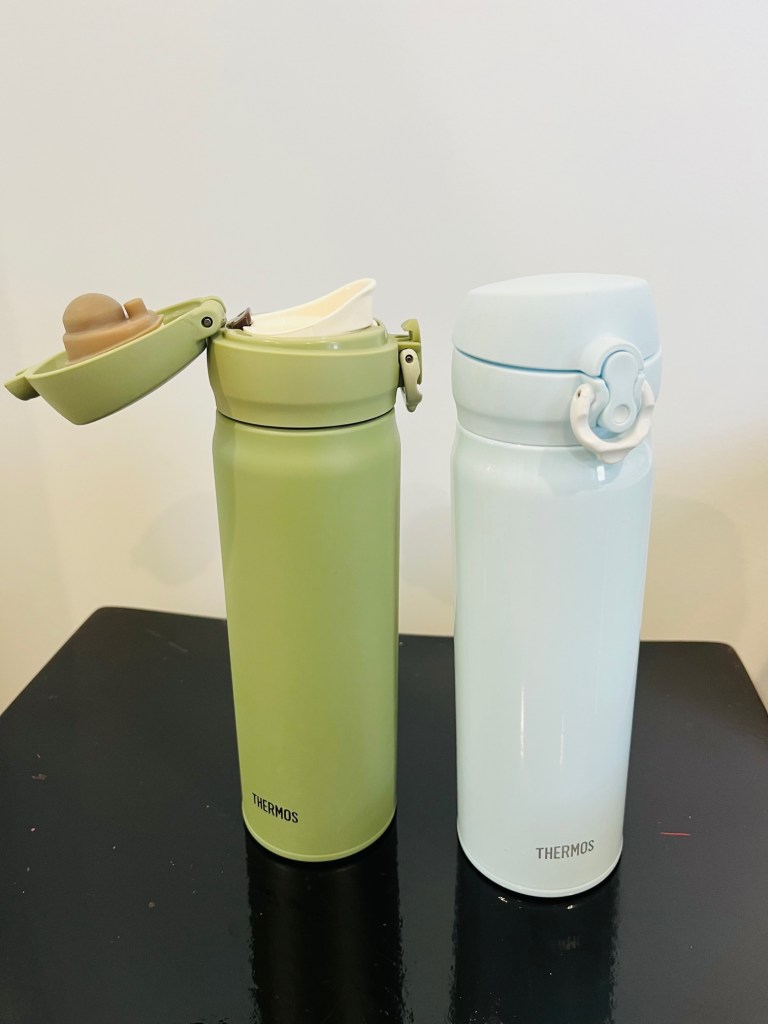
Two of the three 500ml Thermos’s picked up in Tokyo. I paid about $22AUD for each one…bargain, considering they’re about $80 at home… THIRD LEG – MIKOSHI -TOGE PASS TO HOSSHINMON-OJI
Twice in one day – we were hiking downhill again. The descent from Mikoshi to Hosshinmon was another 2-3km which was a blessing as we could slow right down and enjoy what was unfolding around us. Most of the time we followed Otonashi-gawa River downstream. We also wandered through a couple of abandoned villages – one was closed as recently as 1970 by the local council. Historically there were no bridges across the river, so pilgrims traversed the water to purify themselves on the way to the grand temple at Hongu.
TB taking heed of the warning 
Following the river 
lovely trails 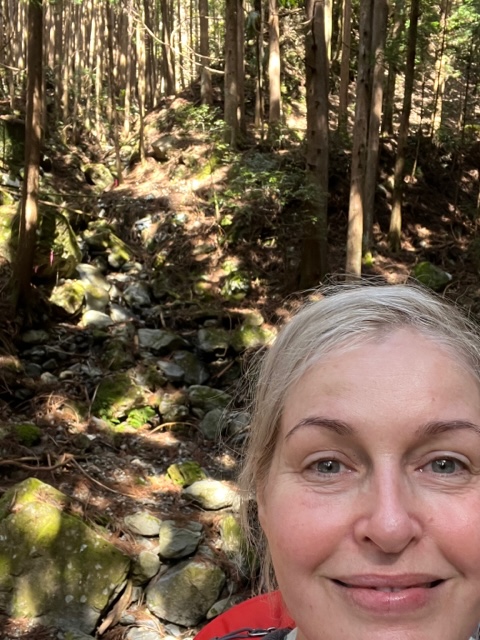
more lovely trails and me! 
The trails beside the river – just beautiful From the Akagi-goe Junction to Hosshinmon it was uphill again, but a short sharp one. TB and I were so enjoying our surroundings that we missed the Kumano signpost going up – and found a dead end…..!

There’s a reason they have the signs – doh. Once up the hill we had arrived at Hosshinmon-oji, which is a large Shinto shrine with an equally impressive torii. We had the shrine to ourselves until a couple of hikers made it up the hill behind us. TB and I decided that with only 8km to go, it was the perfect place to have lunch. Sandwiches on a wooden bench looking at a centuries old shrine. Perfect.

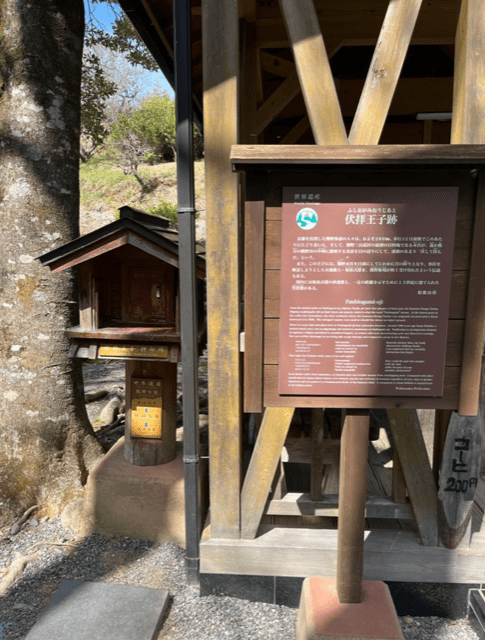
Hosshinmon-oji 
Teeny tiny oji – it takes all kinds Fun fact – Hosshinmon is known as the ‘gate of awakening of the aspiration to enlightenment‘ and is the outermost entrance to Kumano Hongu Taisha’s sacred precincts. I think after two days hiking, this about summed up how TB and I felt walking along a thousand year old pilgrim trail.
FINAL LEG – HOSSHINMON TO HONGU
According to the map, we were only about 8km from our destination, the Hongu Taisha Grand Shrine. And it appeared it was a gentle up and down for the final leg – happy days!
This last leg was different to anything we had walked so far. It was road and trail walking as we wound our way down the mountainside through little hamlets and past houses. We peeked into back gardens and marvelled at the number of what appeared to be concrete fish tanks in yards, along with very well maintained veggie lots, orchards and tea plantations. There were lots of driveway honesty boxes with local produce for sale – it’s the same the world over 🙂
Fish? Eels? Decorative? 
A tea plantation and something hiding
can you see what it is??!! (a monkey!)After about 90 minutes we arrived at Fushiogami-oji. Fushiogami translates as ‘kneeling down in prayer’, and as the crest provided the first sighting of Kumano Hongu Taisha, pilgrims often knelt to give thanks. There’s a lovely shrine here, along with a working teahouse which was open when we came through. We stopped for two outrageously priced ‘forest juices’ which tasted suspiciously like cordial, but who were we to argue with the ancient triumvirate who were obviously in charge?!
Fushiogami – oji 
The rest stop. Up 21 stairs to the view of Hongu. Cherry blossoms were out Now, I’m going to jump a bit in my storytelling here. We actually walked the last section from Fushiogami down to Hongu three times so I’ll save the tale (including our monkey encounter!!) for a later blog.
DESTINATION – HONGU TAISHA GRAND SHRINE
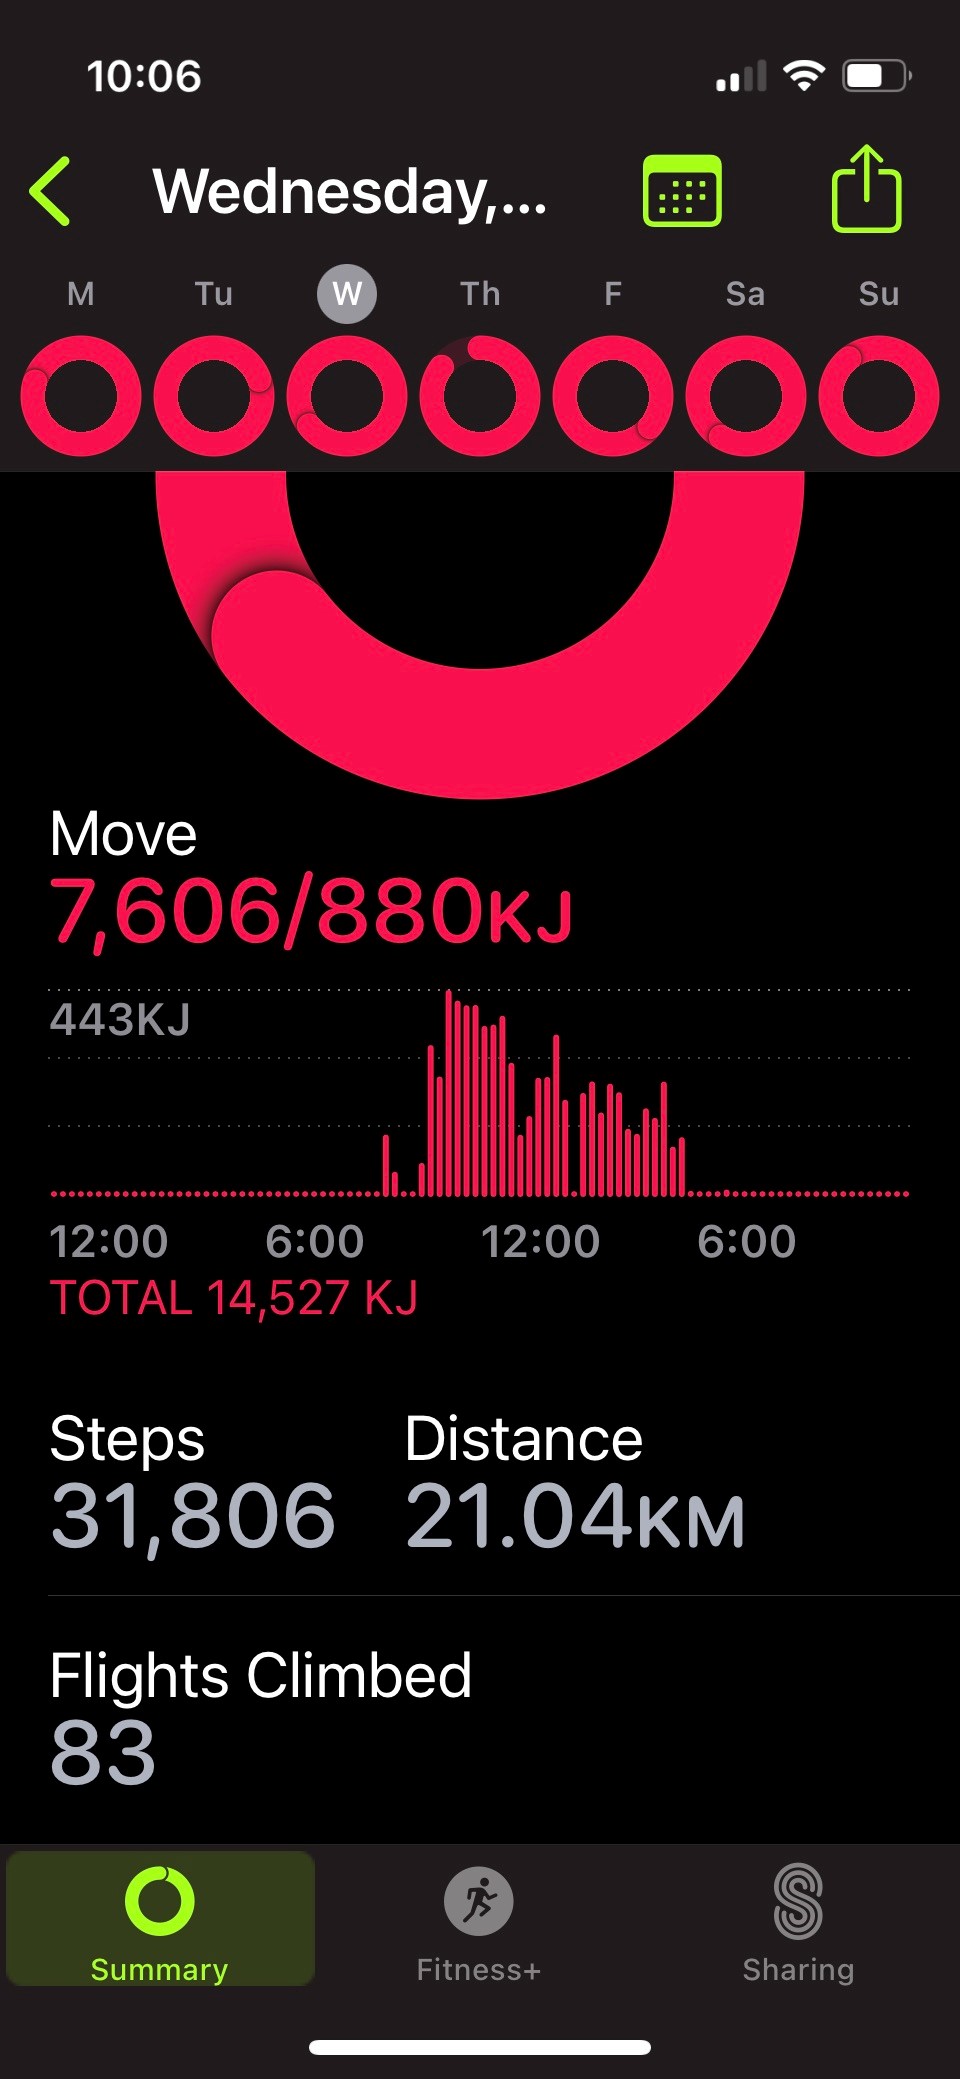
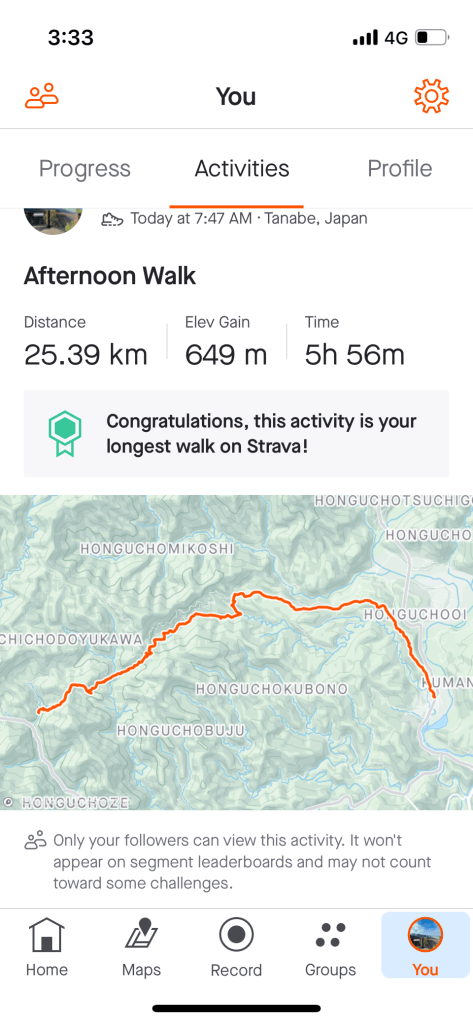
We made it! Our first grand shrine, and what a shrine! TB and I hiked for six hours and depending if you used the paper map, the AppleFitness tracker or Strava, we hiked 18.7km, 19.4km or 25.4km!

It really was a magical day. The weather was perfect, the scenery was varied and the terrain manageable. We had oodles of time to explore Hongu Shrine and really enjoyed arriving early at our destination.
We had the final challenge of getting from Hongu to our next ryokan, which was in Kawayu Onsen, about 4km out of town. However, it is really valuable to have a chat to the lovely staff at the Tourist Information Centre, who not only advised us that our accommodation had a courtesy shuttle, but they actually made the pickup call for us 🙂
ACCOMMODATION
Our accommodation for our second night on the Kumano was at Sansuikan Kawayu Midoriya which was actually a hotel on the banks of the Oto-gawa river.
Again, the hospitality was faultless. We were expected and our luggage was waiting for us, and we couldn’t wait to get unpacked in our traditional tatami room and head to the onsen.
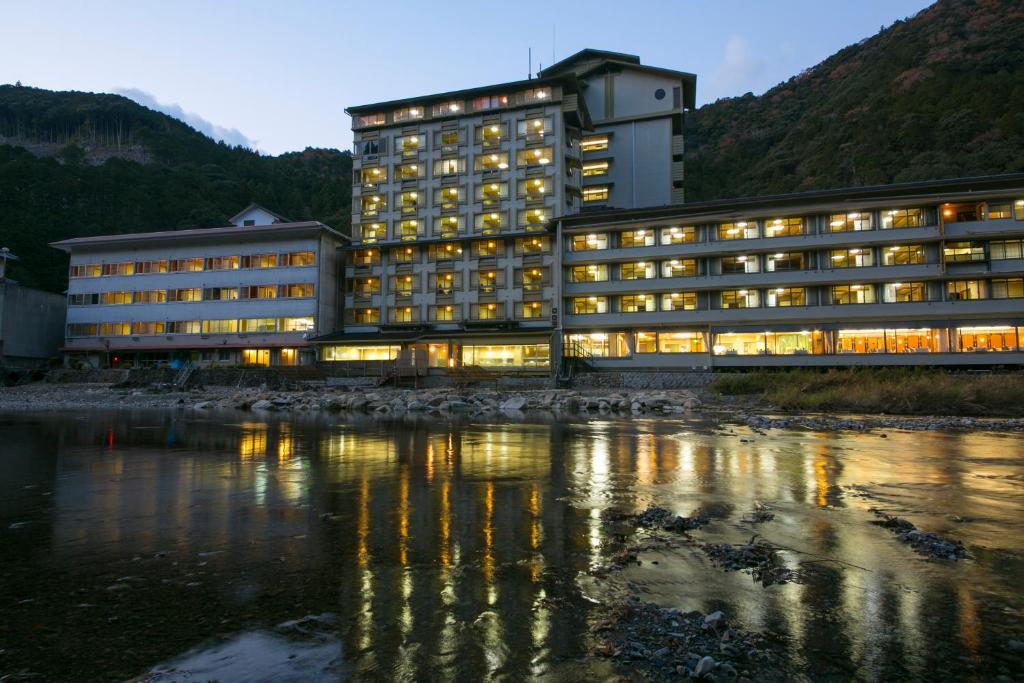
Promo photo of our hotel 
Our tatami room – staff put out the futons when you’re at dinner 
The view from our room – note the outdoor natural hot pools! We were lucky to be in a hotel that had both an indoor onsen and outdoor natural hot pools. The outdoor pools were great – thankfully we had yakutas to wear soaking outside – all very modest.
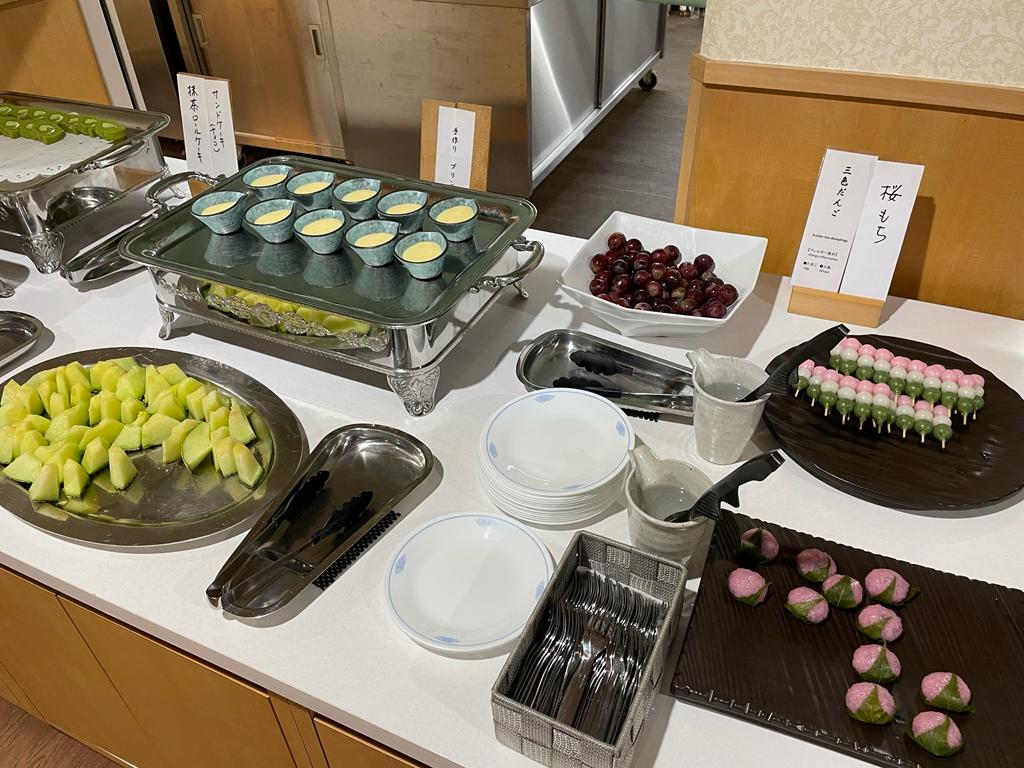
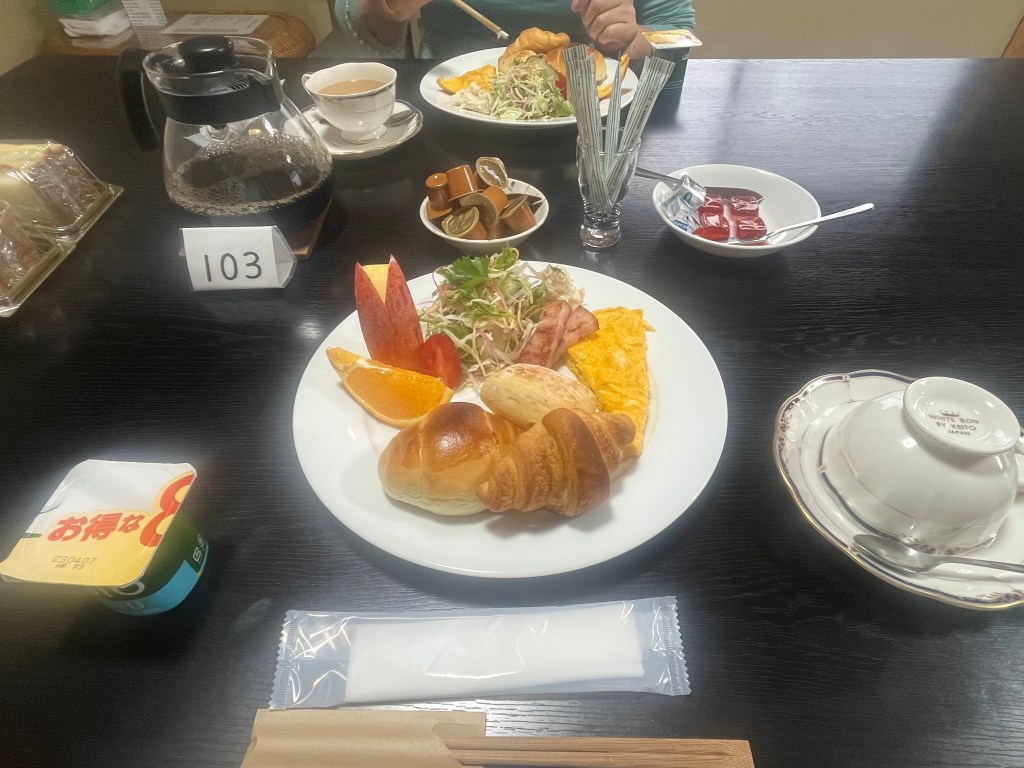
Dinner was an extravagant buffet in a large dining area that I’d say sat around 200 people. It appeared to be very popular with locals and tourists alike, so the place was buzzing. We were able to cook some of our dinner in a hotpot at the table – hugely entertaining to manage liquids, flames and chopsticks….We also participated in the buffet which was incredibly sumptuous. It’s quite amazing what you can pack into a tummy that’s been fuelling a long hike 🙂

TIP – GOTTA LOVE THE FOOD
Don’t skimp on your body fuel. Eating good food helps you to stay warm, move at a good pace and hike safely. When I’m hungry I tend to trip and stumble, not ideal when hiking! Carbs are your friend, especially complex carbs like rice and vegetables. Simple food works best for me. I do carry protein bars etc, but after hiking 20km, I crave clean, unprocessed food. Your body needs good fuel to operate optimally, make sure you give it the best you possibly can.After dinner we both hit the wall.
We survived two long days back to back, and our itinerary had something different planned for day three – a traditional river cruise from Hongu down to the sea and the second major shrine at Shingu. So, day three wasn’t to be a hiking day, but a rest and recovery day. So far, so good. Stay tuned for days three and four of our hikes, as well as some blogs on ryokans and our other adventures – yay!
Thanks for tagging along, and see you out on the trails.
PJ 🙂

-
HIKING THE KUMANO KODO #1
Hello and welcome to my LIKETHEHIKE blog. I’m PJ and I write about the hikes I take, giving you insights, photos, commentary, tips and tools so you can enjoy hiking and embrace the experience.
I’m back from Japan and have LOTS to share with you. I thought I’d start at the beginning and cover off the hiking days, then delve a little more into things like ryokan accommodation, onsens and the like. SO MUCH to share!! Here we go…..
DAY ONE – TAKIJIRI TO CHIKATSUYU
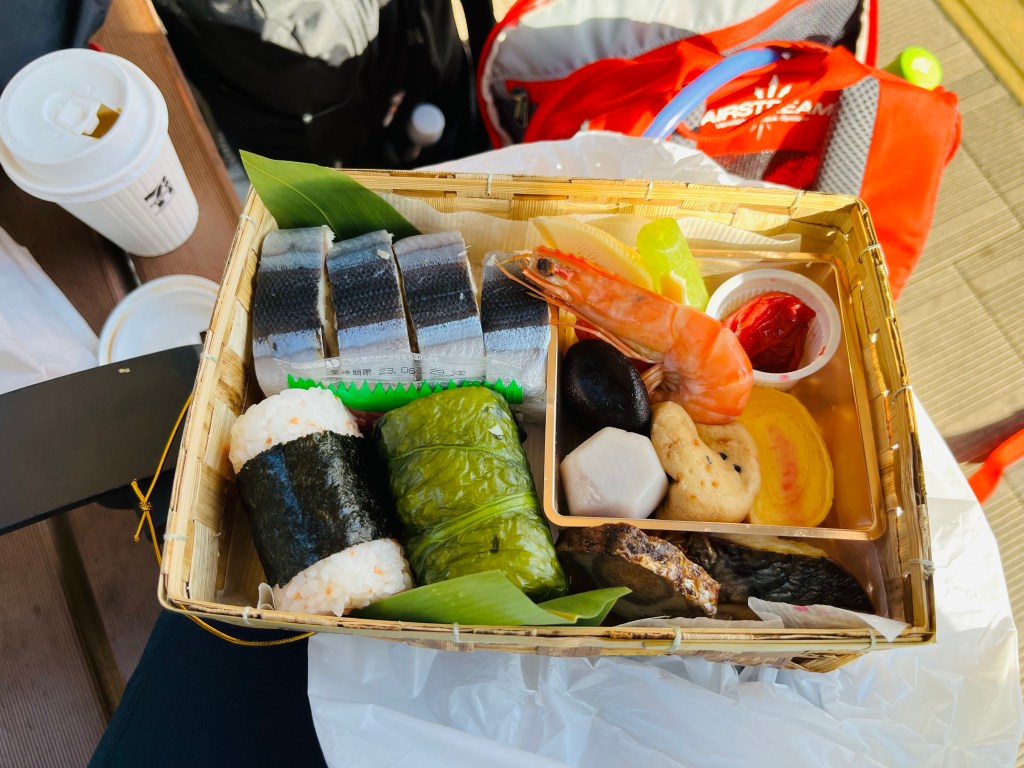
TB and I arrived in Tokyo on the Thursday evening. We gave ourselves 24 hours to have a speedy look at the city, then used Saturday as our transit day to get down to our jump point, Kii-Tanabe on the western side of the Kii Peninsula. After a dodgy overnight at a ‘unique’ BnB in Tanabe (more on that later) and a google interpreter assisted briefing from our Kumano Travel contact, we woke on Sunday morning, sorted our packs out, picked up our bento box lunch and caught the local bus for Takijiri. What a bento box!! While we waited for the bus, I had a little peek inside – magnificent! Only downside, it weighed about 2kg and with the hike we had in store for us, that did make a difference…

Don’t worry about public transport and making your way around in Japan. Buses and trains are easy to identify and most also use English. Bus drivers and the public are incredibly helpful, just make sure you have cash for the local bus services as there is no capacity to pay by card. You don’t need exact change, buses have a neat little change maker you can use when you pay and disembark.
TIP
At the start of your holiday, get your hotel or a local bank to break down some of your larger yen notes. 10,000Y is a great note to carry around, but not for shop owners and bus drivers who can’t make change for a 200Y purchase. Coins are KING in Japan. I even bought a dinky little coin purse to make life easier 🙂ARRIVING AT TAKIJIRI-OJI
We weren’t the only Kumano hikers on the bus from Tanabe to Takijiri-oji, so it was pretty easy to figure out where we were supposed to disembark. Also, the bus conveniently displays the next stop, and shows you exactly the fare you need to pay – all very organised. Oji is Japanese for shrine. Many of the Kumano locations have oji after the name, which indicates the presence of a shrine, usually Shinto. Shinto is one of two main Japanese religions, the other is Buddhism.
Shinto has shrines, Buddhism has temples.
Takiri-Oji is the spiritual entrance to the sacred Kumano mountains. TB and I were a little apprehensive when we arrived – we had planned this day for a long time – and it had finally arrived! We did a quick flyby of the Tourist Centre, did a high five, took some photos for posterity and started walking the trail.
Start point of Kumano trail 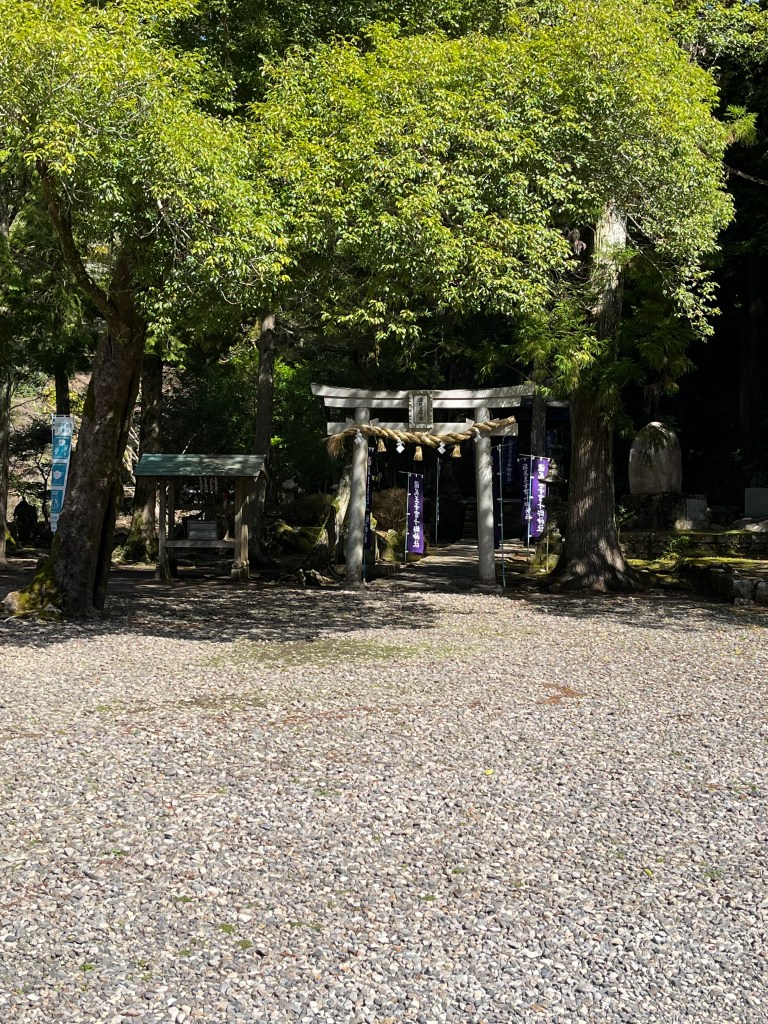
Takijiri Shinto Shrine 
TB and me outside the Tourist Centre FIRST LEG – TAKIJIRI-OJI TO TAKAHARA
And this is where the rubber hit the road. 4km up a hill. No, not a hill. A mountainside. A steep mountainside. Kumano is in the mountains. You will either be going up or traversing down. Maybe, if you’re lucky, there will be some gentle bits in between.

Day one schedule and terrain. Note the ups! I spent the first couple of km sorting out my walking rhythm, looking at all the things, taking photos of things, tripping over things…you name it. There were a few hikers setting off at the same time as us, but only a few and they quickly pulled ahead. TB and I wanted to take our time and embrace the experience…so we had the trail to ourselves which was very special. Usually our hiking pace sits at an average of 4km an hour, but this dropped down to around 1.2km a hour as we picked our way up the side of the mountain.

Climbing up from the Takijiri Shrine 
Tree root stairs taking us up the mountain 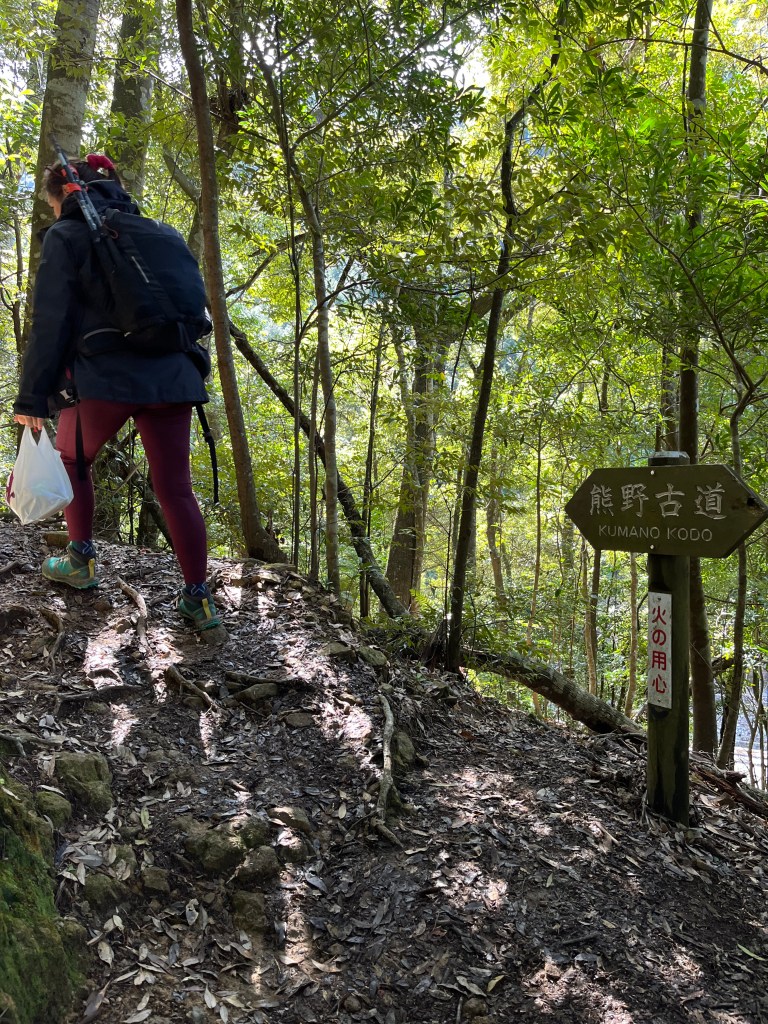
TB carrying her 2kg bento box lunch! We thought it was a 13km day from start to finish. Which is what the map advised. Yeah nah. It ended up being an 18km day.
CAUTION – WHEN IS A KM NOT A KM?
We did realise early into our hikes that there are different measurements on the trails. Some appear to be point to point distance, and some are walking, or trail distance. Kumano has trail markers ostensibly at 500m points, however some of these are up to 800m apart….Then there were the distance readings from py iPhone Fit App and Strava. So, always allow more hiking time than you think you will need.
13.3km on the map, 18.9km on the Fit App… LUNCHTIME AT TAKAHARA
After much huffing and puffing, we made it to Takahara. Perched up on the ridge, it’s a lovely place to stop and take in the views. There is also a Community Centre, vending machines and immaculate public conveniences. Everywhere we went in Japan, we were immensely impressed with the loos. Public toilets were clean as a whistle, fully stocked and open. Even on the trails, the remotest of toilet facilities were impressive. Definitely took the pressure off a nature wee….
Always helpful to know where you are 
Kumano is also road walking through villages We devoured our bento boxes which were delicious, filling, nutritious and we couldn’t’ ask for anything better after hiking up a mountain for 2 hours. We stamped our books at the shrine and headed off. What books you ask? Well…
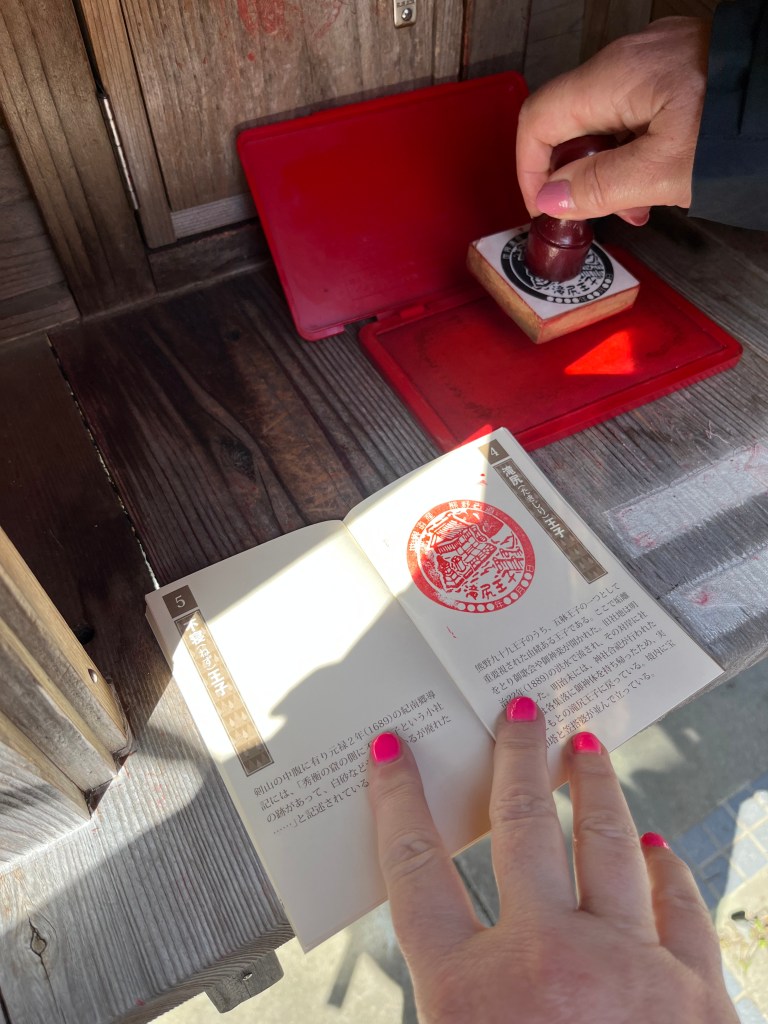
My Kumano Heritage Stamp Book As part of the Kumano Heritage Trail Series, each shrine has a unique stamp, which lives in it’s own little stamp house. You collect the stamps as you hike the trails. It’s a great way to evidence your progress and adds a definite ‘feel good’ factor.
SECOND LEG – TAKAHARA TO CHIKATSUYU
Chikatsuyu was our destination for day one, our ryokan awaited us there. But first, we had to tackle another 10km, according to the map. The elevation map book was proving to be incredibly handy as not only did it detail the ups and downs of the trail, but also the way points for us to track progress. The Kumano trails are incredibly easy to navigate. You will only be walking on one trail, in one direction. Very occasionally there may be a trail intersection, but signage is very clear, even where not to go.
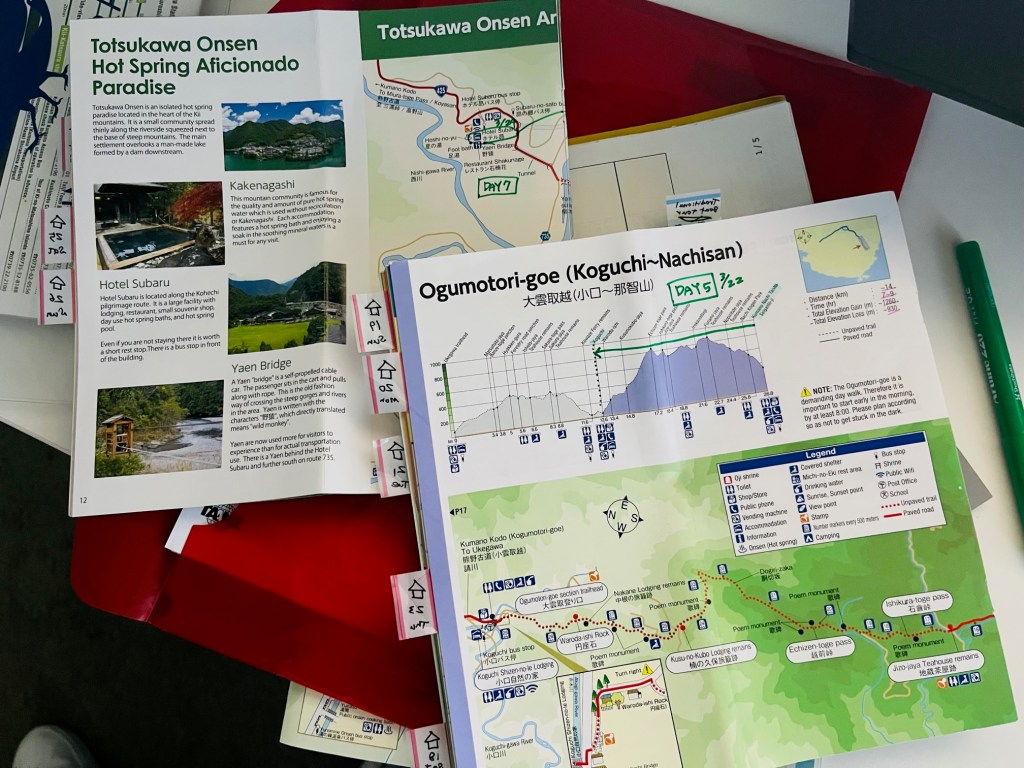
Very handy series of maps covering all Kumano 
Where to go…. 
and where NOT to go… The second leg was really where we started to appreciate the beauty and tranquillity of Kumano. To be walking along trails up to 1,000 years old was both inspirational and humbling. We walked past small village settlements, traveller shrines, redwood forests and all manner of historical sites with some great information.
Always follow the paved brick road 
into the forest 
along the ridge Interestingly at this point in our day we had only passed maybe two groups of hikers. We were starting to realise that we basically had the trail to ourselves. We definitely felt very blessed and thankful.
The pinnacle of the second leg was the Uwadawa-Jaya Teahouse Remains. We knew this because the elevation map told us! From here we figured it was largely a downhill romp to our ryokan in Chikatsuyu. We spent the downhill section traversing a river as we made our way down the valley. The foliage changed from upper forest to a more forest floor feel with the river providing a damper, more enclosed environment. It also grew a little dimmer. By now, time was ticking and as all good hikers know,, daylight disappears an hour earlier in the forest. We knew we had to be clear of the trail by 4.30pm at the latest.

Little streams everywhere 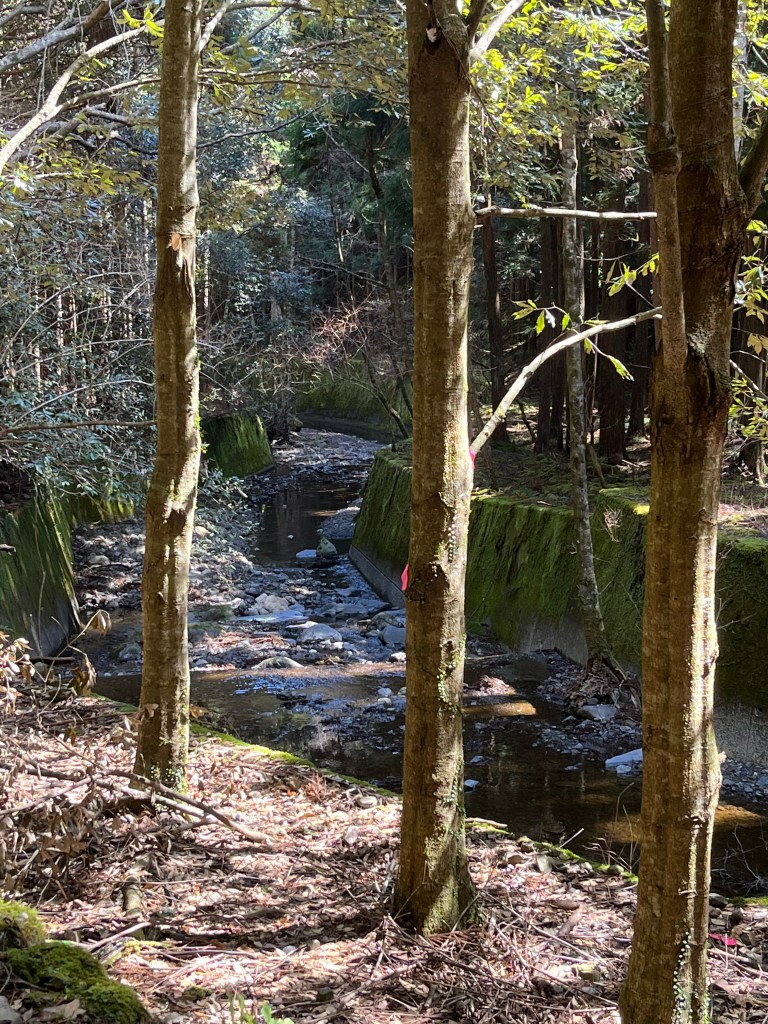
We thought maybe a flood catchment? It’s still very pretty 
Me and one of the many small shrines scattered with coins as an offering… CAUTION – TIME TICKS FASTER IN THE FOREST
Watch your start and finish times when hiking unfamiliar trails. I always allow more time than I think I’ll need as something will delay you. It could be going up a steep section, or taking your time coming down a slippery slope. You don’t want to be hiking out of a forest at dusk – it’s stressful and adds complexity and risk that you just don’t need.Happily, TB and I arrived on the outskirts of Chikatsuyu around 4pm. Whew. Not as early as we would have liked but not in the dark either.

Not our ryokan but a welcome sign nonetheless Imagine our surprise to see a sign on the bridge (which I didn’t take a photo of to my ETERNAL regret) which said “BEWARE OF THE BEARS”. What???? I mean WTF???!!! Turns out the area is popular with Asiatic black bears – a cranky wee animal which thankfully still hibernates in March. I think. We walked just a little faster after seeing that sign, but I did realise, all I had to do was outrun TB and I would be fine… 🙂
OUR RYOKAN – MINSHUKU CHIKATSUYU
Our first rkykan and my oh my – what a fabulous place to finish on day one. We followed our very clear directions and landed on the doorstep about 4.30pm, tired but happy. Located on the banks of the Hiki-Gawa River, this ryokan has traditional tatami rooms in the main house, as well as a delicious hot spring onsen (bath). We saw the line-up of hiking books in the entranceway and realised we were among future friends.

Entrance 
Ryokan with river in background 
our delicious dining room 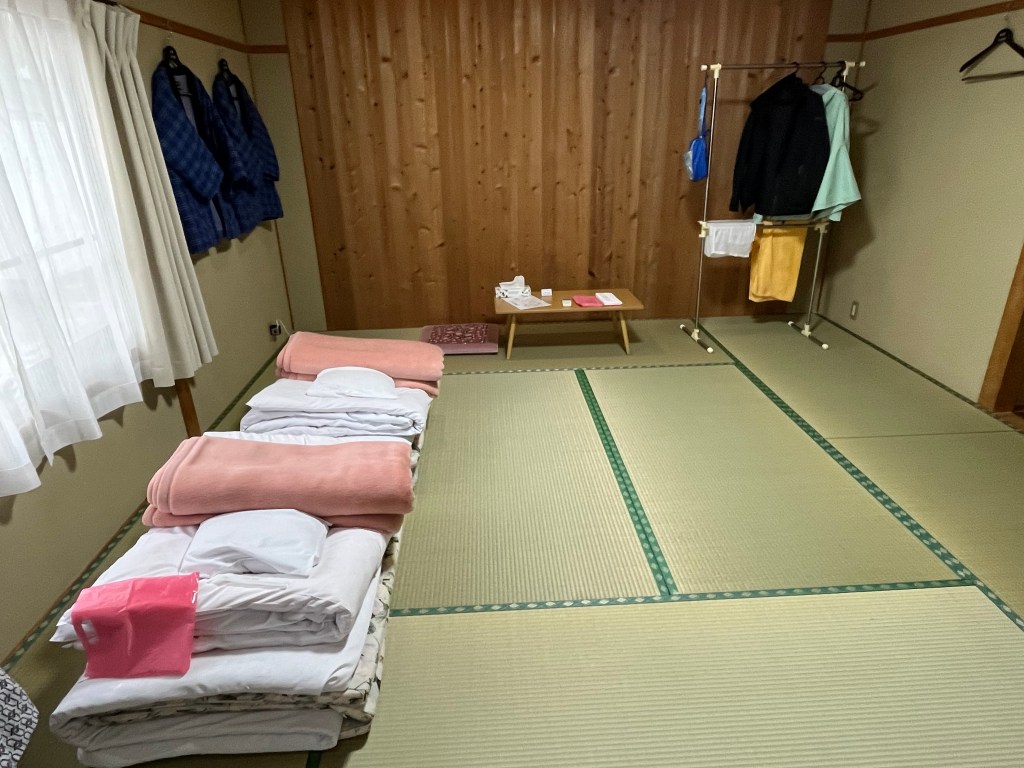
Our traditional tatami room with futon. TB and I booked tatami twin share for our holiday (cost effective and immersive) and upon arrival were were effusively greeted by our hosts, and shown to our room (above). Toilet and sink facilities were shared, but immaculate and more than enough. Happily, our luggage awaited us in the room. I can’t recommend highly enough the luggage transfer service. It was timely, stress free and 110% reliable.
Ahhhh – you have no idea how good the onsen was after our first day of hiking. I will go into much more detail about the ryokans in another blog – look out for “Ranking the Ryokans” soon. Once we overcame the initial “western white woman speed wobbles” about washing nude and communally, the onsens became a place we really looked forward to. We simply watched what the locals did, and then did the same. Easy peasy. I will give you all the gory details in a future blog about “Owning the Onsen” soon.
TB and I ‘onsened’ and then presented ourselves for the communal dinner at 6pm. WOW. And then WOW again.
We had the most fantastic dining experience provided by our outstanding ryokan hosts. TB and I quickly realised that our holiday may just be an equal balance of hiking and food photos…the quality and the service was faultless. We purchased a modestly priced and delicious sake from our hosts, and then enjoyed the company of fellow hikers for our meal – Miss Oregon, Mr Singapore and Mr, Mrs and Miss Melbourne.
TIP – TAKE THE TIME TO SAY HELLO
Whether its on the trail or in the dining room, take the time to say hello to fellow hikers. I’m a chatty person by nature, as is TB, so talking is our happy place. Even if you’re a little hesitant, remember you have a shared love of hiking – what a great place to start. No need for names, as you can see I remember people based on where they come from. PS – we crossed paths with Oregon, Singapore and the Melbourne clan over the following few days, and it was great to see them and compare notes.OVERNIGHT
This was our second night in a traditional tatami room, but about 1000% better than our first night! The futon setup was perfect and as it was going to be quite cold overnight, we had additional blankets to snuggle into. If you saw my previous blog on packing for Japan, you’ll recall that I said I was taking a hiking mattress. Well, I got it out, pumped it up and slipped it under the futon – it worked a treat. It gave my tired old bones a little more padding than I currently provide, and I had a great nights sleep.
Hybrid Japanese/Western brekkie – perfect! 
TB and a foggy morning outside…think 4 degrees! We decided to be on the road by 7am for day two, and hoped this would get us off the mountain before it started to get cold and dark….and give us time for more adventures!
Look our for my Day Two blog – coming your way soon
Happy hiking from Kumano,
PJ

-
WHAT TO PACK FOR A 10 DAY HIKE ON KUMANO KODO
Hi and welcome to my LikeTheHike blog. I’m PJ and I write about the hikes I take, giving you insight, photos, commentary, tips and tools so you can enjoy hiking and embrace the experience.
So, there are a million blogs and resources available for travel packing, how to pack light, how to pack smart, how to pack three items of clothing to last 3 weeks…etcetcetc. I won’t be covering any of that in this blog. This is a post about packing for 10 days hiking the amazing Kumano Kodo trail in Japan!!!!! BEYOND EXCITED!!!!!
Where are we going?
TB (sister) and I are heading to the Kumano Kodo Trail, a series of ancient pilgrimage routes that cross the Kii Hanto, the largest peninsula in Japan. For 1,000 years, pilgrims have been walking the routes as they undertook religious acts of worship and purification. In 2004, the Kuman Kodo routes were UNESCO world heritage listed, one of two alongside the Camino de Santiago in Spain. So, we are heading to a VERY COOL part of the world.

We have selected a 10 day self guided trek of the core section of Kumano Kodo called Nakahechi. It runs from Kii-Tanabe on the south western side of the peninsula, up into the mountains and finishes at Kii-Katsuura. It links the three Grand Shrines of Kumano, and has an incredibly rich historical and spiritual atmosphere.
The trek itself is 68km split into 7 days of hiking with 2 experience days and 1 rest day. We didn’t plan the whole trip ourselves, but decided to use an Aussie based trekking company called Raw Travel.
WHEN TO USE THE EXPERTS
When my husband and I travel for a holiday, I’m very happy to plot, plan and book as sorting the logistics for a holiday is part of the fun. However, this holiday is a bit different. We didn’t know exactly where we were going, what would happen, where to book overnights or what to expect. So, we decided to use a travel company that specialises in self-guided treks. Our accommodation, meals and daily luggage transfers are all sorted, we have maps, briefings, and in country support. All we have to do is walk! So far our experience with http://www.rawtravel.com has been excellent. Ask for Chris, she’s the Japan guru.Why are we going?
Shouldn’t the question be why not? The window in which a person can both afford to travel and is fit enough to tackle multi day hikes is quite small – so we are seizing the day. And, this was a birthday trip planned for 2020, but scuttled thanks to COVID.
What am I packing?
I am a regular traveller so packing for a standard trip isn’t a challenge. However, this is a 13 day hiking trip, and 10 of those days are through terrain that doesn’t offer immediate access to amenities such as cafes, supermarkets or ATM machines. The good news is that our luggage is transferred each day to the next ryokan (B&B lodging) so we only have to carry a day pack.
So, what’s going to Japan??
1. CLOTHES
10 days of hiking in weather that may be cold, warm, gusty or raining – it’s tricky. I don’t want to pack too much, but conversely, I want to make sure I have enough so I’m not wearing crusty socks for 4 days in a row. Here’s my list from the inside out:
- Undies – 14 – minimal seams and super comfy for all day walking
- Bras – 3 – 1 standard sports bra (Berlei) and 2 wire free bras (Enell)
- Socks – 8 – 5 2XU knee length compression socks (Vectr Light) and 3 merino blend
- Swimsuit – although ryokan onsens are strictly a modesty towel only (yikes), the outside natural onsens on the trails are swimsuit friendly so I’m planning to frolic in the water. We are also transiting via Changi Airport on the way home, and I hear there’s a pool we can use there during layover!
- Pjyamas – 2 – singlets and shortie sets

- Tops – 7 – 3 short sleeved and 4 long sleeved (3 merino in total)
- Bottoms – 4 – 3 full length and 1 calf length. Not a fan of hiking trousers…prefer stretchy.
- Head & Hands – gloves, beanie and ear wraps (my ears ache in the cold), baseball cap and sun hat.

- Vest – 1 – Kathmandu Heli down vest. I’m not sure how cold it will be in the mornings, and this packs down to nothing so it’s an easy inclusion. And it’s apricot – a good safe colour in the forest 🙂
- Jackets – 2 – 1 waterproof raincoat (Kathmandu NGX3 Trailhead Jacket) and 1 softshell travel jacket (TK Maxx last winter)

Apricot – good colour for safety 
Waterproof to 1,000m – or a days rain 
Stylish and warm WATCH THE RUB
When I hiked the Kokoda Challenge (49km over 15 hours non-stop), a small seam irritation or issue with clothes quickly escalates into something intolerable. Having clothing fit properly and lie smoothly under your backpack is critical. Ladies, I’m talking bras here! Try different bras, t-shirts, jumpers and jackets on your training hikes so you know what works, and more importantly, what doesn’t.2. HIKING GEAR & EQUIPMENT
It’s the “too much vs not enough” argument here. What if it rains for 3 days straight and I can’t dry gear? What if the trail is actually really easy and light trail shoes are better than waterproof boots – or vice versa?
- Footwear – North Face Vectiv Infinite trail shoes, Merrell waterproof hiking boots

- Rainwear – Kathmandu NGX3 Trailhead Jacket (see above), and disposable ponchos. I’m not taking over-trousers because I just can’t walk in them. I’ll get wet, then dry off at the end of the day.
- Day Pack – MacPac Rapaki Airstream 28L. ( I love the ventilated back – less “sweaty betty” and it can hold a lot of stuff)
- Water – 3L MacPac camelpak which sits very nicely in the day pack and feeds out with a water tube. It’s not absolutely necessary for longer hikes like Kumano Kodo, but it means I have water on tap (*boomtish*) for the day.
- Poles – MacPac telescopic hiking poles
- Sleeping Pad – hear me out! When I was researching ryokan accommodation, there was mention that tatami mats and pillows can be quite firm. I really don’t want to be uncomfortable, so I bought a foot press inflatable air mattress that I can use under a tatami. Its only 500g and fits really nicely into the bottom of my pack. If I don’t need it – happy days.
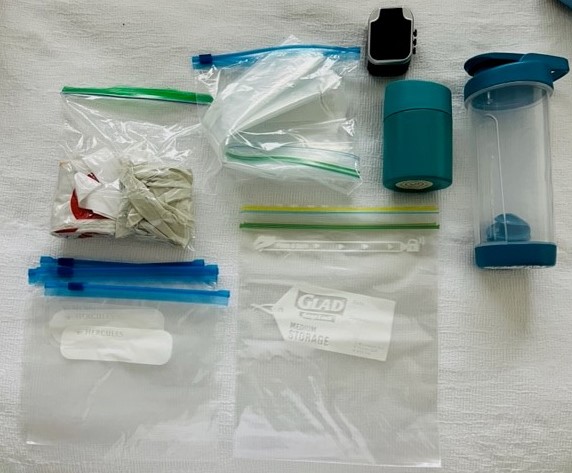
- Plastic Bags and Drinking Things – yes, I need plastic bags for wet gear, dirty shoes, dirty clothes and to protect my phone, laptop and passport. I am also taking a drink bottle which I can use for my protein water, and a little coffee mug to keep me happy in the mornings 🙂
UHOH…WE’VE LOST YOUR LUGGAGE
Lost and delayed luggage is a sad reality of travel. If my suitcase doesn’t make it to Tokyo in time to start Kumano Kodo, I can buy most things, but there are some things like boots and inserts which are worn in, and certain bits of clothing which I really prefer. So, I will be using my daypack as carry on, and will be packing non-negotiables such as hiking boots, inserts, one hiking outfit, medicine, laptop etc. Just in case…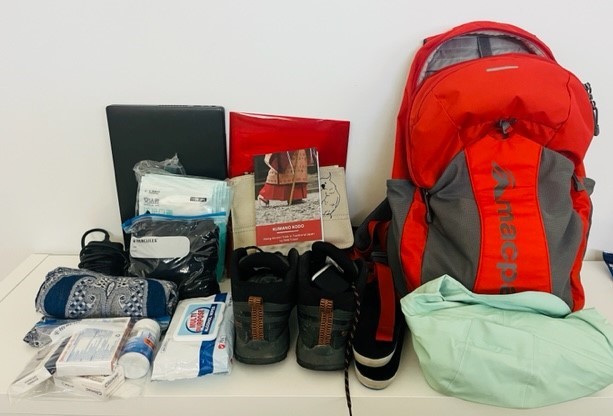
3. MEDICAL & FIRST AID
I always carry a range of medications when travelling, Usually it’s gastro-stop, gaviscon, cold and flu tablets, panadol – drugs that keep you going as travel plans wait for no one! This trip is a little different as it’s post COVID, out of the main tourist areas, and we are hiking almost 70km in forests so the things I’m packing are:
- Anti-inflammatory meds, a footcare kit, hikers wool, muscle ointment, strapping tape, allergy tablets, gastro-stop, bug spray, magphos tissue salts and a shaker of table salt (leeches…. 😦 )
I’m also taking face masks (Japan still requires masks to be worn on public transport and some flights) and a couple of packs of antiseptic wipes for hands and surfaces.

a cornucopia of pharmaceuticals! 
The OG HIKERS WOOL
I grew up in New Zealand, and Hikers Wool is a fantastic kiwi product. My mum (SJ), an avid hiker in her time, swears by it and shared it when I started hiking seriously. It wraps around and underneath individual toes, moulds to your footprint, wicks away moisture and prevents friction – and therefore prevents blisters and damage. Don’t ask me the mechanics – it just works! See for yourself http://www.hikerswool.co.nz4. FOOD
Another recommendation from Raw Travel was to take along hiking snacks. The Nakahechi section runs through some very traditional areas of the Kii Peninsula, so the ability to pop out for a latte will be limited. Corner stores are not on every corner so that means minimal access to snacks etc. TB and I are caffeine fiends, but only via the traditional coffee option and the feedback is most ryokans offer lovely tea, but not really coffee.
So, here’s what I’m taking sustenance wise:
- Coffee – Avalanche Sugar Free Latte 10 pack. Its not a freshly made flat white, but it will do for that caffeine hit. Maybe it’s a good detox opportunity…!
- Protein – FeedGood Tasteless Protein/Collagen which I add to my water bottle. It allows for easy protein delivery when you’re walking and you don’t want to be eating all the time. And it really is tasteless. Really!
- Snacks – Carman’s Snack Bars and Aldi “On the Go” mixed nuts.
My snack needs are pretty simple when hiking. As you hike for longer periods of time, you find out what fuel works for your body, when and in what volume. I’m happy to have the same snacks each day 🙂 and then dive into the local delicacies at the evening meal.

5. OTHER STUFF
So, what else needs to be in my suitcase to ensure an amazing Kumano Kodo experience?
Electronics – laptop and phone, plug converter and charging cords. I’m still on the fence about taking a battery pack. They’re really heavy and we will be at a ryokan each night, so will be able to charge up. We also have access to an itinerary app via Raw Travel so we can track our daily instructions – what could go wrong?!
Cash – another tip from my research – take cash. There are very few EFTPOS and ATM facilities on Nakahechi. If we want a sake or two in the evenings, or buy things on the trail, it will most likely be a cash transaction. So, I did some complex calculations and decided on 5,000JPY a day ($55AUD). And, it was a nice round figure for the lovely Travelex kiosk lady. 🙂
Documentation – Japan travel requirements are pretty self explanatory, and they do require a COVID vaccination certificate at airport checkin, and there are a range of customs, immigration and quarantine forms online, which also have printouts you can take as backup. I’m not a luddite by any means, but I just don’t trust phones, links and screen shots when you’re next in line at customs. I’m a super law abiding traveller, but put me in front of a customers officer and I turn into a female version of Inspector Clouseau, complete with a severe case of the ‘dropsies’. So, I’m taking print copies of all of the above, as well as insurance docs, itinerary, train travel planning screen shots. I have a “folder”…. 🙂
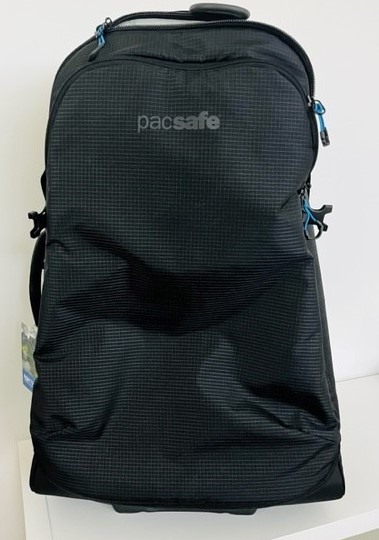
Suitcase – this trip I’m trialling a soft shell Pacsafe Toursafe 96L anti-theft two wheel case. TBH I was quite surprised I got into this with all my stuff, so it’s deceptively roomy. I’ve paced around the house and driveway a couple of times fully loaded to see about wheel and handle robustness – so far so good.
Is That Everything?
After covering off all eventualities, all possibilities, all weather events and circumstances – I THINK I’M READY. AND SUPER EXCITED!!!
This is a once in a lifetime opportunity to experience something that is so different, so exciting and a hike that will, I feel, add to my growth as a human. I will be journaling on the hike, but will also be capturing some great stories (as I’m sure TB will do something very entertaining with her modesty towel in the onsens), so stay tuned for some more Kumano Kodo blogs!!!
See you on the trails,
PJ

-
URBAN HIKING SERIES -#1 SYDNEY CBD
Hello and welcome to my LIKETHEHIKE blog. I’m PJ and I write about the hikes I take, giving you insights, photos, commentary, tips and tools so you can enjoy hiking and embrace the experience.
Let’s talk URBAN HIKING. Yep. URBAN HIKING
What is Urban Hiking?
Urban hiking is walking in a city – usually on a route you haven’t explored before – taking new paths, up hills, down stairs, through parks and reserves, following signs, seeing new things. Sounds pretty good huh?!
Urban hiking is easy to plan and execute. You can use maps, or simply start walking and see where the hike takes you. If you’re staying at a hotel, ask the front desk. Locals are very happy to point you in the right direction.
What Do You Need?
Urban hiking is a bit different to trail hiking.
- No Backpack. I do wear exercise tights with pockets so I can carry a mobile, glasses and ever present lip salve. If I’m feeling like a long urban hike I’ll dust off the bum bag (fanny pack). Food and water I buy as I need it.
- No Hiking Boots. I wear a hybrid or trail sneaker. I find that asphalt walking can be a bit harder on my knees and hips, so I like the additional padding a trail shoe provides. My latest find was at North Face, Vectiv Infinite Trail Shoes. Super padded and comfy. Another tried and true option is New Balance Fresh Foam Hierro v6. Both are great for urban hiking.
- Keep the Hat! I still wear a hat and sunscreen. I’m a child of the 70’s and we weren’t very sun smart back then. Skin protection is EVERYTHING. I use a full brim hat rather than a baseball cap.
- Time of Day. Is important for an urban hike. A city has so many personalities that change according to the time of day. I prefer early morning, but have also hiked later in the day for a change of pace. Don’t worry too much about distance, but look for interesting destinations, happenings, landmarks or people. This will create a great urban hiking experience.
Urban Hike #1 – Sydney CBD
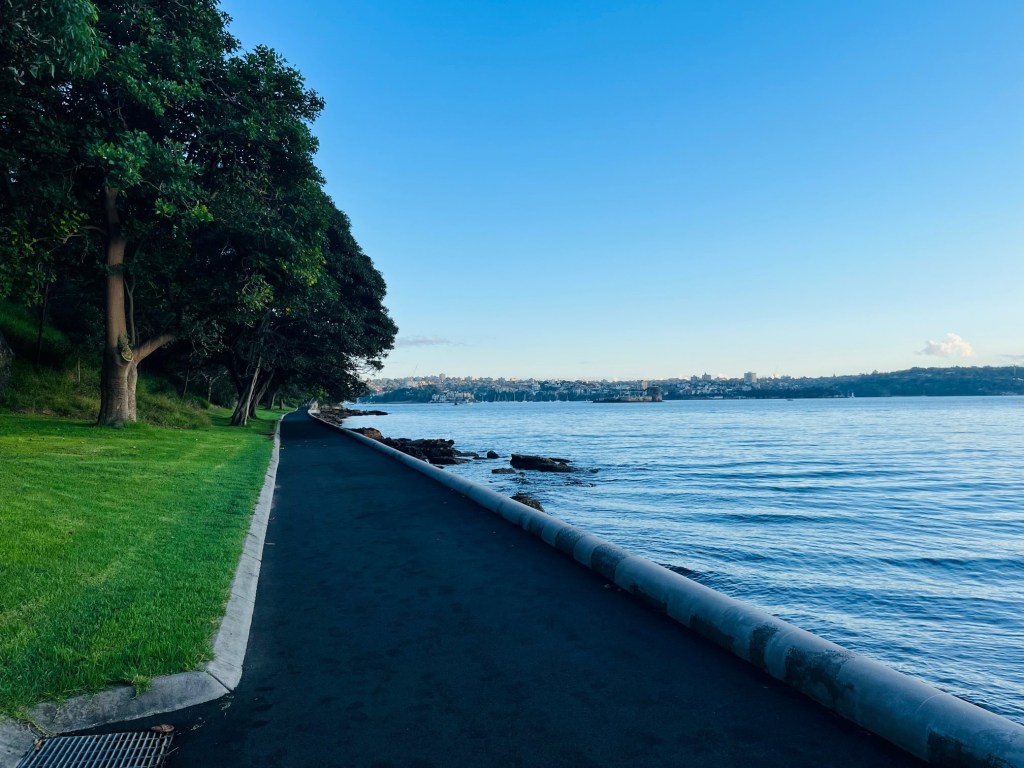
I was in Sydney for work and needed to stretch my legs. I mapped out a cheeky wee 8km urban hike which took in Darling Harbour, Barangaroo, Walsh Bay, the Harbour Bridge, The Rocks and the CBD.
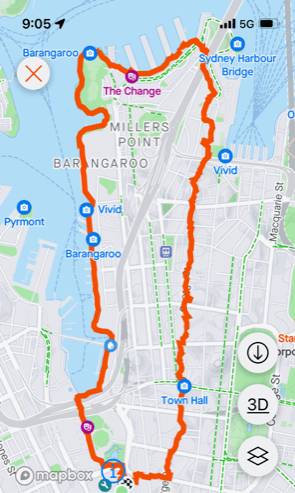
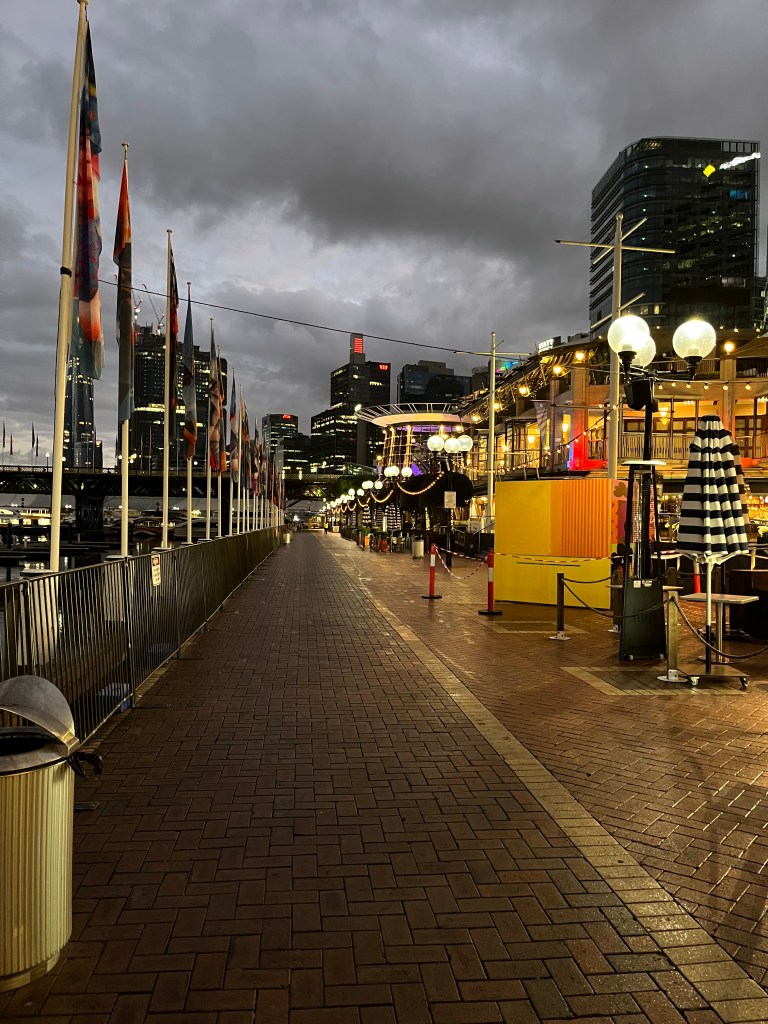
Darling Harbour
Always a favourite destination for either revitalisation or rest, Darling Harbour sits just west of the Sydney CBD. It’s home to restaurants, ships, parks, art trails, ferries, you name it. It was home to the maritime industry through the 1800’s, Sydney’s first gasworks and during the 1980’s underwent a decade long gentrification project.

Handy maps are scattered around 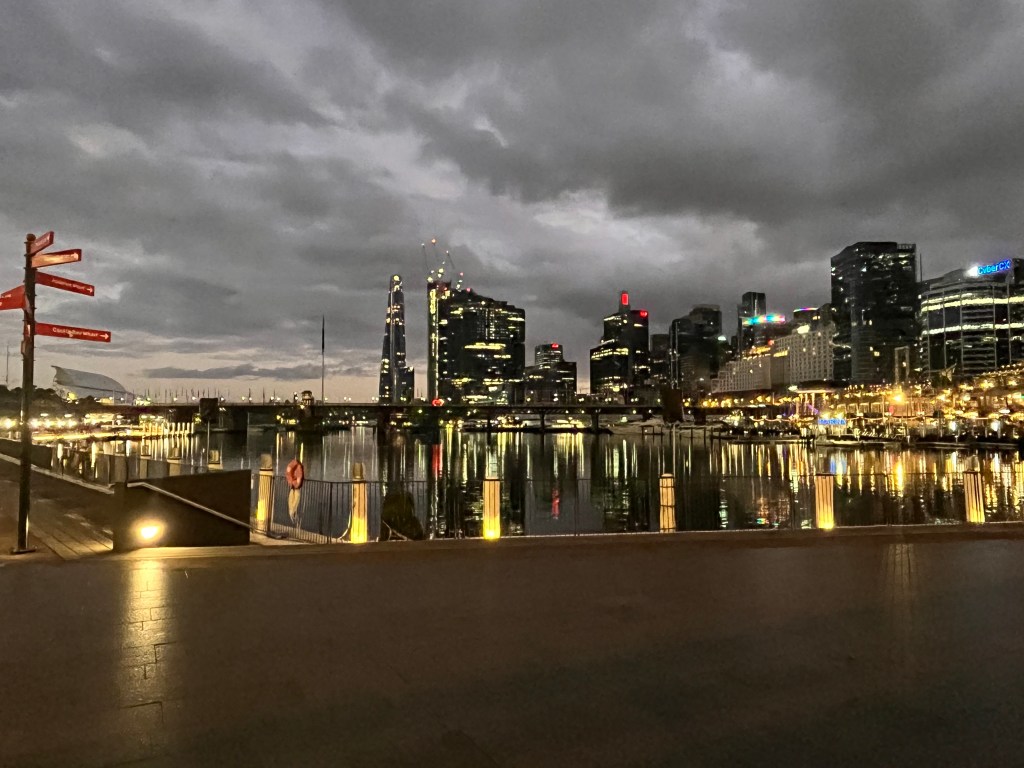
Looking down the harbour out to sea – a little drizzly! For about 3km I walked along the reclaimed wharf, past ferries and a very still harbour. At this time of morning it’s you, some keen exercisers and a whole heap of tradies coming down to work on the construction sites scattered around. It’s still a working harbour but very pedestrian friendly.
Pride Week in Sydney 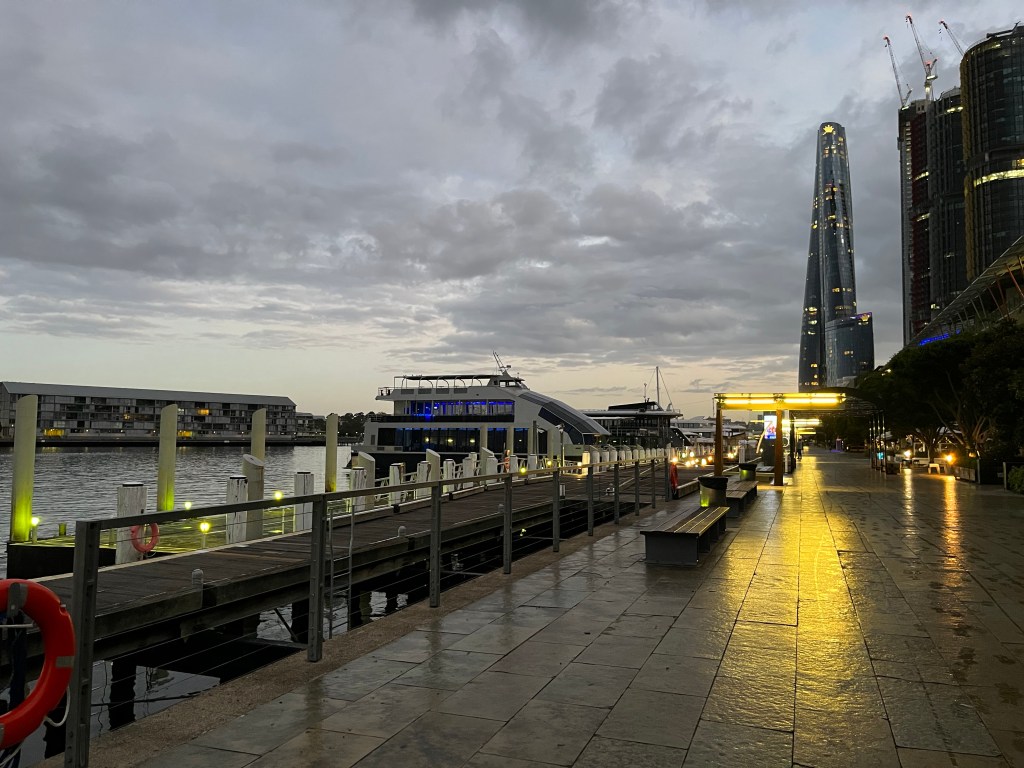
Kings Wharf 
Coming into Barangaroo Barangaroo Reserve
Barangaroo is part of Gadigal country and is named after a powerful female Cammeraygal leader of the Eora nation. Barangaroo Reserve is a landmark waterfront destination, made up of hotels, entertainment precincts, reserves and water. It’s marked by over 75,000 native trees and bushes as well as very distinct square sandstone blocks lining the foreshore. It provides incredible views onto the harbour and passing aquatic traffic. It’s a very visually powerful space to walk though at dawn.

Barangaroo Point with a SIlverSeas vessel peeking around. Note to the left, a Sydney ferry. 
Around the point and this is what you see! Fantastic! Millers Point, Walsh Bay, Dawes Point
At about the 3.5km mark (just around the point you can see in the pic above), you will exit Barangaroo Reserve and enter Millers Point, then Walsh Bay. You could simply follow the road, but I try to stay away from roads wherever possible. With a little bit of trial and error, I found I could walk through the refurbished wharves in Walsh Bay, now home to cafes, residences and a cultural precinct. AND – you get to walk underneath the Sydney Harbour Bridge…!

The exit from Barangaroo Reserve. Historic workmen’s cottages still residential. 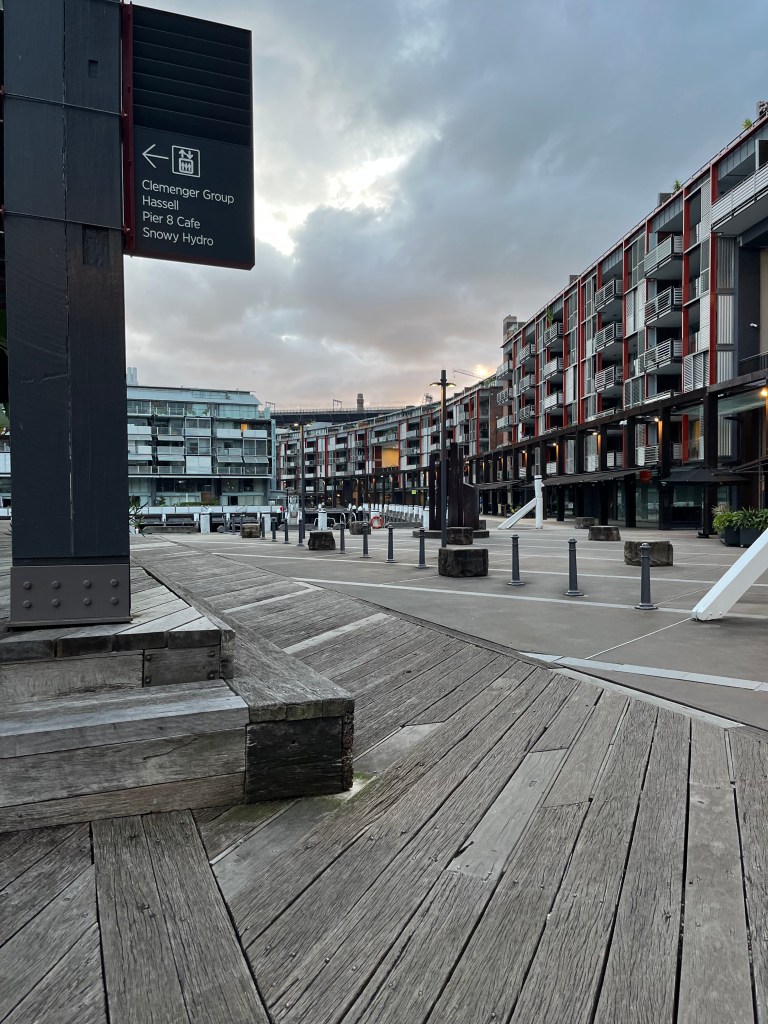
Walsh Bay wharves 
Dawes Bay view The Rocks
Coming out of Dawes and Walsh Bay, the vibe is very historic and utilitarian. This used to be a working area, and the streetscape reflects that. One of the fun parts of this walk is actually walking right under the Sydney Harbour Bridge!

Coming out of the wharf district 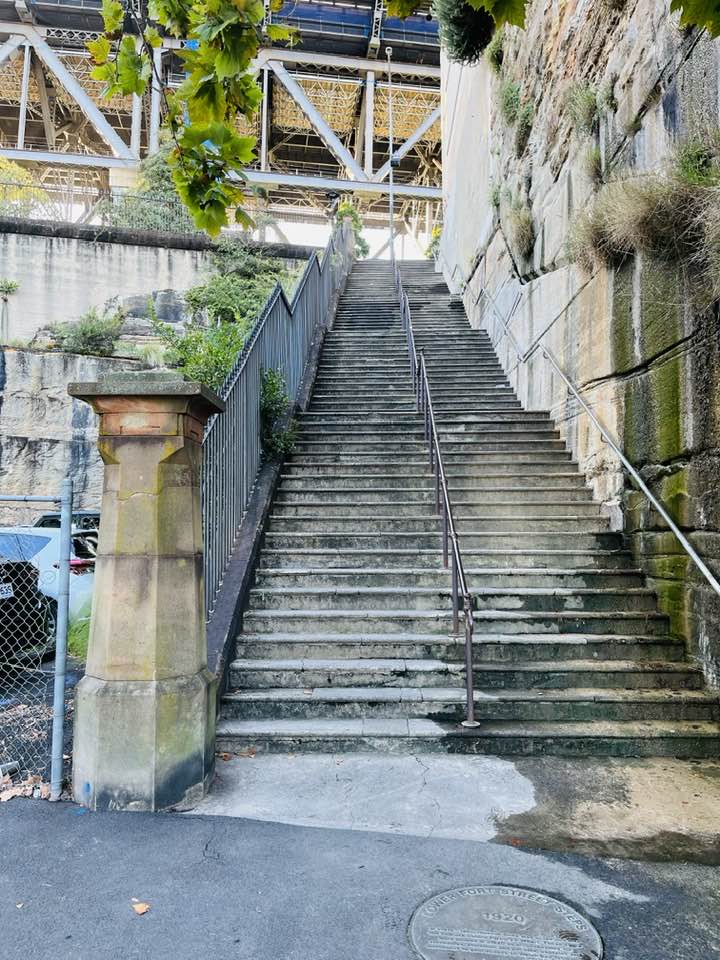
100 year old stairs up to the Bridge and The Rocks. My knees felt about 85 years old looking at these! 
Under the bridge – and look at the Opera House in the distance…. This would have to be one of my recommended destinations in Sydney. Nestled into the side of the sandstone headland supporting the Harbour Bridge, this tiny neighbourhood is a maze of historic laneways, colonial terrace houses, old pubs and a working harbourfront, dating back to 1788.

A pristine example of Rocks terrace housing 
Laneways 
Did I mention it was Pride Week in Sydney?! 
Looking from The Rocks toward Circular Quay – where a monolith was berthed! Road shut for Pride revelry. The Rocks is also home to a passenger ship terminal, The Museum of Contemporary Art and over 50 heritage listed buildings. Your urban hike might slow down a bit as you walk through this fantastic slice of Sydney history, or might even go on pause for a quick coffee break.
George St & Sydney CBD
Once through The Rocks it’s a brisk troy up the middle of Sydney CBD via George St. Running for 3km from Circular Quay to Chinatown, it was Sydney’s original high street, and is still home to a number of the city’s most prestigious buildings and precincts. I walked George St around 7.30am and it was still relatively quiet, with only the first office workers trotting to work. By 11am, George St is awash with humanity. It’s mainly a pedestrian and light rail thoroughfare, so very easy to walk.

Start of George St, all to myself 🙂 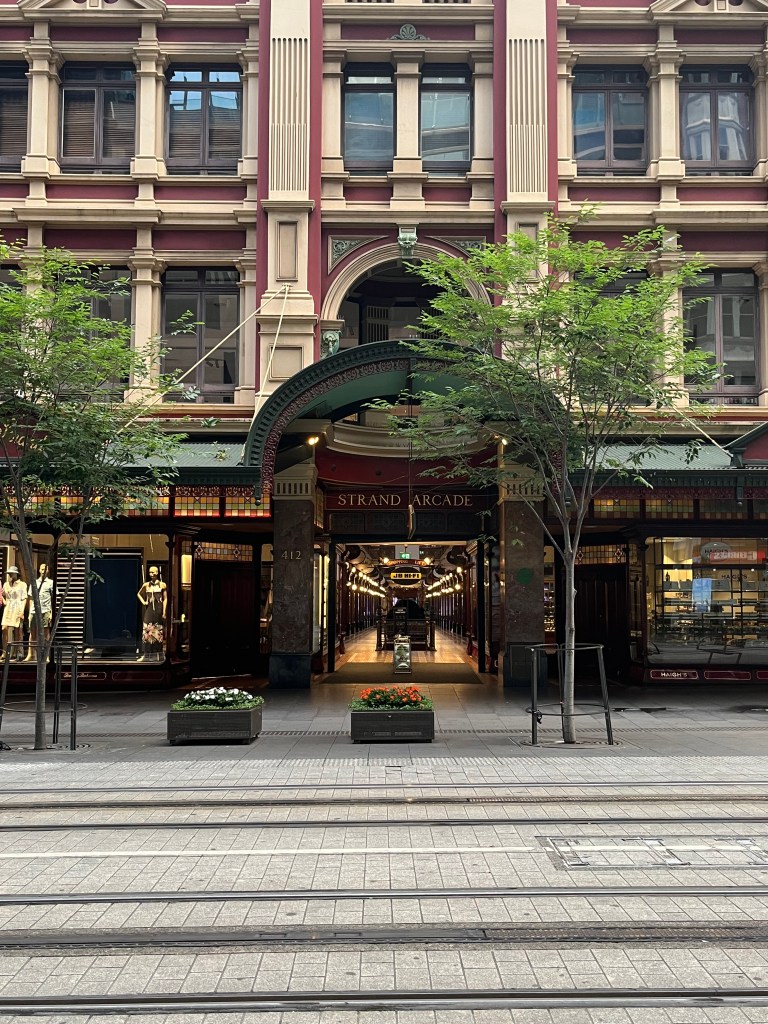
Strand Arcade, one of the Sydney CBD landmarks 
Not often you see George St this quiet… Compulsory Stop – QVB Time
It was about 7km into my urban hike when I felt the need for sustenance. Another great destination in Sydney CBD presented itself – the Queen Victoria Building (or QVB in Aussie vernacular).
QVB is a five-level heritage listed building which is now home to premium retailers such as Bally, Camilla, Coach, Furla, Jimmy Choo, Longines, Georg Jensen, Dior – it’s a shopping destination! It’s also home to a range of eateries, and my breakfast destination.
My visit to Sydney coincided with 2023 Pride Week, so the city was packed with pride related activities, events and decorations. Hence the temporary re-naming of QVB.
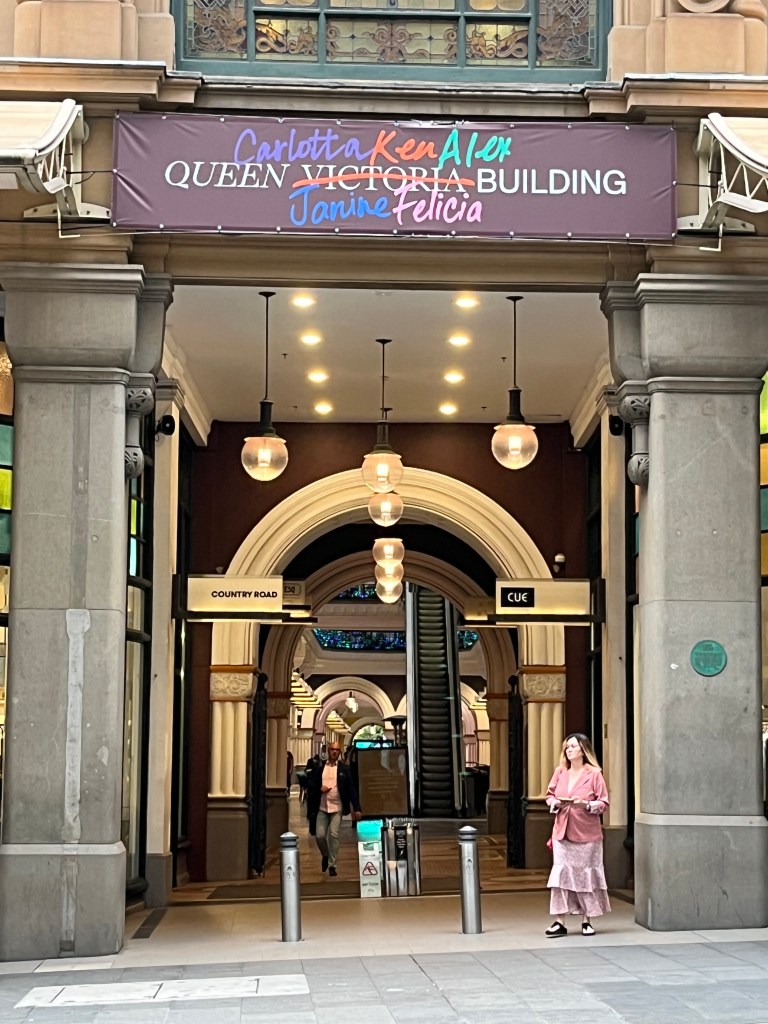
Eastern entry to QVB 
Breakfast sustenance at Manon Brasserie 
Peeking over the cafe curtain at the movie madness Stopping somewhere on your urban hike provides two benefits:
- Sustenance, in both solid and liquid form; and
- An opportunity to people what, to get a sense of the flow in the area.
I had a quick but delicious breakfast and coffee at Manon Brassier, and watched a film crew outside the café as they hustled and bustled very busily filming an ‘as yet unnamed’ movie adjacent to the Queen Victoria statue. By now Sydney was well and truly awake with workers, shoppers, tradies and all the madness of a large CBD.
Last Leg
It was a final 2km up George St to Chinatown, past the Town Hall to my hotel and the start of my working day.

Sydney Town Hall 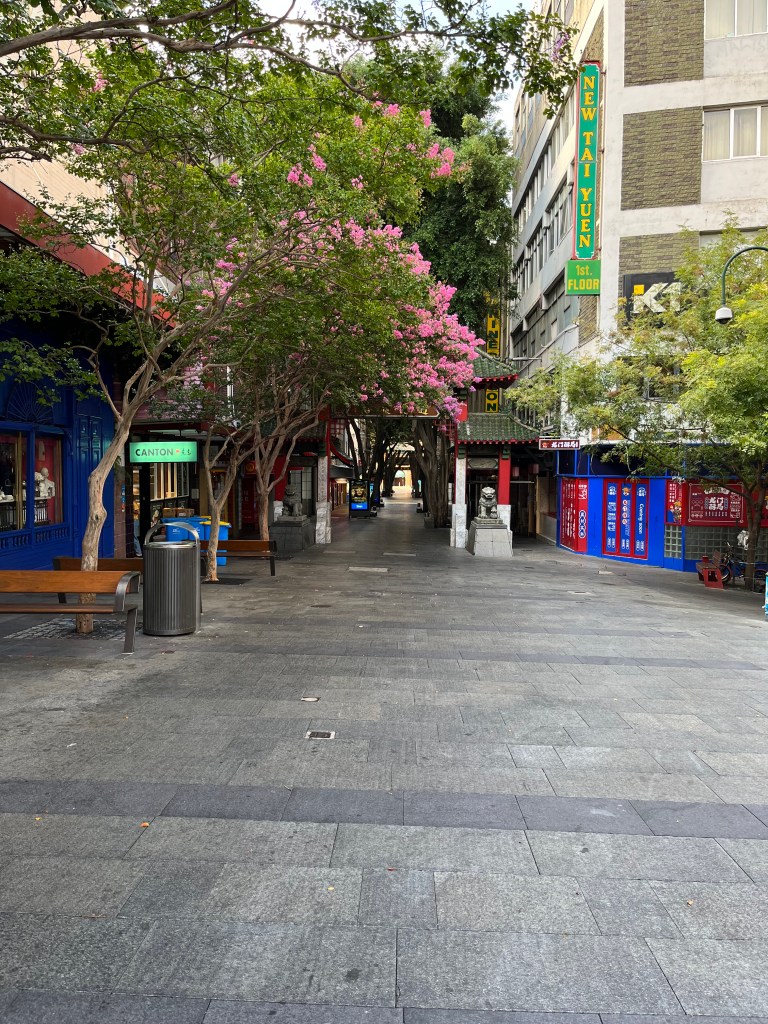
Chinatown… 
where racism IS NOT WELCOME 🙂 Sydney has a wide range of walking trails/tracks/areas for visitors to explore. I also love walking around the Opera House, the botanic gardens, the harbour, Woolloomooloo (yep, that’s a real place), the Domain, and there’s a great 10km circuit that takes in most of these places.
Bottom of Domain 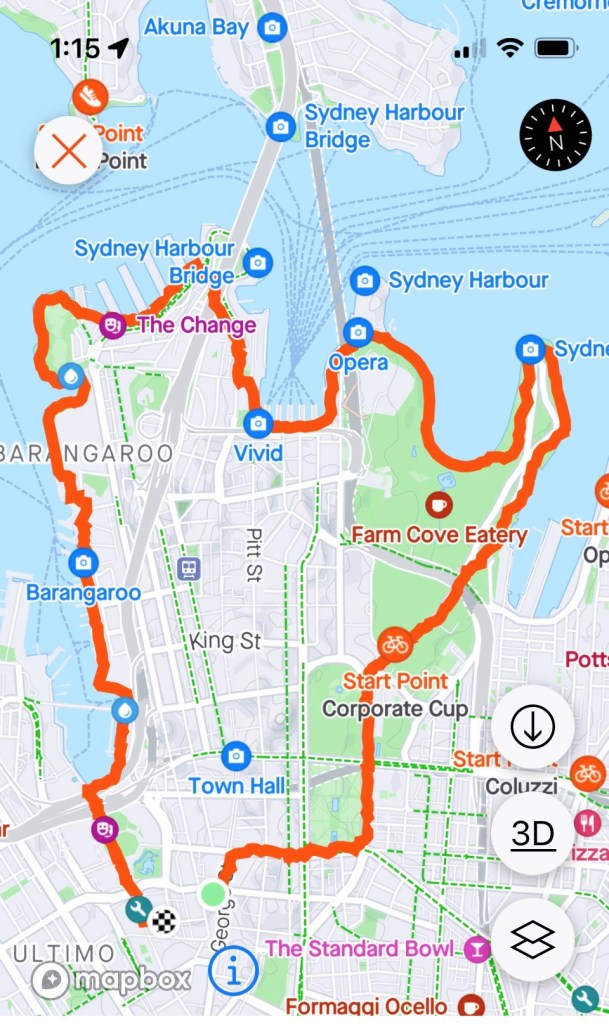
Longer 10km urban hike of Sydney CBD 
Great shot! Take the time to explore your city – or take advantage of travel and explore a new city. You’ll be surprised at what you find.
See you next time out on the urban trails 🙂
PJ.

-
Going to Gondwana – Our Hike into the Distant Past!
Hello and welcome to my LikeToHike blog. I’m PJ and I write about the hikes I take, giving you insights, photos, commentary, tips and tools so you can enjoy hiking and embrace the experience.
Today’s blog is pretty special – we are heading into the Gondwana Rainforest!
Gondwana Rainforest is a cluster of 50 separate reserves stretching from Newcastle in the south to Brisbane in the north. Gondwana was World Heritage listed in 1986, and contains the remnants of the great rainforests which once covered the entire continent of Australia.
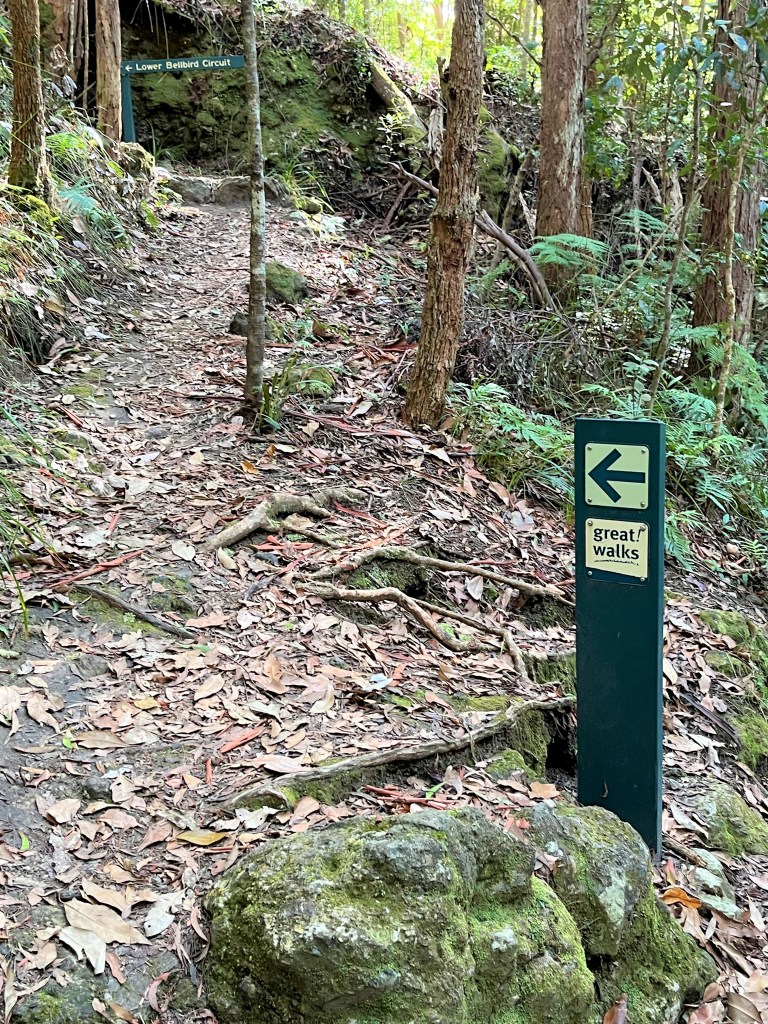
Gondwana is known for vertical stone cliffs, volcanic craters, inspiring waterfalls and a range of ancient flora and fauna. Included in the Gondwana footprint is Lamington National Park, and within that, Binna Burra. One of the many trails at Binna Burra is the Lower Bellbird Track – which is my blog for today…

Welcome to Lower Bellbird Trail
CAUTION
Binna Burra is SW of Gold Coast and close to the Qld/NSW border. The road up to Binna Burra was washed out about a year ago in heavy rains. The trip up takes over an hour to travel 55km as sections of the road are down to single lane and controlled by traffic lights. Allow enough time to get up and down the mountain.
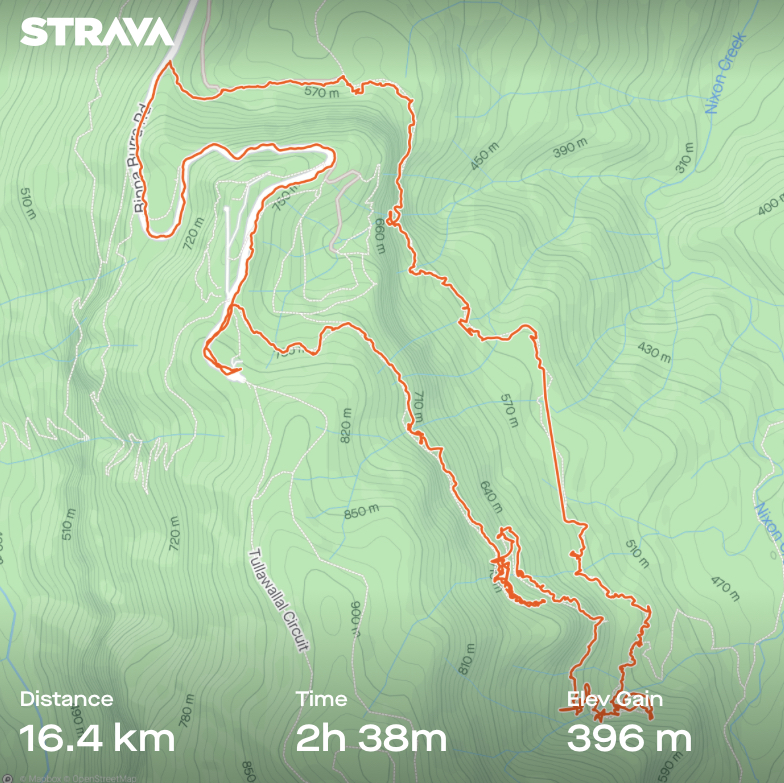
We chose the Lower Bellbird Trail because 1) the name is lovely, 2) I prefer hiking circuits so you’re on new ground the whole way and 3) we wanted a trail that was over 10km long. We are in training for Kumano Kodo, so need to get some miles on the boots.
We hiked Lower Bellbird anti-clockwise, starting at the southern entry point, and looping south, then turning north, and finishing at the northern exit point.
TIP
It’s important to note that Lower Bellbird Trail doesn’t fully loop. Otherwise it would be called Lower Bellbird Circuit!
You will finish at a different place to where you started. We finished further down the mountain, and then walked back up the road to our car, which was at the southern entry point carpark. There are carparks near the southern and northern entry/exit points to Bellbird, but regardless where you park, you will still need to walk on the road to start or finish Bellbird.Let’s Go!
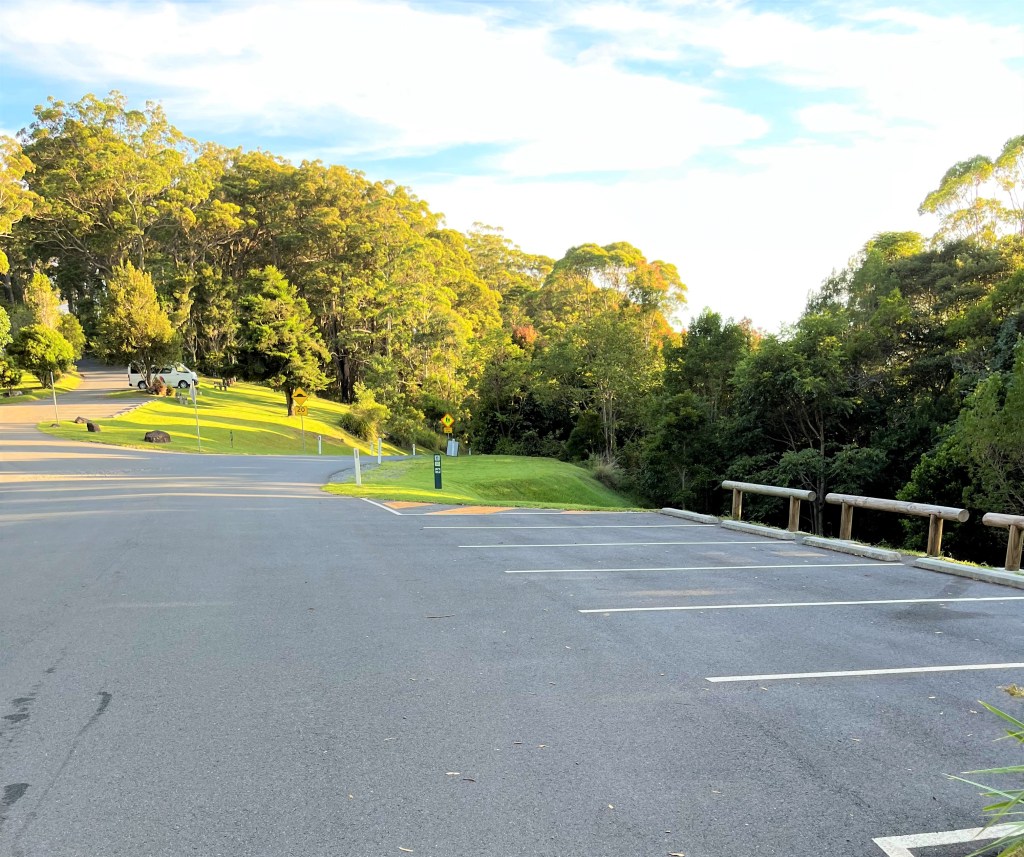
carpark downhill, Bellbird entry to the right 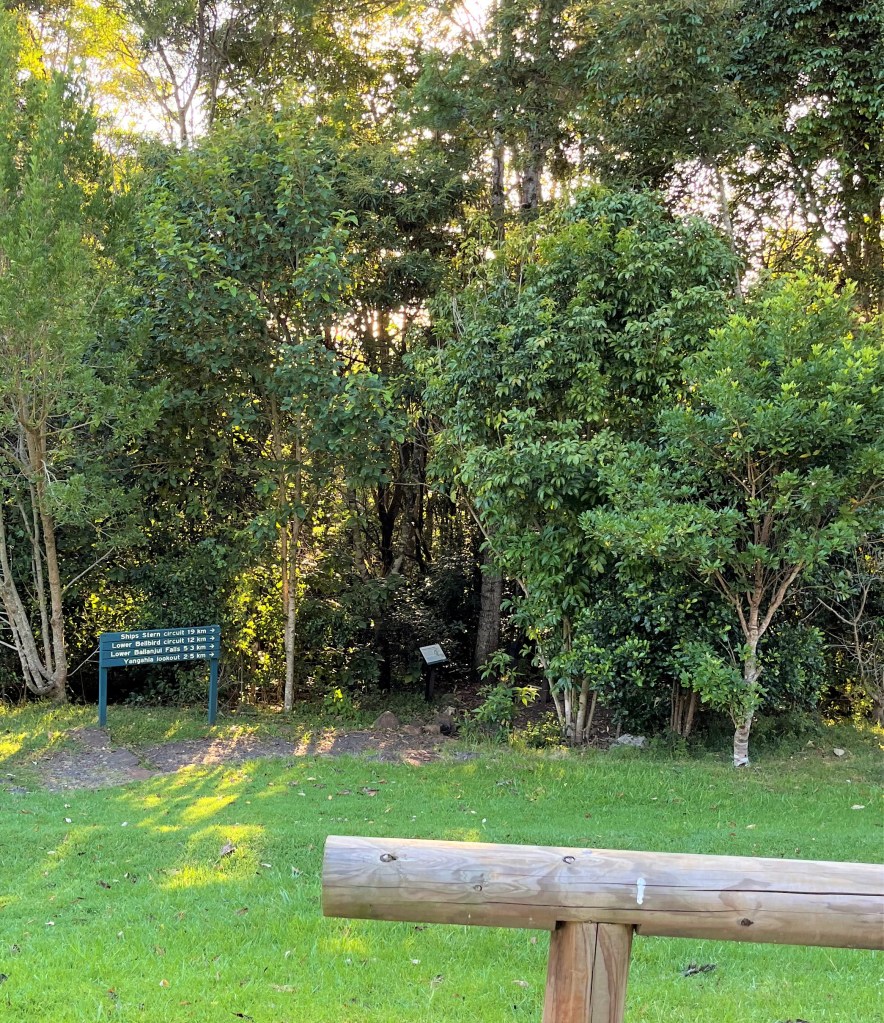
Bellbird entry point 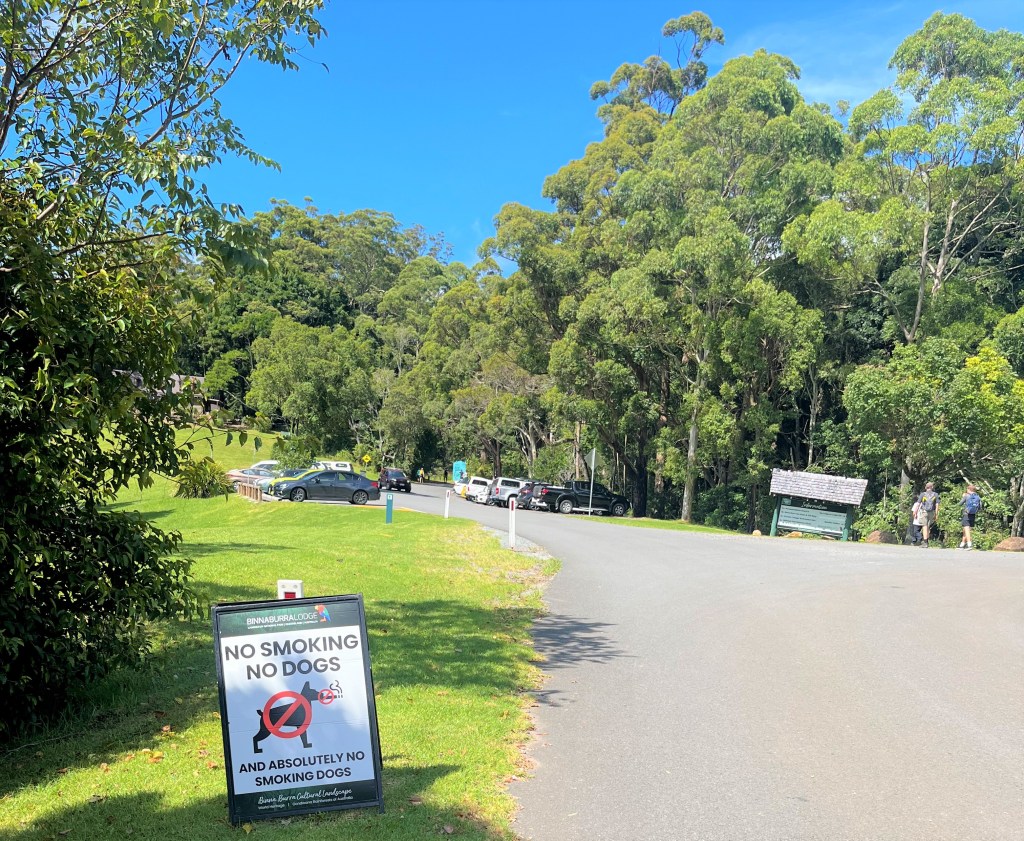
Gotta love Wildlife Ranger sense of humour The Lower Bellbird Trail is well marked and easy to find. We started at 6am, and as you can see, no cars. By 9.30am when we returned, different story. Parking is limited so if you want a good park, start early.
Binna Burra Lodge and the surrounding areas were developed in the 1930’s. Many of the hiking trails were built around the same time. Along some of the older trails you will see stones set into the side of the trail. I find these stones immensely reassuring, because if the stones are there, that means I’m in the right place!

stones = right trail The first 2.8km of Lower Bellbird leads you down a gentle slope, under a beautiful forest canopy. It doesn’t take long to realise you’re in for a very special hike. The forest is dense and cool, and the bird calls are an assault on the senses. It wasn’t long before we got our first glimpse of the views. The trail was taking us long the side of a cliff face, not exposed but certainly high and that afforded us a view from the top of the world.


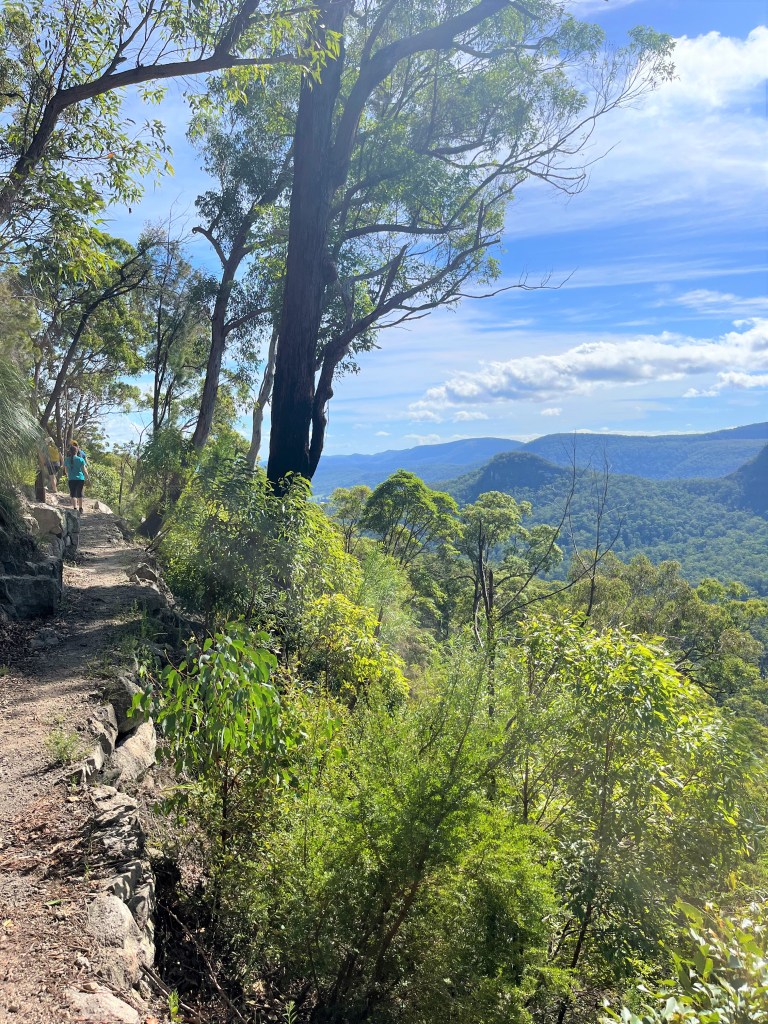
Lookout Spots – AMAZING!
There are two lookout spots on the Lower Bellbird, Koolanbilba and Yangahla. Both are on the trail, so are worth a breather and a look. The signage at the Koolanbilba lookout confused me a little as it didn’t reference Bellbird at all, but you can’t get lost, there’s only one way to walk! The view is nothing short of amazing. There is a map at the lookout which explains what you’re looking at, all the way to the Gold Coast in the far distance.

TIP
The Lower Bellbird Trail is what I would call a medium challenge trail. It’s quite narrow and in parts there are natural obstacles like steep stairs, fallen branches, uneven surfaces, rather large spiderwebs (!) and my nemesis, cliff faces. It’s not aerobically challenging, but skill, experience and mettle challenging. I suspect because it starts and finishes at different points, it’s not as well hiked as other Binna Burra trail options so less well worn, but if you’ve hiked before and/or you’re agile, no worries mate!Rock Formations – AMAZING!
As I mentioned earlier, one of the features of the Gondwana Rainforest is the incredible rock formations. We walked past them, through them, down them, alongside them and under them. I am in awe of the men and women who created these trails almost 100 years ago with the simplest of tools and equipment – no Google or GPS…

Morning Tea Anyone?
If I hike for more than about 10km, I like to stop for a break. Usually when hiking a circuit, the break is at the top (or bottom) which gives you a chance to either catch your breath, or steel yourself for what’s to come. By around the 8.5km we had been walking gently downhill for about 90 minutes – which was lovely, but what goes down has to go back up!
We arrived at the split between Ships Stern Trail and the Lower Bellbird Trail. Our trail was taking us up, so we stopped for a short break of apples, scroggin, iced coffee and marshmallows. (don’t ask, they were in the scroggin!)
The signage around Binna Burra is pretty clear and our trail was well marked. You will start your hike upward around the 8.8km mark, but don’t’ worry, the first upward section is quite gentle.
Scarred Landscape
Australia is known globally for a few things. Kangaroos, drop bears, flies, BBQ’s and hot summers. Along with hot summers comes bush fires. The 2019-20 Black Summer bushfires were some of the worst recorded across Australia. In September 2019, a fast-moving bushfire swept through Binna Burra and burned homes, buildings, lodges and infrastructure to the ground. It also caused unusually significant damage to the surrounding rainforest. Every Australian knows the smell of a bushfire and the visceral fear it can create. Blackened tree trunks identifies a bushfire area and can remain as evidence for many years.


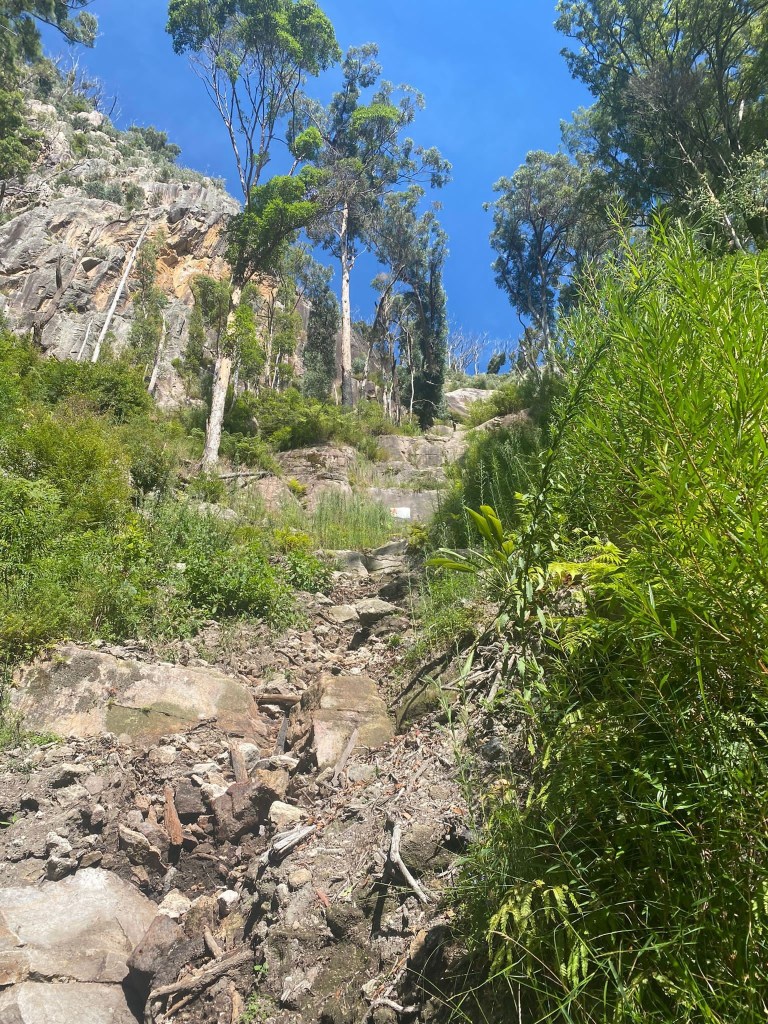
Stone Cliffs – AMAZING!
After walking up a gentle incline through a lovely carpet of dry leaves and another cool rainforest canopy for about 3km, we came across a very imposing set of stone cliffs. The cartographer in me was eyeing up the stone cliffs with some trepidation as I couldn’t see how we were going to traverse our way up and out. What I didn’t know was the trail hugged its way around the stone cliffs to the north, and then turned left into the forest.
The cliffs have regular rock falls, so signage asks you not to stop as you move through two key sections. The feel of walking this section of the trail was very imposing as our human frailty was very much in evidence when compared to eons of rock formations.

Dairy Farm in a Rainforest??
Around the 13km mark, we came out into the most picturesque clearing…in face my niece SB likened it to the Twilight Meadow, and you can see what she means. All we needed was sparkly skin and we would be in a movie set!


I read somewhere that part of the Lower Bellbird used to be a dairy farm, and this clearing definitely had a relaxed bovine vibe to it. We could have plonked here all day and just revelled in the ambience.
PS – it was at this point we saw the first hikers walking the other way. Up to this point, we hadn’t passed anyone!
Back to Reality
The last section of the trail is a gravel access road going up from the Twilight Meadow to Binna Burra Rd. It’s only about 1km from the meadow back to reality. There is a slightly confusing fork in the gravel road, with an arrow to the left, and the gravel road continuing straight ahead. We studied our print map and decided that both led back to the road, so we took the recommended left turn.
Rubber to the Road
Oh my.
We weren’t anticipating the uphill hike back to the carpark.
We exited Lower Bellbird at the first “x marks the spot”. We had to walk back to the carpark, which is the second “x marks the spot”. The difference? 2.5km. Up. Or as I described it to my hiking buddies “just a bit further!”


However, the views from the road our over Lamington were fantastic , and we could just see where we finished Lower Bellbird, circled in blue. Thankfully it wasn’t a hugely aerobic hike, otherwise the last leg up the road would have been painful.
TIP
I would recommend you plan for this last section. Either allow for it at the start, or as we did, at the end. Unless you have a driver on call, you will be walking 2.5km on the road at some stage as part of your Lower Bellbird hike.So, What Did We Think?
I give this trail two thumbs up. So do my hiking buddies TB(sister), SB and MB (nieces). It’s a visually stunning way to spend 3 hours – even the road section views are awesome.
We saw such a range of Australian forest history, walking in a rainforest that has been in existence for thousands of years *mindblown*
We were serenaded with a cascade of forest sounds. We heard whipbirds, green catbirds (very unnerving, they sound like babies crying), cicadas, bullfrogs, kookaburras – and a whole lot more we couldn’t identify but enjoyed nonetheless.
We had the trail to OURSELVES! We didn’t see hikers until we were in the Twilight meadow. That never happens. It was our own little bit of rainforest fabulousness. Forest bathing uninterrupted. yay.
FINAL TIP
It’s great to support local businesses when you hike. We try to buy a coffee, a snack, a map, a hat, and spend our dollars as we hike. If you go to Binna Burra on a Sunday, stop in afterward at the Beechmont Farmers Market (3rd Sunday of the month). hey offer a range of local products and services. I can recommend the Beech Mountain Distillery stand, they do a mean Lemon Myrtle Gin!Wrapping Up
So there you have it. Binna Burra in a nutshell. Take the time to drive up to Binna Burra and explore the trails. You won’t be disappointed.
See you next time out on the trails.
PJ
PS – remember last time I was talking about one of the benefits of hiking being good muscle tone? Well, I managed to face plant on the footpath walking the dogs last week, and gave myself a spectacular black eye.
I also banged my hand, knee and shoulder but guess what – NO BROKEN BONES 🙂
Told ya – hiking works.

-
Why Hiking Saved my Sanity – and the 5 Hiking Benefits You Need to Know!
Hello and welcome to my LikeToHike blog. I’m PJ and I write about the hikes I take, giving you insight, photos, commentary, tips and tools so you can enjoy hiking and embrace the experience.
So, I bet you’re wondering, how did I start hiking, and more importantly, why do I keep doing it?
Well, the second part of that question is easier to answer than the first part, but let’s see how we go.
CAUTION
In this blog I’ll be talking a bit about my own hiking journey and life, some of of the personal things I discovered along the way and doing some “sharing”…..which I’m sure you won’t mind…if you aren’t feeling the vibe, skip and I’ll see you next time!How Did I Start Hiking?
I used to be a runner. Not a lithe, lean, easy runner but a hot, sweaty, ungainly one. I thought that running was the only way to keep fit and healthy. And I did enjoy it. Somewhat. Apart from the chafing, sore knees, sore hips, constant bra issues and blisters.
What really ticked the boxes was being outside, feeling the seasons, moving through different landscapes, having different terrain underfoot, seeing different people and things.
As I transitioned from my third decade into my fourth, I decided there had to be a better way to keep fit and enjoy the outdoors. So, I just slowed it down. I went from running (jogging!) to walking. Albeit fast walking. I found that I had more time to see, feel and experience what was happening around me.
It gave me time to reflect, to ruminate, to problem solve, to de-stress and to mentally and emotionally breathe.
TIP
When you start walking/hiking, some of the apps and tools available make a big difference to your experience. I have used sites like AllTrails and TrailHiking, and apps like Strava and Relive to research and then track my hikes. It makes it feel “real” and in a way, validates what you are doing. If you want to go all in, most apps have a community you can connect with and exchange trails, hikes and performance data.In the middle of my fourth decade I was travelling for work. A lot. Walking was my excuse to explore new cities and towns, to find the walking trails, the rivers, the beaches, the forests and the bush. Every time I packed my suitcase, I threw in my sneakers and my walking gear. So, now I was a walker. Note quite a hiker. Yet.

Clockwise – Canungra, Brisbane & Sawtell (Australia), Havelock North (NZ) and Berlin (Germany) Hello Hiking!
About eight years ago, a work colleague and I had the bright idea of putting a four-person team in for the Gold Coast Kokoda Challenge, which is an endurance event held in the Gold Coast hinterland.
Yes, it was about fundraising and developing professional and personal relationships, but it was also about committing to training and pushing, both mentally and physically. We trained as a team for six months – every weekend and sometimes during the week, all through a Queensland summer, then hiked 48km non-stop in July, starting at 11am and finishing at 3am the next day.
And it was FANTASTIC!
However, if you want to try hiking for the first time, maybe aim for something a little less hard core. But then again….there’s a lot to be said for jumping in boots and all…

2016 – the hiking love affair begins So, Why Do I Keep Hiking?
When I went from my fourth decade into my fifth, some things happened. I got fat. Not super fat, but about 20kg worth. Some was diet and lifestyle, but most of it was age and stage. I was still walking, but hormones were dictating the direction, not me.
I did realise that if I wanted things to change, it was up to me to create the environment, the conditions and the outcomes.
So, what were the things in my world that brought me pleasure, and what were the things I really didn’t like? What did I want in my life? What were my non-negotiables?
The good news? Husband, child and the two dogs made the cut. So did hiking.
The bad news? The unwanted weight didn’t make the cut. Neither did the job I didn’t like, the commute I hated, the stress, the gaslighters and the crappy food.
At the end of 2021 I made a commitment and embarked on the “year of me”. As this isn’t a self transformation blog I’ll park it there, but by the end of 2022 my goals were met – and hiking played a big part.
Back to the top five benefits of hiking that YOU NEED TO KNOW!
1. Self Esteeem
Nope, the first benefit isn’t weight loss. It’s actually about you. Your confidence, your self esteem. We live in a fast paced world, driven by social media and impossible standards which presume to tell us all the things we aren’t doing well. Or correctly. Or at the right time. Or the right way.
Hiking makes you feel good about you. You’re in charge of the hike. It’s all about where you want to walk, when you want to walk, how fast, how long, with whom and why. You’re in charge of everything. This provides an incredible push of confidence. Embrace the new experiences….

2. Shinrin-Yoku
My favourite pastime. Forest bathing. A phrase coined in Japan about 40 years ago to describe the process of taking in the forest atmosphere to combat tech burnout and reconnect with the natural environment. I love embracing the calm and quiet in the bush, listening to the sounds and just being. Everywhere I hike has a soundtrack, and I love tuning in.
The best part? You don’t need to hike 20km to enjoy the benefits of shinrin-yoku. Try the park down the road. Sit. Listen. Enjoy.

Forest Bathing in a park in Melbourne, Australia 3. Stress Reduction
Told you, weight loss probably won’t make the top 5…
A common by-product of our busy lives is stress. In Australia right now, we have cost of living and mortgage stress as inflation creeps and a recession may be on the horizon. Job security, job performance, family, relationships, being perfect. Its a tough ask.
Hiking gives you a reason to park all that for a short while. Boots. Backpack. Hike. Rinse and repeat. Concentrating on a hike means your brain has less time to worry endlessly about the above. When I hike I’m focussed on my feet, the trail, the trees, the map, my poles, hydrating, saying hello to people and generally what’s happening around me. I unplug from all the “things”.
Less stress. It works.
Springbrook National Park, Queensland 4. Muscles and Bones
It’s a fact of life that as we get older, muscles and bones age also. Strength, density and tone become more important, especially for women. Toned muscles support bones. How many times have you heard about that nana who tripped and broke a wrist? Or that auntie who rolled an ankle? Good muscle tone might not prevent the fall, but it will help minimise the damage.
Hiking is an activity that encourages good muscle development and maintenance. Uneven terrain, hills, slopes, valleys, steps, rocks – they engage and encourage muscle tone in legs, arms, back, feet and core. All the good places.
5. Sense of Community
Rounding out my top 5 benefits of hiking is a sense of community. A sense of belonging to something bigger than you.
Hiking is a popular pastime and offers some incredible events and opportunities on a global scale. You can hike Everest, slog the Kokoda Challenge, shinrin-yoku the Nakasendo Way or commit to the Camino Trail – there’s a hike for you and a fantastic network of like-minded individuals who will be cheering you on. If you haven’t participated in a hiking event, I can highly recommend it., Having a shared purpose and common experience is something very special.
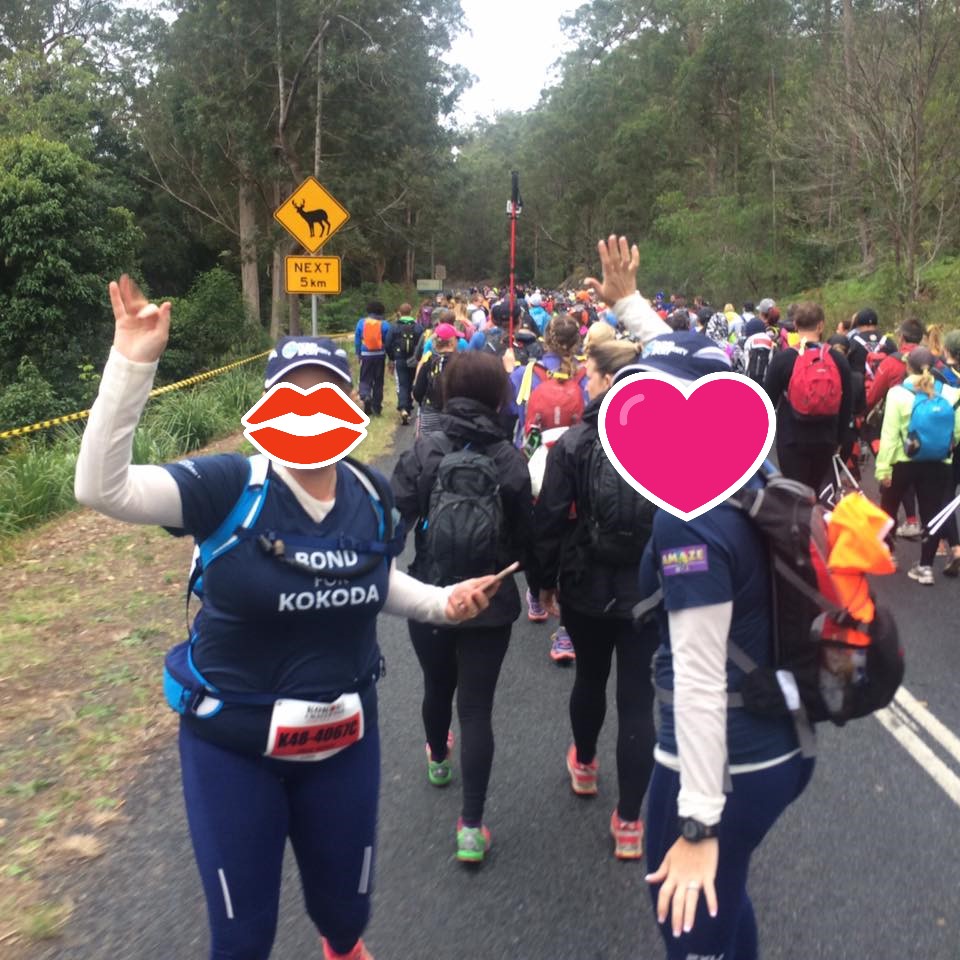
Kokoda Start 2016 
Kokoda Finish 2021 (at 3.35am!) Hiking gives you entry into a community of people who not only accept you and your goals, but actively encourage and support your endeavours. Pretty cool huh?!
Wrapping It Up
So there you have it.
My top 5 benefits of hiking that you need to know. Keep in mind, this is my top 5, and have come from my hiking journey of discovery. Everyone has a different journey with different experiences and milestones – which is the fun of it.
See you next time out on the trails.
PJ.
PS – weight loss is definitely a benefit – but it’s a result of hiking – not the reason 🙂

-
CONQUERING THE TE MATA GIANT – ONE SCARY STEP AT A TIME
Hello and welcome to my LikeToHike blog. I’m PJ and I write about the hikes I take, giving you insight, photos, commentary, tips and tools so you can enjoy hiking and embrace the experience.
Today we are tackling one of the more ‘interesting‘ hikes I’ve done, located in the North Island of New Zealand. It’s not a long hike but wow, it was challenging – and not in the way you would think.
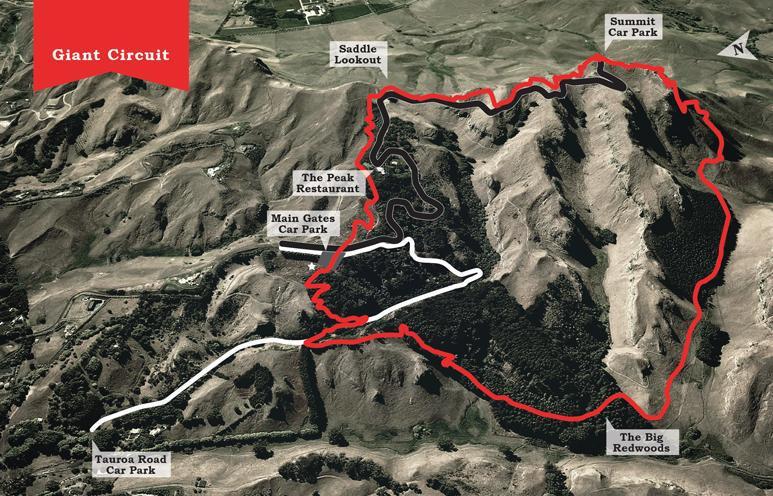
Welcome to the Giant Circuit on Te Mata Park, located in the beautiful Hawkes Bay. This is a 5.5km trail that will have you smiling, smug, surprised, suffering, swearwording and satisfied all within a two hour timeframe.


Before you grab your backpack and boots, have a look at the Te Mata Park website at http://www.tematapark.co.nz. There are a lot of resources including maps of the trails through the park and some handy information.
Upon Arrival
First things first. To access the trails in Te Mata Park, make your way up Te Mata Peak Rd from the charming cafe village of Havelock North. The road is twisty and narrow, so take your time. You’re looking for the Main Gates Carpark.
Like many popular hiking spots on weekends, just follow the stream of cars and outdoor enthusiasts. There are some great info boards up at the carpark to assist you with planning your hikes.

Map at Main Entrance CAUTION
I hate to be a Debbie Downer, but this carpark area is very well used, not only by hikers but day trippers and people just out for a cruise. As a result, petty theft from cards tends to be a frequent occurrence. Take the usual precautions and don’t leave valuables in sight in your car when you depart. This rule applies to every hiking carpark you frequent.Starting The Giant Circuit
I was lucky enough to have a hiking companion with me for the Giant Circuit., which is always nice when exploring new trails. It was also a godsend as I got really stuck on a section of the Circuit with a “frozen legs my god its steep” moment. But more of that later…

I hiked this trail with my sister – TB. She’s a great hiking partner as we are about the same age (give or take), fitness level and generally the same enthusiasm for hiking.
Technically you can hike the Giant Circuit either way, but it’s recommended to hike counter clockwise. We hiked in the afternoon in early autumn which is a fantastic time to be in New Zealand and outdoors – a balmy 16 degrees, no humidity (!) and a slight breeze.
Te Mata Peak makes the most of its natural surrounds and has a strong Ngati Kuhungunu importance. Ngati Kuhungunu is the local iwi (tribe) traditionally centred in the Hawkes Bay region and also Wairarapa which runs south of the Bay. It’s important to acknowledge the land, the culture and the history and embrace the overall experience as you hike Te Mata. Being surrounded by such rich history makes a hike that much more enjoyable.
Easing Into It
Several of the trails run concurrently and then split at certain points in the park. The trails are clearly marked with their respective colour and you’ll see the red market for the Giant Circuit as you hike. Another fun fact is that the whole of the park is an ‘off leash’ area for dogs. Which is unusual. So don’t be surprised if you’re greeted by a groodle or surprised by a staffy…
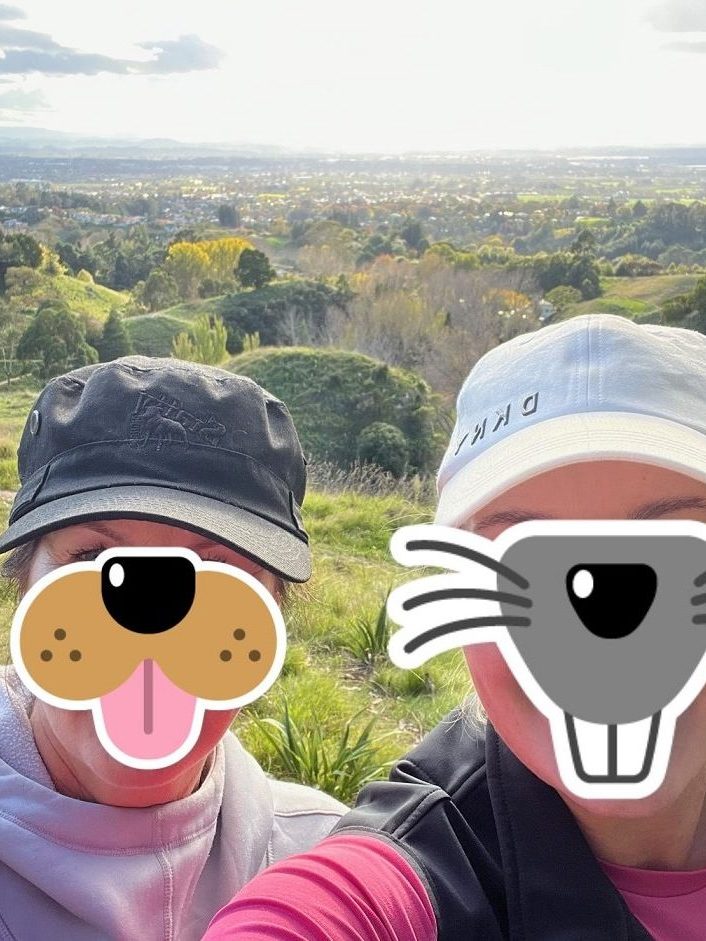
Who are those masked hikers?! TB and I set off counter clockwise and the first section of the trail takes you gently down into a gully, past some great vantage points for views over Havelock North and Hastings.
The shorter trails are all in this initial section which is a densely wooded gully, with lots of lovely twists and turns, and loops back to the carpark. You can start on one colour, intersect with another and take a new direction. They myriad of trail colours on the main map brings a sense of anticipation of what may unfold.
TIP
Take advantage of short trails and circuits to introduce hiking to your family, your kids, friends or colleagues. Short hikes of 2km or less are not so intimidating and give hikers the chance to try new equipment, clothing or shoes with minimal risk. My son loved bush walks when he was young – it gave him the opportunity to express his sense of adventure and be “in charge” of our destination.The Big Redwoods (Te Hau Valley)
About 1.6km into your hike, welcome to the Big Redwoods copse.
The redwoods were planted almost 100 years ago and make for an ethereal section of the Circuit. They provide natural shade and you’ll see some cute huts and lean-tos made by kids playing in the area. The Te Mata Park website mentions the Redwood copse being used for weddings, events and even plays! When you enter it, the vibe is rather incredible.
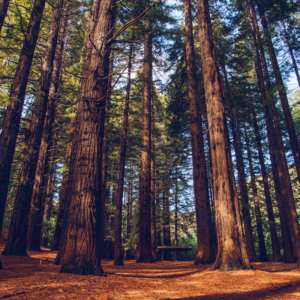
If you continue walking in a general southerly direction toward the opposite side of the redwood copse and keep your eyes peeled, you’ll spot the Giant Circuit red marker. You will feel its taking you away from the park and into farmland, and you’d be somewhat correct. Part of Te Mata Park is farmland. Complete with sheep. And fences. And more sheep.
The Gully
So far, the Giant Circuit was a gentle, pleasant hike. TB and I were walking, chatting and enjoying the outdoors. Our pace was pretty quick as the terrain was mostly either downhill or flat.
The beauty of walking in New Zealand is the incredible terrain scupted by eons of volcanic activity. A bird’s eye view of Te Mata Park shows the land pushed together like ruffled fabric, resulting in rugged peaks and valleys. Think Lord of the Rings! Hiking in these areas means you’re either on the top of a peak, or walking along the floor of a valley, or traversing between the two.
Had studied my maps more closely, I would have realised where the gully was heading. And possibly turned around…
TIP
I always take a photo of the information panel when I arrive at a hike. Regardless of mobile coverage, I then have a photo of the map which I can blow up and scrutinise at my leisure. I also take a print copy of the trail map. Call me old fashioned but a printout is a great backup.‘Snakes and Ladders’
You will arrive at the base of the Snakes and Ladders about 4.5km into the hike. Now I’m not sure of the origin of the name, I remember reading somewhere that the park ranger who created the track named it – and TBH – you need a ladder to get up the blimmin thing! It actually starts off quite gently, and after all, the hillside was scattered with sheep, how hard could it be?

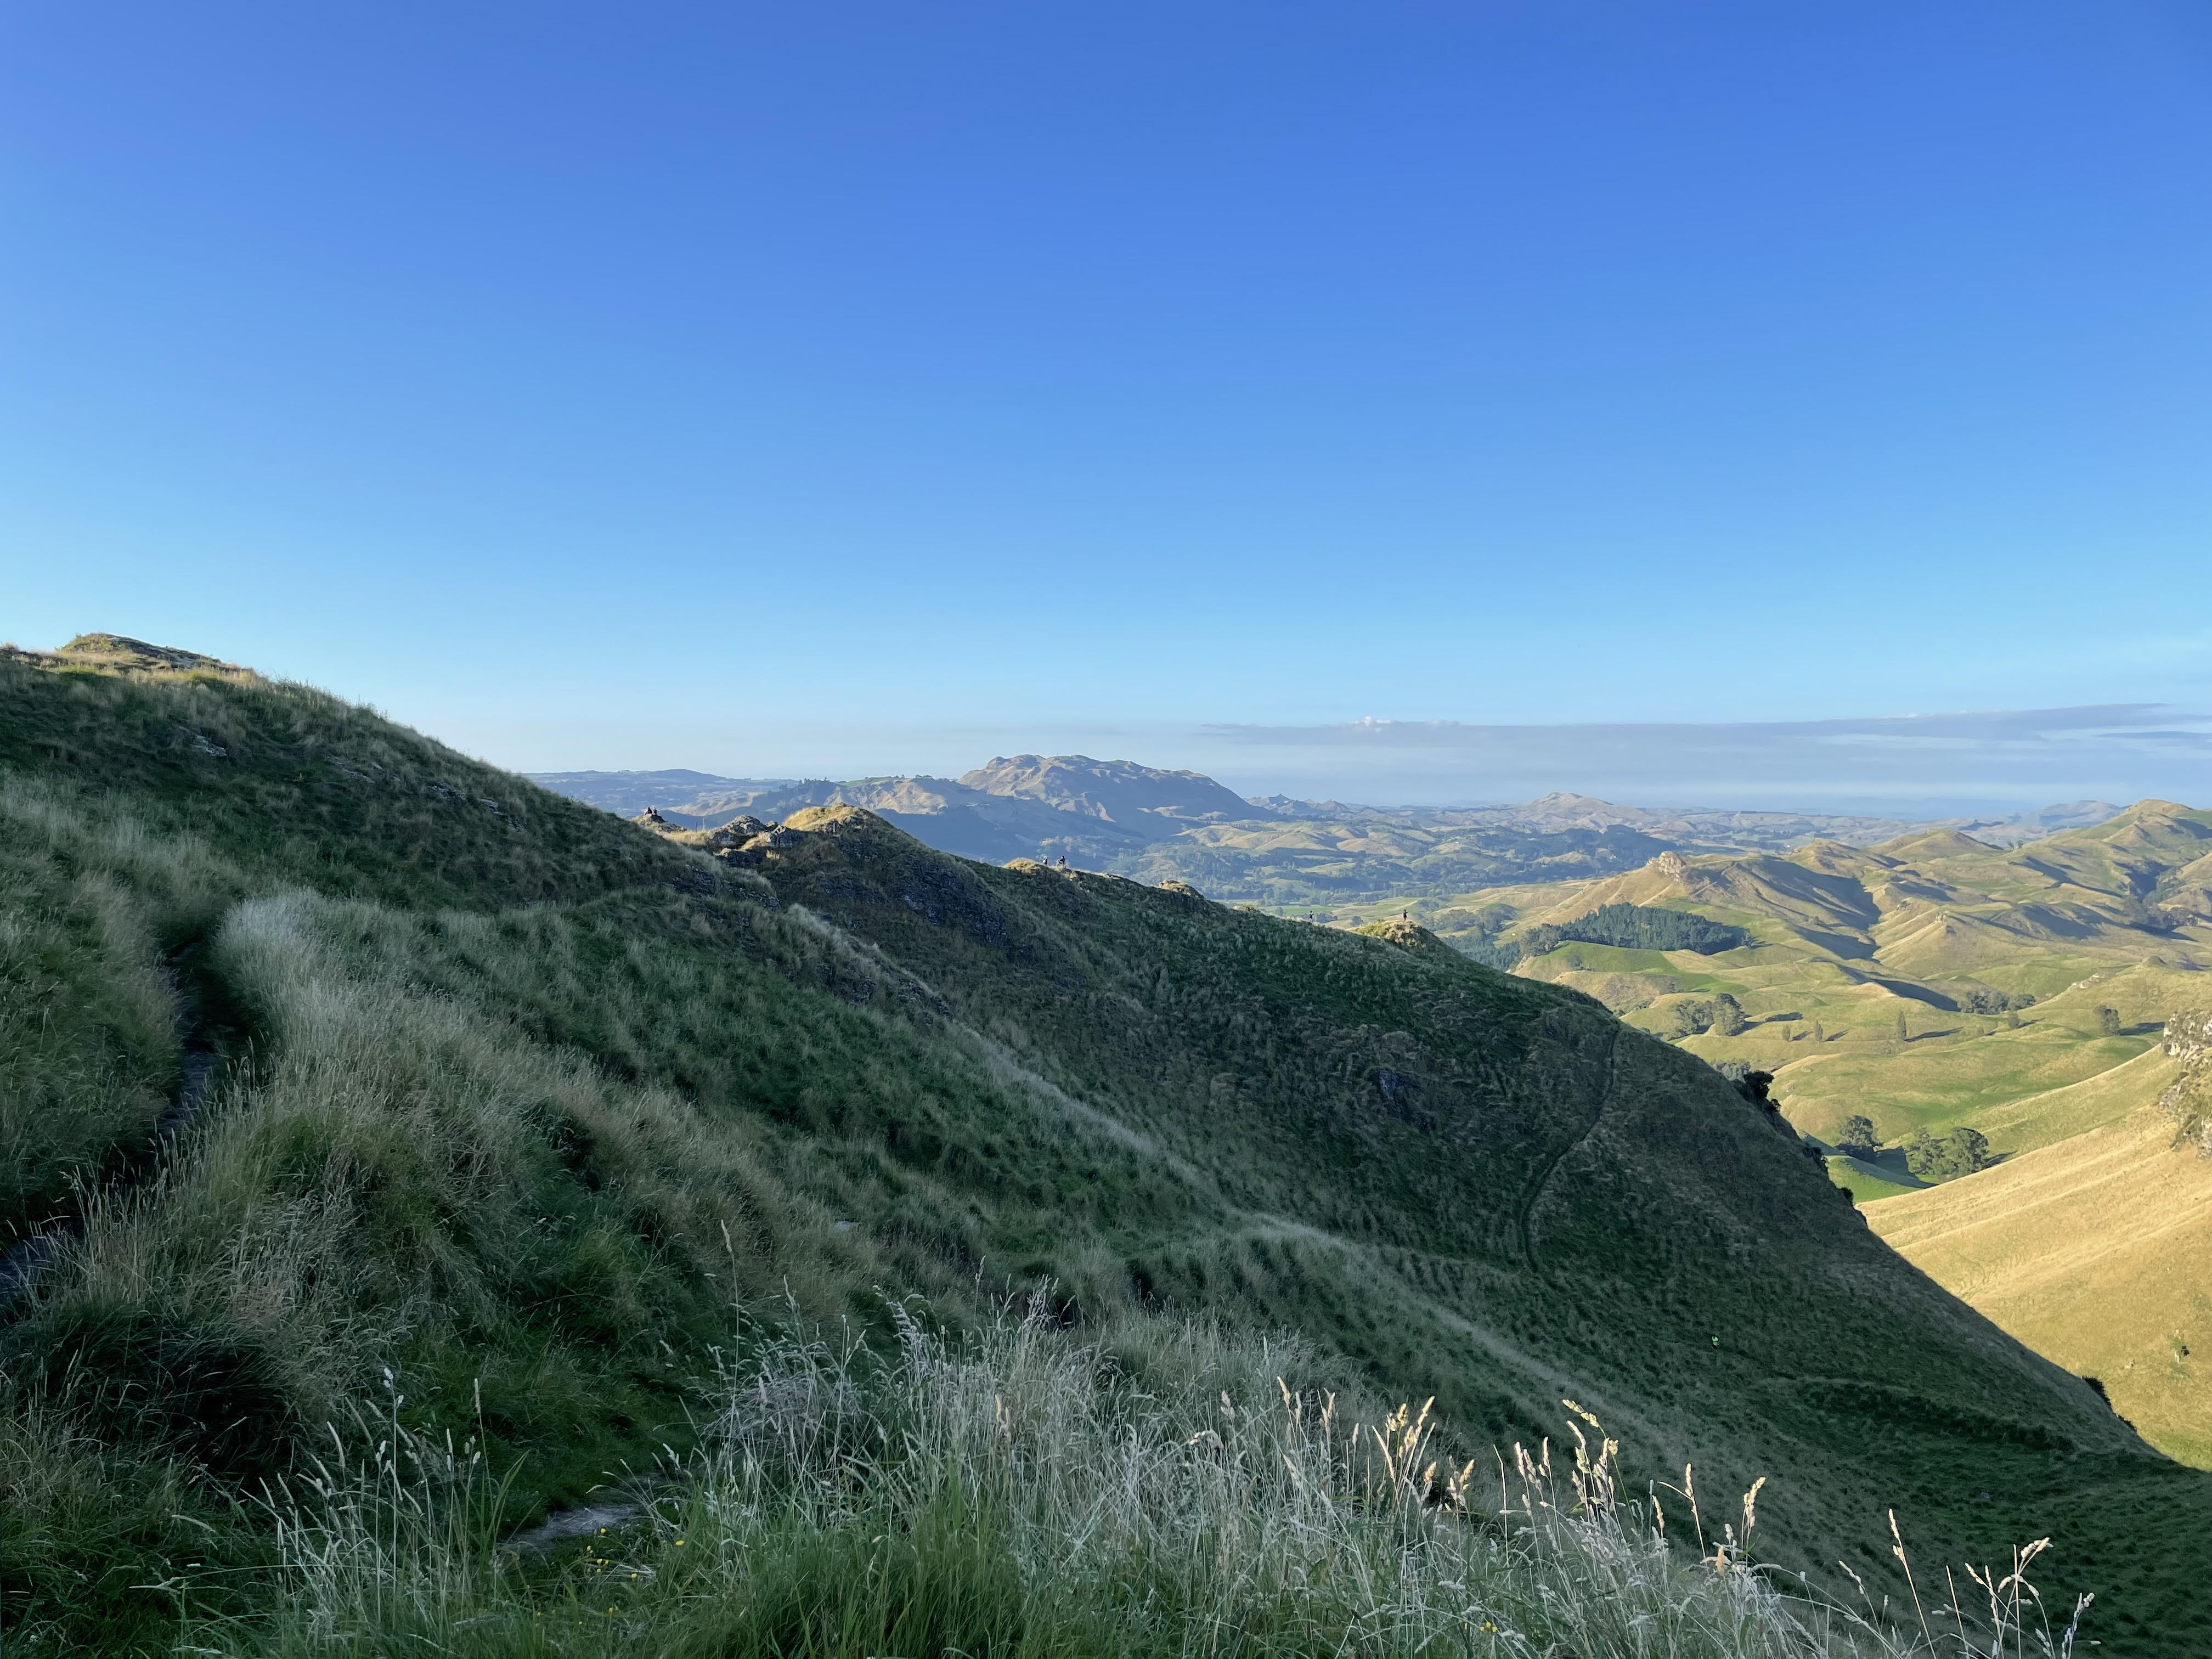


It’s about now I will apologise. I didn’t take many photos from here, I was concentrating more on the track, my feet and balancing….then recovering!
It’s a steep, sharp switchback climb up the side of the largest peak in the Park. This track takes you up the southern face to the Summit, where the views are unrivalled.
Here’s where things got a bit hairy. I’m not amazing with heights. You know that prickly, hot, clammy feeling you get in your hands and feet? Yep, that’s me.
As the track narrowed from a comfortable width down to one that was only about 25cm wide, I knew I was going to struggle. Thankfully it didn’t phase TB at all. One of us kept her cool…
So, I didn’t look back/down, and used the vegetation to balance my climb. I think I zoomed up this section in a time to rival an Olympic runner. I just wanted it over and done with.
TIP
If you find yourself on a section of a hike that you’re not comfortable with, take a moment to centre yourself and make a decision to focus forward. If you don’t like super steep climbs and feel nervous, focus upward, and lean into the track. I use strong vegetation as a tool to balance. Not to pull myself up, but as reassurance that I’m grounded and stable. KEEP MOVING!! The hill isn’t going to get any smaller and you magically won’t float to the top. Every step forward is an achievement and when you’re done – breathe…
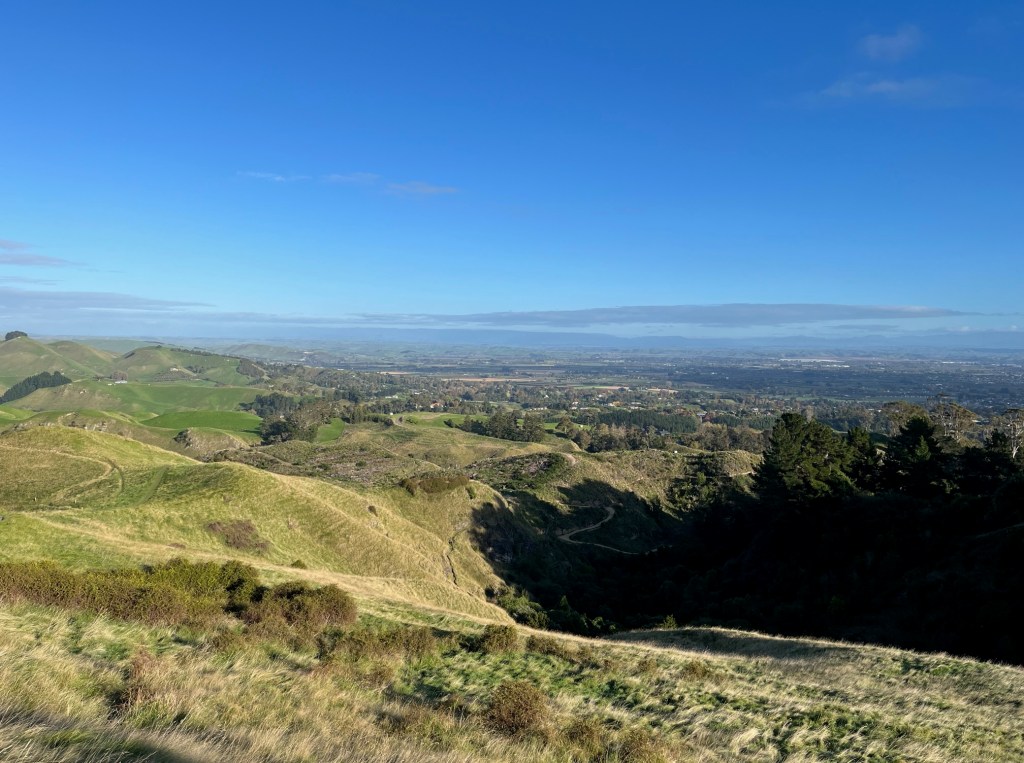
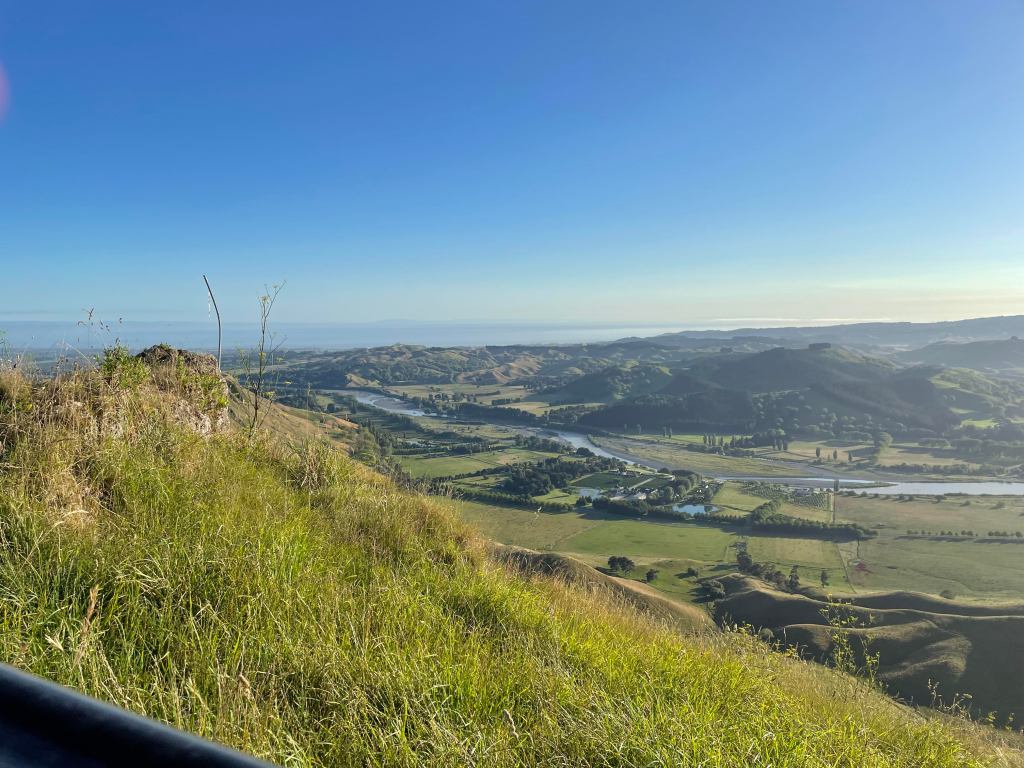
Summit and Saddle Lookout
The view from the Summit almost made Snakes and Ladders worth it. If you google Te Mata, most of the imagery is from this vantage point. This is why hikers and trekkers LOVE New Zealand. It was quite windy on the day TB and I hiked, so be prepared for some gusts as you walk along the Summit toward the Saddle. There is also a carpark at the Summit, so don’t be surprised when you heave yourself over the last couple of rocks, you are greeted by five curious tourists watching your efforts. The view from the Saddle Lookout is again – spectacular. You’re on the homeward section now, so spend a moment, have a sip of water and drink in the vista. *boomtish*
CAUTION
The section of track from the Summit to the Saddle Lookout runs adjacent to the road. Don’t be tempted to walk on the road (as many day-trippers do). You’ll be competing for space with a constant flow of cars going both ways. Enjoy walking on the track and continue with your Giant Circuit hike.

Interesting to see that the road really hasn’t changed in 100 years….
A Quick Peek at Peak House
The final section from Saddle Lookout to the Main Gate Car Park takes you through a lovely wooded area and past Peak House. Built as a destination venue in the late 1960’s, Peak House now offers coffee, meals and in the afternoons, a great bar and live music. As you can imagine, the views from their balcony make that glass of Clearview Reserve Chardonnay taste divine.
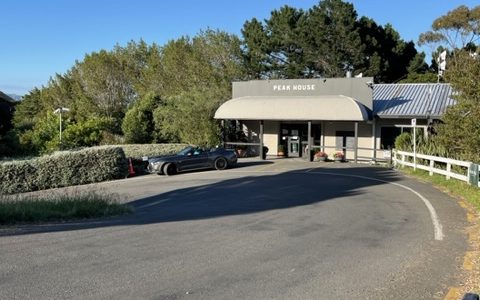
Nope, I didn’t stop but maybe next time…
After two hours of walking, climbing, sheer panic and recovery, TB and I arrived back at the car.
This is a great circuit to hike, not for the fainthearted (or those a little bit unsure of cliff faces) however the sense of achievement is worth the push.
Pat yourself on the back, you’ve just completed a fantastic hike, enjoyed the outdoors, perhaps tried some new gear for the first time. You’ve definitely done your steps for the day and embraced the experience.
Love and thanks to my bestest hiking buddy TB – and see you next time out on the trails.
PJ.

-
THE HIKE TO GET YOUR LEGS PUMPING & HEART THUMPING
Hello and welcome to my LikeToHike blog. I’m PJ and I write about the hikes I take, giving you insights, photos, commentary, tips and tools so you can enjoy hiking and fully embrace the experience.
Today I’m going to write about a cheeky wee 6km hike in the Nerang National Park on the Gold Coast, Queensland. The Nerang National Park is home to a great range of trails, and is popular with hikers, runners, bikers, families, training groups and everyone in between.
This 6km circuit is one I do regularly, simply because its a great, snappy cardio workout with four dry creek gullies, a short sharp climb and a gradual descent back down to the finish. You can knock this hike off in under 90 minutes depending on your fitness, and you get to experience some lovely scenery.
There are some map resources on the Queensland State Government website here, and below is the official map of the area. It’s not the best for hiking detail, but gives an overall picture with my lovely blue overlay. My pic on the right shows where the hike is in relation to the map.
Official map with overlay 
Let’s get into it!
Upon Arrival
The Nerang National Park is very easily accessible from Hope St, Nerang. Parking is plentiful outside the velodrome, which signals the access point into the park. On the weekend, just follow the stream of hikers and bikers – you can’t miss the entry. If you’re lucky enough to be hiking during the week, here’s a couple of pics of the hiking entrance.

Approaching Entrance 
Entrance Starting Your Hike
I walked counter clockwise. I find that most hikers naturally turn left, so I turned right…
First thing you’ll notice is the tree cover. Thankfully there is an abundance of high trees in this section of the park, and sun protection is needed hiking in Queensland. I started around 6am – and it was already 26 degrees with relative humidity at 88%. Thank you trees!

Nerang National Park info 
Turning right and… 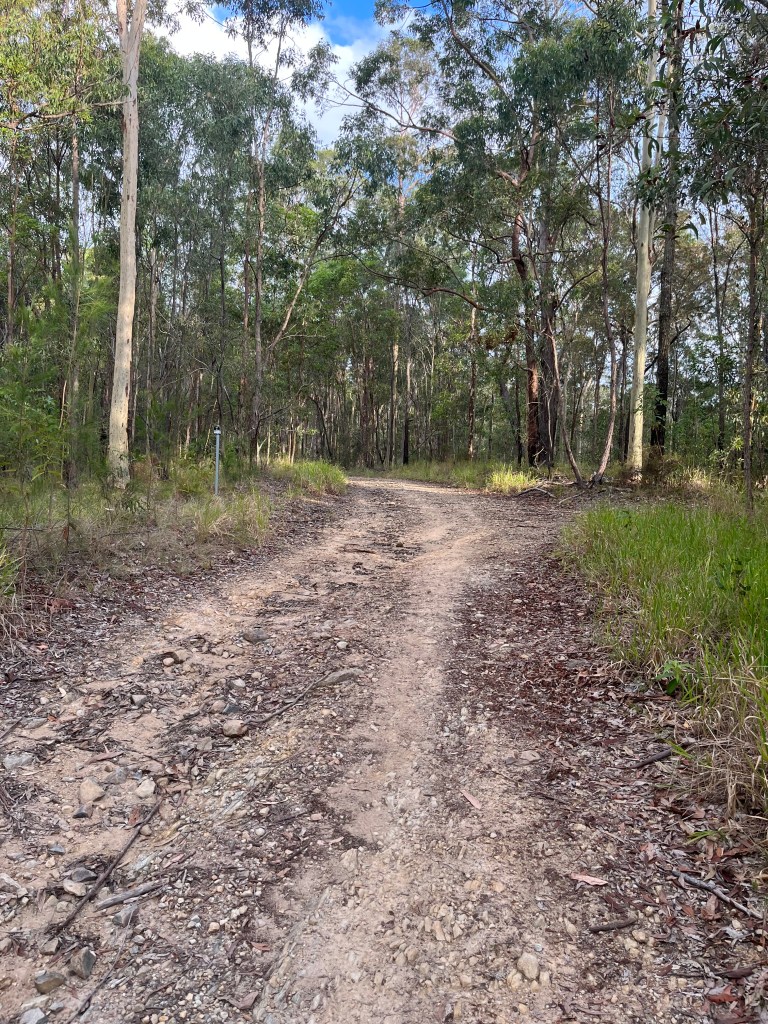
heading up the trail Second thing you’ll notice is the trail is quite rocky. This section of the National Park is perched on shale, so basically compacted silt and clay stone. It can be hard going on the soles of your feet, so hiking footwear would be the best option. My first hike here many moons ago was in sneakers, my feet were sore for about a week afterwards.
Navigating the Section Names
The trails in Nerang National Park have both names and numbers. The numbers are prefixed by NG – and you can see them on the trail map I loaded above. There will be small plates attached to poles as you walk along the trails detailing the NG and the name of the trail.

Intersection plate on the main trail So, navigation is pretty easy using maps and the trail signs. The other good part about Nerang National Park and this 6km trail is it runs adjacent to the park border, so you’re in line of sight of roads and some houses. For the new hikers (yay – welcome!) I think this provides a bit of security and peace of mind – we won’t take you into the wilds just yet…
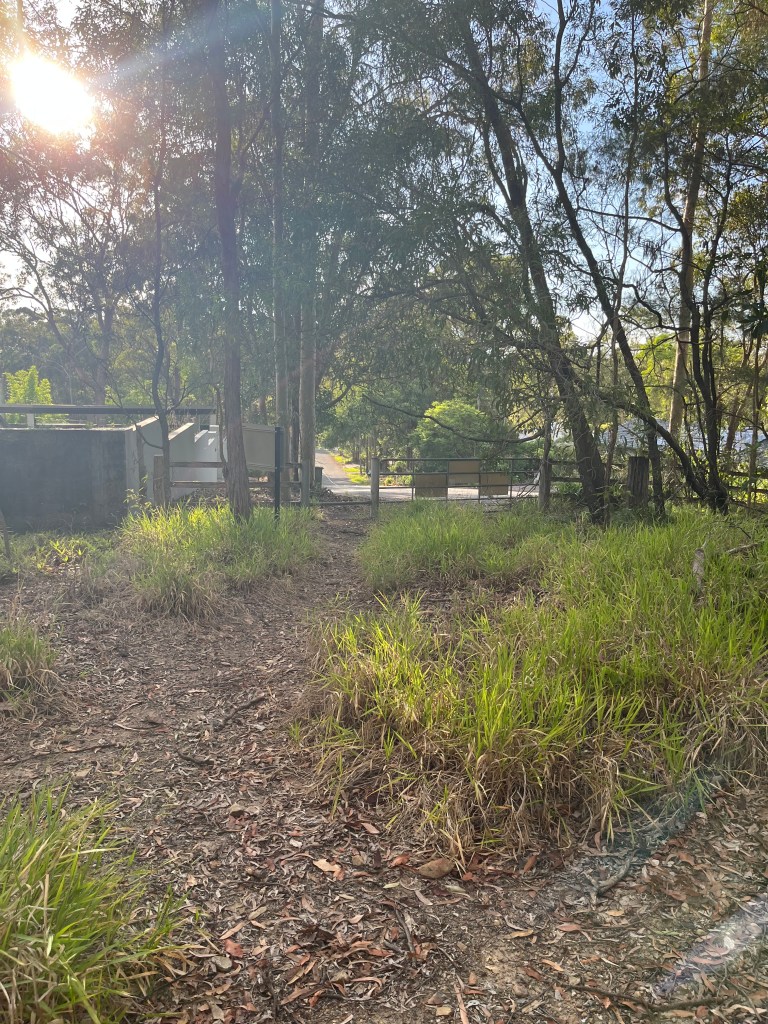
Houses and road adjacent to Coolibah break You will also see some of the mountain bike tracks which criss-cross the main hiking trails. Here’s an example of the signage you’ll see around the trails.

CAUTION
Don’t walk on the biking tracks. They’re not for hikers, they’re for bikers, and they clock some serious speed! I’ve found the bikers extremely polite and respectful of me when I’m hiking, so I extend the same courtesy. Nerang National Park is an area designed for hiking and biking so let’s play nicely together.Turn Right and Enjoy Coolibah Break
After a brisk trot up NG22 for about 1.6km, you’ll be making a right hand turn at the NG23 marker. This is the Coolibah Break. Coolibah has four dry creek bed crossings, so prepare yourself for 1.5km of leg pumping and heart thumping! I like this track for two reasons. 1 – you get to explore, which is what hiking is all about and 2 – you get some serious exercise.
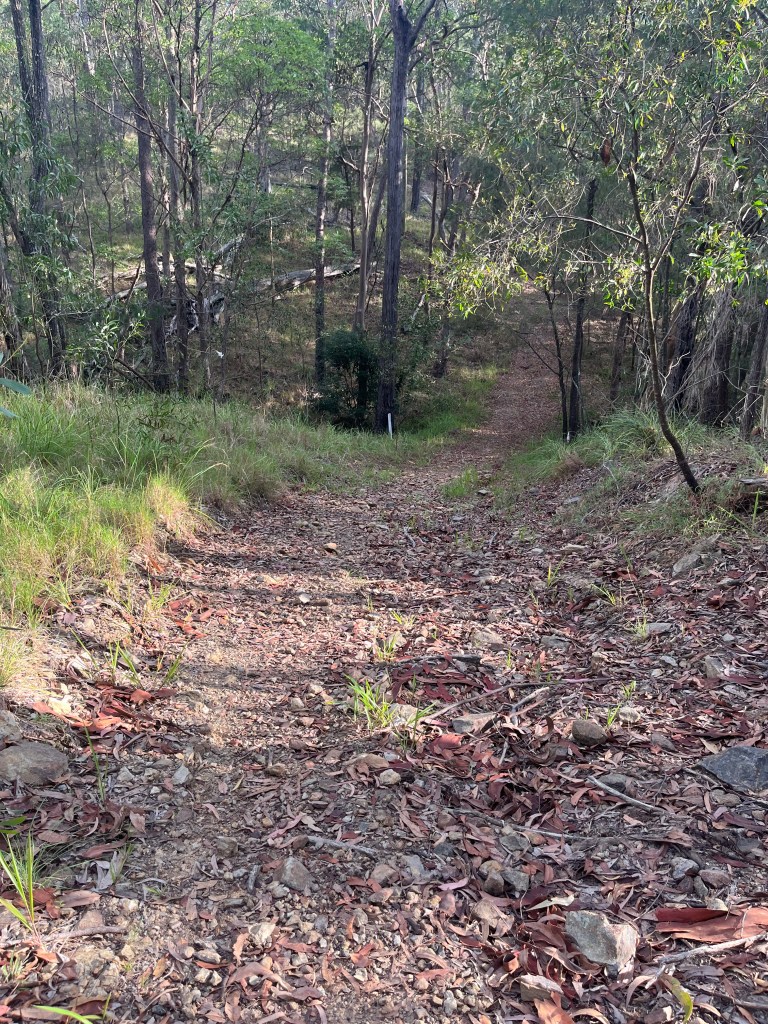
Coolibah Break dry creek bed #1 going down… 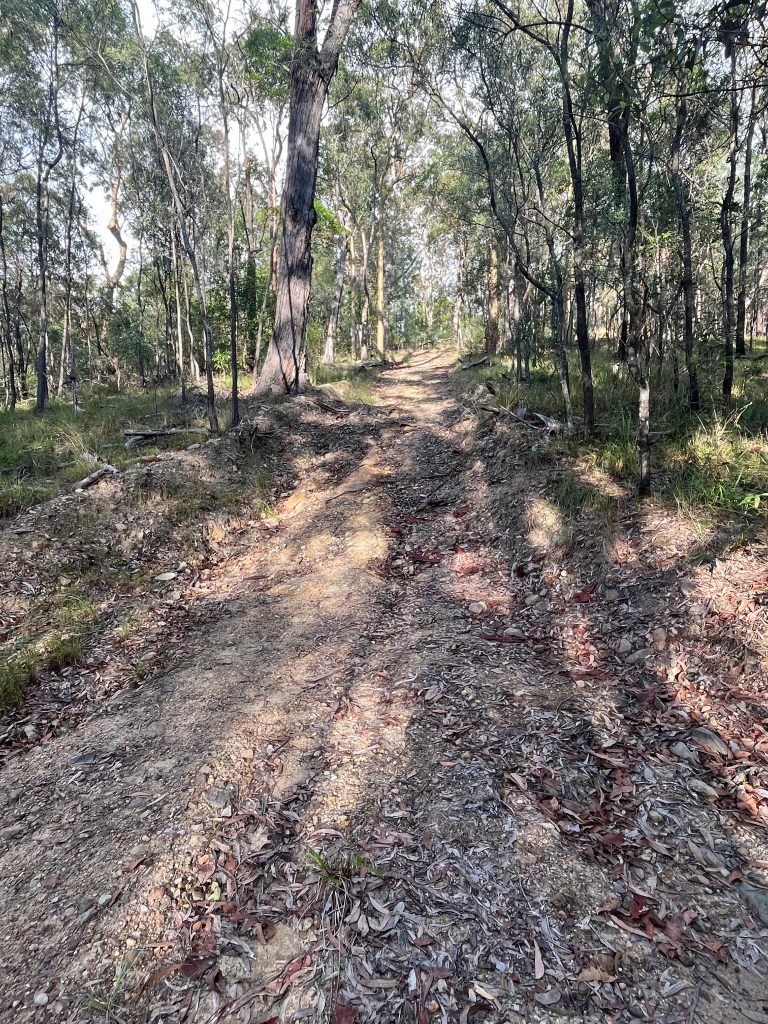
and then back up the other side! CAUTION
Don’t walk the Coolibah Break after heavy rain. Dry creek beds have a habit of filling up quickly, and the creeks can rise to over 2.5m in the blink of an eye. We have a saying in Queensland – if it’s flooded, forget it.Turn Left and Enjoy Castle Hill
You’ve conquered the ups and downs of Coolibah Break and have arrived, around the 3km mark, at a T junction. This is Castle Hill, or NG25 on the map. Today we are going left and heading back toward the main trail.
You will meet mountain bikers on this section, they’re coming back up the main trail to start their crazy descents. This section of the trail is sandy underfoot , and in the shade so quite a pretty part of the walk. Slow down, enjoy the birds, the cicadas and the vibe.
TIP
I hike with a camel pak for fluids. I find I can’t juggle a water bottle from my pack – it’s on – it’s off – it’s on again – I drop the water bottle in the sand – argh. Remember to hydrate regularly, before you get thirsty. I take plenty of small sips when I’m walking downhill or on the flats. I also add electrolytes if I think I’ll need them on longer hikes.Back on the Main Track
Congrats, you’ve completed the Coolibah Break! You will notice that the track widens and at NG24, Castle Hill continues to the right. We’re going a little deeper into the park, not much but enough to see some lovely vistas to the north and south. Before we turn for home, we do have one more hill climb, but you’ve got this. Your legs are warmed up, you’re in the groove and you power up the hill.
Castle Hill section, including the hill climb up to NG26! TIP
I find going down a hill far harder than walking up. I think it has a bit to do with balance, and a bit to do with confidence. Lean slightly forward when hiking down a steep hill. This reduces the risk of jarring and sliding, especially on gravel. So, stick your butt out, tilt forward from the waist and own that descent.Information Junction and Turn Left
Finally the top. This is NG26, and is home to an information panel, hence my name for it. It’s the only info panel out in the trail areas, so a good place to commit to memory.

Info Junction markers and panel to the left 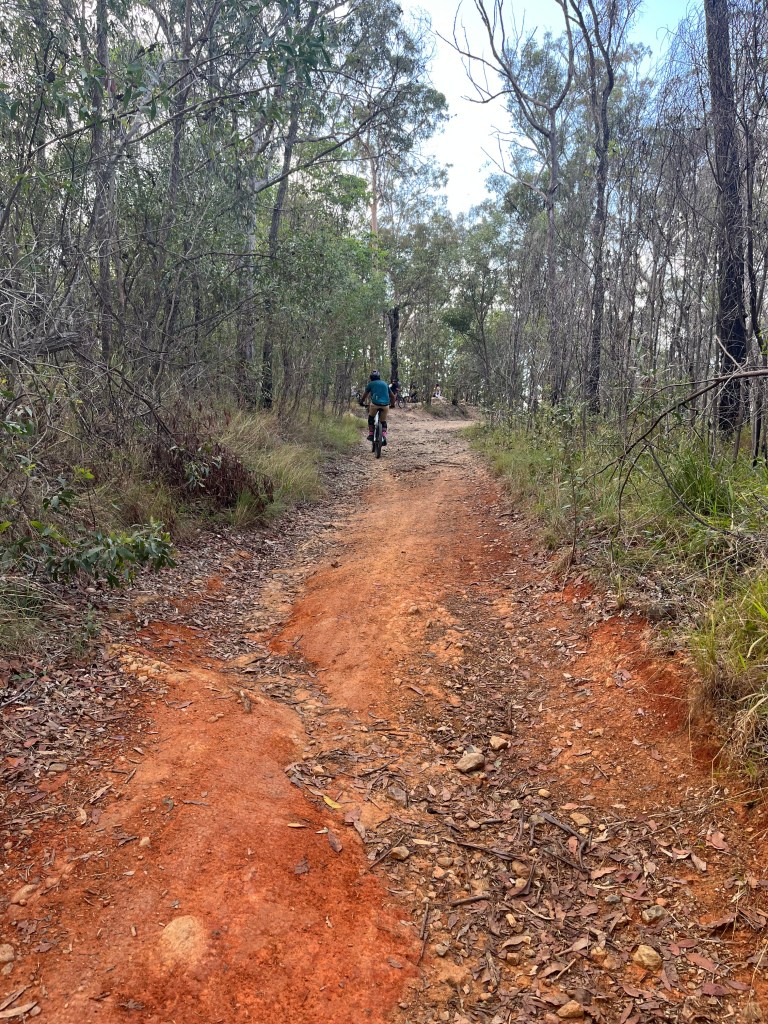
Heading home…with the bikers TIP
I always take a photo of the information panel when I arrive at a hike start point. Regardless of mobile coverage, I then have a photo which I can blow up and study at my leisure. I also take a print copy of the trail I plan to walk. Call me old fashioned, but if you’re hiking, you need maps!Information Junction is also the marker for the final 2km of the 48/96 Kokoda Challenge, an endurance event held each July in the Gold Coast hinterland. I’ve done Kokoda 48 twice, so this location is burned in my brain as the “we’re almost home” point.
Turn left and we are now on the descent back to the car. You have a strong visual red clay section which goes slightly uphill, then it’s a leisurely 2km back to the parking area. This section is called Centre Road. I’m not the expert but I understand that many of these main tracks are also emergency service access roads. The Gold Coast does have occasional bushfires in the dry periods so access to the forest is critical to manage fires and backburns.
You can see that bikers are going gangbusters to the left of the track. When walking on these larger tracks you’ll be sharing with other hikers and runners, and also bikers as they come back up to throw themselves down another bike track. I usually stick to the bike groove in the track as it’s a smoother descent and more stable underfoot.
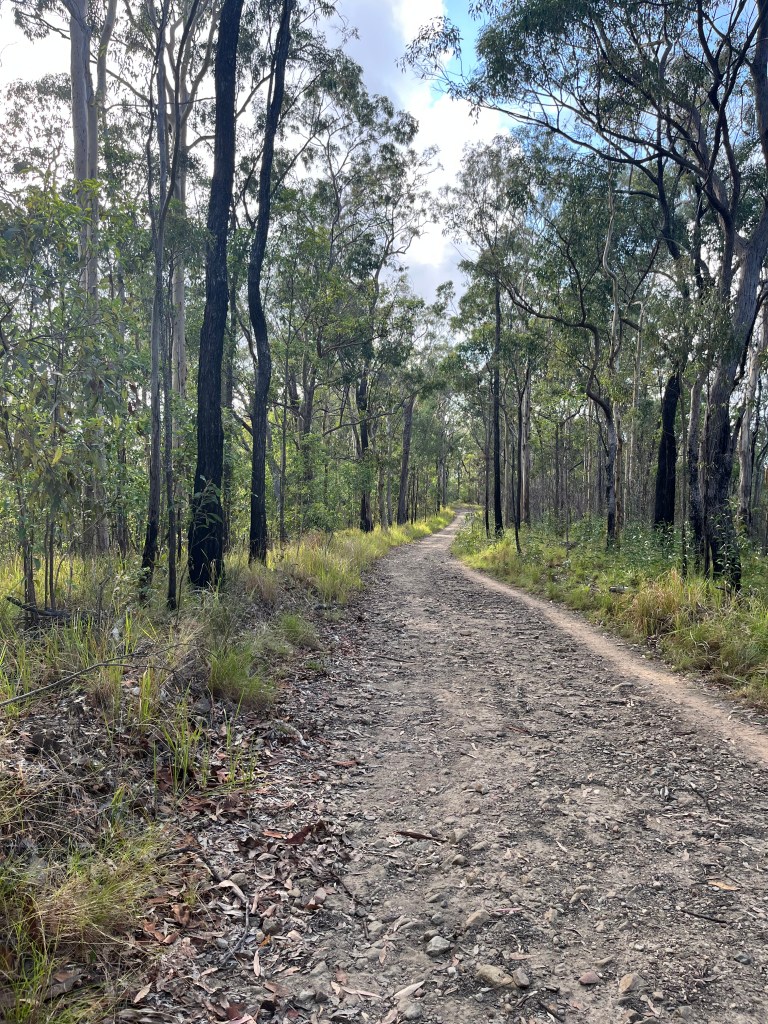
Bike groove to the right 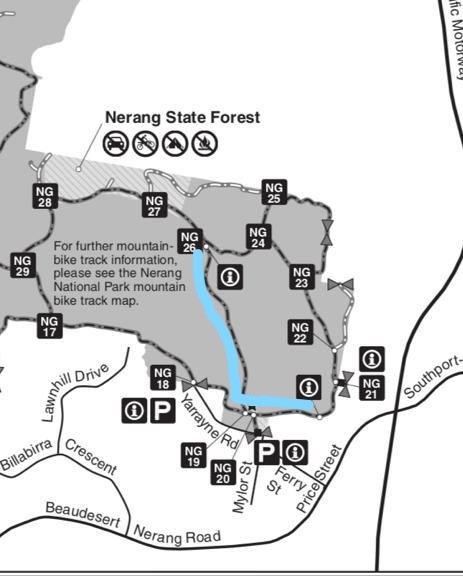
Centre Road 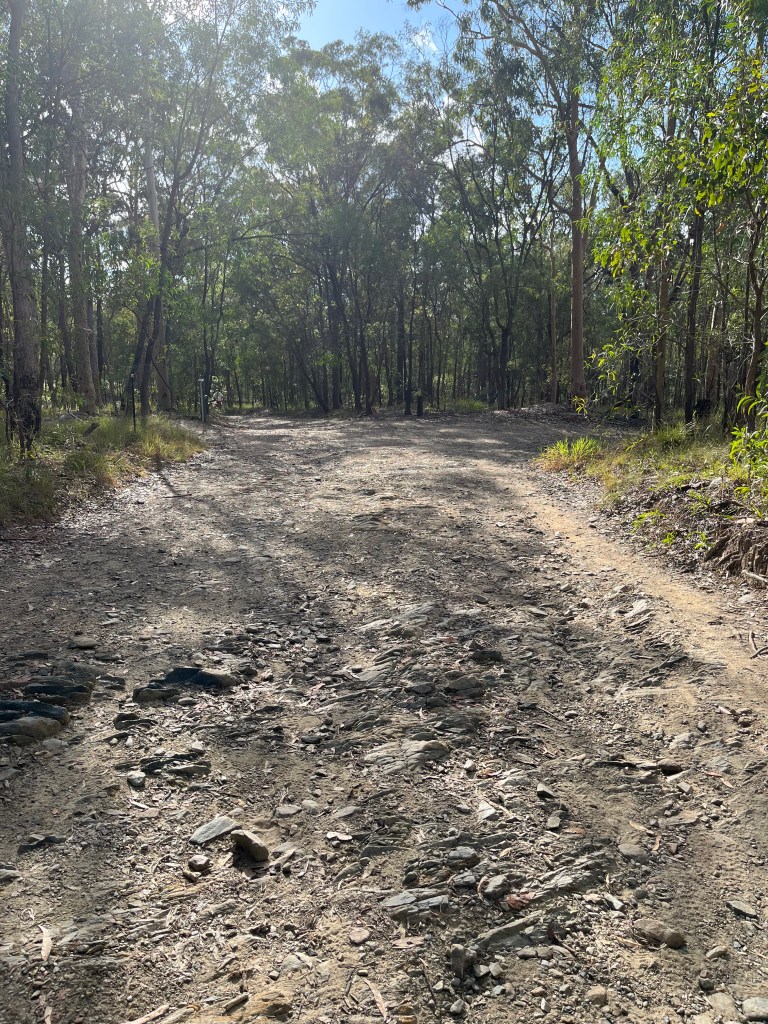
Smoother walking CAUTION
Be alert as the bike trails cross the main track and bikers can come out at speed. They are quite noisy so you can hear them coming and 99.8% are incredibly considerate, but if you hike with ear buds, you may be at a disadvantage….and the 0.2% have no mercy….To Pole or Not To Pole
I was trying out my new Macpac telescopic walking poles when I took these pics. I’ve started hiking prep for Kumano Kodo (future blog – keep an eye out), and I want to take poles but they need to be travel appropriate. I also managed to colour coordinator with my boots – well done me!

Macpac telescopics with my faithful Merrell boots 
Very stylish and clean! I wasn’t a fan of poles when I started hiking. I figured it was hard enough juggling boots, backpack, water, coat, hat, gloves, snacks, lip salve…why complicate life with two more bits of equipment?
I then did the Kokoda Challenge for the first time. Without poles.
I now get it. Walking poles are a great extension of your body. Great for balance, for fatigue management, to haul hiking buddies up that final hill and to bat away the spider webs you walk into. I’ve walked with one and two poles and find that two poles creates a good walking rhythm for me. One pole just felt lopsided.
So, what’s the verdict on the Macpac telescopics? I got them for a great price on clearance so that’s a plus. They are easy to extend and retract. Another plus. I’m undecided on the knobs and grips, so I’ll need a couple more hikes to break them in.
TIP
Shop around for gear if you’re new to hiking or buying for the first time. Decide how many times you’re going to use it, and what your budget is. I don’t quibble over key items like boots and a backpack. I like what I like and need to have the quality gear that works. If you’re buying extra gear to use sometimes, like poles, then be a bit more flexible as the prices can range from $50 to $500 a pole – yikes!Heading Home
The last kilometre of Centre Road will bring you back alongside a bitumen cycling track and a metal pipe fence. Keep to the large trail, there are a number of smaller tracks, we will explore those another day.
Watch out for bikers completing their downhill run at the exit gate – it’s fun watching them skid to a stop with literally inches to spare!
Pat yourself on the back, you’ve just completed a fantastic 6km hike, enjoyed the outdoors, perhaps tried some new gear for the first time.
Congratulations on embracing the experience, and see you next time out on the trails.
PJ.

